You’ll grill chicken legs perfectly in 25 to 35 minutes by combining direct and indirect heat methods. Start by searing skin-side down for 2 minutes at 400–450°F, then move to indirect heat at 275–325°F, flipping every 10–15 minutes until you reach 185°F internally. Pat your legs dry beforehand, brush with olive oil, and apply your dry rub for ideal browning. The specific timing depends on leg size and your grill setup, so understanding each technique’s nuances will transform your results.
Preparing Your Chicken Legs for Grilling
Before you fire up the grill, you’ll want to prep your chicken legs properly to guarantee crispy, evenly browned skin and ideal flavor absorption. Start with chicken drying techniques—pat your legs thoroughly with paper towels to eliminate excess moisture. This prevents steaming and reduces sticking to grates while promoting superior browning and crispier skin texture.
Next, apply oil application guidelines by brushing all sides evenly with olive oil. This coating prevents adhesion, enhances heat distribution, and helps seasonings adhere effectively. Combine salt, pepper, garlic powder, and paprika for a classic dry rub, applying the mixture generously over all surfaces, including under the skin for optimal flavor penetration. For enhanced flavor and moisture retention, consider using a brining or dry rub approach before your dry seasoning application. The combination of flavors creates an awesome deliciousness that will make your grilled chicken legs unforgettable. You can brush them with your preferred sauce during the last minute or two of grilling to enhance the flavor, similar to the technique used for grilling chicken tenders.
Finally, allow your chicken legs to reach room temperature before grilling. This reduces cooking variability and ensures consistent, juicy results. For even crispier skin, you can air dry the chicken in the refrigerator uncovered for several hours before grilling. Proper preparation and even thickness contribute to avoiding dryness and ensuring your chicken legs cook uniformly. To prevent sticking during cooking, preheat the rack on the grill and spray contact points with nonstick spray or oil before placing the chicken legs. Have a meat thermometer ready to check for doneness during the grilling process.

AIR PRESSURE ONLY: Pompeian cooking sprays contain no propellants or additives, providing you the best-tasting, highest-quality oil to help you Eat and Live Well.

Organic extra virgin olive oil spray in 5 fl oz bottle

One 5 oz can of PAM Non Stick Olive Oil Cooking Spray
Understanding Direct Heat Cooking Methods
Once you’ve prepped and seasoned your chicken legs, it’s time to master direct heat grilling—the technique that creates those coveted crispy exteriors and beautiful grill marks. You’ll preheat your gas grill to 400–450°F or set charcoal coals for equivalent direct heat. Start by searing skin side down for 2 minutes per side to develop char, then flip every 5 minutes for maintaining even browning. This initial 5-7 minute direct phase locks in flavor while you’re achieving crispy skin through consistent turning. Monitor your grill temperature carefully—you’re aiming for 275–325°F during direct cooking phases. Turn your drumsticks frequently to prevent burning and ensure uniform color development across all surfaces before shifting to indirect heat. Keep the lid closed to lock in heat and smoke during your grilling process. For enhanced flavor, consider using a portable kettle grill with charcoal, which allows you to utilize the full grate for direct grilling. After your direct heat searing, move chicken legs to indirect heat to continue cooking with the grill cover closed for even heat distribution. Using a meat thermometer inserted in the thickest part of the chicken leg is crucial to ensure proper doneness without overcooking. Flipping frequently every 3 to 5 minutes helps ensure even cooking and prevents hot spots from charring the skin. Before grilling, pat the chicken dry to improve seasoning adherence and promote better browning on the grill surface. Once grilling is complete, let the chicken rest for several minutes to allow juices to redistribute throughout the meat for optimal flavor and moisture.
Mastering Indirect Heat Techniques
After you’ve achieved that initial sear and developed your grill marks, it’s time to shift to indirect heat—the method that’ll cook your chicken legs through evenly without charring the skin. Managing indirect heat requires positioning your legs on the cooler zone, away from direct flames or active burners. Maintain a steady 275-350°F by adjusting vents on charcoal grills or using one burner on gas models. Close your lid to create an oven-like environment that circulates heat uniformly around the meat. Mastering grilling techniques means monitoring internal temperatures in the thickest thigh section, flipping every 10-15 minutes until you reach 165-185°F. Waiting until the end of cooking time to baste with sauce will prevent sugar-based sauces from burning before your chicken is fully cooked. This low-and-slow method, typically requiring 30-40 minutes, guarantees juicy, tender results with perfectly rendered skin. The low-and-slow approach helps keep the chicken moist by allowing fat and connective tissues to break down slowly, resulting in more flavorful and succulent meat. For optimal results, use a leave-in thermometer to continuously monitor the internal temperature without having to open the grill lid repeatedly. Patting your chicken legs dry before seasoning helps achieve better browning and allows rubs or marinades to adhere more effectively to the skin surface. Once your chicken legs reach the proper temperature, rest the chicken for 5 to 10 minutes to allow the juices to redistribute throughout the meat. Some pitmasters enhance moisture retention by spraying the legs with apple cider vinegar during the cooking process.
Temperature Guidelines for Safety and Quality
Nailing the right temperature is what separates perfectly cooked chicken legs from disappointing results. You’ll achieve ideal outcomes by maintaining consistent temperature between 400°F and 450°F throughout cooking. Use an instant-read meat thermometer to verify your chicken reaches 185°F internally, guaranteeing both safety and tenderness.
Minimizing temperature fluctuations is essential for even cooking. Adjust your grill vents to control airflow—opening them increases heat while closing them reduces it. Avoid temperatures below 350°F, which dries out meat and creates tough texture, and prevent flare-ups by moving chicken away from flames. For dark meat cuts like drumsticks, targeting 185°F ensures the meat stays juicy and tender rather than tough. While the minimum safe temperature is 165°F, allowing chicken legs to reach higher internal temperatures helps break down connective tissues for more tender results. Lightly oiling the grates will help prevent chicken from sticking when flipping.
Pre-heat your grill on high for 15 minutes and stabilize at your target temperature before cooking begins. This preparation confirms even heat distribution and prevents burnt exteriors paired with undercooked interiors. After grilling, resting the chicken wrapped in foil for about 10 minutes helps the connective tissue break down, keeping the meat moist and tender. Using a meat thermometer is crucial for accurately checking doneness and ensuring your chicken legs have reached the proper internal temperature. For exceptionally crispy skin, consider finishing at higher heat around 400-450°F after the initial cook to achieve a perfect sear. Properly cooked chicken legs provide essential vitamins and minerals including niacin, B6, and selenium that support metabolism and immune function.
Grilling Times Based on Leg Size
How long should you grill chicken legs? Timing depends entirely on size. Small legs under one pound cook in 20-25 minutes over direct heat, requiring flips every 5-7 minutes. Medium legs (1-1.5 pounds) need 30-35 minutes at medium heat with 450°F surface temperature, flipped every five minutes. Large legs exceeding 1.5 pounds demand 30-40 minutes using indirect heat to prevent exterior charring while the thicker meat cooks through.
For mixed batches, use staggered placement across grill zones, flipping every few minutes. Check internal temperatures at the 20-minute mark. Dark meat chicken legs do not dry out as easily as white meat, making them an ideal choice for grilling. The char on the grill gives chicken legs that desirable summer flavor while keeping them tender and juicy. For maximum juiciness, aim for an internal temperature of 175°F to 185°F rather than the standard 165°F minimum. If grilling frozen chicken legs, increase your total cooking time by approximately 50% compared to thawed chicken and use indirect heat initially to help thaw thicker pieces. Vertical racks enable efficient leg grilling while saving valuable grill space for upright cooking. Similar to smoking chicken wings, you can finish grilled chicken legs at a higher temperature to crisp the skin after the initial cooking period. Regardless of marinade techniques or seasoning options you’ve applied, always rest your chicken for 10 minutes post-grilling. This resting period allows carryover cooking and guarantees juiciness throughout all sizes. Monitoring with a meat thermometer ensures you reach the safe internal temperature of 165°F for perfectly cooked chicken legs every time.
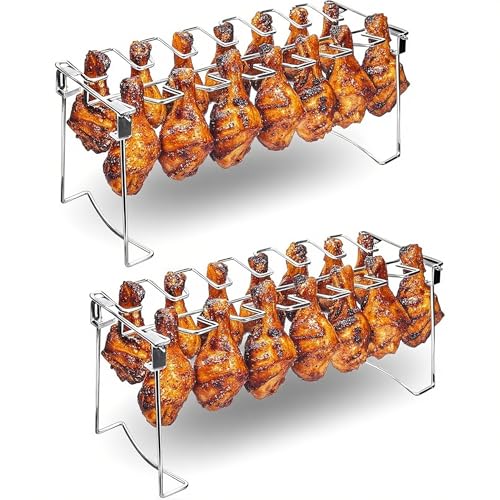
【Holds 14 Drumsticks Securely for Even Cooking】Two racks included – each holds 14 chicken legs upright without flipping. Cooks evenly indoors or outdoors on grills, smokers, or ovens

Just Hang And Leave - Don't have to worry about turning them, this 12-slot chicken drumstick grill rack will make your chicken legs and wings perfectly cooked on all sides evenly and incredibly juicy!
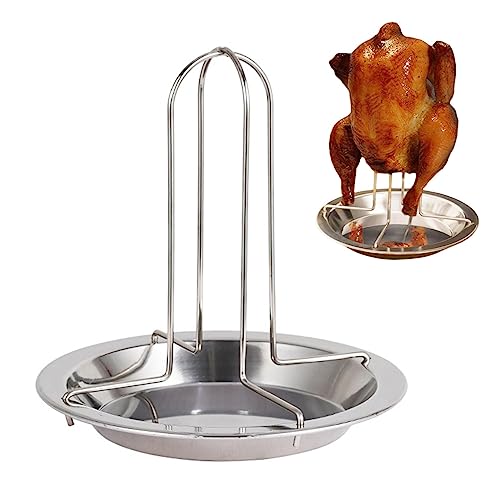
【Material】Chicken holder and drip pan made of stainless steel,easy to clean, durable, high temperature resistan t and can be used in ovens and ovens.
Creating a Two-Zone Fire Setup
Now that you understand the timing requirements for different chicken leg sizes, you’ll need to set up your grill properly to execute those cook times successfully. A two-zone setup gives you superior temperature control and grate configuration for consistent results.
For charcoal grills, light 12-15 briquettes in your chimney starter, then dump them onto unlit coals banked to one side. This creates your hot zone for searing. For gas grills, ignite only half your burners on one side, leaving the opposite burners off.
Position your grate so half sits directly over heat—your searing zone—while the other half remains cooler for indirect cooking. Place a foil pan under the cool zone to catch drippings. This strategic setup prevents flare-ups while allowing you to move chicken between zones as needed for perfect cooking. The cool zone can be used for gentler cooking or keeping food warm as you finish other pieces on the hotter side. Indirect heat helps manage temperature fluctuations and ensures even cooking throughout your chicken legs. The glowing charcoal embers will emit radiant heat upward toward the chicken, which is the primary way your grill cooks the meat. Ensure proper airflow by fully opening your grill vents to maintain consistent temperature throughout the cooking process. Before placing chicken on the grill, make sure to clean and oil the grates to prevent sticking. If you need to light charcoal without a chimney, arrange small piles over fire starters positioned just under the top charcoal layer for optimal heat development. Once your chicken is nearly done on the indirect side, move it to the direct heat zone for a quick sear to develop a flavorful crust and achieve the perfect finish.

🧳 Lunchbox‑Size Portable BBQ – Unfolds from a compact carrying case; open the hasp and fold out the legs to start grilling fast.
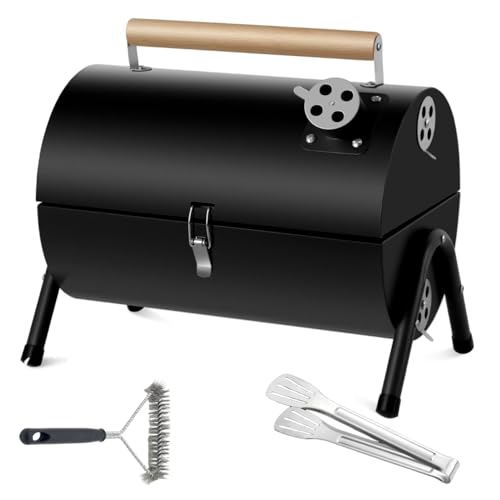
SUPER WORTH CONSTRUCTION: Portable Charcoal Grill is adopt upgraded powder spraying technology, Reduce the risk of rusting, cracking, and peeling while withstanding high grilling temperatures reaches 750-800, Extra thick steel provides sturdy construction without deformation, Last for a long time use, Bring you a reassuring bbq time

【Built-In Water Pan for Juicy BBQ & Stable Temps】 Stop guessing temperature control. The integrated water pan adds essential moisture to the cooking chamber, preventing meat from drying out during long smokes. It also acts as a heat sink to stabilize low temperatures, making it easier to maintain that perfect 225°F for briskets and ribs. Get that tender, fall-off-the-bone texture every time.
Achieving the Perfect Internal Temperature
Getting chicken legs to the right internal temperature is where precision pays off. You’ll want to target 170°F for juicy results, though 175°F delivers superior tenderness. Use an instant-read thermometer for verifying internal temperature accurately—this is non-negotiable.
When using thermometer properly, insert the probe into the thickest part of the meat, away from bone contact. Check multiple legs to guarantee consistency across your batch. At 165°F you’ve reached USDA safety standards, but darker meat truly shines at higher temperatures. For fall-off-the-bone tenderness, consider cooking to 185-190°F for an exceptional eating experience. Preheating your smoker to 275°F prevents leathery skin from developing on the exterior.
Once you hit 170°F, consider brushing sauce if desired. Continue cooking to your target, then let legs rest five minutes. For monitoring multiple chicken legs simultaneously without standing over the grill, consider a wireless grill thermometer that lets you track temperatures from inside your home. Models like the ThermoPro TP20 offer dual probes and a 300-foot wireless range for convenient remote monitoring. This carryover cooking settles the meat while maintaining ideal juiciness and texture. Similar to cooking bratwurst, using broth or beer while grilling can add moisture and enhance the flavor of your chicken legs. After cooking, resting the chicken for 5 to 10 minutes helps redistribute the juices for best texture and flavor. Pair your perfectly grilled chicken legs with savory baked beans or fresh pasta salads to create a complete, satisfying meal.
Managing Flare-Ups While Cooking
While you’re monitoring internal temperature, you’ll also need to manage the flare-ups that come with grilling fatty chicken legs. Start by trimming excess fat pockets before cooking—this critical grease removal method minimizes drippings that ignite on hot grates. Establish a two-zone setup, moving chicken to cooler indirect heat during flames.
Maintain your grill meticulously; regular grate cleaning frequency of every 3-6 cooks prevents grease buildup that fuels flare-ups. Empty catch pans quarterly and scrape solidified grease before heating. After each grilling session, use a bristle-free grill brush to safely remove residue without leaving metal fragments that could contaminate your food. Keep a fire extinguisher or spray bottle of water nearby in case flames become unmanageable. For optimal safety, station a multipurpose dry chemical extinguisher rated for Class B and Class C fires within 30 feet of your grill to handle grease flare-ups and propane leaks. Always disconnect the propane tank before performing any deep cleaning of your grill to ensure maximum safety.
When flames emerge, stay composed. Turn down gas burners to reduce intensity, and use a water spray bottle for stubborn localized fires. Never use water on grease fires. If you need to use a fire extinguisher, apply the P.A.S.S. method by pulling the pin, aiming at the base, squeezing the handle, and sweeping side to side. Flip chicken only once to minimize unnecessary handling that causes additional flare-ups. Keep chicken skin-side up initially to monitor white areas before flipping, minimizing unnecessary handling that causes additional flare-ups. Installing stainless steel heat tents over your burners provides an extra layer of protection by shielding them from grease drippings and distributing heat more evenly across the cooking surface.
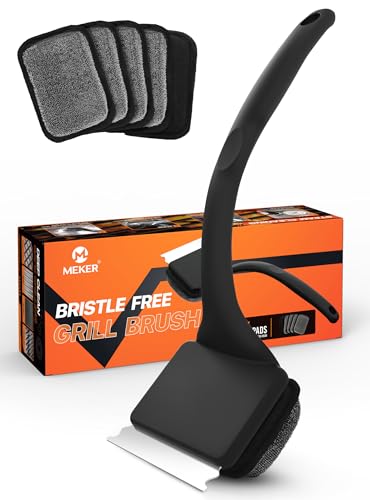
【ULTRA SAFE CLEANING】BBQ is a wonderful thing, but cleaning the grill can be a challenge! MEKER Grill Cleaner Brush can help you! Our grill cleaner brush ensures a bristle-free cleaning experience, eliminating the risk of swallowing dangerous metal bristles. Enjoy safe, worry-free grilling with our innovative design.

【BRISTLE-FREE & COLLAPSIBLE DESIGN】Experience worry-free grilling with the MEKER grill brush bristle-free design. Say goodbye to dangerous metal bristles and hello to a safe cooking environment for you and your family. The foldable bucket offers hassle-free storage by folding flat, making it an ideal outdoor water container for grilling adventures at home or on the go. Say goodbye to bulky options with this compact dunk tank

【The Safest Bristle Free Grill Cleaner】:No wire bristles at all, no melting like nylon grill brushes; With this safe grill brush and scraper, your food will stay 100% Bristle Free. No more worry about swallowing some metal pieces, Let's free to gobble up some favorite barbecue! Save your effort and time, let’s just have fun! (PATENTED design)
Resting Your Chicken Legs Properly
Once you’ve pulled your chicken legs off the grill, you’ve got to resist the urge to cut into them immediately. Tent them loosely with foil and let them rest for 5-10 minutes, allowing juices to redistribute throughout the meat and muscle fibers to relax.
During this critical window, the internal temperature stabilizes around your serving temperature considerations. Aim for 165°F minimum before resting; bone-in legs benefit from 170°F for maximum texture. As a general guideline, rest for half the cooking time to optimize juiciness and flavor.
After resting, your chicken reaches peak juiciness and tenderness. For post rest storage options, wrap cooled legs in foil and refrigerate up to four days. Reheat any leftovers to at least 165°F before consumption to ensure they’re safe to eat. When reheating, use methods that retain moisture and prevent overcooking such as adding broth or covering the dish tightly with foil. Using a reliable thermometer before resting ensures you’ve hit your target temperature and the meat is safe to eat. Never slice during the resting period—this locks in moisture and guarantees every bite delivers superior flavor and texture you’ve worked to achieve. The resting period is just as important as careful temperature control during grilling to achieve perfectly tender meat and preserve the juices you’ve developed throughout the cooking process. Before grilling, make sure your grill grates are clean and free from rust buildup, as corroded surfaces can affect food taste and grilling performance. After cooking, clean your grates while still warm and remove debris from burner ports to maintain optimal grill performance.
Pro Tips for Juicy and Tender Results
The key to achieving juicy, tender chicken legs lies in mastering a handful of critical techniques that work together throughout the grilling process. Start by preserving marination flavors—pat your legs dry before seasoning, then coat with olive oil to seal in moisture and enhance adhesion of your dry rub or marinade.
Target an internal temperature of 185-190°F for ideal juiciness without bloody spots. Flip every 5-10 minutes to prevent burning while promoting even cooking. Apply BBQ sauce around the 20-25 minute mark for caramelization without charring. Preheat your grill to medium-high heat at 375-400°F to ensure consistent cooking and proper browning of the skin.
Finally, garnishing presentation matters. Remove legs when they’ve reached perfect doneness, allowing the crispy skin and tender meat to showcase your technique. Let the chicken rest for a minute before serving to retain texture and warmth, similar to how resting helps a grilled sandwich maintain its ideal consistency. If you have leftovers, freeze cooked chicken on the same day to maintain safety and quality for future meals. These coordinated steps guarantee restaurant-quality results every time.
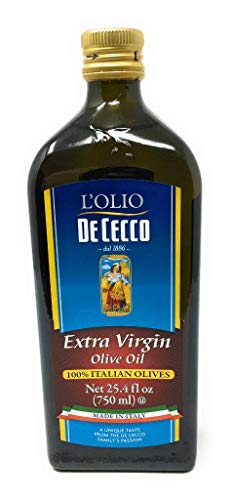
Made exclusively from selected olives grown in Italy, Rich taste.


One 15.5 fl oz Bertolli Dress & Drizz Extra Virgin Olive Oil, Rich Taste with easy squeeze bottle for precise pouring