You’ll achieve juicy, crispy-skinned chicken thighs by mastering three essentials. First, brine your thighs for 1–3 hours using a 1/4 cup salt per 4 cups water ratio to lock in moisture. Next, pat them dry and sear skin-side down over direct heat for 3–4 minutes until crispy. Finally, move them skin-side up over indirect medium-high heat for 18–20 minutes, monitoring internal temps until they hit 170–175°F. Rest the meat 5–10 minutes before serving. The techniques that separate mediocre results from restaurant-quality outcomes require understanding each stage’s purpose.
Marinade and Brining Techniques
Because brining infuses chicken thighs with moisture and flavor while seasoning them evenly throughout, you’ll want to master the timing and ratios specific to your cut. For skin-on, bone-in thighs, brine 2-3 hours using the standard wet brine ratio of ¼ cup kosher salt per 4 cups water with ¼ cup sugar. Brine timing adjustments matter—boneless, skinless cuts need only 1-2 hours, while ideal results for thighs reach 30-60 minutes. Exceeding recommended times causes over-salting and texture degradation. Brining solution variations let you add garlic cloves, fresh herbs like thyme or rosemary, and black peppercorns for depth. Dissolve ingredients by boiling 5-12 minutes, then cool in an ice bath before submerging your chicken fully. The chemical reaction during brining makes the chicken more tender and flavorful. Remember that brining protects against overcooking by helping the meat retain its juices during the high heat of grilling. After cooking, resting the chicken for 5 to 10 minutes helps redistribute the juices for best texture and flavor. Using a meat thermometer ensures your bone-in chicken thighs reach the safe internal temperature of 165°F without guesswork. Before grilling, allow your chicken thighs to reach room temperature for more even cooking throughout. Grilled chicken provides essential vitamins and minerals including niacin, B6, selenium, and phosphorus that support energy production and immune function. Alternatively, marinating boneless thighs enhances flavor while keeping them moist and tender during the grilling process.

Versatile - This coarse salt for cooking is perfect for brining, rimming glasses, grilling, marinades, rubs and more

No additives; Only pure kosher salt

Skin Preparation and Crisping
Proper skin preparation makes the difference between soggy and supremely crispy chicken thighs. You’ll start by trimming fat deposits from inside the skin while preserving the exterior layer. Gently scrape excess fat with your knife, then cut vertical lines along the bone sides for an even rectangle shape. If competing, remove the ball joint of the bone for presentation standards.
Before grilling, pat your skin completely dry after brining—this guarantees oil adheres smoothly. Coat both sides with olive oil, then place skin-side down over direct heat for 3-4 minutes to sear and crisp. Once your internal temperature reaches 175°F, flip skin-side down over hot charcoal for exactly 20 seconds. This final crisping step delivers that signature golden exterior without burning. Monitor the internal temperature throughout cooking to ensure the thighs are cooked through while maintaining juiciness. For optimal results, season chicken generously before grilling to enhance both the skin’s flavor and texture. During the cooking process, flip frequently to prevent hot spots and ensure the skin crisps evenly on all surfaces. After removing from the grill, let chicken rest for 5-10 minutes to allow juices to redistribute throughout the meat for maximum tenderness. Insert a meat thermometer in the thickest part of the thigh to confirm it has reached the proper doneness. Cooking to this higher temperature helps break down connective tissues, resulting in exceptionally tender meat.
Heat Management and Grill Setup
How you arrange your heat zones will determine whether you’ll achieve crispy skin and juicy meat or burnt exteriors and undercooked interiors. You’ll want to create a two-zone configuration: one side at medium-high (375-400°F) for searing, the other at medium heat for finishing. This heat distribution pattern prevents flare-ups while allowing timing considerations that guarantee even cooking.
For gas grills, light one set of burners on medium-high and keep the other low or off. Charcoal users should bank coals to one side, leaving the other half cooler. For charcoal grills, keep the bottom vents fully open and adjust the top damper to maintain your target temperature range. Preheat with the lid on to 350-400°F before placing thighs skin-side up over indirect heat for 18-20 minutes. The proper temperature gradient allows for initial searing and finishing without burning. Move pieces to your direct zone last for final crisping, monitoring internal temperatures at 170-175°F for perfect texture and safety. Using an instant-read thermometer is essential to monitor doneness precisely and avoid overcooking. After removing from heat, let the meat rest for 5 to 10 minutes before serving to retain juiciness. Remember to oil grates well before grilling to prevent the chicken from sticking to the surface. For even more flavor, consider applying a dry rub to the thighs before grilling to develop a flavorful crust. If you frequently grill delicate items or want easier cleanup, grill mats can protect your grates while still allowing proper heat transfer and grill marks.

BBQ / Grill pit thermometer, safe and environmentally friendly.

TEMPERATURE RANGE: Large 2-inch dial displays temperature from 100°F to 550°F, with clear markings for smoke and BBQ zones for precise cooking control

2 Pack. 2" BBQ grill smoker pit thermometer stainless steel thermostat pit temp gauge
Seasoning and Flavor Enhancement
Once you’ve perfected your heat zones and preheating strategy, you’ll turn your attention to seasoning—the element that transforms properly cooked chicken thighs into genuinely memorable grilled poultry. Start with a dry rub combining brown sugar, paprika, garlic powder, and oregano to establish your flavor foundation. Apply this mixture directly onto patted-dry chicken, ensuring seasoning consistency across all surfaces. Next, marinate for at least 30 minutes—up to 12 hours refrigerated—using olive oil, acidic components like lemon juice, and soy sauce to create balanced flavor profiles. For best results, rub olive oil over the chicken before applying your dry rub seasoning to ensure even coating and better adhesion. The acidic citrus in your marinade breaks down proteins, which tenderizes the meat and allows deeper flavor penetration. Reserve a portion of your marinade as a basting liquid during grilling. When grilling at high heat, consider switching to refined avocado oil or other high-smoke-point oils that withstand elevated temperatures without burning. This layered approach penetrates the meat while developing a flavorful crust that’ll distinguish your chicken thighs as exceptional. Whether grilling or smoking, always verify that your chicken reaches an internal temperature of 165°F to ensure both safety and juiciness. After grilling, let your chicken rest for a few minutes to ensure tenderness and flavor retention before slicing and serving. While you’re preparing your grilling setup, place a heat-resistant grill mat underneath your grill to protect your deck from grease splatters and potential heat damage. To complete your meal, consider pairing your perfectly grilled chicken thighs with classic baked beans or a refreshing pasta salad featuring fresh vegetables and customizable dressings.
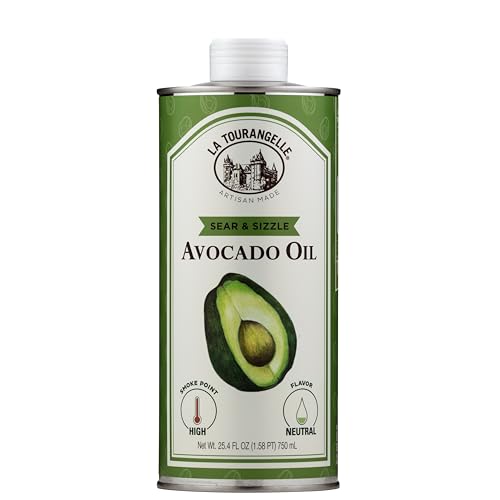
Healthy High Heat Oil: Expeller-pressed from fresh avocados and protected in our iconic light-blocking tin, this smooth, neutral oil preserves freshness and flavor. Fire up the grill, sear the perfect steak, or master a golden, crispy fry — all without losing the natural taste of your ingredients. With a high smoke point and everyday versatility, Sear & Sizzle should be every kitchen’s secret weapon.

GREAT FOR COOKING: Our refined avocado oil is the perfect all-purpose cooking oil. It is great for fried dishes, and it makes a nice base for a homemade salad dressing when cold

𝟭𝟬𝟬% 𝗣𝗨𝗥𝗘 𝗔𝗩𝗢𝗖𝗔𝗗𝗢 𝗢𝗜𝗟: Crafted from premium, ripened avocados, this oil is free from additives, preservatives, or blends. Enjoy the natural flavor and health benefits of pure avocado oil in every drop, perfect for all your culinary adventures from cooking to dressing.
Temperature Control and Cooking Time
Why does temperature matter so much when grilling chicken thighs? Precise heat control prevents undercooked poultry while preserving juiciness. You’ll preheat your gas grill to 350–375°F for medium heat, maintaining consistent grill temperature monitoring throughout cooking.
Bone-in thighs require 35–45 minutes at 350°F using indirect heat, while boneless cuts finish in 10–12 minutes on high heat. Your meat thickness guidelines dictate timing—thicker portions demand longer cooking periods. Flip midway through cooking for even browning. Starting with skin side down helps render fat and achieve a crispy exterior.
You must reach an internal temperature of 175°F in the thickest part, verified with an instant-read thermometer. Account for carryover cooking; you can safely push to 200°F without compromising tenderness. Boneless, skinless thighs will dry out if pushed past 175°F, so monitor them closely near the end of cooking. Rest your thighs for ten minutes post-grill to redistribute juices properly. Using indirect heat helps prevent flare-ups that can char the exterior before the interior reaches safe temperature. For direct grilling over coals, a portable kettle grill with accessories like the Slow ‘N Sear can deliver enhanced smoky flavor while maintaining heat control. Always use a meat thermometer to ensure your chicken has reached the proper internal temperature for food safety. Resting the chicken for several minutes allows juices to redistribute throughout the meat for optimal flavor and texture. Oiling the grill grates before placing your chicken prevents sticking and ensures easy flipping during the cooking process.
Direct Heat Searing Method
While indirect heat guarantees thorough cooking without burning, direct heat searing creates the crispy, caramelized exterior that makes grilled chicken thighs truly exceptional.
Position your thighs skin-side down directly over medium-high heat. You’ll sear undisturbed for 5-6 minutes, allowing the skin to develop that golden, crispy crust you’re after. Oil selection matters—use quality olive oil to coat your grates evenly before heating.
Temperature control is critical here. Your grates should reach approximately 375°F, confirmed when you see faint smoking. Flip once edges turn golden and release easily, then cook the other side 5-7 minutes.
After the initial sear, reduce heat to medium, preventing over-charring while the interior cooks through. Finish bone-in thighs skin-side down over direct heat for 2-3 final minutes, ensuring juices run clear and internal temperature hits 165°F minimum. For optimal results, avoid moving the chicken during the initial 5-6 minute sear, which allows the exterior to brown properly without disruption. To verify doneness, use a meat thermometer to check that the thickest part of the thigh has reached the safe internal temperature. For even crispier skin, consider finishing at a higher temperature of 400-450°F for the final moments to enhance brownin g and texture. Allow the chicken to rest for 5 minutes before cutting to retain its juices and maximize tenderness. Letting the meat rest after grilling allows the juices to redistribute throughout, ensuring moist and flavorful results. Proper seasoning before grilling enhances flavor penetration and helps create a more flavorful crust during the searing process. To achieve attractive presentation, rotate the thighs 90 degrees halfway through each side’s cooking time to create professional-looking grill marks.

The information below is per-pack only

For Fat Free Cooking, so there’s more on your plate, and less in your pan

AIR PRESSURE ONLY: Pompeian cooking sprays contain no propellants or additives, providing you the best-tasting, highest-quality oil to help you Eat and Live Well.
Indirect Heat Finishing Process
After your initial sear, you’ll move your thighs to indirect heat—the pivotal stage that cooks the meat through while preserving juiciness. Position your heat source to one side, maintaining 300-325°F with the lid closed for even circulation. Keep bottom vents fully open to sustain consistent airflow and temperature regulation.
Cook bone-in, skin-on thighs for 18-20 minutes over indirect heat. During this phase, begin sauce basting every 20 minutes with reserved marinade. Focus on temperature monitoring—aim for 170°F internal temperature for superior texture, though 175°F guarantees complete collagen breakdown for exceptional tenderness. The breakdown of connective tissues transforms tough meat into tender, succulent thighs that rival even the best preparations. Apply sweet sauces only in final stages to prevent burning. Using a reliable thermometer, insert the probe into the thickest part of the thigh while avoiding the bone to eliminate guesswork and confirm the meat has reached a safe internal temperature. Ensure your grill grate is clean before starting to prevent sticking and promote even heat transfer. Proper preheating of your grill ensures even cooking and helps achieve the ideal temperature zone for this indirect heat phase. Consider using a leave-in thermometer for continuous monitoring without lifting the lid and disrupting heat circulation. Before beginning your cook, scrape the interior of your grill to remove any ash buildup that could restrict airflow and compromise heat consistency. With the lid closed, hot air circulates inside the grill chamber, allowing convection to transfer heat evenly around the chicken thighs. This methodical approach yields perfectly cooked thighs: tender, juicy, and flavorful throughout.
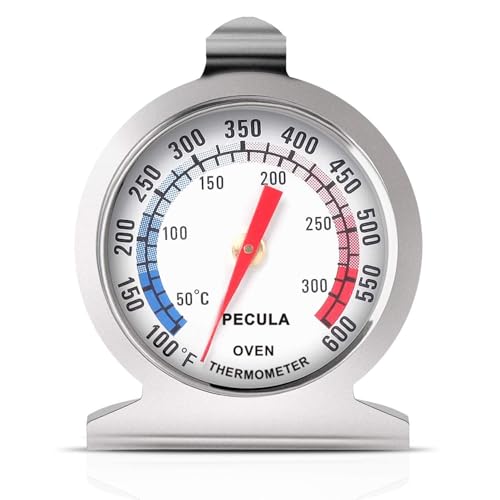
Clear Dial Display: PECULA's analog oven thermometer delivers precise, instant readings from 50–300°C / 100–600°F. Its dial features clear dual-zone blue and red indicators for at-a-glance temperature monitoring—perfect for ovens, grills, smokers, and deep fryers, ensuring you master every bake, roast, or fry.

𝐕𝐞𝐫𝐬𝐚𝐭𝐢𝐥𝐞 𝐓𝐨𝐨𝐥𝐬: Infrared technology allows you to measure various objects at home and outdoors; Use it for 𝒎𝒆𝒂𝒕, 𝑫𝑰𝒀 𝒄𝒂𝒏𝒅𝒚, 𝒐𝒗𝒆𝒏𝒔, 𝒈𝒓𝒊𝒍𝒍𝒊𝒏𝒈, 𝒇𝒐𝒐𝒅, 𝒄𝒐𝒐𝒌𝒊𝒏𝒈, 𝒂𝒖𝒕𝒐𝒎𝒐𝒕𝒊𝒗𝒆 𝒖𝒔𝒆, 𝑨/𝑪, 𝒓𝒆𝒇𝒓𝒊𝒈𝒆𝒓𝒂𝒕𝒐𝒓𝒔, etc.
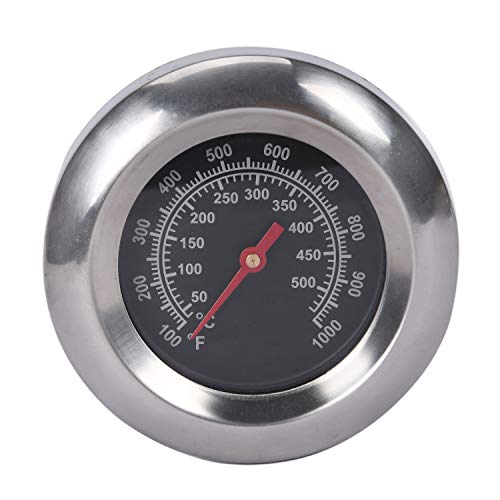
Wide temperature range: 100 F-1000 F/ 50 ℃- 500 ℃(Accurate Readings). Dimensions: 3" face, 2" stem, M10 nut (0.39" strew), Please check the dimensions of your grill before you order
Resting and Serving Recommendations
Once your thighs reach 165°F internal temperature, remove them from the grill immediately and transfer them to a clean plate away from the heat source. Tent them loosely with aluminum foil—this steaming effect allows connective tissue to break down further while carryover cooking raises the ideal resting temperature to 170°F.
Rest for 10 minutes minimum. Don’t cut into the meat during this period; doing so releases accumulated juices onto the plate rather than keeping them locked inside. The 5-10°F temperature increase during resting guarantees superior texture and moisture retention. Garnishing the rested chicken thighs with fresh parsley adds both visual appeal and enhanced flavor to your finished dish.
After resting concludes, transfer thighs to your serving platter immediately and add fresh herb garnishes. Proper serving etiquette requires hot plating to maximize flavor development and maintain perfect eating temperature for 15-20 minutes. If you have leftovers, reheating in an air fryer with a quick spray of cooking oil helps maintain the juiciness and texture of your grilled chicken thighs. Any uneaten grilled chicken can be safely stored in the refrigerator for three to four days when kept at or below 40°F. For longer storage, you can freeze cooked chicken in airtight containers or freezer bags for up to four months at 0°F or lower. For a unique smoky twist on leftovers, you can place the cold chicken thighs in a preheated smoker at 225°F for 20-30 minutes to infuse a rich smoke flavor. Leftover grilled chicken thighs can be transformed into versatile new meals like wraps, tacos, pasta dishes, pizzas, salads, or stir-fries by combining them with fresh vegetables and complementary sauces. Grilled chicken thighs pair excellently with rice, roasted vegetables, salads, and pastas for a complete meal.
Pairing Suggestions and Side Dishes
Your perfectly rested grilled chicken thighs deserve complementary sides that enhance rather than compete with their smoky, rich flavors. You’ll find vibrant produce combinations work best—charred lemon-garlic broccoli, balsamic grilled Brussels sprouts, and cauliflower steaks add textural contrast without overwhelming the protein. For easy make ahead prep, assemble quinoa tabbouleh or herby olive Italian orzo salad hours before grilling. Starch sides like roasted baby potatoes with rosemary or creamy Parmesan polenta provide satisfying anchors. Fruit-forward options—summer strawberry kale salad or avocado peach tomato salad—introduce brightness that balances richness. Consider caramelized Brussels sprouts with bacon or grilled mini sweet peppers with goat cheese for elevated restaurant-style accompaniments. A cilantro lime rice base transforms these vegetable sides into cohesive, flavorful plates that showcase your chicken. Try pairing your chicken with mayo-free coleslaw for a refreshing, tangy contrast that complements the smoky flavors. For a comforting twist, serve alongside creamy tomato soup and crusty bread to balance the richness of the grilled meat. Add grilled corn on the cob brushed with butter and finished with lime for a charred, sweet complement that rounds out your plate. Before grilling, soak the corn in cold salted water for 10 to 20 minutes to prevent the husks from burning while achieving tender, juicy kernels. Cheesy garlic breadsticks offer a crowd-pleasing option that adds savory comfort to your grilled chicken presentation. Balance the protein’s richness with crisp pickles that add acidity and crunch to each bite. These strategic pairings transform your grilled chicken into complete, memorable meals.