You’ll want to preheat your gas grill for 10-15 minutes with all burners on high and the lid closed. Charcoal grills require 20-30 minutes of preparation using a chimney starter until coals are uniformly grey-white. Professional grillers often extend preheating for thick cuts or multiple dishes. Cold weather, wind, and outdoor conditions can prolong these times considerably. Clean your grates beforehand to optimize heat distribution. Understanding how various factors influence your specific setup will help you achieve consistent results.
Gas Grill Preheating Times
You’ll want to preheat your gas grill for 10 to 15 minutes with all burners on high and the lid closed, which allows the grate to reach the desirable searing temperature of around 500°F. Professional grillers recommend extending this timeframe to at least 15 minutes when cooking thick cuts or multiple dishes concurrently.
Larger grills demand additional preheat time due to their expanded surface area. Outdoor conditions—including temperature, wind, and cold weather—will prolong your preheating duration. Gas tank monitoring guarantees consistent performance; a standard 20lb propane tank provides approximately 18-20 hours of operation. During preheating, the Maillard reaction activates on the grates, which enhances the flavor and appearance of your food. Using an infrared thermometer allows you to directly verify that your grates have reached the proper temperature.
Grill maintenance requirements drastically impact heat-up efficiency. Clean your grates beforehand to eliminate residue buildup and improve heat distribution. For optimal cleaning results, consider using stainless steel grill cleaners to remove buildup and restore shine before preheating. For optimal cleaning results, consider using bristle-free or replaceable-head brush designs to safely remove stubborn grime without risking stray bristles on your cooking surface. For optimal cleaning results, consider using specialized metal scrapers designed to wrap around rods and remove stubborn grime effectively. Top-performing products like Carbona’s 2-in-1 Oven Rack and Grill Cleaner provide mess-free cleaning that cuts through grime on cold grates in just five minutes. Performing routine light cleaning after each use ensures your grates remain clear of debris that could impede heating performance. Avoid opening the lid during preheating, as this releases critical heat and prolongs your preparation time.
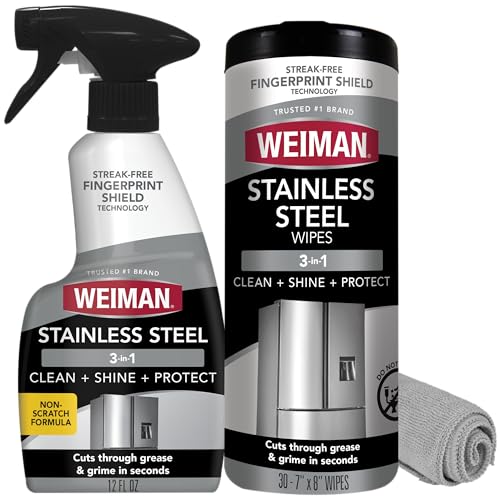
Cleans, polishes & protects stainless steel: Our stainless steel cleaner for appliances removes fingerprints, grease, residue, and water spots. This kit includes spray, which won a 2026 Good Housekeeping Cleaning Award, cloth & appliance wipes that leave a streak-free shine and a protective barrier that helps prevent future smudges.

GREAT FOR MULTIPLE SURFACES: Clean & Ready Grill breaks down built-up grease, splatter stains, and burnt-on food on stainless steel, steel and porcelain enamel, leaving your grill looking clean and ready for the next BBQ, campout, or tailgate party.

Removes dirt and grime build-up, and is great for everyday cleaning on any exterior grill surface
Charcoal Grill Preheating Methods
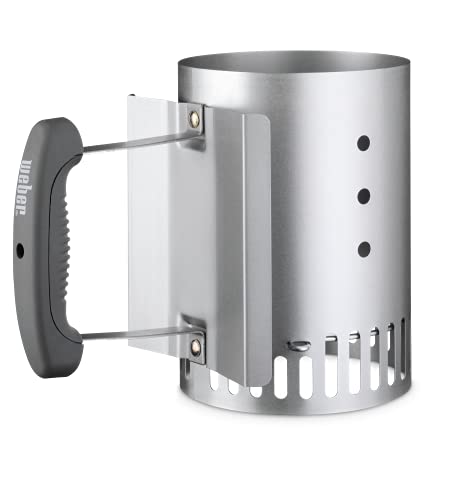
Charcoal grills require a distinct preheating approach compared to their gas counterparts, demanding roughly 20 to 30 minutes of preparation before you’re ready to cook. Start by using a chimney starter filled with your selected fuel type—either briquettes or lump charcoal—atop crumpled newspaper. Light from the bottom; coals reach readiness in 10-15 minutes when uniformly ignited. Watch for grey-white ash coverage across the surface, indicating stable temperatures. Pour the lit coals onto your grate using tongs, arranging them based on your cooking needs. For coal amount adjustment, spread evenly for direct heat or create a two-zone setup using ½ to 1 chimney. For medium heat cooking, approximately 50 charcoal briquets will provide the ideal temperature range for most grilling applications. Different charcoal types like lump charcoal and briquettes offer distinct burn characteristics that may influence your total preheating time and heat management strategy. Choosing a sturdy chimney design with a secondary helper handle ensures safer pouring and better control when transferring hot coals to your grill. When evaluating grill options, consider models with superior lid seal performance, as this feature maintains consistent temperatures during preheating. Leave vents half-open during preheating, then adjust post-arrangement to maintain your target temperature between 450-550°F. Avoid lighter fluid to prevent chemical smells and unwanted flavors that can compromise your grilled food. Opening vents fully during the initial preheating phase ensures even cooking temperature throughout the grill chamber. Consider using natural kindling or fire starters beneath your charcoal pyramid to promote consistent ignition without relying on chemical accelerants.

Porcelain-Enamel coating for Superior quality: double-enameled construction withstands extreme heat from while resisting deformation. Protects against thermal shocks and corrosion for long-term durability. simplifies cleaning
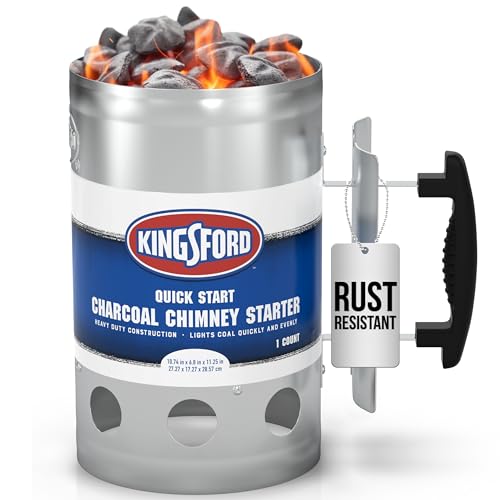
FAST CHARCOAL LIGHTER PULLS STEADY AIRFLOW FOR EVEN IGNITION: Helps get briquettes lit quickly and more evenly by pulling steady airflow through the chimney, reducing time from lighting to cooking for grills, smokers, and kettles.
Lights coals in under 15 minutes. Dimensions : 8 H x 5.8 W x 10.4 D inches
Understanding Optimal Temperature Targets
Once your charcoal’s arranged and your vents are adjusted, maintaining the correct temperature becomes essential for cooking success. You’ll need to understand ideal temperature ranges for different foods. High-heat targets between 450°F and 650°F work best for searing steaks and proteins requiring quick exterior browning. Medium-high heat, ranging from 375°F to 450°F, suits burgers, chicken, and vegetables needing balanced searing and thorough cooking. Medium heat at 350°F to 375°F accommodates thicker cuts and poultry requiring slower, even cooking. For slow-cooked meats like ribs and pork shoulder, low heat between 250°F and 300°F guarantees proper internal temperatures. A standalone thermometer is inexpensive and easy to use for monitoring your grill’s heat levels accurately. Thicker steaks over 1 inch should be cooked at medium heat to ensure even cooking throughout without burning the exterior.
Verifying heat consistency requires a grill thermometer placed directly on the cooking rack. This measurement gives you accurate surface temperature data, confirming your food cooks properly every time. For serious pitmasters seeking precision, instant-read thermometers offer rapid temperature verification to validate your grill’s performance. Wireless probe thermometers with app connectivity provide hands-off grilling precision by continuously monitoring both internal food temperature and ambient grill heat throughout extended cooks. Models using radio-frequency technology deliver superior long-range reliability compared to standard Bluetooth connections, ensuring consistent temperature data even from across your yard. The intense radiant heat from burning charcoal embers is the primary force that cooks your food directly on the grill. Keeping your grill lid closed where possible helps stabilize your temperature throughout the cooking process.
How Weather Affects Preheating Duration
Weather conditions substantially alter how long your grill needs to reach ideal temperatures. Cold weather effects demand extra attention—chilly air absorbs heat from your grill, extending preheat time by approximately five minutes regardless of your cooking vessel. You’ll consume increased fuel to compensate for heat loss.
Conversely, hot weather effects accelerate heating efficiency. Your grill reaches preferred temperatures faster under intense conditions, though you’ll need to monitor closely to avoid overcooking delicate foods.
Windy conditions complicate both scenarios. Gusts pull heat away from your grill, necessitating additional fuel and extending preheat duration unpredictably. Position your grill in a shielded area or under a hardtop gazebo structure to minimize heat loss. A covered outdoor kitchen station provides weatherproof protection that maintains consistent grill temperature regardless of environmental conditions. Consider using a grill cover during preheating to trap warmth and expedite the process across all weather conditions. For best results, season your grill grates with high smoke point oils before preheating to ensure a durable cooking surface. Using an infrared temperature gun provides more accurate readings than relying solely on built-in thermometers when environmental factors create unpredictable heating challenges. For optimal precision during preheating, multi-probe Wi-Fi systems allow you to monitor internal grill temperature and ambient conditions simultaneously. Maintaining watchful eye on fuel levels ensures your grill sustains adequate temperature throughout the preheating phase, especially when environmental factors create unpredictable heating challenges.
Essential Pre-Cooking Preparation Steps
Now that you’ve positioned your grill strategically and accounted for environmental factors, you’re ready to execute the preparatory steps that’ll safeguard exceptional cooking performance. Begin with preheating maintenance by clearing debris and ash from cooking grates using a grill brush before ignition. Employ proper cleaning procedures by scrubbing off leftover food particles from previous sessions. Regular cleaning prevents debris buildup that interferes with preheating efficacy. For optimal results, ensure all parts are rinsed and air-dried thoroughly before heating to remove any residual cleaning solutions. For cast iron grates, applying cooking oil with high smoke point after cleaning helps create a protective surface during the preheating process. After oiling, allow the grill to burn until the oil begins to smoke, which typically takes 15–30 minutes for proper seasoning. Cast iron grill pans are particularly valued for their heat retention capabilities, which enhances searing performance on both grills and stovetops.
Next, prepare your food and tools. Let meat sit at room temperature for thirty minutes before grilling, then season according to your recipe. Oil food lightly—not grates—to minimize sticking and flare-ups. Gather essential tools including tongs, spatulas, brushes, and a thermometer. For burgers and other foods that benefit from a quality crust, aim to preheat to 500-600°F to achieve the ideal searing temperature. To ensure even heat distribution and prevent burning, preheat the grill for 10-15 minutes before placing food on the cooking surface. Avoid overcrowding your grill to reduce flare-ups and ensure even cooking throughout your session. A meat thermometer will help you verify that your grill has reached the proper temperature for optimal results.

Graza Frizzle Oil Made from 100% Olives: A neutral-flavored, high heat cooking oil made from 100% peak harvest olives. With a smoke point of up to 490 degrees, Frizzle is your high-heat kitchen hero. 1 bottle/750ml.

Light Buttery Flavor That Elevates Every Meal: Algae Cooking Club Chef-Grade Algae Oil enhances every dish with subtle richness. Its neutral profile makes it ideal for searing, baking, and dressings, transforming everyday meals into gourmet experiences.
Grill Size and Its Impact on Preheating
Because your grill’s dimensions fundamentally determine how quickly it’ll reach ideal cooking temperature, understanding this relationship is critical to mastering preheating efficiency.
Smaller grills concentrate heat across reduced surface areas, achieving 400-500°F within 10 minutes using efficient preheating techniques. Larger models demand 15+ minutes due to expanded cooking zones that disperse thermal energy across greater distances. Compact grills like the Weber Spirit II E-210 excel in rapid heat concentration due to their foldable side shelves and efficient burner design. To protect your grill and extend its lifespan between uses, consider investing in a weather-resistant grill cover that fits snugly around your specific model.
Your burner configuration compounds this effect. Single burners accelerate preheat cycles, while multiple burners on expansive grills require full-power settings to equalize temperature distribution. Infrared burners hasten the process regardless of size, reaching preferred temperatures in 3-5 minutes. Built-in thermometers may not accurately reflect the actual grill grate temperature, so consider using an infrared temp gun for precise measurements during your preheat cycle. The build materials of your grill also influence how efficiently it retains and distributes heat during the preheating process. Portable tabletop models like the Weber Q1200 are particularly efficient at preheating due to their compact design and powerful burner output.
Post-preheat heat retention characteristics differ vastly. Large grills maintain stable temperatures longer after reaching target heat, while compact models lose temperature rapidly upon lid opening. Match your preheating duration to your grill’s specific dimensions for consistent cooking results.

[APPLICATION]--- This ceramic infrared heating burner replaces the stainless steel side ceramic plate burner of infrared grill, heater and BBQ Grill Stove.

MODULAR COOKING SYSTEM: Go from classic grilling to versatile griddling in under 90 seconds or swap to charcoal grilling with our patented Gas2Coal charcoal tray (sold separately).

Fast & Efficient Heating – 1500℉ in 3-5 Mins: This small propane grill features a powerful 19,000 BTU infrared burner that heats up to 1500℉ (800°C) in just 5 minutes. From backyard cookouts to off-grid adventures, this tabletop propane grill doubles as a compact small gas grill that delivers fast, even heat with minimal energy waste—perfect for juicy, flavorful steaks every time
Equipment Considerations for Faster Preheating
While grill dimensions set the baseline for preheating timelines, your equipment’s specific components determine how efficiently you’ll actually reach cooking temperature. Understanding burner performance factors proves critical—higher-powered burners reduce preheating to 10-15 minutes when you set them to high during startup. Propane gas heats faster than alternatives due to superior efficiency. Infrared technology dramatically accelerates your process; full infrared models preheat in 3-5 minutes with the lid open, bypassing convection requirements entirely. For gas grills with multiple burners, selecting models with heavy-duty burner covers protects your burners from debris while maintaining consistent heat output during preheating.
Your preheat timing strategies should also account for grate condition. Clean grates before each use to maximize heat distribution and conduction. Residue buildup profoundly extends preheating duration by impeding thermal transfer. Heat shields like porcelain-coated steel plates or stainless steel deflectors vaporize drippings and improve overall heat distribution throughout your cooking chamber. Thicker stainless steel alternatives resist corrosion and buildup better than enameled surfaces, improving long-term heat transfer efficiency. Regular cleaning of venturi tubes prevents blockages that restrict fuel-and-air delivery and slow your preheating process. Additionally, verify your thermometer functions accurately—failed thermometers misread surface temperature, delaying your cooking readiness assessment. Using a temperature gauge helps monitor when the grill is preheated and ensures you’re cooking at the optimal temperature for your food.

Designed to fit 3-4 burner gas grills, large charcoal grills and smokers up to 62 inches wide

Small Grill Cover Dimension - 32"W x 24"D x 43"H. Compatible for most 2-burner gas grills with folding side shelves, such as Weber Charbroil Nexgrill KitchenAid and Monument; also fits 3 burner grills such as Kenmore with side shelves down up to 30'' wide. Be sure to measure your grill before purchasing.

MATERIAL: 18 Mil thickness polyester fabric with Sun Fade Protective Liner
Checking for Hot Spots and Temperature Consistency
Even with your burner settings optimized and preheating time met, you’ll discover that your grill’s heat distribution isn’t uniform across the cooking surface. Temperature variations persist across most gas grills despite manufacturer claims of even heating.
You’ll identify hot spots using heat mapping techniques with plain white bread slices arranged densely across your grates. After 60-90 seconds, untouched sections reveal cool spots while blackened areas expose your grill’s hottest zones—typically concentrated directly over flame burners and front-center areas. Set your gas knob to medium heat to ensure consistent bread toasting results across the entire grill surface. The newer Weber Genesis II SE-410 model demonstrates more even heat distribution compared to earlier grill generations. Premium models like the Monument Mesa feature dedicated sear burners that allow you to manage temperature zones more effectively for specialized cooking techniques.
Document these patterns photographically for future reference. Weber manufactures many of their grill models at their Illinois manufacturing facility to maintain rigorous quality control standards. Front-to-back temperature gradients and corner variations demand strategic food placement. Models like the Grilla Primate are engineered to achieve minimal temperature variation across the cooking surface for more predictable results. Uneven heat distribution can also be addressed by ensuring your flavorizer bars are properly positioned and maintained, as damaged or misaligned bars may contribute to inconsistent heating across the cooking surface. Superior stainless steel construction grades like 304 can also help minimize hot spots by improving overall heat conductivity and durability. Position foods requiring faster cooking in identified hot zones and relocate items prone to overcooking toward cooler sections. This knowledge enables predictable, consistent cooking outcomes.
Manufacturer Guidelines and Best Practices
Now that you’ve identified your grill’s hot spots and temperature patterns, you’ll want to align your preheating strategy with manufacturer specifications and established best practices. Most manufacturers recommend 10-15 minutes preheat time on high with the lid closed, though larger models may require up to 25 minutes. You’ll implement proper cleaning techniques by oiling grates before preheating—never spray hot surfaces. For efficient fuel management, open the lid, light all burners, close the lid, and monitor temperature with a thermometer targeting 400-500°F. New grills demand 20-30 minutes initial burn-off on high to eliminate manufacturing residues. Before preheating, ensure you’ve cleaned the grease collection tray to maintain optimal grill functionality. Seasoning builds a non-stick, rust-resistant surface that protects your investment long-term. Proper preheating prevents food from sticking to the grates and ensures optimal caramelization. Cool completely before your first cook. This methodical approach guarantees consistent results and maximizes your equipment’s longevity and performance.