You’ll grill bone-in chicken thighs in 20-45 minutes using a two-zone setup. Start by searing skin-side down on direct heat (400-450°F) for 4-5 minutes until you’ve achieved a golden-brown crust and reached 155-160°F internally. Then move them skin-side up to indirect heat for 30 minutes, brushing with sauce during the final 15 minutes until you’ve hit 165-175°F. Finally, rest them 5-10 minutes. The specific timing depends on your heat approach and grill type, with additional techniques available for perfecting your results.
Essential Preparation Steps
Before you fire up the grill, you’ll want to prepare your bone-in chicken thighs to maximize browning and verify even cooking. Start by patting the thighs dry with paper towels to eliminate surface moisture—this prevents steaming on the grates and promotes even browning. Next, trim any loose skin and excess fat around the bone to reduce flare-ups and assure uniform cooking.
Apply your seasoning generously to all sides, working the rub under the skin for deeper flavor penetration. Consider dry brining or using a spice blend containing garlic powder, paprika, and cumin. Scoring the skin lightly with a knife creates additional surface area for crisping and enhanced browning. Let the thighs rest at room temperature for 20-30 minutes, allowing the seasoning to penetrate fully and confirming even cooking throughout. Kosher salt and black pepper are excellent basic seasonings that enhance the natural flavor of the chicken. Grilled chicken is a lean protein source that provides essential vitamins and minerals while supporting muscle growth and metabolism. Have a meat thermometer ready to check for doneness, as it’s crucial for ensuring your chicken reaches the safe internal temperature. Bone-in thighs should be cooked to an internal temperature of 170°F to 185°F for optimal tenderness and food safety. After grilling, resting the chicken wrapped in foil for about 10 minutes helps the connective tissue break down, keeping the meat moist and tender. Preheat your grill to medium-high heat to ensure the cooking surface is ready for achieving that perfect sear and crispy skin. This methodical preparation transforms your grilling results.

One value pack tray of bone-in, skin-on chicken thighs weighing between 4 and 6 pounds

Traceable to farm or ranch.

No Antibiotics Ever
Setting Up Your Two-Zone Grill
Now that your chicken thighs are seasoned and resting, you’ll create a two-zone grill setup that lets you sear on high heat while simultaneously slow-cooking on low heat without temperature adjustments. For charcoal grills, concentrate your ideal fuel placement by pouring lit coals into a tightly packed single layer across half your grate, leaving the opposite side bare. For gas grills, light one or two burners to 450°F while keeping remaining burners off or at 250°F. Temperature control principles require verifying both zones with an oven thermometer before cooking begins. This versatile cooking method allows you to experiment with different techniques and achieve superior results with various proteins. Position top vents directly over your cool zone to direct heat and smoke across the meat. Open all bottom vents fully to maximize airflow and maintain consistent temperatures throughout your cooking process. Many experts recommend keeping bottom vents fully open for good airflow and modulating heat via the top lid damper for precise temperature control. The high-heat zone is ideal for searing your chicken thighs quickly while developing a flavorful crust. The burning charcoal embers produce intense radiant heat that cooks the chicken directly from below, working together with the conduction from the hot grate to create perfect sear marks.
Direct Heat Searing Techniques
With your two-zone grill calibrated and your chicken thighs rested, you’re ready to begin the searing phase that’ll establish the flavorful, crispy exterior your grilled thighs demand. Place thighs skin-side down on the hot zone (400-450°F) for 4-5 minutes without flipping—this uninterrupted searing process creates a golden-brown crust. Your sizzling techniques should prioritize minimal movement; resisting the urge to peek prevents crust disruption. After the skin achieves crispness, flip once and sear the meat side for another 4-5 minutes at medium-high heat. Monitor internal temperature; you’ll target 155-160°F before moving to indirect heat. This methodical searing process develops Maillard reaction complexity while rendering fat gradually, preventing flare-ups and ensures even browning throughout your bone-in thighs. Insert a reliable thermometer into the thickest part of the thigh, avoiding the bone, to confirm you’re hitting your target temperature without guesswork. Using a meat thermometer is crucial to ensure the internal temperature reaches 165°F for food safety. Once you’ve completed the searing phase and your thighs have reached the target temperature zone, continue grilling over indirect heat to finish cooking evenly without burning the exterior. It’s essential to flip the thighs halfway through cooking to ensure even cooking on both sides. After reaching the proper internal temperature, allow the chicken to rest for 5-10 minutes so the juices redistribute throughout the meat for maximum tenderness.
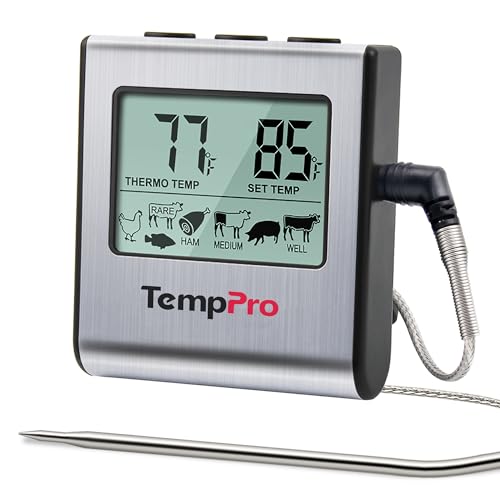
Cook mode with USDA preset temperature settings: TempPro cooking thermometer ideal for meat, oven, smoker or stove top; Programmable alert with preset temperatures for specific foods recommended by USDA; All of the preset temps can be reset to your desired tastes

BBQ charcoal pit temperature gauge with large degree scales and numbers , easy to read even from far away.

Bluetooth Monitor Remotely: Govee Bluetooth meat thermometer lets you check the temperature of your grill, smoker, or oven from your phone. With this smart BBQ thermometer, you can multitask while grilling.
Transitioning to Indirect Heat
Once your bone-in thighs reach 155-160°F internal temperature with a golden-brown skin crust, you’ll move them to the indirect heat zone where they’ll finish cooking through gentle, even heat. This shift timing prevents overcooking the exterior while the interior reaches safe temperatures.
Position your thighs skin-side up on the cooler side of your grill, maintaining 400-450°F in the indirect zone with the lid closed. After 30 minutes of indirect finishing, brush your thighs with sauce for the final 15 minutes to develop a caramelized glaze.
Monitor internal temperature closely as you approach 165-175°F. Once achieved, you can optionally return them to direct heat for 2-3 minutes of final crisping if desired, ensuring perfectly rendered skin without drying the meat. Proper preheating ensures your grill reaches safe cooking temperatures and prevents sticking during this final searing step. Bone-in thighs require higher temperature targets than boneless varieties to ensure complete cooking. Using a thermometer will help you confirm the internal temperature is high enough to destroy harmful bacteria and ensure food safety throughout the cooking process. For the most reliable readings during grilling, instant-read thermometers like the ThermoWorks Thermapen ONE deliver results in just 1 second with exceptional accuracy. Continuing to cook until the internal temperature reaches 175-180°F allows the connective tissues to break down completely for optimal tenderness. Budget-conscious grillers can achieve accurate monitoring with dual probe thermometers like the ThermoPro TP20, which offers a 300-foot wireless range for convenient remote temperature tracking. Let the chicken rest a few minutes before serving to seal in juices and maintain maximum moisture.

2.0 inches large auto-rotating backlit display: Digital food thermometer has a 180° auto-rotating backlit display, making this kitchen thermometer perfect for left-hand users and allows you to use it in low light conditions

【8X Faster + 4X More Precise】: Upgraded with an industrial-leading professional thermocouple sensor, Themomonster meat thermometer digital with NIST certified ±0.5℉ precision provides you the accurate temperature of your food in just 0.5 Seconds.

More Accurate, More Professional: With a National Institute of Standards and Technology (NIST) certification for its ±0.5℉ accuracy, this meat thermometer is a game-changer cooking tool for BBQs, roasts, candy, and everyday meals, ensuring your food is cooked safely and deliciously every time.
Monitoring Internal Temperature
Accurate temperature tracking is essential to achieving both food safety and ideal tenderness in bone-in chicken thighs. You’ll want to use an instant-read thermometer like a Thermapen for precision during grilling.
Your probe placement matters considerably. Insert the thermometer into the thickest part of the thigh meat, carefully avoiding bone contact, which conducts heat and produces false readings. Check multiple spots across the thigh, as cooler areas may exist below your target zone.
Monitor progress by flipping and checking every few minutes once you’ve shifted to indirect heat. Temperature monitoring should continue until you reach 175-185°F for prime tenderness. The safe internal temperature for chicken thighs is 165°F (74°C), ensuring all harmful bacteria are eliminated while maintaining juiciness. For bone-in, skin-on thighs specifically, pushing toward 195°F will reward you with crisp skin and deeper flavor development. If you prefer hands-free monitoring during longer cooks, a wireless grill thermometer with accurate probe placement can alert you when your target temperature is reached without constantly opening the grill lid. The ThermoWorks Thermapen ONE stands out as the fastest and most accurate instant-read option, excelling in speed, consistency, and reliability tests against competitors. Before cooking, ensure your grill grates are clean and free of rust buildup, as rusty surfaces can cause sticking and affect the flavor of your chicken with a metallic off-taste. Verify the fattest section last, typically after skin crisps, ensuring consistent doneness throughout the entire piece. After grilling, let the chicken rest for a few minutes to allow juices to redistribute for optimal tenderness. Regular scrubbing of cooking grates before and after use prevents flavor transfer and maintains optimal heat distribution for evenly cooked chicken.
Determining Doneness Without a Thermometer
You can reliably assess bone-in chicken thigh doneness through multiple sensory indicators that correlate with safe internal temperatures. Pierce the thickest part and observe juice clarity—transparent fluids indicate completion, while pink discharge requires additional cooking. Press the flesh firmly; it should feel springy and opaque without translucency. Check moisture content by examining meat fibers near the bone; they’ll appear white and fully set when cooked through.
Examine the bone-meat interface where separation occurs naturally upon doneness. Reduce flipping frequency during final cooking stages to develop consistent browning while monitoring these visual cues simultaneously. Allow the chicken to rest for several minutes after grilling to let juices redistribute throughout the meat. Combine the juice test with texture assessment for reliable confirmation. A meat thermometer inserted into the thickest part of the thigh remains the most accurate method to verify the internal temperature has reached 165°F (74°C). Using a digital thermometer to monitor temperature in the thickest part ensures you achieve both safety and optimal texture. Dark meat chicken should reach 175°F (79°C) for optimal food safety. If grilling on a cast iron grill pan, the superior heat retention will help develop defined grill marks while maintaining consistent cooking temperatures. Golden, crisp edges paired with firm flesh and clear juices confirm your thighs are safely cooked and ready to serve. After enjoying your meal, clean your grill grates effectively using specialized metal scrapers that conform to grill rods for thorough grime removal without bristle risks. For stubborn residue on grates, soak them in warm soapy water before scrubbing to remove baked-on grease and carbon buildup.
Timing Variations by Heat Level
Now that you’ve mastered the visual and tactile cues for doneness, grill temperature becomes your primary variable for controlling cook time and achieving ideal results. Heat control directly determines your timing strategy. At 450-500°F direct heat, you’ll finish bone-in thighs in 10-14 minutes, flipping once when skin browns. Medium-high setups (350-450°F) require 20-25 minutes using a two-zone approach: 4-5 minutes per side direct, then 10-15 minutes indirect. Lower temperatures demand more time—350°F indirect heat extends cooking to 35-45 minutes. For progressive cooking, start at 250°F until reaching 175°F internal, then increase to 450°F for final tenderness development. The connective tissue breakdown at higher temperatures accelerates the gelatin formation that creates succulence and tenderness. While grilling differs from smoking, understanding that smoking at 225-250°F typically takes 2 to 3 hours provides useful context for how low-temperature cooking affects chicken thighs. Preheating the grill to 375°F creates an optimal environment for starting with direct heat to crisp the skin before transitioning to indirect heat for thorough cooking. Temperature monitoring guarantees consistent results across varying thigh sizes and grill configurations.
Achieving Crispy Skin and Juicy Meat
Since moisture prevents crisping, you’ll want to start by patting your chicken thighs completely dry with paper towels before seasoning—this foundational step eliminates the steam that’d otherwise soften the skin during grilling. Next, apply aluminum-free baking powder to raise skin pH and degrade proteins for superior skin texture quality. This technique draws surface moisture outward for evaporation while cooking.
Employ two-zone cooking: sear skin-side down over direct heat for 4-5 minutes at 400-450°F until golden and blistered. Move thighs skin-up to indirect heat, cooking until internal temperature reaches 160-175°F. This method guarantees meat moistness retention by preventing direct heat overcooking. For best results with charcoal grilling, light a full chimney starter of briquettes to ensure consistent heat throughout the cooking process. Use a meat thermometer to verify the chicken has reached a safe internal temperature for properly cooked, moist results. Just as with smoking meats, maintaining proper air circulation through your grill vents helps achieve better surface drying and texture development. If outdoor grilling isn’t an option, you can achieve similar results by broiling in the oven at high heat to create that charred, crispy exterior. Finally, return skin-side down briefly for a final crisp, achieving perfectly balanced texture and managing airflow throughout the cook for temperature consistency. After cooking completes, let the chicken rest for several minutes to allow the juices to redistribute throughout the meat before serving. Regular grill maintenance, including removing ash and debris, ensures optimal performance and prevents unwanted flavors from transferring to your food.

Our Baking Powder Makes The Lightest, Fluffiest Cakes, Quick Breads And Baked Goods
Perfect for Gluten-Free Baking – Achieve consistent rise and texture in your gluten-free baked goods with Mom’s Place Double Acting Baking Powder. Ideal for cakes, muffins, and more.

Gluten Free, Vegan, Vegetarian, Kosher, Halal
Resting Your Chicken for Maximum Flavor
Allowing your grilled chicken thighs to rest isn’t optional—it’s the crucial final step that locks in juiciness and guarantees even flavor distribution throughout the meat. The ideal resting duration spans 5-10 minutes under loose foil, permitting carryover cooking to raise internal temperatures 5-10°F toward the target 165°F. This pause allows proteins to relax and collagen to break down, enhancing tenderness.
For proper resting technique, tent your thighs loosely with foil on a clean surface away from direct heat—avoid tight wrapping to preserve crispy skin. Use a thermometer to verify the thickest portion reaches your target temperature. This methodical approach prevents juice loss onto your cutting board while maximizing moisture retention, yielding superior texture contrast and flavor intensity in each bite. Just as moisture retention strategies such as water pans and periodic spritzing improve ribs on a charcoal grill, proper resting ensures chicken thighs remain succulent. Similar to the 2-2-1 method used for smoking ribs, strategic resting and wrapping techniques help maintain moisture while developing optimal texture. If you have leftovers, reheat with added liquid and cover tightly to maintain the same moisture and tenderness you achieved during the initial cook. Any remaining grilled chicken thighs can be safely stored in the refrigerator for three to four days when kept at or below 40°F. For longer storage, freeze cooked chicken on the day of cooking in airtight containers or freezer bags to maintain quality and prevent freezer burn.
Troubleshooting Common Grilling Issues
Even with meticulous prep and technique, you’ll encounter challenges that can derail your grilled bone-in chicken thighs—uneven cooking, flare-ups, burnt skin, and temperature inconsistencies that compromise both safety and flavor.
Address flare-ups by moving thighs to indirect zones until flames subside, then return for finishing sears. Trim excess fat and pat skin dry beforehand to diminish ignition risk. Prevent charring by searing skin-side down briefly over moderate heat, then finishing indirectly with the lid down.
Manage uneven cooking by maintaining grill zone temperature through asymmetrical coal or burner arrangement. Rotate pieces between direct and indirect areas, minimizing temperature fluctuations by limiting lid opens. Use an instant-read thermometer to verify 165°F in the thickest muscle near bone. Sample multiple pieces from different zones to guarantee consistency across batches. Avoid opening the lid excessively, as frequent lid opens can cause significant temperature drops that extend cooking time and create uneven results. Ensure all air holes in the cooker are clean for even airflow to prevent hot and cool spots throughout the cooking process.

【Ultra-Fast & Precision Accurate】This meat thermometer digital delivers accurate readings within ±1°F/±1°C in just 2–3 seconds, with a wide temperature range of -58°F to 572°F (-50°C to 300°C). No more waiting over the heat - know your food's exact temperature instantly.

【Easy to Use】Easily release the meat probe at the push of a button, and control the backlight or power with another button. With TempPro, cooking becomes a seamless, stress-free experience

Instant Read Food Thermometer | Our instant read thermometer features a temperature probe and advanced, highly accurate technology with 1-2 seconds response time; Instructions, meat temperature chart, comes pre-calibrated for your convenience, and recalibrating feature if needed.