You’ll nail perfectly grilled lobster tails by thawing them 24 hours in your refrigerator—this preserves texture and guarantees even cooking. Select cold-water tails with vibrant, shiny shells and opaque meat. Butterfly them lengthwise, brush with butter, then grill on a 450-500°F surface meat-side down first. Use a thermometer to reach 135-140°F internal temperature. The technique demands precision, but mastering each component reveals why restaurants charge premium prices for this elegant dish.
Thawing Your Lobster Tails Properly
You’ll find that proper thawing is fundamental to achieving tender, flavorful lobster tails on the grill. When considering thawing time considerations, you’ve got two reliable options: the refrigerator versus water methods.
The overnight refrigerator method takes 24 hours but preserves texture beautifully. Place sealed tails on a tray to catch drips, allowing them to thaw slowly and reabsorb moisture for ideal flavor. For smaller tails (4-6 oz), you’ll need 4-6 hours; larger ones (12-20 oz) require up to 36 hours. Use multiple bags and plates if you’re thawing several tails to ensure they thaw evenly in a single layer. Fully thawed meat releases from shell more cleanly and cooks more evenly. Once thawed, check the internal temperature with a meat thermometer to ensure proper doneness during grilling, just as you would with other seafood. For precise temperature readings, consider using an instant-read thermometer that provides accuracy within seconds to avoid overcooking your lobster. A wireless grill thermometer can also help you monitor temperatures remotely while you prepare other parts of your meal. The ThermoWorks Thermapen ONE delivers the fastest and most accurate readings when checking your lobster’s doneness.
The quick cold-water method works when time’s tight. Submerge your sealed bag in 30-40 degree water for 60-90 minutes, changing the water every 15-30 minutes. Whatever method you choose, pat the surface dry before cooking and avoid hot water, which causes uneven thawing. If you have leftover cooked lobster, you can store it in an airtight freezer bag to maintain freshness for up to three months.
Choosing the Right Lobster Tails
Since quality lobster tails make or break your grilled dish, selecting the right specimens demands attention to freshness indicators and sourcing. You’ll want vibrant, shiny shells without gray discoloration or mushy texture when pressed. Cold-water tails from Maine, Canada, Australia, or New Zealand deliver superior sweet, firm meat compared to warm-water varieties, which often turn mushier with higher quality-compromise rates. Warm-water lobster tails are frequently treated with sodium tripolyphosphate to extend their frozen storage life, making cold-water options a more reliable choice for consistent quality.
When choosing fresh versus frozen options, prioritize wild-caught cold-water tails graded A for highest meat density. Look for opaque white meat in pre-cooked tails, avoiding gray or translucent discoloration. Frozen lobster tails should be thawed in the refrigerator before cooking to preserve texture and flavor. Select the 5oz to 12oz size range for optimal flavor and texture balance.
Sustainable sourcing matters too—research your supplier’s practices to promote responsible harvesting. Before grilling, ensure your grill grates are clean and free of rust buildup, as corroded surfaces can affect food taste and compromise the quality of your lobster tails. If you prefer using a griddle on your grill for more controlled cooking, cast iron griddles offer superior heat retention and even distribution for perfectly seared lobster tails. For indoor preparation or when weather doesn’t cooperate, cast iron grill pans deliver excellent searing capability with defined grill marks while maintaining the even heating needed for delicate seafood. Their pre-seasoned surfaces resist metal utensils and build natural non-stick properties over time, making them ideal for delicate seafood like lobster tails. If you’re investing in a stainless steel flat top, models like the Solo Stove Steelfire provide commercial-grade construction and exceptional even heating across nearly 500 square inches, perfect for cooking multiple lobster tails simultaneously. You’ll achieve restaurant-quality results by investing in premium specimens from reputable sources.
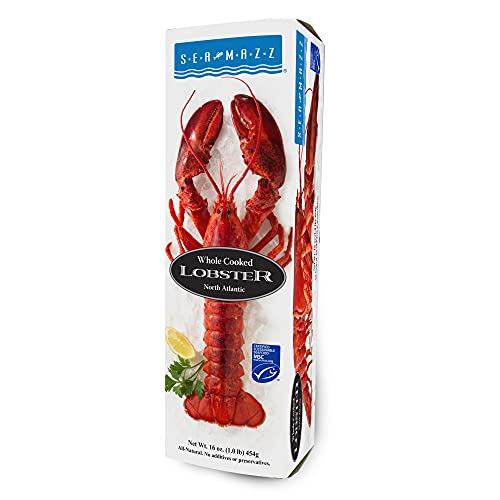
WHOLE COOKED LOBSTER | Thaw, Reheat and Serve

ALL NATURAL | 100% Chemical-Free, No Additives

BUTTERY, TENDER MEAT. Maine lobster thrives in frigid Atlantic waters. The cold temperatures limit the amount of salt the lobsters can absorb into their bodies which preserves their natural sweetness and tender texture — and gives you a distinctive, buttery taste you can savor.
Essential Tools and Equipment
Now that you’ve secured premium lobster tails, assembling the right equipment separates amateur attempts from restaurant-quality results. Start with sharp kitchen shears and knives—regular knife sharpening guarantees clean cuts through shells without crushing delicate meat. You’ll need a reliable instant-read thermometer for tracking doneness at 135-140°F, the optimal internal temperature range for perfectly cooked lobster. Your grill setup matters considerably. Preheat your gas or charcoal grill to 450-500°F, using metal skewers to prevent tail curling. Invest in grill tongs with silicone tips and long-handled tools for safe handling. Keep a basting brush nearby for applying lemon garlic butter throughout cooking.
For meat storage before grilling, maintain your lobster tails at 32-35°F in airtight containers. Position drip pans on cooler grill zones, and use grill covers to trap heat during the second half of cooking, preventing dryness and assuring perfectly succulent results. Consider using a grill basket or grill mat to keep meat intact and prevent sticking while maintaining even heat distribution. Look for non-stick grill mats with heat resistance up to 500-600°F that prevent flare-ups and simplify cleanup while protecting your grill grates. A quality vegetable grilling basket with nonstick coating can also double as a seafood holder, preventing delicate lobster pieces from falling through grates while ensuring even heat circulation. After cooking, maintain your grill with a bristle-free grill brush to safely remove residue without risking metal fragments in future meals. Regular grill maintenance includes replacing worn brush heads to ensure effective cleaning without compromising safety. Protecting your grill investment with a durable outdoor cover featuring UV-resistant, waterproof materials extends equipment life and ensures consistent performance season after season.
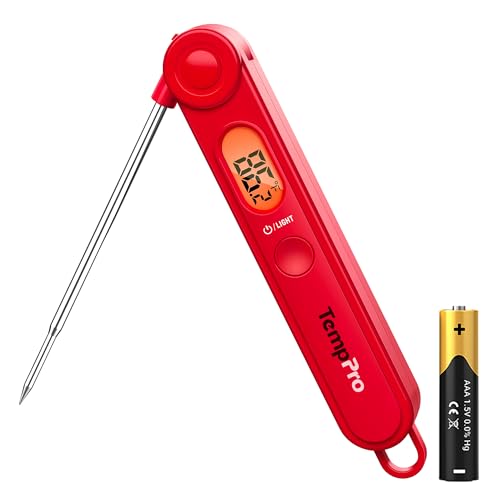
【Easy to Use】Easily release the meat probe at the push of a button, and control the backlight or power with another button. With TempPro, cooking becomes a seamless, stress-free experience

【Instant & Accurate Readings】Get precise temperature results in just 2-3 seconds with Q128 Instant Read Meat Thermometer. With a wide range of -58°F to 572°F (-50°C to 300°C) and ±1°F/°C accuracy, it’s perfect for grilling, baking, BBQ, and candy making, ensuring your food is cooked to perfection every time
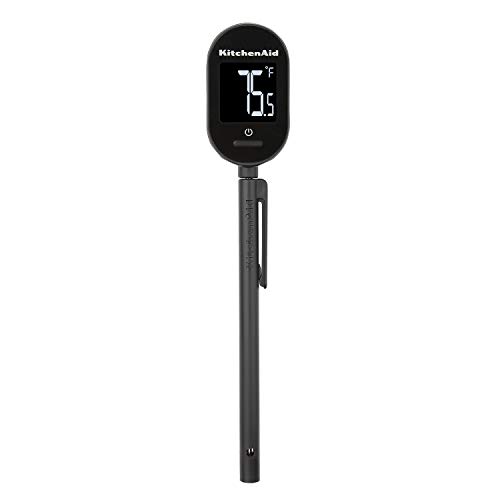
UNIQUE FEATURE: Extra-large backlit display makes viewing easy from any angle
Butterflying Techniques for Even Cooking
The butterfly cut—achieved by splitting the shell lengthwise while keeping the meat attached—is what transforms a lobster tail from an uneven cooking challenge into a perfectly uniform dish. You’ll start by using kitchen shears to cut down the center of the top shell, stopping just before the tail fins to preserve structural integrity.
Next, flip the tail and press along the center shell to release the meat from the bottom. Gently pry the meat free while maintaining meat integrity by keeping it attached near the tail fan. Lay the meat flat across the shell halves, then squeeze them together beneath it for enhanced structural stability. This technique allows the lobster meat to puff up over the shell as it cooks, creating an impressive presentation.
A wooden skewer inserted lengthwise prevents curling. Small slits cut into the meat’s top surface improve heat penetration and presentation, ensuring even cooking throughout the grilling process. Brush the exposed meat with melted butter, salt, and garlic before grilling to enhance flavor and moisture retention. Use a meat thermometer to monitor doneness and prevent overcooking the delicate lobster meat. For enhanced precision when monitoring internal temperature, consider using a dual-probe thermometer that allows you to track multiple tails simultaneously while keeping the grill lid closed. Just as cordierite pizza stones provide superior heat retention for grilling, a stable grilling surface ensures consistent temperature for delicate seafood. Before placing the lobster on the grill, ensure your grates are clean and well-oiled to prevent the delicate meat from sticking to the surface. Consider placing a grill mat beneath the lobster tails to protect your deck from grease drips and to catch any juices that escape during cooking.
Creating the Perfect Seasoning Blend
Once you’ve prepared your butterflied lobster tail, you’re ready to build layers of flavor that’ll complement the meat’s natural sweetness without overpowering it. Start by mixing the seasoning components: combine 1¼ teaspoons paprika, 1¼ teaspoons kosher salt, ¼ teaspoon black pepper, and ¼ teaspoon each of garlic and onion powder. For enhanced depth, incorporate 1 teaspoon each of minced thyme and rosemary. This foundational blend creates balance without dominating delicate lobster flesh.
When storing the seasoning blend, keep it in an airtight container away from heat and light to preserve potency. Remember that high-quality seafood selections like cold water lobster will showcase these seasonings beautifully without requiring excessive flavoring. For applications requiring intensity, consider supplementing with Old Bay seasoning at ¼ teaspoon or incorporating 1 tablespoon of Cajun seasoning for bolder profiles. You’ll apply your chosen blend directly to the meat before grilling or infuse it into compound butter for richness. For an innovative presentation and mineral-rich flavor enhancement, try grilling your lobster tails on a Himalayan salt block heated gradually to high temperatures. If you’re looking to add a subtle smoky note, consider using cherry wood chips on your gas grill to impart a mild, fruity essence that pairs exceptionally well with seafood. For pellet grill users, apple wood pellets deliver a similarly delicate sweetness that won’t overwhelm the lobster’s natural flavor. While oak woods like post oak excel in traditional BBQ applications, fruitwoods remain the better choice for delicate proteins like lobster. Alternatively, you can create a seasoned garlic butter mixture to brush over the lobster meat, which enhances the natural sweetness while adding rich, aromatic notes. This spice blend with a touch of heat ensures your lobster tails develop complex flavors on the grill.

Signature Flavor: Crafted to bring the iconic Red Lobster taste right into your kitchen, this seafood seasoning combines paprika, onion, garlic and spices designed to enhance fish, shrimp, lobster and seafood dishes with balanced, restaurant-style flavor

Bold Flavor for Seafood Lovers: Whether you're grilling, baking, or pan-searing, Salmon Magic Seasoning brings out the best in every bite; This seafood seasoning is crafted for salmon but works just as well on shrimp, crab, and other fish, making every dish taste special

All Natural Ingredients: Made with all natural ingredients, no artificial flavors or preservatives
Preparing Your Grill for Success
Your seasoning blend’s success depends entirely on proper grill preparation, which starts with temperature control and setup strategy. You’ll want to preheat your grill to 400-450°F, ensuring ideal grill configuration for even cooking.
Implement a two-zone setup by banking charcoal to one side or leaving a burner off on gas grills. This creates both direct and indirect heat zones, allowing you to manage flare-ups effectively. Position your lobster tails off-center from the hottest coals.
Clean your grates thoroughly with a wire brush after preheating, then lightly oil them to prevent sticking. For oiling your grates, choose refined avocado oil or other high-smoke-point options that can withstand grilling temperatures without burning. Temperature monitoring is critical—use a reliable thermometer to verify your heat level before placing tails on the shell-side down. For enhanced flavor, consider adding wood chips in a smoke box or foil pouch to introduce a smoky dimension to your grilled lobster tails. If using a smoker box, place it directly over a lit burner and allow the chips to begin smoking before adding your lobster tails. Close your lid during the second half to trap essential heat and moisture. Aim for an internal temperature of 135-140°F to ensure your lobster tails are perfectly cooked without drying out. Regular re-seasoning of cast iron grates helps maintain their non-stick properties and prevents rusting between cooking sessions. Grills with porcelain-enameled cast iron grates deliver consistent heat distribution while minimizing flare-ups during delicate seafood cooking. Just as achieving a crispy grilled texture requires proper heat management when preparing items like burritos with melted cheese exteriors, your lobster tails need controlled, consistent temperatures to develop their signature caramelized shell.
Mastering the Cooking Process
With your grill properly configured and preheated, you’re ready to execute the technique that separates mediocre lobster tails from exceptional ones.
Position your tails cut-side up at medium-high heat (450-500°F) for ideal texture enhancement. Grill 4-6 minutes, then flip for another 4-6 minutes, using the reliable rule of 60-75 seconds per ounce for juicy results.
Basting throughout is vital. Apply your lemon garlic butter mixture after flipping, maintaining constant attention to flavor pairing and moisture retention. Squeeze fresh lemon over the meat-side while cooking, stirring your butter continuously to guarantee even coating. Run a skewer through the center of the flesh lengthwise to prevent the lobster from curling during the cooking process.
Monitor internal temperature carefully, continuing to baste until you reach 140°F. This method ensures succulent, perfectly cooked lobster tails with enhanced flavor complexity and perfect texture every time you grill.
Determining Doneness and Temperature
Pulling your lobster tails from the grill at precisely the right moment separates perfectly cooked seafood from overdone disappointment. You’ll achieve ideal results within the 140–145°F temperature range, though pulling at 133–137°F allows carryover heat to finish cooking perfectly.
For accurate doneness verification, insert an instant-read thermometer into the thickest meat portion from the side, avoiding shell contact. Larger tails warrant checking two separate spots. Visually, you’re seeking opaque, pearly white flesh with a vivid red shell exterior and clear juices. The shell turns vivid red as proteins heat, providing a reliable visual indicator alongside your temperature readings. Temperatures above 145°F cause protein fibers to contract excessively, resulting in tough and rubbery meat that loses its tender, juicy quality.
After removal, rest your tails for just 1–2 minutes, allowing carryover cooking to complete. Recheck the temperature to confirm final doneness. Like with grilled burgers, resting after cooking helps retain juices and preserve the delicate texture of the meat. Using an instant-read thermometer ensures you pull your lobster at the precise moment, just as it does when grilling steaks to perfect doneness. A digital meat thermometer provides the most accurate readings to prevent overcooking and maintain tenderness.
Basting and Flavor Enhancement
Once you’ve mastered timing and temperature, basting becomes your secret weapon for elevating grilled lobster from good to extraordinary. Your basting techniques should begin before the lobster hits the grill—brush generously with melted garlic butter mixed with lemon juice to retain moisture and create a flavorful crust.
During cooking, baste every 2-3 minutes with your herb butter mixture, intensifying flavor infusion as the lobster develops. After flipping to shell-side down, apply additional butter liberally during the final 4-5 minutes. This strategic approach prevents drying while building layers of richness. Remember to place lobster halves on the grill with the shell side down initially for optimal heat distribution.
For maximum impact, combine 1.5 sticks unsalted butter with minced garlic, fresh lemon juice, cayenne, and parsley. Pour this seasoned mixture directly into the shell slit during grilling. Just as with other proteins, using a meat thermometer ensures you achieve the perfect doneness without guesswork. For quick and accurate readings, consider investing in a grill thermometer like the Thermapen ONE or budget-friendly ThermoPro TP20 for consistent temperature monitoring. Make sure to properly preheat the grill to establish the right cooking environment before placing your lobster tails on the grates. For gas grills, allow 10-15 minutes with the lid closed and burners on high to reach optimal searing temperatures. After removing from the grill, allow the lobster to rest for a few minutes to let the juices redistribute throughout the meat. Finish with fresh lemon squeezed over the meat while butter browns lightly, creating an unforgettable dish. Aim for an internal temperature of 132-136°F to ensure your lobster meat remains juicy and tender throughout the cooking process.

Campbell's Condensed Sauces, new from America's favorite soup maker, make dinner easy when you add your favorite protein

Lemon and Garlic Butter marinade combines tangy lemon, butter, and garlic flavors.

BRING HOME THE FLAVOR YOU LOVE: Made with Italian herbs, parmesan cheese and garlic, our Parmesan Garlic sauce delivers the familiar, delicious taste you love.
Plating and Serving Like a Pro
All your meticulous grilling work deserves a presentation that matches its quality. You’ll elevate your lobster by lifting the meat atop the shell for a fanned presentation or slicing it for linear arrangement on long plates.
Create visual impact through height and layering—stack tails on sauce bases or risotto beds. You’ll achieve complementing plating by incorporating vibrant vegetables and contrasting colors that enhance the meat’s natural hue.
For complementing garnish, apply fresh herbs, citrus slices, or edible flowers. Drizzle flavored oil and sprinkle sea salt for polish. Wipe plate edges clean meticulously. Consider finishing the dish with a compound butter made from minced garlic, salt, and chopped parsley for added richness and flavor.
Serve immediately on long plates with extra melted butter. Present under natural lighting to showcase colors brilliantly. Choose ovenproof construction for any serving platters if you need to keep the lobster warm between kitchen and table. If you frequently prepare seafood at home, a salamander grill can help you achieve restaurant-quality finishing touches with intense heat for perfect browning. Complete your grilling setup with quality tongs and spatulas to handle delicate lobster tails with precision and control. Invest in tools with ergonomic grips and heat resistance to ensure safe handling and better control during the entire cooking process. For outdoor grilling enthusiasts, a carbon steel griddle offers superior heat retention and durability for cooking delicate seafood alongside your lobster tails. You’ve created a restaurant-quality dish that showcases both skill and refinement.

Every Family Needs A Set of 3-sized Large Serving Platters -- Large:15.8x8.8 inch, Medium:14x7.8 inch, Small:11.8x6.8 inch. With 3 sizes, these oval platters meet all your different need, ideal for serving food, snacks, sushi, fruits, fish, appetizers, sandwiches and chips/salad, dessert.

Ideal Capacity for Everyday Entertaining: Set of 4 serving platters (13.5" × 9.5" top, 12.2" × 8.3" base) feature 1.3" raised edges to keep food in place. Ideal for serving warm dishes (below 70°C), desserts, cookies, snacks, fruits, appetizers, veggies, charcuterie boards, burgers, BBQ items, or a relatively small party spread. Plus, Larger sizes and more quantities are offered if you need more serving space

GREAT VALUE: Ample 6-Tray pack ensures convenience, perfect for gatherings or daily use. Never run out of food trays for party buffet, stay prepared to serve with ease. Enjoy flexibility and style with this convenient supply.