To clean your Weber grill properly, you’ll start by disconnecting power and allowing residual heat to dissipate completely. Gather soft-bristle brushes, scrapers, and appropriate cleaners for your grate type—cast-iron grates need vegetable oil, while stainless steel requires baking soda and vinegar. Clean interior surfaces with oven cleaner, tackle the exterior with all-purpose cleaner and microfiber cloths, then establish a routine maintenance schedule. Each component demands specific attention to maximize performance and longevity.
Essential Cleaning Tools and Materials
To effectively maintain your Weber grill, you’ll need a curated collection of brushes, scrapers, cleaning agents, and cloths that’re specifically designed for various grill surfaces.
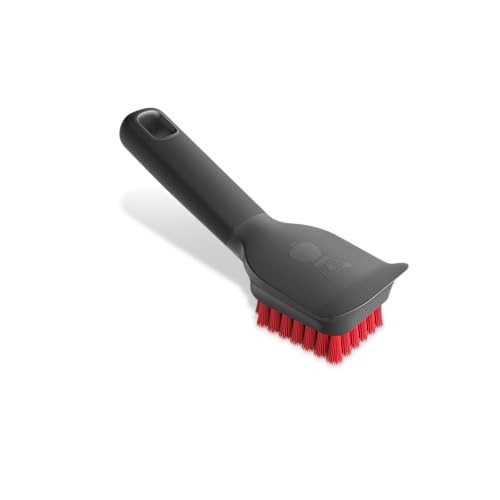
Start with an 18-inch grill brush to reach all areas, supplemented by a 12-inch bamboo brush for standard cleaning. Add a detail scraper with beveled design for corners and a plastic scraper to avoid enamel damage. The six-in-one paint tool chisel handles grates and crevices effectively. For stubborn buildup on cast-iron or porcelain-enameled grates, consider investing in a specialized grill brush designed specifically for these durable surfaces.
For detachable hardware, gather non-abrasive scour pads and cleaning stones with grip handles. Stock all-purpose cleaner, oven and grill cleaner, and aluminum cleaner for different surfaces. For particularly tough baked-on grease and grime, Carbona’s 2-in-1 Oven Rack and Grill Cleaner cuts through buildup on cold grates in just five minutes with minimal scrubbing. Bar Keeper’s Friend addresses stainless steel needs, while a stubborn stain remover tackles exterior challenges.
Complete your arsenal with microfiber rags, standard rags for liquid absorption, and paper towels for final polishing. The easy grip handles clip on securely for effortlessly cleaning detachable components. When selecting a brush, prioritize bristle-free designs like coil or chainmail options to avoid the safety risks associated with stray wire bristles. The Grillaholics Bristle-Free Grill Brush features a triple helix design with a built-in scraper that effectively cleans between grates while eliminating bristle ingestion hazards. For routine cleaning tasks, stainless steel woven wire heads offer efficient performance that cleans up to 5X faster across gas, electric, or charcoal grills. For flat-top griddles and steel surfaces, pumice-based grill bricks remove grease, rust, and caked-on residue without scratching when used with water and light pressure. This methodical selection guarantees you’ll achieve bristle removal and thorough cleanliness without damaging your grill.

Multipurpose tool for grates, cookboxes, burners and more

【The Safest Bristle Free Grill Cleaner】:No wire bristles at all, no melting like nylon grill brushes; With this safe grill brush and scraper, your food will stay 100% Bristle Free. No more worry about swallowing some metal pieces, Let's free to gobble up some favorite barbecue! Save your effort and time, let’s just have fun! (PATENTED design)
Preparing Your Grill for Cleaning
Before you begin any cleaning process, you’ll need to establish a safe working environment by systematically powering down your grill and allowing it to cool completely. Start by verifying power disconnection—unplug gas or pellet models entirely and close all propane tank valves. For charcoal grills, extinguish coals using the ash catcher system. Wait 30-60 minutes for residual heat dissipation, checking that all surfaces remain cool to touch.
Next, guarantee your work area supports safe operations. Spread drop cloths underneath to capture debris, position garbage containers nearby, and have your garden hose ready. Wear protective gear including old clothes and rubber gloves. Line your workspace with aluminum foil for efficient cleanup. Gather steel wool pads, sponges, and plastic scrapers before beginning to ensure you have all necessary cleaning tools available. Consider having disposable cloths on hand for wiping down surfaces and removing grease buildup throughout the cleaning process. Position a bucket of warm, soapy water nearby for soaking removable components during the cleaning process. If you’re cleaning a new grill for the first time, plan to apply a thin layer of cooking oil to the grates after cleaning to create a protective, non-stick surface. For Weber grills with porcelain-coated grates, you won’t need to season them, but you should still preheat and brush them before first use. Finally, conduct an initial safety inspection, checking gas tubes, burner spider guards, and verifying no loose components exist before proceeding. Use a high-quality cover to protect your grill from dust and moisture when storing your cleaning supplies nearby for future maintenance sessions. For stainless steel exteriors, have a microfiber cloth ready to buff and prevent water spots after cleaning.

Designed for heavy-duty grill cleaning

Scrape away the old and create something new with the Griddle Scraper. Its no-slip, easy grip handle and design helps to effectively remove grease and grime.
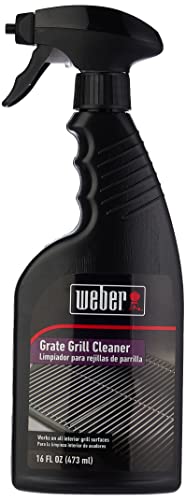
This 16 oz spray bottle of Weber Grill Grate Cleaner was engineered for use on cooking grate surfaces, including stainless steel and porcelain-enameled, cast-iron grates
Cleaning Your Grill Grates
Your grill’s grates require systematic cleaning to maintain their integrity and cooking performance, with the approach varying based on your grate material. For porcelain-coated surfaces and stoneware grate care, use soft-bristle brushes exclusively to prevent chipping. Heat the grill for 10–15 minutes first, then brush and wipe with a damp cloth before drying thoroughly. Cast iron demands immediate attention while warm; scrub with soapy water, dry completely, and apply vegetable oil to prevent rust. For stainless steel and ceramic grate maintenance, scrape debris, then use baking soda and vinegar for deep cleaning. Tackle stubborn buildup by soaking grates in vinegar and baking soda for 30 minutes. For particularly tough, baked-on residue, consider using a wire cup brush to achieve more effective cleaning results. Always rinse and dry completely before reusing your grill to guarantee optimal performance and longevity. Regular cleaning after each use prevents grease and grime buildup that can compromise your grill’s performance and food quality. After cleaning, apply a thin layer of high-temperature cooking oil like vegetable or canola oil to season the grates and protect them from rust. For stubborn rust spots, create a paste of baking soda and vinegar or lemon juice and detergent, apply to affected areas, let soak, then scrub and rinse thoroughly. When steaming grates at around 400°F to soften grime, brushes with heat-resistant sponge heads offer a safer alternative that eliminates the risk of metal bristles breaking off and causing injury. For enhanced safety during cleaning, consider switching to wooden grill scrapers that mold to your grates over time and eliminate the risk of dangerous wire bristles contaminating your food. Beyond routine maintenance, perform a deep cleaning once or twice per grilling season to remove accumulated residue and maintain optimal flavor.

GRILLBADGER NON-METAL GRILL BRUSH FOR SAFER COOKING: GRILLBADGER offers a BBQ grill brush with non-metal bristles, making it the safest choice for outdoor grill cleaning. Protect your family from the risk of ingesting metal bristles with this premium BBQ brush, designed for safer grilling. Enjoy peace of mind while using a non-toxic, durable grill cleaner brush that eliminates the dangers associated with traditional metal brushes.

BRISTLE-FREE GRILL BRUSH FOR SAFE CLEANING: Keep your family safe with our bristle-free grill brush! Unlike traditional wire brushes, there are no dangerous bristles to break off and end up in your food. Grill Rescue's BBQ cleaning brush is a safer alternative for gas, charcoal, porcelain, ceramic, cast iron, and stainless steel grates.

HIGH QUALITY STAINLESS STEEL BRISTLES - Easily Removes Food, Grease, and Debris from all type of Grill Grates without Scratching or Damaging the Surface
Maintaining Flavorizer Bars and Interior
Now that you’ve perfected your grill grates, the flavorizer bars demand equal attention to sustain peak grilling performance. These bars vaporize grease and create your grill’s signature smoky flavor, so maintaining them’s essential.
Employ three line cleaning techniques: brush debris with a stainless steel grill brush after each use, wipe with a damp cloth to remove excess grease, and scrape stubborn particles with a plastic putty knife. For monthly deep cleaning, remove bars from the grill using proper bar installation methods to access them thoroughly. Submerge bars in warm soapy water and scrub with an SOS pad for stubborn buildup. Rinse completely and towel dry immediately—never air dry or use a dishwasher, as this prevents rust formation and extends bar longevity. To maintain optimal performance, clean flavorizer bars every 2-3 weeks depending on your usage patterns and cooking frequency. Surface corrosion on your flavorizer bars is normal but does not require replacement, so don’t be alarmed by minor discoloration over time. When visible corrosion or warping becomes severe, consider replacement flavorizer bars to restore your grill’s ability to direct drippings away from burners and reduce flare-ups. For heavy buildup that resists standard cleaning, create a paste from coarse salt and cooking oil to serve as a gentle abrasive that lifts stubborn grime without damaging the surface. You can also make a baking soda paste and apply it to stubborn areas, allowing it to break down grease naturally before scrubbing. When cleaning the interior of your grill, use mild detergents and avoid harsh chemicals that could damage protective coatings or leave harmful residues. Regular maintenance helps avoid buildup of grease and food residue, ensuring better cooking results and extending your grill’s lifespan.

[Perfect Fit for Spirit & Spirit II 300 Series Grills] -This grill parts replacement kit is designed for Spirit 300 Series gas grills including E-310, S-310, E-320, S-320, E-330, S-330 and SP-330 (2013–2017) with front-mounted control panels. Also compatible with Spirit II / GS4 II 300 Series models such as SP-310 and SP-330 (2013–Current).

WARM TIPS: Please check for the SIZE and MODEL of your BBQ grill accessories before ordering. The barbecue grill brand and models we listed are for reference only. NOTE: 17.5" flavorizer bars and heat deflector 7622 grill repair kits for Weber Genesis 300 series with front mounted control, Genesis 330 series, Genesis 320 series, and Genesis 310 series grill parts.

✅ Special Notes for this item: If you are looking for parts, the BRAND and MODEL No.# listed below are just for your reference. Please Kindly check again for the SIZE and MODEL of your original parts before purchasing. if you have any problem with the item, please feel free to contact us 7 * 24 Hours, We will reply to you within 24 hours and give you a satisfactory solution.
Cleaning the Exterior and Components
Once you’ve addressed the interior components, shift focus to the grill’s external surfaces, which require tailored cleaning approaches based on their material composition. For porcelain enamel maintenance, apply degreasing spray generously, then scrub with super-fine 0000 steel wool in circular motions. Wipe thoroughly with damp cloths to eliminate residue. Stainless steel surfaces demand mild cleaner applied with side-to-side grain motions, followed by warm soapy water and microfiber buffing. For stubborn smudges and streaks on stainless steel, consider using a specialized stainless steel cleaner that leaves a protective, glass-like finish without requiring extensive buffing. Control panel cleaning involves spraying burner knobs with appropriate cleaner and wiping for grease removal. Vacuum the storage area underneath, then spray and wipe clean. Check and replace ignitor batteries during deep cleaning sessions. Reapply cleaner if it begins to evaporate to maintain cleaning effectiveness during longer scrubbing sessions. For a natural cleaning alternative, create a paste using baking soda and vinegar to tackle tough grime on exterior surfaces without harsh chemicals. Always cool surfaces before cleaning and dry thoroughly with a non-lint cloth to prevent water spots. After cleaning and drying, apply a protective layer of cooking oil to metal surfaces to help prevent future rust formation. If you notice rust spots or chipped paint on the exterior, remove the rust with a wire brush or sandpaper, then apply high heat spray paint rated for temperatures up to 1200°F to restore protection and appearance. Covering the grill when not in use protects the chromium oxide layer that provides corrosion resistance.
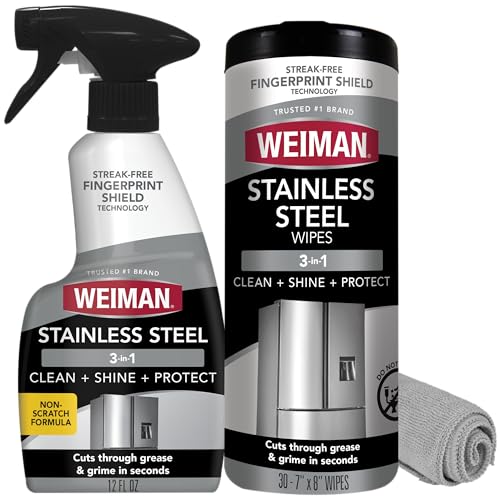
Cleans, polishes & protects stainless steel: Our stainless steel cleaner for appliances removes fingerprints, grease, residue, and water spots. This kit includes spray, which won a 2026 Good Housekeeping Cleaning Award, cloth & appliance wipes that leave a streak-free shine and a protective barrier that helps prevent future smudges.

Removes dirt and grime build-up, and is great for everyday cleaning on any exterior grill surface

Cleans, polishes & protects stainless steel: Our stainless steel cleaner for appliances, which won a 2026 Good Housekeeping Cleaning Award, helps clean delicate, hard-to-clean surfaces. This appliance cleaner removes grease, fingerprints, water spots and residue while restoring a polished, like-new shine.
Establishing a Regular Maintenance Schedule
How often you clean your Weber grill directly impacts its performance, safety, and longevity. You’ll need frequency adjustments based on your grilling habits. For casual use, serious cleaning every two months suffices, though you should scrape grates after each session. Frequent barbecuing demands weekly thorough cleaning to prevent rust and maintain consistent temperatures.
Seasonal preparation is equally critical. Perform ideal cleaning at least twice per grilling season, prioritizing your grease tray and cookbox to prevent flare-ups. During annual maintenance, inspect your burner tubes for clogs and verify your tank date for safety compliance. Regular grate scraping after each use helps reduce rust buildup and ensures your food tastes good when grilling. If you notice significant rust accumulation, soaking grates in vinegar can effectively dissolve the corrosion before scrubbing. Replacing worn-out cooking grates every 2-5 years prevents uneven cooking and maintains consistent heat distribution.
This methodical approach prevents diminished performance, eliminates food sticking, and extends your grill’s lifespan. You’ll maintain perfect heat distribution and avoid costly repairs through preventive care. Consider upgrading to cast iron grates for superior heat retention and searing capabilities during your next grate replacement. Cast iron’s exceptional heat retention makes it ideal for achieving restaurant-quality searing on steaks and vegetables. Protecting your investment with a quality grill cover shields your Weber from sun, wind, and weather elements between grilling sessions. For effective cleaning without bristle risks, specialized metal scrapers that wrap around grill rods offer durable performance superior to traditional wire brushes.
Tips for Long-Lasting Grill Performance
By combining regular inspections with preventive maintenance, you’ll maximize your Weber grill’s performance and lifespan. Avoiding rust damage requires applying stainless steel cleaner to exteriors and components seasonally, addressing corrosion immediately before it compromises structural integrity. If you notice rust buildup on grill grates, remove it by scrubbing with a grill brush or steel wool and using cleaning solutions like vinegar and baking soda, followed by proper drying to prevent recurrence.
For optimizing cooking performance, burn off residue on high for 15 minutes before each use to prevent sticking and uneven heat distribution. Test your ignition system routinely and replace batteries promptly to guarantee reliable starts. Check burner tube ports for blockages by brushing across them, and verify all components remain securely attached. Inspecting gas connections with soap and water solution helps detect leaks that could compromise safety and grill functionality. When selecting a grill brush, consider nylon-bristle options as a safer alternative since metal wire brushes can shed dangerous bristles that may contaminate food.
Perform annual deep cleaning by disassembling your grill and scraping carbon buildup from interior surfaces. Remove cooking grates and Flavorizer bars when the grill is completely cool to allow safe handling. Replace drip pans when overflowing and empty ash catchers to prevent corrosion. For heavy grease deposits, choose degreaser strength based on the severity of carbonization—mild dish soap works for routine cleaning while industrial-strength formulas tackle baked-on buildup. Always disconnect the propane tank before beginning any cleaning procedures to ensure safe maintenance. After using a charcoal grill, extinguish coals by closing all vents and the lid completely to cut off oxygen supply and allow them to cool safely before disposal. These methodical practices sustain consistent heating and extend your grill’s operational life substantially.