
You’ll start by cooling your grill completely and disconnecting gas or power. Remove and soak the grates in warm soapy water, then scrub with a nylon brush. Vacuum the interior with a shop vacuum to eliminate pellet dust and ash. Empty and clean your drip tray every 2-3 cooks using a plastic scraper. Deep clean every 20 hours of cooking to maintain ideal performance. The following sections outline each step in greater detail.
Getting Your Grill Ready for Deep Cleaning
Why wait? You’ll want to let your grill cool completely before beginning any deep cleaning. Rushing this step risks burns and potential damage to internal components. After you’ve finished cooking, allow the temperature to drop to ambient levels—don’t attempt cleaning on hot surfaces. This cooling period is non-negotiable for safety.
Once your grill reaches room temperature, you’re ready to proceed safely. The cold grill enables you to vacuum firepot ashes without hazard and perform thorough inspections across all surfaces. You’ll also avoid warping components or damaging seals that heat might compromise. Deep cleaning every 20 hours of cooking time ensures optimal grill performance and longevity. Remember to inspect the grill thoroughly for moisture and mold growth if your grill has been idle between uses. Before starting, turn off all gas or power connections and ensure the grill is completely disconnected. Gather the necessary tools to carefully disassemble components like grates and burners during your cleaning process. Regular maintenance helps you avoid buildup of food residue and grease that can compromise cooking results. Just as proper startup prevents temperature swings or flame-outs, thorough cleaning ensures consistent performance for your next cook. Emptying the ashes regularly maintains proper airflow and heat distribution for optimal grilling results.
Check that all surfaces feel completely cool before touching them. This methodical approach prevents injury and guarantees you can work efficiently throughout your deep cleaning process.

Heavy-duty Palmyra is abrasive enough to effectively remove baked-on food from cold grates and heat resistant for removing food from hot grates before a cook

Removable brush head with dishwasher-safe, bristle-free design

Compatible with Pro, Ironwood, and Timberline Grills – The Traeger Wooden Grill Scrape is designed to fit the grooves of Pro Series, Gen 1 Ironwood and Timberline, and Portable Series grills, offering precise cleaning for all your grilling needs.
Scrubbing and Maintaining Your Grates
Now that your grill’s cooled completely, you’ll want to tackle your grates with a systematic approach. Remove them from the grill and spray both sides with all-natural degreaser, allowing several minutes for soaking. Use a wooden scraper or nylon brush to scrub away residue—never wire brushes, which damage coatings. Wipe clean with damp towels.
For stubborn buildup, soak grates in warm soapy water for an hour. Deep clean every 2-3 cooks or 20-24 hours of cook time. Dry grates thoroughly before reassembly to prevent rust. Similar to managing workplace demands, establishing clear boundaries around your grill maintenance schedule ensures you don’t become overwhelmed with neglected cleaning tasks.
Establish periodic inspection habits by scraping after each use when food contacts them. For a chemical-free alternative to remove light carbonization and charred food, try rubbing a halved onion along the grate lines. You can also create a paste using baking soda and vinegar to tackle tough grime and grease buildup naturally. Proper storage requires completely dry grates before reinstalling. If rust does develop, remove it by scrubbing with steel wool and cleaning solutions like vinegar and baking soda to restore your grates. After cleaning, apply a protective layer of cooking oil to the grates to help prevent future rust formation. Avoid lining your grates with aluminum foil during cleaning or cooking, as aluminum particles can leach into food at high temperatures and create health concerns. Conduct thorough deep cleaning annually to maintain ideal performance and extend your grates’ lifespan. Food build-up in the grill grate may breed bacteria that could contaminate your meals and compromise food safety.

CitruSafe is a pioneer in the grilling industry by manufacturing the first spray specifically formulated to provide a simple, safe, yet powerful alternative to cleaning a barbecue grill’s cooking surfaces (grates). CitruSafe BBQ Grill Cleaner utilizes the cleaning power of citrus peels to provide a natural degreaser. CitruSafe not only saves fuel, but also avoids the unnecessary risks associated with ingesting bristles from wire grill brushes.
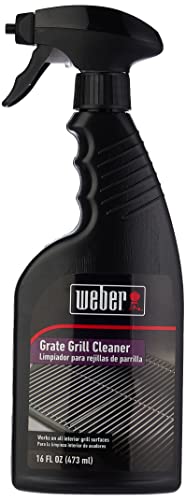
This 16 oz spray bottle of Weber Grill Grate Cleaner was engineered for use on cooking grate surfaces, including stainless steel and porcelain-enameled, cast-iron grates

Easy Spray, Wait & Wipe: Designed as an effective bbq grill grease remover spray, fume-free and heavy-duty grill cleaner. You simply need to shake, spray generously, allow 10–15 minutes dwell time, then wipe clean for best results. No instant harsh scrubbing required.
Vacuuming the Interior Thoroughly
Once you’ve finished with your grates, you’ll need to prepare the grill’s interior for a thorough vacuuming. Start by removing the drip tray and heat baffle, then empty your hopper completely for accessing auger tube debris. Allow the grill to cool fully before beginning.
Using your shop vac with appropriate attachments, systematically remove pellet dust and ash from the bottom, firepot, and walls. Tap components lightly to dislodge stubborn particles before applying suction. Work methodically through hard-to-reach areas, including corners and crevices. For optimal results, use a shop vacuum to ensure you capture all fine particles and debris throughout the interior. Be sure to collect as much residual sawdust as possible from all surfaces during this process.
When vacuuming the firepot, exercise caution around sensitive components. Avoid disturbing the thermocouple and RTD unless visible buildup is present. Use a non-metallic scraper first to remove excess ash accumulation. The igniter in the fire pot is responsible for heating the pellets during startup, so take care not to damage it while cleaning. Avoid using water inside the grill during this cleaning process to prevent rust from forming on metal components. After cleaning, apply a thin layer of oil to exposed metal surfaces to protect against oxidation and maintain the grill’s interior finish.
After your initial pass, inspect thoroughly for remaining debris, verify chimney cleanliness, and confirm the hopper’s auger tube is completely clear before reassembly. Protect your hands with heat-resistant grill mitts while handling any components that may retain residual heat. This routine maintenance balanced with occasional deep cleaning will optimize your grill’s longevity and ensure safe cooking performance.

The kit fits 1-1/4 inch diameter vacuum hoses. The 5 mini nozzles must be used with the 1-1/4" adapter in the set.

PERFECT FOR INTERIOR CLEAN UP: Work saving attachments for above the floor cleaning for upholstery drapes Venetian blinds fine furniture & car interiors
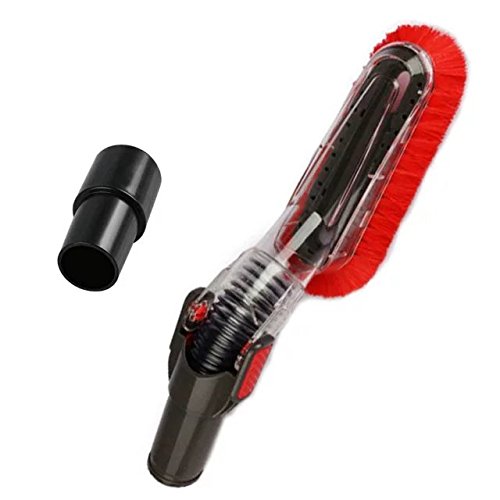
The brush is flexible and soft, perfect for cleaning furniture, high Surface, and ceiling, and orther places that is hard to reach.
Managing Your Drip Tray and Grease
Your grill’s drip tray collects the byproducts of cooking—grease, drippings, and debris—that’d otherwise accumulate inside the barrel and damage internal components. Empty and clean it every 2-3 cooks using a plastic scraper to remove buildup, then apply non-chemical degreaser and scrub with a nylon scouring pad. After greasy cooks like salmon or chicken, prioritize thorough cleaning for prime performance.
Start properly disposing grease by lining your tray with Traeger Drip Tray Liner or heavy-duty aluminum foil, replacing it every 2-3 cooks. Pour water on top post-cleaning to verify proper flow into the grease chute. When inspecting tray wear, test functionality by observing water pooling or flow patterns. Mild warping from heat is normal; however, rust creating holes requires replacement to maintain functionality. For optimal results, cover drip tray with foil or custom Traeger covers to minimize cleanup time between cooking sessions. Consider upgrading to a stainless steel drip tray for superior durability and heat resistance compared to standard materials. To protect your deck surface from grease spills and splatters, position a grill mat for your deck that extends beyond the grill’s footprint underneath your Traeger. Choose a mat with a raised lip to catch spills and nonslip backing to keep your grill stable while preventing grease stains on your decking. Look for mats with PTFE non-stick layers that handle temperatures up to 500°F and resist greasy buildup for easier maintenance. Heavy-duty options made from recycled tire rubber offer fire-resistant protection that’s non-absorbent to grease and oils while lasting for years with simple soap-and-water cleanup.

DIMENSION: Depth 15 1/2", Adjustable width between 24" and 30". Overall height with catch pan: 2 3/4". MEASURE YOUR CURRENT GRILL DRIP TRAY TO MAKE SURE OURS FIT YOUR GRILL MODEL.

MEASUREMENT: Depth 15 1/2", Adjustable width between 24" and 30". Overall height with catch pan: 2 3/4". PLEASE MEASURE YOUR CURRENT DRIP TRAY TO MAKE SURE OURS FIT YOUR GRILL MODEL.

Wide Compatibility: Adjusts in length from: 24" to 27", Width 15.5". The grill grease tray set is compatible with lots of gas grill models from Dyna Glo, Nexgrill, Kenmore, Backyard Grill, BHG, Uniflame and other brands. NOTE: Please measures the size of your current grill grease tray to ensure fit your grill model.
Cleaning Your Chimney and Grease Chute
After you’ve tackled the drip tray, it’s time to work on your chimney and grease chute—two critical components that accumulate soot and grease buildup that’ll restrict airflow and compromise your grill’s performance. Start by unscrewing your chimney cap completely. Use a non-abrasive bristle brush to break up buildup on the interior walls, then attach a rag to tongs for deeper access. Vacuum the soot fallout, then spray the interior with all-natural degreaser. For maintaining chimney airflow and preventing soot buildup, this thorough approach is essential. Next, scrape your grease chute with a stiff non-metallic tool, working edges and corners with a paint tool. If you need to tackle stubborn residue on metal surfaces, a crumpled ball of aluminum foil can serve as an effective scrubbing tool that won’t damage your grill components. For tougher buildup on steel surfaces, pumice-based grill bricks paired with water and light pressure effectively remove caked-on residue without scratching. Wipe out excess debris after sweeping loose material away. For particularly stubborn grime, consider using specialized cleaners designed for grills to break down tough buildup effectively. When cleaning the stainless steel exterior of your Traeger, apply Bar Keepers Friend powder mixed into a paste for superior results on metal surfaces. When selecting cleaning tools, avoid traditional wire bristles that pose safety risks from stray bristles potentially contaminating food, and instead opt for bristle-free coiled designs with sturdy handles and scrapers. Regular cleaning of these components allows you to monitor your grill’s condition and extend its lifespan.

【The Safest Bristle Free Grill Cleaner】:No wire bristles at all, no melting like nylon grill brushes; With this safe grill brush and scraper, your food will stay 100% Bristle Free. No more worry about swallowing some metal pieces, Let's free to gobble up some favorite barbecue! Save your effort and time, let’s just have fun! (PATENTED design)

Extra Strong Ergonomic Handle - Still believe that as long as the bristles are stiff enough, the grill cleaning brush can live up to the name - a good barbecue brush? Of course not! A soft and sturdy handle with a stainless steel ring for hanging can make the clean work easier. No possibility such as the handle breaking up or snapped. You can succeed in using this BBQ cleaner for a very long time!

BRISTLE-FREE GRILL BRUSH FOR SAFE CLEANING: Keep your family safe with our bristle-free grill brush! Unlike traditional wire brushes, there are no dangerous bristles to break off and end up in your food. Grill Rescue's BBQ cleaning brush is a safer alternative for gas, charcoal, porcelain, ceramic, cast iron, and stainless steel grates.
Putting Everything Back Together
Now that you’ve thoroughly cleaned every internal and external component, it’s time to reassemble your Traeger grill methodically. Start by positioning the heat baffle, then align the drip tray carefully with the rear exhaust port alignment to guarantee proper fit. Secure all interior component securing by inserting grill grates and connecting your meat probe, completing the internal assembly sequence.
Next, attach external hardware systematically. Install the smoke stack and chimney cap before adding the lid handle. Use two 1/4-20×1.25 bolts with mica washers for the grill handle, and secure side shelves with four 1/4-20x.5 stainless steel bolts. Attach the side lift handle with 1/4-20x.6 bolts and mica washers to prevent scratching the grill surface.
Attach leg braces using four 1/4-20x.6 bolts per set, including spring washers to prevent loosening. Finally, install the hopper grate and bucket, lock your casters, and verify all alignment before connecting power. If your grill’s exterior shows rust or wear, consider applying Rust-Oleum High Heat spray paint to metal surfaces, which withstands temperatures up to 1200°F and provides corrosion resistance. A protective grill cover will help maintain your freshly cleaned Traeger and extend its lifespan between deep cleaning sessions. Look for covers with heavy-duty vinyl construction that resist cracking, fading, and weather elements to ensure long-term protection. Before purchasing a cover, measure your grill including side shelves to ensure a snug fit that will resist wind and provide optimal protection. Once reassembly is complete, consider upgrading your grilling experience with a quality grill tool set that includes essentials like ergonomic tongs and spatulas designed for durability.
Finishing Touches and Exterior Care
With reassembly complete, you’ll want to wrap up the deep cleaning process by attending to your grill’s exterior and protective systems. Spray the entire exterior with an all-natural degreaser and allow it to soak before wiping clean. Follow up with Clorox wipes for thorough sanitation. Use only non-abrasive cloths to avoid compromising the protective coating while restoring paint and finish to their original condition. Clean your temperature probe with a damp cloth, avoiding submersion. Inspect the grill body for damage requiring touch-up maintenance. Whether your Traeger was manufactured in the USA or overseas, maintaining its exterior finish is essential for longevity. Many outdoor cooking equipment brands, like Blackstone with their Logan, Utah headquarters, combine American design with global manufacturing to deliver quality products. Similar to Weber’s approach with their Palatine, Illinois headquarters overseeing production across multiple continents, modern grill manufacturers balance quality control with efficient global operations. Before storing, inspect and clean the interior surfaces to prevent residue from affecting food quality during your next cook. Just as flat-top griddles offer versatile cooking capabilities for multiple food types simultaneously, proper maintenance ensures your Traeger performs optimally across all cooking methods. Finally, apply a grill cover to shield your equipment from rain, snow, and humidity. To maintain optimal grill performance, verify the temperature probe is properly positioned before storing your equipment for future use. This extensive approach to treating wood components and finishing your exterior guarantees long-term protection and ideal grill performance.