You’ll start by unboxing your Traeger, assembling the legs and wheels on a flat surface, then installing the hopper with its handle. Next, attach the smoke stack and interior components like heat shields and grill grates. Fill your hopper with quality hardwood pellets, set the temperature to HIGH, and let it prime for 2-4 minutes before ignition. Season at 250°F initially, then gradually increase heat to 450°F-500°F over 45 minutes, expecting heavy smoke. Once seasoned, you’re ready for your first cook, though mastering temperature control requires understanding several key adjustments.
Unboxing Your New Grill
Before you assemble your Traeger grill, you’ll need to carefully remove all components from their packaging and identify each part. Start by extracting the grill grates, drip tray, and heat baffle from the interior. Next, retrieve the side shelf, meat probe, and grease bucket. Check the hopper thoroughly for the smokestack and power cord, which manufacturers often store inside.
Inspect components for damage before proceeding. Manage packing materials strategically by using them to prop the grill during removal, preventing surface damage. Flip the grill upside down after initial extraction for easier access to remaining items. Use a plastic bag as barrier between the grill and cardboard to protect the surface during this process. The Start Here box contains instructions, pellet guide, assembly guide, owner’s manual, probe, and tools to guide you through setup. Your Traeger grill uses wood pellets as fuel to create consistent smoke and heat for versatile cooking.
Organize all fasteners—bolts, washers, and hex nuts—in a designated area. Locate the honeycomb pellet sensor or hopper grate stored in the small box. Once your grill is fully assembled and positioned, protect your investment by using a UV-resistant grill cover to shield it from weather elements and fading when not in use. Consider placing your assembled grill on a grill mat for decks to protect your outdoor surface and catch any grease spills during cooking. For maximum deck protection, choose a mat with nonslip backing and raised lip to prevent shifting and contain spills effectively. A grill mat with weather-resistant materials will ensure long-lasting protection against moisture and UV exposure from outdoor elements. With everything identified and arranged systematically, you’re prepared to begin assembly on a clean, flat surface.
Assembly Legs and Wheels
With your components organized and ready, you’ll now attach the legs and wheels that’ll make your grill mobile and stable.
Start by laying your grill on its back on a non-abrasive surface, using foam or plastic to protect the finish. Position it upside down for leg attachment. You’ll identify two leg types: wheeled leg assemblies for one side and caster leg assemblies for the other.
Begin with larger wheeled legs using 5/16-18 button head bolts, washers, and nuts, ensuring nuts face toward the grill center. This wheeled leg stability supports your grill’s weight effectively.
Next, attach caster legs to the opposite end using 1/4-20 screws and washers. Caster leg maneuverability lets you reposition your grill easily. Install leg braces between leg pairs using 1/4-20 bolts. Once your grill stands upright with help from another person, tighten all fasteners securely. For routine grill maintenance, choose bristle-free brush designs to protect your grill’s finish from damage during cleaning. To maintain your grill’s finish and performance over time, use grill brushes specifically designed to avoid damaging surfaces during regular maintenance. After assembly is complete, protect your grill’s finish by avoiding abrasive brushes during future cleaning and maintenance, and consider seasoning your grill before your first cookout to create a protective, non-stick surface. For optimal seasoning results, apply high-temperature cooking oils like vegetable or canola oil right before cooking to build up that non-stick layer.
Install Hopper and Handles
Now that your grill’s legs and frame are secured, you’ll install the hopper and handles to complete the assembly. Start by laying your grill on its back and locating the hopper side, typically the right side of the grill body.
Remove six screws from the hopper access panel, then slide the new hopper into place, ensuring the auger enters the auger tube. Careful thermocouple wire routing is essential—feed the thermocouple and igniter wires through entry points before securing the hopper with six screws.
Next, attach the chrome door handle using supplied black bolts, washers, and nuts. Align the handle with pre-drilled holes on the door exterior and tighten securely with the provided wrench.
Finally, connect your wiring harnesses, reinstall the P.A.L Rail, and run a self-test on your controller to verify all connections function properly.
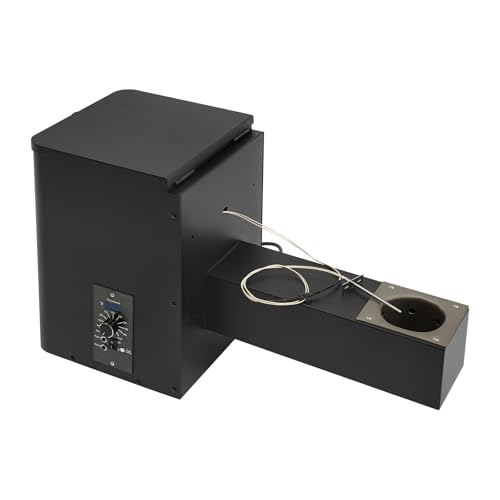
【Pellet Smoker Hopper Assembly Kit】Equipped with an advanced temperature sensor and an intelligent control chip, the product can monitor and maintain your desired temperature with high accuracy. This ensures even, stable heat distribution across each skewer, delivering consistently good grilling results.
Simple Temperature Adjustment: The large temperature control knob allows you to quickly and easily adjust the temperature among 180-450℉ according to your needs for better and easier barbeque fire control.

These units also work with many of the common pellet stove. an easy way to fix your broken pellet smoker. This is also the EASIEST and CHEAPEST way to build a CUSTOM pellet smoker. Long time pellet hopper seller.
Attach Smoke Stack and Interior Parts
Your grill’s exhaust system and interior components are essential for proper operation and even heat distribution. Start by positioning the flue pipe gasket between the grill assembly and smoke stack. Secure the smoke stack using two 1/2″ hex head bolts with zinc flat washers, tightening them with a wrench from both exterior and interior sides.
Next, install the chimney trim piece over the smoke stack, then hand-tighten the chimney cap onto the mounting bracket for ideal chimney cap alignment. Avoid over-tightening.
Now arrange the upper and lower heat shields inside the grill body for perfect heat shield orientation. Position the grease drain pan on its support ledges and hang the grease bucket on the drain tube hook. Regular maintenance of your grease trap will prevent buildup and ensure optimal grill performance. Finally, seat your porcelain-coated grill grates on the support ledges, ensuring they’re properly clipped before initial firing. Proper assembly of these components ensures consistent and precise temperature control throughout your cooking sessions. Quality digital temperature control helps you maintain optimal cooking conditions for better results across all your backyard BBQs. These hardwood pellet-fueled components work together to regulate heat distribution and support versatile cooking from low-and-slow smoking to high-temperature searing. Pellet grills like the Traeger offer set-and-forget convenience compared to traditional charcoal smokers that require more hands-on management.

WIDELY APPLIED - Chimney insulation wool parts compatible with Traeger/ Pit boss/ Camp Chef wood smoker Pellet Grill, and other DIY grills.

Package includes 1pcs black grill gasket, perfect for sealing air leaks on your grill.

COMPATIBLE WITH TOP PELLET GRILLS: Perfect fit for Traeger, Pit Boss, and Camp Chef pellet grills (including wood pellet grill smokers), ensuring seamless replacement of worn/damaged chimney insulation parts. Confirm model/size before purchase
Fill Hopper and Prime
Before you’ll need to fill the hopper with quality wood pellets and prime the auger system. Use only Traeger brand hardwood pellets specifically designed for grills, ensuring proper pellet storage to prevent moisture absorption during long-term storage. Check pellets for freshness before refilling, and change them after week-long grilling breaks. Proper care of pellets ensures optimal grill performance by maintaining consistent heat and flavor throughout your cooking session. For best results, select pellets with 100% natural hardwoods and no fillers or additives to ensure clean-burning performance. Different hardwood pellet flavors like hickory and apple can be blended together to create your preferred smoke profile. Unlike charcoal options such as lump charcoal, wood pellets provide a more automated and consistent cooking experience with less hands-on temperature management. Traeger’s wood pellets are manufactured in several facilities across the USA to maintain quality standards.
Open the hopper lid completely and fill it to capacity. Turn the temperature dial to HIGH, allowing pellets to fall into the firepot during initial charging. Once pellets begin dropping, reset to SHUT DOWN CYCLE. Ensure power cord is plugged into grounded outlet before proceeding with startup.
Next, verify the auger rotates by switching on and setting the dial to SMOKE. Confirm no foreign objects obstruct the auger, and check that the draft inducer fan moves air over the firepot. The priming process runs 2-4 minutes depending on your model, forcing pellets into position without ignition. Pellets should be protected from moisture at all times to maintain their quality and performance. Starting on low or smoke mode helps ensure optimal ignition before adjusting temperature for your recipe.

The information below is per-pack only
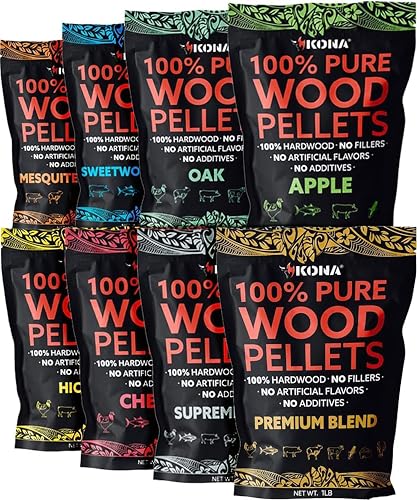
Wood Fired Flavor Excellence: Kona BBQ smoking pellets are crafted from hand-selected trees, sourced from retired orchards and sustainably harvested forests, ensuring superior flavor in every pellet. Compatible with Ninja Woodfire outdoor grill

OAK FLAVOR: pairs well with pork, poultry, and veggies. However, it's great with seafood, baking, and beef. 100%
Season and Initial Burn-In
Once you’ve primed the auger system and confirmed pellet flow, it’s time to season your grill before cooking any food. Set the temperature to 350°F and maintain it for 15–20 minutes after the grill reaches target temperature. Then increase the heat to 450°F–500°F and run for 30–45 minutes. During this seasoning process duration, expect excessive smoke and ash—this is normal and decreases on future uses.
Managing smoke and ash involves understanding that you’re burning off manufacturing oils and creating non-stick surfaces on grill components. Ensure all internal components are removed before running the grill at high temperatures to prevent damage. For optimal results, start your seasoning at 250°F initially to properly cure the paint before ramping up temperatures. The digital controller monitors your grill’s temperature and automatically regulates pellet feeding to maintain consistent heat throughout the seasoning cycle. Similar to electric water smokers, it’s important to inspect and clean the interior surfaces before your initial use to prevent residue from affecting food quality. Wood pellet grills maintain consistent temperatures in cold weather, which helps ensure even seasoning and curing across all grill surfaces. Like smoking a turkey, maintaining proper internal temperature control throughout your seasoning cycle ensures optimal performance and longevity of your grill. Many modern pellet smokers feature WiFi connectivity that allows you to monitor and adjust your grill remotely via smartphone apps during the seasoning process. Once finished, initiate the shutdown cycle by pressing your selection dial for 3 seconds. Allow the full 25-minute cycle to complete. Your grill enters standby mode when seasoning finishes, and you’re ready for cooking.
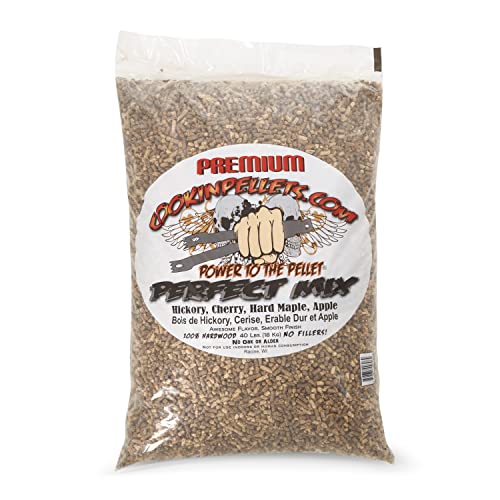
Natural Hardwood Pellets: Premium quality pellets for smoker grill are crafted to infuse your BBQ dishes with an authentic, mouthwatering smokiness that will tantalize your taste buds and leave your guests craving more

13oz package contains packet of brine mixture and packet of rub
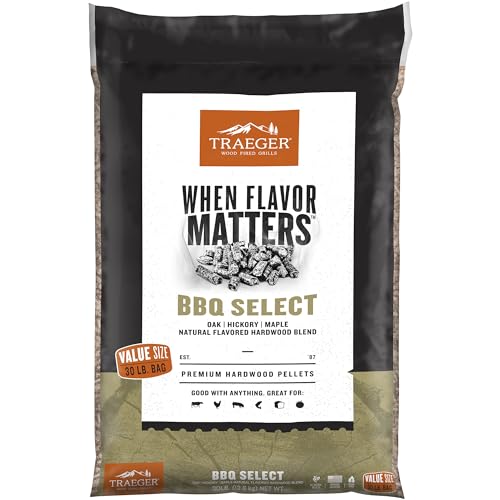
BBQ Select Wood Fired Flavor: Blend of oak, hickory and maple hardwood
First Cook Setup and Temperature Control
Now that you’ve completed the seasoning process, it’s time to prepare for your first actual cook. Start by setting your temperature dial to 350°F and pressing ignite. Close the lid and let your grill run for 20 minutes after reaching temperature. Once stabilized, adjust to 450°F and maintain it for 30 minutes.
For ideal performance, keep pellet fuel consistency by using the same hardwood blend throughout your cooks, as different woods burn at varying rates. Monitor your temperature probe maintenance by cleaning the RTD temperature controller located left of your hopper inside the grill. This guarantees accurate temperature readings every 60 seconds. Maintain a full hopper for steady pellet fueling and minimize lid openings to prevent heat fluctuations during your cook. Consider using foil packets for vegetables and other foods to retain moisture and flavor while cooking. Like traditional grills with thick ceramic insulation, Traeger pellet grills rely on consistent fuel and proper maintenance to minimize heat loss. Even heat distribution is essential for achieving consistent cooking results across your grill’s surface. Adjust your grill’s vents and dampers to control oxygen supply and maintain stable heat throughout your cooking session. The large flat-top surface design of modern pellet grills allows you to cook multiple food items simultaneously, similar to griddle-style cooking appliances. In extreme climates, you may need to access the hidden P-setting adjustment hole on your controller to fine-tune temperature performance. Seasoning ensures optimal performance of your Traeger Wood Pellet Grill for all your future cooks.

REPLACE OEM TEMPERATURE PROBE - Meat thermometer compatible with most Traeger BBQ Grills: Bronson 20, Century 22, Century 34, Century, Deluxe Elite 300, Double Commercial, Eastwood 22, Eastwood 34, Executive, Heartland, Junior Elite 20, Texas Elite 34, Lil Tex Elite 22, Lonestar 20. (TIP: Not fit for Masterbuilt& Camp Chef Grill)

Compatible With: This Thermocouple Probe Kit is compatible with Traeger D2 Pro 575 & 780 and Ironwood 650 & 885 wood pellet grills, including the Traeger Redland 650.

SIGNATURE BLEND WOOD FIRED FLAVOR: The flavors of hickory, maple, and cherry hardwoods combine for in our Traeger Signature Blend Hardwood Pellets for flavor that can take on just about anything you cook; From classic BBQ meats, to fish and veggies, this versatile blend gives you full-bodied flavor you'll go back to time and time again