
You’ll start by thoroughly cleaning your griddle with hot water and mild soap, then preheat all four burners to 350-375°F. Apply 2-3 tablespoons of high smoke-point oil like avocado oil in the thinnest possible layer across the entire surface. Let it smoke and bond, then repeat this seasoning process 2-3 times for ideal results. Maintain your seasoning by applying thin oil layers after each use and storing in a dry location. Understanding the complete polymerization process and troubleshooting techniques will guarantee your griddle achieves that perfect non-stick performance.
Cleaning and Preparation Steps
Before you season your Blackstone griddle, you’ll need to thoroughly clean and prepare its surface to guarantee ideal seasoning adhesion. Start by filling a bucket with hot water—this water temperature effectively dissolves residue without damaging the griddle. Select a mild soap that cuts through grease without leaving harmful chemical residue. Scrub the entire surface vigorously using a towel, paying close attention to corners and edges where debris accumulates. Dry thoroughly with paper towels to prevent rust formation before seasoning begins. For stubborn stuck-on food, pour water onto a warm griddle to create steam, then scrape gently with a metal spatula. To remove remaining gunk and achieve optimal surface preparation, use steaming and scraping techniques methodically across the entire cooking surface. Complete drying is critical; any moisture compromises seasoning effectiveness. Remember that soap should be avoided for regular cleanings after this initial preparation, as it can damage the seasoning layer you’re about to build. If you discover rust on your griddle surface, heat the flat top on medium-high for 20 minutes to loosen the rust, then let it cool and scrape it off before proceeding with seasoning. For particularly stubborn grease buildup, you can apply a paste of baking soda and vinegar to help break down the residue before scrubbing. You can also use lemon juice and salt as a natural scrub to cut through tough grime without introducing harsh chemicals to your cooking surface. After cleaning, consider wiping down the exterior surfaces with a vinegar solution to remove any grease splatter or fingerprints. Proper drying is especially important because rust corrodes metal over time, weakening your griddle’s structure and potentially leading to costly repairs or replacement. Once completely dry, your griddle is ready for the seasoning process.

Extend The Life Of Your Griddle: By using AWEASROY's griddle cleaning kit before and after cooking, it prevents your griddle from flaking and getting damaged. Top this with proper re-seasoning for a long lasting use

SOLVE ALL CLEANING WORKS WITH THE WHOLE SET: The griddle cleaning kit includes 5pcs scouring pads and 1pc cleaning handle, comes in an exquisite package. This griddle cleaning kit not only for griddle cleaning but also for your kitchen
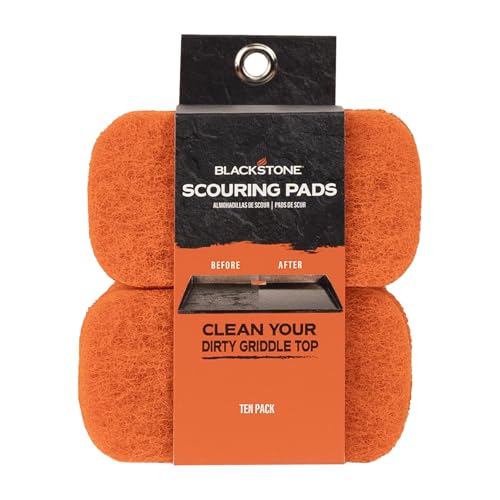
Generous Pack Size: Includes 10 heavy-duty scrub pads to ensure you have plenty of replacements on hand
Preheating the Griddle Surface
Now that your griddle’s surface is clean and dry, you’ll want to preheat it properly to guarantee even heat distribution and ideal seasoning adhesion. Start all four burners on low simultaneously for uniform heating. Check your surface temperature after 5-10 minutes using an infrared thermometer for precision. You’re aiming for an ideal preheat temperature between 350-375°F, which typically takes approximately 15 minutes on low. Avoid cranking burners to high initially, as this risks warping the cooking surface. The water dance test confirms readiness: water should run and evaporate within seconds. Using an infrared thermometer is the most efficient way to determine your griddle’s exact temperature during preheating. Once you’ve reached your target temperature, you’re prepared to apply your seasoning oil. Make sure to use heat-resistant gloves when handling the hot griddle surface to prevent burns. Never exceed 15-20 minutes of unattended preheating to prevent overheating beyond safe operating temperatures. Properly preheating your griddle is essential for maintaining the high-quality flat-top surface that makes Blackstone grills ideal for versatile outdoor cooking. The Blackstone 36″ model provides ample cooking surface capacity for seasoning multiple zones simultaneously, making it one of the most popular outdoor griddle options available. While Blackstone specializes in griddles, other outdoor cooking brands like Weber maintain rigorous quality control through their Illinois manufacturing facility to ensure product durability across their charcoal and gas grill lines. For those seeking a compact outdoor cooking solution beyond full-size griddles, the Weber Q1200 Gas Grill offers exceptional portability with its 189 sq. in. cooking area and 8,500 BTU propane power in a 31 lb. package. If you frequently season your griddle during evening hours, consider adding accessory or aftermarket lights to improve visibility and ensure even oil application across the cooking surface.
Oil Application and Tools Required
Since you’ve preheated your griddle to the ideal 350-375°F range, you’re ready to apply seasoning oil—the critical next step in building a durable, non-stick cooking surface. Select oils with high smoke points—avocado oil at 520°F or grapeseed oil offer superior polymerization. Canola oil provides budget-friendly alternatives at 450-470°F.
Apply 2-3 tablespoons across your four-burner griddle using paper towels for even distribution. Spread the thinnest possible layer across the entire surface. Guarantee oil quality considerations prioritize 100% pure, non-cold-pressed formulations. The heat will take the oil past its smoke point, burning off organic compounds and leaving polymers that create a molecular bond with the steel surface. Flaxseed oil creates a particularly durable and long-lasting seasoning layer due to its superior bonding properties.
For application, gather clean cloths and paper towels for thin, controlled coverage. Store application tools in a designated, dry location. Avoid metal utensils initially to prevent scratching fresh seasoning layers. Just as pellet grills and smokers require proper maintenance for consistent temperature control, your griddle surface needs careful treatment during initial seasoning. Similar to how cordierite stones withstand extreme temperatures on pellet grills, your griddle’s steel surface must endure high heat to form its protective coating. Refined sesame oil also works well for seasoning thanks to its neutral flavor and ability to withstand high temperatures. Just as different hardwood pellet flavors like hickory and apple create distinct smoke profiles for grilling, your choice of seasoning oil will influence the griddle’s performance characteristics. After the oil smokes and bonds to the surface, allow the grill to cool completely for the coating to set properly. Repeat oiling 2-3 times until you achieve a dark, uniform finish.
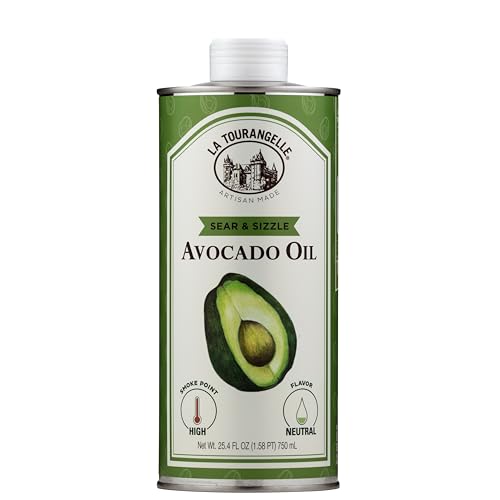
Healthy High Heat Oil: Expeller-pressed from fresh avocados and protected in our iconic light-blocking tin, this smooth, neutral oil preserves freshness and flavor. Fire up the grill, sear the perfect steak, or master a golden, crispy fry — all without losing the natural taste of your ingredients. With a high smoke point and everyday versatility, Sear & Sizzle should be every kitchen’s secret weapon.

Mild and Easy: Grapeseed Oil is at its best in stir-fries and sautés; it doesn't overwhelm other ingredients and lets fresh flavors shine. When grilling or frying, it is a must-have in the pantry.
Polymerization Process and Heat Management
Why does your griddle surface transform from shiny to matte black during seasoning? Heat causes oil to reach its smoke point, breaking down organic compounds and leaving polymers that bond molecularly with steel. This polymerization prevents air and water from accessing the surface.
Set all burners to the highest setting and preheat for approximately 15 minutes. Apply a thin oil layer to achieve even coverage across the entire griddle, including sides. Maintain high heat for about 30 minutes. Smoke cessation signals completion of the polymerization cycle. Allow the griddle to cool down completely before wiping away any excess residue.
Monitor the surface for uniform black coloration and glossy finish. Proper temperature duration guarantees durable bonding without pooling or bubbling. Blackstone griddles are designed with strict quality control standards to ensure the steel surface accepts and maintains seasoning effectively. Using seasoning after cleaning to maintain the surface will keep your griddle in optimal condition for extended periods. Regular maintenance helps avoid buildup of food residue and ensures better cooking results over time. The protective coating also prevents rusting by creating a barrier between the steel and moisture. After seasoning, buff with a microfiber cloth to prevent streaks and enhance the protective finish. After completing the initial seasoning, apply a protective layer of cooking oil to maintain the non-stick surface and provide additional rust prevention. Repeat this process three to four times, allowing 10-15 minutes between layers for optimal protection.

Graza Frizzle Oil Made from 100% Olives: A neutral-flavored, high heat cooking oil made from 100% peak harvest olives. With a smoke point of up to 490 degrees, Frizzle is your high-heat kitchen hero. 1 bottle/750ml.

Light Buttery Flavor That Elevates Every Meal: Algae Cooking Club Chef-Grade Algae Oil enhances every dish with subtle richness. Its neutral profile makes it ideal for searing, baking, and dressings, transforming everyday meals into gourmet experiences.

Light Buttery Flavor That Elevates Every Meal: Algae Cooking Club Chef-Grade Algae Oil enhances every dish with subtle richness. Its neutral profile makes it ideal for searing, baking, and dressings, transforming everyday meals into gourmet experiences.
Multiple Seasoning Rounds for Best Results
To achieve a durable non-stick surface that’ll withstand years of cooking, you’ll need to apply multiple seasoning layers rather than relying on a single application. Four rounds represents the standard recommendation for proper polymerization, though five rounds benefit larger griddles.
Each layer bonds with the steel, creating enhanced polymer coatings that resist chipping and peeling. Single-layer seasoning produces brittle surfaces prone to failure. Protecting against oxidation ensures the griddle maintains its performance and appearance over extended periods.
Apply thin, even layers using two to three tablespoons of seasoning oil per round on standard 28-inch griddles. Use paper towels for uniform surface coverage across all exposed metal, including sides and edges. Avoid using bacon fat as it can lead to chipping if not used frequently. Unlike grills where aluminum foil can trap heat and create uneven cooking zones, griddles require direct metal-to-oil contact for proper seasoning.
Allow 10 to 15 minutes between applications for complete smoke dissipation. Choose oils with high smoke points, such as vegetable or canola oil, for the best seasoning results. This extended application time guarantees each layer properly bonds before adding the next, establishing superior food release properties and maximizing durability. If the seasoning ever fails or the griddle develops rust, wire brush cleaning followed by re-seasoning will restore the cooking surface. When not in use, protect your investment with a waterproof cover designed to resist UV damage and weather elements. Just as with BBQ grill maintenance, performing routine light cleaning after each cooking session prevents buildup and extends the lifespan of your griddle’s seasoned surface.
Understanding the Color Changes
As you heat your griddle and apply oil layers, you’ll observe distinct color transformations that signal proper seasoning progression. Your griddle starts silver, then browns after 10-15 minutes of high heat as moisture evaporates. With each oil application, the surface darkens toward black through polymerization, with smoke rolling off immediately upon oil contact. This smoke persists 15-30 minutes per layer, indicating thermal regulation and proper bonding.
You’ll notice color changes start at the center, spreading uniformly toward the edges. Three to four layers produce uniform coloration and a shiny black finish. Over time, your seasoning may fade to bronze with use—a normal sign requiring maintenance reapplication. Patchy dull spots indicate wear. Just as cherry wood imparts a mahogany color to smoked meats, the oils you apply will darken your griddle’s steel surface to a rich, protective patina. Regular oiling restores the dark, even finish you’ve established. The sulfur in onions helps bond the oils to the steel surface, creating a more durable seasoning layer that resists fading. Cooking bacon or onions as your first dishes will further season the griddle beyond the initial seasoning process. Similar to achieving charred texture on grilled corn, the darkening process creates a protective barrier that enhances both performance and flavor development on your cooking surface. When smoke appears during the seasoning process, aim for thin blue smoke rather than thick white smoke to ensure clean polymerization without acrid residue buildup. Maintaining proper temperature control around 225°F range during low-and-slow cooking processes helps develop optimal flavor profiles without burning. Like grilling pineapple to achieve golden grill marks, each oil layer should be heated until it produces visible color changes that indicate proper bonding to the steel surface.
Final Conditioning and Maintenance
Now that you’ve established your griddle’s seasoning foundation, maintaining that protective layer becomes essential to preserving its non-stick properties and preventing rust formation.
Implement consistent oil reapplication frequency by conditioning after every use with two to three tablespoons of oil spread thin and evenly across all surfaces. Establish routine inspection procedures weekly to identify areas needing spot conditioning or additional protection.
Monthly deep conditioning with specialized cast iron conditioner products maintains surface hydration. Apply multiple thin layers rather than single thick applications, allowing ten to fifteen minutes of cooling between each coat for complete polymer bonding. Proper seasoning improves the non-stick properties and flavor of the food cooked on your griddle. Use oils with a high smoke point, such as vegetable or canola oil, to ensure proper bonding during the heating process.
During winter months, perform seasonal deep cleaning and re-seasoning to combat moisture damage. Store your griddle with protective covers to minimize environmental rust and oxidation. Consider placing a grill mat for decks underneath your Blackstone to protect your outdoor surface from grease drips and heat exposure during the seasoning process. Non-slip mats provide grill stability while keeping your deck or patio clean from oil drips during regular maintenance. This systematic approach builds cumulative non-stick properties while extending your griddle’s operational lifespan considerably.

TLC for your griddle cooktop: All you need to build a slick, easy-release surface that's protected from rust and easy to work with using Blackstone griddle seasoning and cast iron conditioner
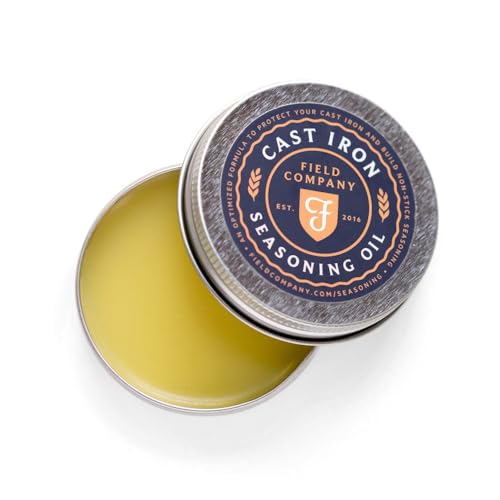
HOW TO USE: The key to naturally nonstick cast iron cookware? Cook often, and apply Seasoning Oil every time you clean your pan. Clean your cast iron with soap and a brush, then use a chain mail scrubber to smooth out existing seasoning layers. Apply a dab of Seasoning Oil and spread it thinly over the surface with a paper towel or clean rag. Wipe away excess oil to leave a dry, matte finish.

YOUR NEW GO-TO SEASONING SPRAY: The Lodge Seasoning Spray is the perfect seasoning spray to maintain your cast iron cookware. It is made of 100% canola oil - no additives or propellants, to protect your cookware and enhance its finish.
Common Mistakes to Avoid
Even with proper maintenance protocols established, you’ll undermine your seasoning efforts if you don’t sidestep critical application errors. Avoid preservative containing oils like bacon, which deposits salt and additives that prevent proper polymerization. Instead, apply thin oil layers—just 2-3 tablespoons per four-burner griddle—using folded paper towels with tongs for controlled spreading. Multiple thin coats build durable seasoning far better than single thick applications that create sticky residue and chipping. Maintain low heat after initial spread to guarantee even polymer formation, preventing aggressive burning. Uneven spreading causes black spots indicating oil rejection. Temperature control proves essential; high heat throughout burns oil too aggressively. Let each coat burn off completely for approximately 20 minutes before applying the next layer to ensure proper seasoning development. Cook fatty foods like bacon on your griddle frequently to build and maintain the seasoning patina over time. Implement these precise techniques to establish lasting, non-stick seasoning.
Long-Term Care and Storage
How you’ll protect your Blackstone griddle between uses ultimately determines how long your seasoning lasts and how effectively you’ll prevent rust formation. Establishing a proper storage environment is foundational to maintaining your griddle’s protective coating. Store your griddle in a cool, dry location away from moisture exposure. Use a heavy-duty cover to shield it from rain, snow, humidity, and excessive heat during non-use periods. These rust prevention best practices drastically reduce long-term maintenance demands.
Before storage, confirm you’ve applied a thin oil layer across the entire surface. This protective barrier blocks moisture penetration. When selecting a cover, prioritize weather-resistant materials like polyester with PU coating or vinyl that offer UV and water resistance to protect your griddle’s seasoning. Look for covers with reinforced seams and sturdy straps or drawcords to ensure wind resistance and extended durability in harsh weather conditions. For enhanced protection, consider housing your griddle under a grill gazebo with roof that provides permanent shelter from the elements while maintaining ventilation. Quality options feature rust-resistant aluminum frames with ventilation systems that reduce moisture buildup while protecting against UV damage and precipitation. Premium hardtop gazebos can be tested to withstand 3,800-pound roof loads and extreme wind conditions, ensuring your griddle remains protected even during severe weather. Consistent adherence to these protocols preserves your griddle’s seasoning integrity and extends its operational lifespan considerably.

Heavy Duty and Durable Material: Made with heavy-duty 600D polyester and weather-resistant materials with reinforced stitching

【Upgraded 1000D Thickened Fabric - Tear Resistance Improved by 200%】The GuardKove griddle cover is made of high-strength 1000D Oxford cloth, with tear and abrasion resistance that is twice as effective as traditional 420D/600D materials. It effectively withstands harsh sunlight, wind and rain, and daily friction, providing longer-lasting and more reliable protection for your grill.

COMPATIBILITY--The grill cover fits for Blackstone 22 Tabletop Griddle with hood. It is also suitable for Coleman RoadTrip 285 Portable Stand-Up Gas Grill. We have also lengthened the cover so that it covers the whole grill. Please Note: It is advisable to check the grill model you own before purchasing.
Troubleshooting Seasoning Issues
Despite your best efforts to maintain your Blackstone griddle, seasoning problems can still develop and compromise both appearance and performance. You’ll encounter common issues like over-seasoning, dry spots, flaking, and uneven heat distribution. Grease build up removal requires heating your griddle to high temperature for ten minutes, then applying thin oil and scraping repeatedly until buildup disappears. For restoring damaged seasoning, clean the surface thoroughly with a metal scraper to remove compromised layers. Then apply multiple thin coats rather than one heavy application, heating between each coat. Regulate temperature with an external thermometer to guarantee consistent heat distribution. After seasoning is complete, store the griddle in a dry location when not in use to prevent rust formation. Two to three complete seasoning rounds establish the proper dark brown finish and restore effective non-stick performance to your cooking surface. The seasoning process prevents rust and corrosion, ensuring your griddle maintains its durability and functionality for years to come. For stubborn residue or tough grime, wash the exterior with soap and water using mild detergent to restore cleanliness without damaging the surface. While pumice stones can adequately remove stuck-on residue, specialized metal scrapers often prove more effective and durable for maintaining your griddle’s cooking surface. Pumice-based cleaning bricks offer an ecological alternative that wears away during use and requires only water and light pressure to remove grease and caked-on food residue without scratching steel surfaces. Once cleaning is complete, allow the griddle to cool by closing all vents to safely extinguish any remaining heat before covering or storing your equipment. When scrubbing your griddle surface, always use a non-abrasive cloth to avoid scratching and maintain the integrity of the seasoned layer.