You’ll need to inspect your grates, clear your burner ports, check your gas lines, and clean your grease trap before firing up for summer. Start by brushing hot grates with a wire brush, then soak them in vinegar and baking soda. Disconnect your gas tank and coat the line with soapy water to detect leaks. Remove burners and clear flame ports with a pipe cleaner. Empty your ash catcher and scrape accumulated grease from the drip pan. These essential steps guarantee optimal performance and safety throughout the season.
Spring Cleaning and Inspection Checklist
Before you fire up your grill for the season, you’ll need to thoroughly inspect and clean every component to verify safe, efficient operation. Start by wire brushing your grates while they’re hot from your last cook, then soak them in vinegar and baking soda for 30 minutes before scrubbing. Clear all burner ports of soot and debris using specialized tools or a wire brush to confirm even flame distribution. Empty your ash catcher and inspect your drip tray. Examine the chassis for rust at welded joints and pop rivets, scrubbing off corrosion with steel wool before applying rust-inhibiting primer and paint. Check all fasteners for tightness. If you’ve noticed paint damage repair or upholstery cleaning needs, address these before grilling season begins. Locate and check your grease traps for excessive buildup that can affect performance. Inspect any grill trays for damage, replacing flimsy pans with durable stainless steel or heavy-duty options that can withstand high temperatures. Remove and clean burners regularly to prevent grease fires and ensure optimal performance throughout the season. For stubborn grime on grates, create a paste using lemon juice and salt to naturally break down residue without harsh chemicals. Finally, test your fuel connections with soapy water to detect leaks. Neglecting rust buildup on grill grates can lead to unsanitary cooking surfaces, food sticking, and degraded grilling performance that affects both taste and safety. After cleaning, apply a thin layer of cooking oil to grates to prevent rust and make spring maintenance easier. Consider investing in heat-resistant grill mats that can protect your cooking surface while simplifying cleanup and preventing flare-ups throughout the grilling season.
Gas Line Safety and Burner Maintenance
The heart of your grill’s performance lies in its gas delivery system and burners, which require careful attention to maintain safe, efficient operation. Start by turning off your gas supply and disconnecting the tank completely. Coat the gas line with soapy water to identify leaks before reconnecting. Remove your burners following your manual’s instructions, then brush them lightly with a wire brush to eliminate debris. Clear flame ports using a pipe cleaner or thin wire to prevent blockages that cause uneven flames. Check venturi tube alignment and perform burner adjustment procedures if flames appear yellow rather than blue. Grill burners are manufactured using materials such as stainless steel, cast iron, or cast brass to withstand high temperatures and frequent use. Test burners after reassembly to confirm proper operation. Areas where grease accumulates in seams and flame holes become thin and corroded over time, requiring regular attention to prevent gas leaks and hot spots. Installing porcelain heat plates above your burners can shield them from grease drippings and flare-ups while ensuring even heat distribution across your cooking surface. Clean burners monthly and deep clean your entire grill twice yearly to prevent corrosion and stress cracks. Inspect venturi tubes regularly for pest nests and debris that can block the air-and-fuel mixture needed for proper combustion. Ensure your gas line setup includes a shutoff valve positioned for easy access in case of emergency or when performing routine maintenance on your grill. Consider protecting your investment with a budget PVC-lined cover to shield against rain and wind damage during the off-season. Always wear grill mitts to protect your hands when handling hot components during the cleaning process.

➤ The Burner Tubes Dimensions: 14 7/8" x 1", PLEASE NOTE: Our burner tube length is 14 7/8 inches. Please measure the sizes of your original parts BEFORE you order.➤The Pipe Tube Material: Stainless Steel, ➤Includes 4 Grill Burner Tubes. ➤ Cooks better, Lasts longer, Extend the life of your grill, Exact-fit parts, Works well.

➤ The Burner Tubes Dimensions: 14 7/8" x 1", The Pipe Tube Material: Stainless Steel, ➤Includes 5 Grill Burner Tubes. ➤ Cooks better, Lasts longer, Extend the life of your grill, Exact-fit parts.
Grate Preparation and Protection
Once you’ve guaranteed your burners are firing efficiently, you’ll want to focus on the cooking surface itself—your grates. Proper preparation ascertains both longevity and performance.
For stainless steel grates, apply Bar Keeper’s Friend or a baking soda paste to remove baked-on residue, then scrub with appropriate tools. This maintains your polished appearance while preventing corrosion. Cast iron requires gentler handling—wash annually with mild soap, then immediately season at 400-450°F for 40-60 minutes to restore the non-stick surface and prevent rust.
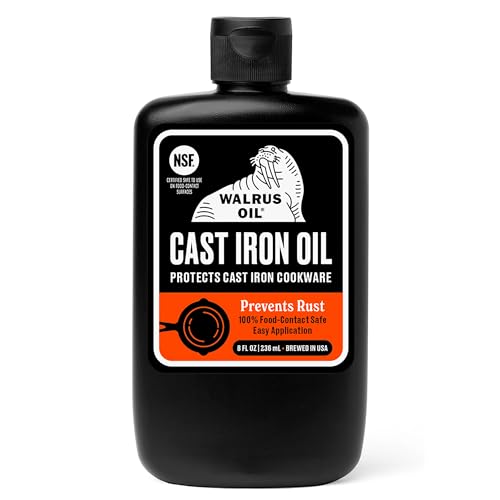
Before summer cooking begins, perform a high-heat burn-off at 500-550°F for initial seasoning. Apply a thin, even layer of high smoke point oil such as vegetable, canola, or flaxseed oil to build a durable coating. During the season, monthly hose-downs and post-cook scraping keep debris from accumulating. Dry grates thoroughly after every cleaning. Seasoning cast iron grates with high heat resistant oil creates a protective barrier that prevents rust and extends grill life. For new grills, preheat to burn off factory coatings and residue before performing your initial oiling. Deep cleaning once or twice per grilling season with vinegar and baking soda soaks helps remove stubborn buildup and maintain optimal performance. For particularly stubborn stains, consider using a specialized grill cleaner combined with a stainless steel brush to tackle both sides of the grates. For heavy rust on cast iron grates, soaking in vinegar effectively dissolves the oxidation before re-seasoning. This routine prevents grease buildup, bacteria growth, and flare-ups, affirming reliable performance throughout summer.

Graza Frizzle Oil Made from 100% Olives: A neutral-flavored, high heat cooking oil made from 100% peak harvest olives. With a smoke point of up to 490 degrees, Frizzle is your high-heat kitchen hero. 1 bottle/750ml.

Light Buttery Flavor That Elevates Every Meal: Algae Cooking Club Chef-Grade Algae Oil enhances every dish with subtle richness. Its neutral profile makes it ideal for searing, baking, and dressings, transforming everyday meals into gourmet experiences.
Grease Trap and Drip Pan Care
While grate maintenance establishes your grill’s cooking surface, you’ll also need to address what happens beneath—your grease trap and drip pan. You’ll want to establish a detailed grease trap service schedule, cleaning every 1-3 months depending on your cooking volume. Empty the trap before grease reaches 25% capacity to prevent blockages and odors.
For your drip pan, remove it regularly and scrape accumulated grease with a nylon brush. Wipe residue with paper towels. Never pour used cooking oil down drains; instead, allow it to cool and dispose of it properly in sealed bags with kitty litter. When grease and solids accumulate beyond the 25% capacity threshold, separation of fats and wastewater fails, creating drainage problems. After removing and washing your drip tray with warm soapy water, consider using drip tray liners to simplify future cleanups and protect your pan. For pellet grills, upgrading to a sturdy lockable assembly like The Grease Box can prevent spills and protect your deck from grease damage while deterring pets and critters. Once all parts are dry, reassemble your grill to ensure proper functionality before your next cookout.
Implement proper chemical cleaning techniques alongside mechanical removal. If you notice rust on your flat top grill, heat it on medium-high for 20 minutes to loosen the buildup, then scrape it off and re-season the surface with oil to prevent future corrosion. Quality flat top grill scrapers with bent handles and durable materials make maintenance more efficient during cooking sessions. For stainless steel grill exteriors, Bar Keepers Friend powder mixed into a paste works superior to standard cleaners for removing stubborn grime and restoring shine. Train household members to scrape plates before washing and install sink strainers to catch debris. These preventative measures keep your drainage system functioning efficiently throughout summer entertaining.
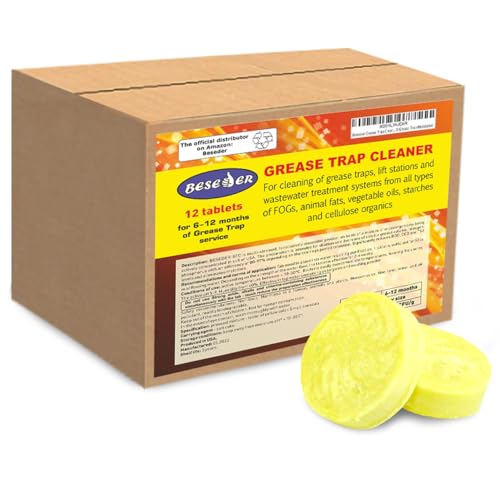
Grease Trap Cleaner tablet

【BLOCK FOOD GREASE GATE】: Magnet griddle grease gate is capable of blocking food from slipping into griddle rear grease trap while letting grease drain smoothly. It‘s a great bbq cooking accessory used to help reduce food waste

Opens clogged grease joints and fittings effortlessly is less that a minute
Creating Optimal Heat Zones
Most successful summer cookouts depend on mastering heat zones—the strategic division of your grill into high-heat and low-heat areas. You’ll create a multi-zone configuration by banking lit coals to one side for your direct zone while leaving the other side empty for indirect cooking. For gas grills, you’ll turn left burners to high and right burners off, using adjustable airflow control to fine-tune temperatures at the grate level. You should measure actual temperatures with a thermometer—aim for 500–600°F direct and 225°F indirect. This setup enables you to sear steaks over flames, then finish them gently away from heat. For optimal results with steaks, experts recommend grilling at 450°F to 500°F to achieve the best sear and flavor development. By moving food between zones as needed, you can prevent overcooking or burning while managing flare-ups and cooking multiple items simultaneously. The indirect heat side also gives you the ability to keep cooked food warm during your cookout. After cooking, allow your steak to rest for 5–10 minutes so juices can redistribute throughout the meat. For charcoal grills, keep the bottom vents fully open to maintain good airflow and use the top lid damper to modulate your desired heat level. Understanding how your grill transfers heat through conduction, convection, and radiation helps you predict and control cooking outcomes more precisely. Between cookouts, regular grill maintenance prevents buildup of food residue and grease while extending your grill’s lifespan. You’ll accomplish professional-quality results by combining searing and slow-cooking on a single grill surface.

High Power: With 1800W (120V, 15A) of power, this electric grill heats up quickly and holds temperature steadily—perfect for large gatherings and fast grilling

BBQ High/Low Temperature Alarm: This smoker thermometer will flash and beep to notify you if your grill's temperature ever exceeds your desired range, and when to add more fuel. HI/LOW temp range alarm is specifically designed for usage with smokers, grills and BBQs
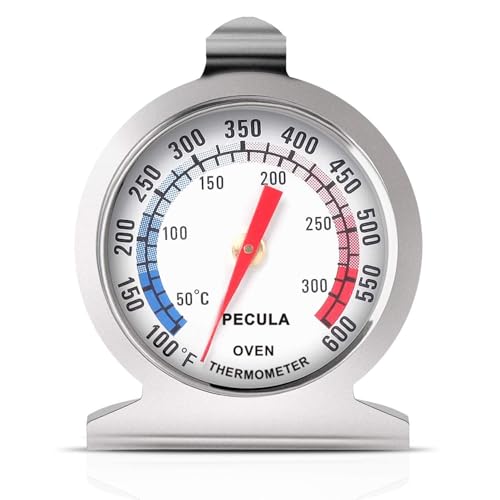
Clear Dial Display: PECULA's analog oven thermometer delivers precise, instant readings from 50–300°C / 100–600°F. Its dial features clear dual-zone blue and red indicators for at-a-glance temperature monitoring—perfect for ovens, grills, smokers, and deep fryers, ensuring you master every bake, roast, or fry.
Essential Tools and Supplies
You’ll need five categories of specialized equipment to operate your cookout efficiently: core utensils for food handling, cleaning supplies for grate maintenance, temperature tools for doneness verification, safety gear for heat protection, and charcoal starters for fuel ignition.
Heavy-duty tongs and slotted spatulas enable precise food manipulation without piercing. Stainless steel grill brushes with scraper blades eliminate burnt debris quickly. For temperature monitoring precision, digital instant-read thermometers provide reliable doneness checks on meat and poultry. Heat-resistant silicone gloves safeguard your hands during evening cookouts. A grill light with a gooseneck design allows you to see your food clearly during evening cookouts. Premium materials in quality accessories ensure long-lasting performance throughout multiple grilling seasons.
Charcoal starters preparation begins with a chimney starter, which lights charcoal evenly within minutes using natural fire starter sticks. This handy tool guarantees consistent heat distribution across your cooking surface, making it indispensable for successful grilling sessions. Look for models with a secondary helper handle that provides safer pouring and better control when transferring hot coals to your grill. Fully opening the grill vents ensures proper airflow for optimal charcoal ignition and temperature control. When evaluating lighting options, check the waterproofing IP rating to ensure your grill light can withstand grease splatter and outdoor weather conditions. Consider investing in a comprehensive grill tool set that includes essential pieces like spatulas, tongs, and forks in a convenient carrying case for organized storage and portability. Keep a multipurpose dry chemical extinguisher rated for Class B and Class C fires stationed within 30 feet of your grill to handle grease flare-ups and propane leaks safely.

Efficient 2-in-1 Grill Scraper: Cut cleaning time with this dual-action tool. The sharp stainless steel scraper chips away stubborn residue, while thick bristles remove heavy grease instantly. The ultimate solution for restoring dirty gas or charcoal grills quickly

Extra Strong Ergonomic Handle - Still believe that as long as the bristles are stiff enough, the grill cleaning brush can live up to the name - a good barbecue brush? Of course not! A soft and sturdy handle with a stainless steel ring for hanging can make the clean work easier. No possibility such as the handle breaking up or snapped. You can succeed in using this BBQ cleaner for a very long time!

【Easy Cleaning】: Consists of 3 rows of thicker stainless-steel bristles that are in perfect balance between stiff and flexible - neither too rigid so cause unwanted scratch nor easy to be flatten out so lead to useless, just a simple rotate, you can 360° thoroughly clean every bit of stubborn stains out of all corners & edges of your grill, not just the top; Along with an extra solid and sharp scraper, cut your cleaning time in half is definitely not a dream!
Pre-Cookout Performance Testing
Once you’ve gathered your tools and supplies, the next step involves guaranteeing that your grill itself operates safely and efficiently. You’ll perform structural integrity auditing by inspecting the frame, lid, hinges, and handles for rust or corrosion, then tightening any loose bolts. Test your burners for blockages and verify flame stability under fluctuating pressure. Check igniters for consistent spark production and replace batteries if needed. Apply soapy water to all gas connections—hoses, valves, and regulators—watching for telltale bubbles indicating leaks. For comprehensive safety assurance, use a helium mass spectrometer to detect microscopic gas leaks that soapy water alone might miss. Calibrate your thermometer in an ice water bath; it should read 32°F. These weatherization procedures and performance checks certify your grill’s reliability before your first cookout. Position your grill in a well-ventilated outdoor space away from flammable materials to ensure proper airflow and reduce fire hazards. Don’t forget to inspect gas hoses and connections for any visible cracks or signs of wear that could compromise safety during cooking. When replacing your propane tank, remember to turn off the gas supply at the valve before unscrewing the coupling using the “lefty-loosey, righty-tighty” rule to safely disconnect it from the regulator. When your grill isn’t in use, protect it with a heavy-duty vinyl cover that resists cracking, fading, and weather elements to extend its lifespan between cookouts. Clean your grill grates thoroughly with a bristle-free brush to avoid the safety risks associated with stray wire bristles that can stick to food. Avoid fully lining your grill grates with aluminum foil, as it restricts airflow and heat distribution, leading to uneven cooking, increased flare-ups, and potential health concerns from aluminum leaching into food at high temperatures.
Season-Long Maintenance Schedule
Because your grill’s performance depends on consistent upkeep, establishing a structured maintenance rhythm throughout the season will preserve its functionality and extend its lifespan. You’ll follow an escalating maintenance schedule: clean grates and empty ash after every use, perform thorough inspections every ten cookouts, conduct deep cleaning weekly, and inspect burners and gas connections monthly. Between seasons, you’ll execute full deep cleans, soak grates to remove stubborn buildup, and season them with high-heat oil. Implement seasonal weatherproofing by inspecting the exterior for rust and damage, then covering your grill when not in use. If you discover rust during your inspection, remove it by soaking grates overnight in vinegar and salt mixture, then scrub with a soft brush and apply cooking oil to prevent recurrence. Proper post cookout storage in a dry location prevents corrosion and maintains your equipment’s integrity year-round. Use appropriate brushes based on your grate material to avoid damage during cleaning. For safer cleaning alternatives, consider using crumpled aluminum foil with a baking soda paste to scrub grates without the risk of metal bristles. When tackling heavy buildup during deep cleaning sessions, mess-free spray cleaners can cut through grime on cold grates in just minutes without extensive scrubbing. Bristle-free coiled designs eliminate the safety concerns of traditional wire brushes while still providing effective cleaning power with their sturdy handles and integrated scrapers. For stainless steel exterior surfaces, apply cleaner with a soft brush or microfiber cloth, then buff with microfiber to prevent streaks and water spots. Keeping your grill covered when not in use does not cause rusting and provides essential protection from the elements.