
You’ll shut off burners, disconnect your propane tank, and let your grill cool completely. Remove cooking grates, burners, and heat deflectors for individual cleaning. Use degreaser spray and wire brushes on grates, soak removable components in soapy water, and apply Bar Keepers Friend to stainless steel surfaces. Clean your grease trap thoroughly, then reassemble everything in reverse order. Finally, reconnect your propane tank and test all connections with soapy water. The detailed steps ahead reveal professional techniques for stubborn buildup.
Preparation and Safety Measures
Before you begin deep cleaning your propane BBQ grill, you’ll need to prioritize safety by taking five critical preparatory steps. First, shut off all burner dials and disconnect your propane tank entirely, eliminating gas leak hazards. Second, allow the grill to cool completely to room temperature—typically 30 minutes to an hour—before touching internal components. Third, wear heat-resistant gloves, eye protection, and closed-toe shoes to guard against sharp edges and debris. Fourth, inspect and verify gas connections by applying soapy water to all fittings; bubbles indicate leaks requiring professional attention. Finally, prepare your workspace in a well-ventilated area with adequate lighting, organizing containers for small parts like screws and gaskets. Maintaining proper ventilation facilitates safe air circulation throughout the cleaning process. Keep a multipurpose dry chemical extinguisher rated for Class B and Class C fires accessible within 30 feet of your grill in case of emergencies during maintenance. Use grill-safe, non-toxic cleaning solutions to ensure no harmful residues are left behind on your grill’s surfaces. For natural cleaning alternatives, consider using baking soda and vinegar to create an effective paste for removing tough grime from grill components. To prevent future rust buildup after cleaning, apply a protective layer of cooking oil] to all metal surfaces once the grill is completely dry. Before starting the deep cleaning, follow manufacturer’s maintenance schedule recommendations to ensure you’re addressing all components that may need attention based on your grill’s specific requirements. Since your grill’s base should ideally be placed on non-combustible materials, ensure your cleaning area has a stable, safe foundation for your equipment. For optimal results, plan to perform regular maintenance to ensure grill functionality and hygiene before your next use.
Gathering Your Cleaning Supplies
With your grill properly secured and cooled, you’re ready to assemble the tools and materials that’ll make your deep clean efficient and effective. Gather protective gear including heat-resistant work gloves to shield your hands from sharp edges and chemicals. Collect brushes suited to your grill type—wire bristles for standard grates, nylon for porcelain-coated surfaces. Include scrapers, a toothbrush for tight spaces, and a paper clip for unclogging burner ports.
Stock cleaning agents like degreaser spray, dish soap, and Bar Keepers Friend for rust removal. For stainless steel exterior surfaces, consider using commercial stainless steel cleaners that are specifically formulated to restore shine and prevent corrosion. If your grill’s exterior shows signs of rust or discoloration, high heat spray paint designed for metal surfaces can restore its appearance after proper cleaning and preparation. Prepare containers including a bucket for soaking and a shop vacuum for ash removal. Designate storage options for supplies and disposal methods for debris and used materials. Bring microfiber cloths, stainless steel wipes, and aluminum foil for protection during cleaning. For best results on grates and exterior surfaces, specialized products like grill cleaner sprays can dissolve baked-on residue more effectively than basic dish soap. Powerful stainless steel formulas like Trinova Stainless Steel Cleaner leave a protective finish without requiring buffing. Since rust corrodes metal over time and weakens your grill’s structure, addressing rust buildup during deep cleaning is essential to prevent costly repairs. Avoid caustic oven cleaners, chloride cleaners, and bleach, as these can damage your grill’s components. Deep cleaning only needs to be performed every 5-10 uses or at the start of grilling season to maintain your grill’s performance.
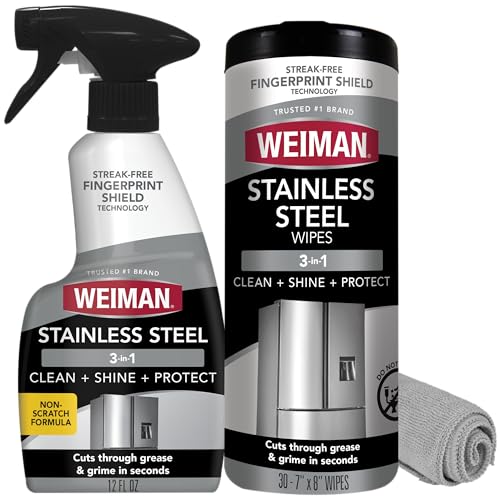
Cleans, polishes & protects stainless steel: Our stainless steel cleaner for appliances removes fingerprints, grease, residue, and water spots. This kit includes spray, which won a 2026 Good Housekeeping Cleaning Award, cloth & appliance wipes that leave a streak-free shine and a protective barrier that helps prevent future smudges.
Removes dirt and grime build-up, and is great for everyday cleaning on any exterior grill surface

2-in-1 benefits clean while preventing future fingerprints and smudges.
Cooling and Pre-Cleaning Setup
Once you’ve assembled your cleaning supplies, the foundation for a successful deep clean depends on properly guaranteeing and preparing your grill. Start by turning off all control dials and disconnecting your propane tank completely. Allow the grill to reach room temperature from its last use before proceeding.
Next, implement pre-heating protocols by running the grill on high heat for approximately 15 minutes to loosen debris and buildup. Monitor temperature carefully during this phase. After pre-heating, let the grill cool completely before scrubbing or applying water-based solutions. Ensure you work in a well-ventilated space to safely manage any fumes or vapors during the cleaning process.
While cooling, conduct your interior and exterior inspections. Check the firebox, burner tubes, and grates for grease accumulation. Examine exterior surfaces for rust or discoloration. This systematic temperature monitoring and assessment verifies safe, effective cleaning throughout your entire deep clean process. A fire-resistant mat made from recycled rubber can catch spills and protect your deck during the cooling and inspection phase. Placing a fire-resistant grill mat under your propane grill can help catch spills and protect your deck during the cooling and inspection phase. For grates and other removable components, measure their dimensions to ensure your grill cover fits properly after reassembly and cleaning. Consider investing in a fire-retardant grill cover after cleaning to protect your equipment from weather elements and extend its lifespan. Remember to also remove and clean drip pans regularly to prevent grease fires and maintain safety. Coating grates with cooking oil after cleaning reduces stuck-on food during future use.
Removing Grill Components
After you’ve thoroughly inspected your grill during the cooling phase, you’re ready to begin systematic disassembly. Start by disconnecting the fuel source—close the propane tank valve completely, then detach the regulator from the tank connector. Keep the tank upright and store it in a well-ventilated area away from sunlight. Proper propane tank disposal requires following local regulations to ensure safety and environmental responsibility. When transporting the tank to a refill or exchange center, ensure you do not leave it unattended in the vehicle.
Next, remove smaller components using screwdrivers and wrenches. Unscrew the top ignition cap, extract the battery, and detach control knobs. Remove side trays and unscrew pins holding burners in place. The standard 20-pound tank is the most popular choice for residential grills due to its portability and compatibility with typical grill storage compartments. To prevent unexpected fuel depletion during future grilling sessions, you can estimate your propane usage based on 20,000 BTUs per hour for medium-sized grills, which will help you plan refills accordingly. Propane delivers higher BTUs for quicker preheating and stronger peak heat compared to natural gas alternatives. After reconnecting your propane tank, always conduct a leak test using soap bubbles to confirm a secure connection before operating your grill.
Proceed to extract burners and collectors by first removing grids and flavor waves for access. Carefully slide the burner assembly off rails after removing securing screws. Detach the igniter if it’s attached to the middle burner. Cap all lines for safety once disconnection is complete. Remember to use the lefty-loosey, righty-tighty rule when unscrewing any threaded connections to ensure proper removal without cross-threading.
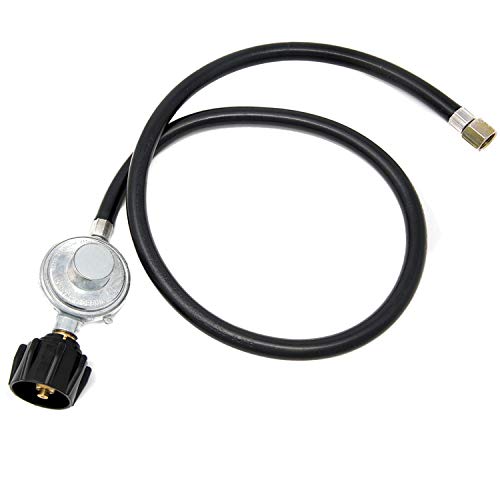
A TOP QUALITY PROPANE REGULATOR AND HOSE - maxing out at 80, 000 BTU, this 3Ft low pressure propane regulator is fiber reinforced to ensure quality performance. The hose is the perfect fit for a wide variety of grills, fire pit tables, and other propane appliances

SIZE - QCC propane gas cylinder adapter, 3/8″ female flare fitting, 5/16" diameter hose, 2 feet length for more flexible use

USER FRIENDLY AND TOP QUALITY CONNECTION - this high-pressure regulator and hose is adjustable from 0-20 psi with its red knob and has a top notch output for a wide variety of propane appliances from burners and heaters to smokers and fryers
Cleaning Grates and Interior Components
Now that you’ve removed the major components, you’ll focus on cleaning the grates and interior surfaces where most buildup accumulates. Start with preheating techniques by running burners on high heat for five minutes to burn off residue and loosen debris. High-temperature preheating can kill bacteria effectively before you begin scrubbing. Next, employ chemical soaking strategies using Easy-Off oven cleaner in plastic bags for 2.5 hours, or soak grates overnight in PBW for deep cleaning. For cast iron grates, use brass-bristle brushes to preserve seasoning. On stainless steel, employ wire wheels or table scrapers for stubborn baked-on residue. For particularly stubborn grime, bristle-free brushes and scrapers offer effective removal without the risk of bristle fragments contaminating your food. When choosing a grill brush, nylon-bristle options are safer alternatives that prevent dangerous shed bristles from contaminating your food. Consider using natural materials like crumpled aluminum foil combined with baking soda paste as an effective and safer scrubbing method for grill grates. For heavy carbonization, stronger degreasers may be necessary to lift baked-on deposits that standard scrubbing cannot remove. Consider using routine light cleaning after each use to prevent excessive buildup and extend the time between deep cleaning sessions. After scrubbing, dry thoroughly with compressed air to prevent flash rusting. Proper cleaning is essential since heated combined residue can lead to carcinogenic substances that affect both flavor and health. Apply a thin oil layer before reusing or storing your grates.

You Want A Clean Grill Without Having To Worry About Your Family's Safety: We get it. Bristles are great for cleaning your grill, but are a HORRIBLE addition to your deliciously grilled meal. That’s why Grillaholics Essentials Grill Cleaning Brush is built from heavy duty stainless brass and triple machine tested to the highest safety standards. Our brushes are 50% stronger and last 25% longer than other inferior grill brushes.

This grill brush features a black body with a grey grip.

NON-SCRACH BRASS BRISTLES - The high tensile strength brass bristles bbq brush are long lasting without falling apart, and will not scratch or damage your weber porcelain coated and cast-iron grill grates, unlike Steel Wire Bristles
Treating Heat Deflectors and Flavorizer Bars
Before you tackle the heat deflectors and flavorizer bars—components that shield burners and distribute heat throughout your grill—you’ll need to safely disconnect your propane tank and verify all dials are in the off position. Remove grates first, then access the deflectors, which may slide out front or back depending on your model.
Perform initial debris removal using a plastic paint scraper or grill brush, positioning components over a trash can. For ceramic restoration, employ a gentle touch to avoid damage. Consider using a grill brush or degreaser to remove stubborn residue from the heat shields before soaking. For the safest cleaning approach, bristle-free coiled designs are recommended to avoid leaving residues on your cooking surfaces. Wooden grill scrapers like wooden grill scrapers offer superior safety by eliminating the bristle contamination risks entirely. Traditional wire-bristle brushes carry safety risks due to stray bristles that may contaminate food, so prioritize bristle-free or replaceable-head options for routine maintenance. Tests show that bristle-free grill brushes perform effectively on propane grills while eliminating the ingestion hazards associated with wire alternatives.
Soak deflectors in warm soapy water for one hour minimum. For stubborn buildup, extend soaking duration using a vinegar and baking soda mixture—two parts vinegar to one part baking soda. Scrub with a nylon brush post-soak, avoiding degreaser on ceramic surfaces. Dry thoroughly before reinstallation.
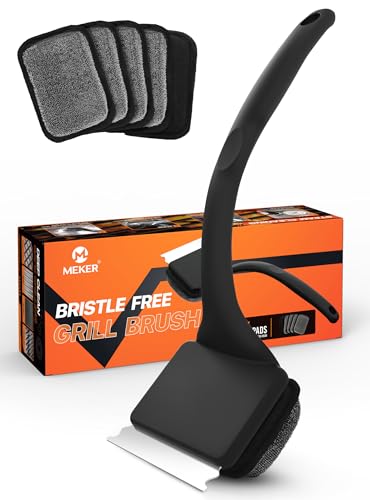
【ULTRA SAFE CLEANING】BBQ is a wonderful thing, but cleaning the grill can be a challenge! MEKER Grill Cleaner Brush can help you! Our grill cleaner brush ensures a bristle-free cleaning experience, eliminating the risk of swallowing dangerous metal bristles. Enjoy safe, worry-free grilling with our innovative design.

【BRISTLE-FREE & COLLAPSIBLE DESIGN】Experience worry-free grilling with the MEKER grill brush bristle-free design. Say goodbye to dangerous metal bristles and hello to a safe cooking environment for you and your family. The foldable bucket offers hassle-free storage by folding flat, making it an ideal outdoor water container for grilling adventures at home or on the go. Say goodbye to bulky options with this compact dunk tank

【The Safest Bristle Free Grill Cleaner】:No wire bristles at all, no melting like nylon grill brushes; With this safe grill brush and scraper, your food will stay 100% Bristle Free. No more worry about swallowing some metal pieces, Let's free to gobble up some favorite barbecue! Save your effort and time, let’s just have fun! (PATENTED design)
Emptying and Scrubbing Grease Trays
With your heat deflectors and flavorizer bars restored and drying, you’ll turn your attention to the grease tray—the component that collects rendered fats and drippings during cooking. Allow the grill to cool completely before sliding out the removable tray from its designated slot. Empty accumulated grease into a disposable container, then soak the tray in warm, soapy water for 5-10 minutes. Scrape away loosened debris using a plastic scraper or putty knife, then scrub with a nylon mesh pad. Rinsing thoroughly and drying completely prevents rust and corrosion damage. Rinse thoroughly and dry completely to prevent rust. For enhanced grease management and to prevent overflow, consider upgrading to sturdy enclosed grease catchers designed specifically for your grill model. When not actively using your grill, protecting it with a quality grill cover will help shield the grease tray and other components from weather damage and debris accumulation. Regularly checking and cleaning your grease collector is essential to avoid overflow or grease fires. Empty and wipe your drip pan after each use to prevent pest attraction and maintain a hygienic cooking environment. When treating grill thermometers and replacing grease traps, consider installing a drip pan liner for reduced buildup. Like charcoal grills, propane grills benefit from routine maintenance] to maintain optimal performance and cooking safety. Clean every 3-5 uses to prevent grease fires and maintain ideal grill performance. For grills that are no longer functioning properly, consult professional disposal services to handle safe removal and recycling of components.

DIMENSION: Depth 15 1/2", Adjustable width between 24" and 30". Overall height with catch pan: 2 3/4". MEASURE YOUR CURRENT GRILL DRIP TRAY TO MAKE SURE OURS FIT YOUR GRILL MODEL.

✅【Universal Compatibility】➤ Compatible with a wide range of 3/4/5 burner BBQ grill models from various manufacturers, such as Dyna Glo, Nexgrill grease tray replacement, Kenmore, Expert grill, Backyard Grill, BHG, Uniflame, and other grill manufacturers.

Upgraded Grill Grease Tray – Adjustable & Universal Replacement 【Adjustable & Universal Fit】 Our grill grease tray is designed to fit most 3/4/5 burner gas grills, with an adjustable length from 23.6" to 31.6" and a fixed width of 15.04". Please check and compare dimensions with your grill’s drip pan before ordering.
Polishing Exterior Surfaces
After you’ve restored the interior components and allowed the grill to cool to approximately 250-300°F, disconnect the propane tank and begin your exterior deep clean. Spray grill cleaner evenly across the surface, then scrub stubborn stains with a non-abrasive sponge. Follow the grain direction when wiping stainless steel surfaces to achieve professional results. Avoid using wire brushes on stainless steel to prevent surface damage.
Rinse thoroughly with a garden hose, then dry completely with a microfiber towel, avoiding water spots that compromise aesthetics. Apply stainless steel polish as your final step, which simultaneously enhances shine and protects against corrosion. This protective coating guards your grill from oxidation and rust formation. Stainless steel grills maintained with regular polishing and protective coatings typically last 10 to 15 years with proper care. For heavy-duty exterior protection, consider investing in burner covers designed for your specific grill model to shield components when not in use. For additional surface protection, consider using grill mats when your propane BBQ is in use to prevent stains and extend the life of exterior surfaces. Choose mats made from PVC or silicone materials for superior heat and stain resistance on your deck. Consider pairing your grill with a hardtop gazebo structure to provide year-round weather protection against rain, snow, and UV exposure. In South Florida’s challenging climate of intense sun, rain, and salty air, regular polishing becomes especially critical for preventing structural damage.
Inspect the polished exterior for any remaining damage or rust spots. Your propane BBQ now displays a pristine finish while benefiting from enhanced durability and weather resistance.
Final Assembly and Reconnection
Your grill’s exterior now gleams with protective polish, and it’s time to reassemble the internal components you’ve cleaned and inspected. Begin by reinstalling cooking grids, flame tamers, and burners in their correct orientations. Verify burner alignment verification by seating burners properly with pegs into mounting brackets, then secure them with cotter pins. Install the pressure regulator onto your propane tank with hand-tight tightening, then thread the connector using right-tighty-lefty protocol. Guarantee proper gas line routing through designated pathways, avoiding kinks or obstructions. When reconnecting your gas line, ensure all fittings comply with local codes and pressure ratings to prevent leaks or safety hazards. Check all connection points for potential leaks using bubble formation testing. Before proceeding, ensure you wear appropriate personal protective equipment to protect against sharp edges and pinch points that may be present during reassembly. Secure your tank with wire restraints in the storage compartment. For propane tank connections, verify that your quick connect fitting or connector is compatible with your grill model to ensure a secure seal. Select stainless steel braided hoses for superior durability and weather resistance when replacing any damaged gas lines during reassembly. Finally, confirm all screws and fasteners are tight before performing initial ignition tests to confirm proper gas flow and burner operation. Consider upgrading to electronic ignition kits for reliable and consistent burner startup after reassembly.