Before you remove your old BBQ grill, you’ll need to assess its condition for rust and structural damage while wearing protective gear. Drain the propane tank completely and close the valve before disconnecting it. Clean and disassemble smaller components first, then tackle larger sections using penetrating oil on seized joints. Separate all materials by type—ferrous metals, aluminum, and non-recyclables—for proper disposal through local waste management or recycling facilities. Following these protocols minimizes environmental impact and personal injury risk, though thorough guidance covers additional specialized techniques you’ll find valuable.
Safety Precautions Before Starting
Before you begin dismantling your old BBQ grill, you’ll need to prioritize safety precautions that protect you from common hazards inherent to this task. Start with a detailed assessment of the grill’s condition, inspecting for rust, seized bolts, and structural wear that could complicate removal. Perform material identification to detect hazardous elements like residual grease or pressurized tanks requiring specialized handling.
Equip yourself with appropriate protective gear: gloves shield your hands from sharp edges and rust, safety glasses protect your eyes from debris, and sturdy footwear guards against dropped components. Flame-retardant mitts prove essential when handling residual heat sources, as grills remain dangerously hot up to one hour post-use. Be aware that leaking propane tanks and unstable structures pose additional safety risks during removal. Since grills are often placed on non-combustible bases, ensure you have cleared surrounding combustible materials before starting work. Rust corrodes metal over time and can weaken the grill’s structure, potentially causing structural collapse during removal. High heat exposure during dismantling can cause aluminum particles to leach from grill components into your skin or respiratory system if you’re working with older aluminum-constructed grills. Ensuring you have proper protective equipment prevents most common injuries during the removal process. Keep a multipurpose dry chemical extinguisher accessible nearby in case of accidental ignition during the dismantling work.
Confirm complete cooling before proceeding. Always conduct a leak test using a soap bubble solution to verify that any remaining propane connections are safely sealed before beginning dismantling work. These foundational precautions minimize injury risks and establish safe working conditions for the removal process.
Cleaning Your Grill Thoroughly
Once your grill has cooled to a safe temperature, you’ll perform a thorough cleaning to remove hazardous residues and prepare components for safe disassembly and disposal. Start by scraping the interior sides, bottom, and firebox corners with a plastic scraper to dislodge debris. Vacuum remaining particles using a shop vac. Follow your deep cleaning schedule by scrubbing grates back to front with a grill brush while warm, then flip to clean undersides. For your thorough sanitization process, wash all removable components with mild detergent and water, applying Bar Keepers Friend powder for stubborn rust. Clean burner holes carefully with a toothbrush, avoiding water exposure. Spray degreaser inside the lid and wipe thoroughly. Consider soaking heavily soiled removable parts in a degreasing solution of hot water, dish soap, and grill cleaner to break down stubborn grease before final cleaning. For best results on baked-on residue, consider using specialized grill cleaners that can dissolve tough buildup with minimal scrubbing effort. You can also create a baking soda and vinegar paste to apply on stubborn grime, letting it sit before scrubbing for natural, non-toxic cleaning power. To prevent water spots and streaks on stainless steel components, dry and buff with a microfiber cloth after rinsing all parts thoroughly. After removing rust and debris, re-season the grill with a protective layer of oil to maintain component integrity during the disposal process. For exterior surfaces that won’t be directly exposed to flames, you may apply high heat spray paint to improve the grill’s appearance before final disposal. Rinse all parts completely and dry before reassembly, reducing contamination risks during removal. Avoid using caustic oven cleaners or bleach, as these can damage grill components and create safety hazards during the disposal process.

Extra Strong Ergonomic Handle - Still believe that as long as the bristles are stiff enough, the grill cleaning brush can live up to the name - a good barbecue brush? Of course not! A soft and sturdy handle with a stainless steel ring for hanging can make the clean work easier. No possibility such as the handle breaking up or snapped. You can succeed in using this BBQ cleaner for a very long time!

【Efficient BBQ Grill Brush】: Our Pepeng grill cleaner brush for outdoor grill is specially crafted, the moderately stiff grill cleaning brush can effectively remove stubborn residue and grease from your grill but without damaging the surface, making it look brand new after every use.

[Safe Wire Brush & Scraper ] - Grill cleaning brush with sharp stainless steel grill scraper can easily scrub stubborn grease and dirt effortless. Our bbq brush tools reuseable after clean.It's also the perfect Father's Day gifts for dad, family, friends, and barbecue enthusiasts.
Disassembly Steps and Techniques
With your grill now clean and cooled, you’re ready to safely disassemble it into manageable components. Start by removing smaller parts—side trays, handles, and wooden elements—before tackling larger sections. Detach burners, grates, and igniter components carefully, preserving delicate burner tubes. Spray rusted joints with penetrating oil to facilitate removal during seasonal maintenance preparations. For stubborn rust and grease buildup on metal surfaces, consider using pumice-based grill cleaning bricks to ensure all residue is removed before disassembly. After cleaning, apply a thin layer of high-smoke point oil to any cast iron grates before storage to prevent future rusting. To maintain grill safety and integrity, avoid using wire brushes when cleaning, as steel bristle brushes can leave dangerous metal fragments on cooking surfaces. For optimal results, only use nylon-bristle grill brushes on cooled grates to prevent melting and ensure safe food preparation surfaces. Systematically loosen and remove frame bolts, separating the firebox from the main structure. If necessary for transport, disassemble the frame into two sections. Organize all hardware in labeled bags for potential reuse. Wrap removable grates in protective material to prevent damage, similar to how Himalayan salt blocks require careful handling due to their fragility during storage and transport. Keep all nuts, bolts, and washers in clearly marked containers to ensure you have every component needed for reassembly. For any propane tanks, ensure they are removed and stored safely before proceeding with further disassembly. This methodical approach guarantees seasonal preparation is completed safely while maintaining component integrity for recycling or potential reassembly.

MATERIAL: Emerald, grit-infused nylon bristles—5X thicker for safe, high-visibility cleaning

NYLON BRISTLE GRILL BRUSH: Designed for cleaning cooled grill grates, the durable nylon bristles help scrub away residue after cooking, making this brush a practical tool for routine grill maintenance at home or outdoors.

【Durable Nylon Bristles Protect Grates】Designed for safe and effective cleaning, this BBQ grill brush has durable, heatproof nylon bristles that won’t scratch your grill grates. A great choice for keeping your grill in pristine condition with regular upkeep
Handling Hazardous Materials Properly
Numerous hazardous materials—including propane residue, rust inhibitors, and cleaning solvents—remain present in your grill even after disassembly, and you’ll need to handle them with strict adherence to safety protocols. You must wear chemical-resistant gloves, eye protection, and respiratory equipment appropriate to each substance’s hazard classification. Before handling, consult the Safety Data Sheet for every material to understand proper containment and disposal requirements. Maintain inventory management records documenting all hazardous components removed. Store separated materials in labeled, sealable containers, ensuring chemical compatibility—never combine incompatible substances. Keep materials in cool, ventilated areas away from heat sources. Always ensure the tank valve is closed before disconnecting the propane tank to prevent residual gas leaks during the disposal process. When working with grease buildup and residue, match cleaner strength to the job to avoid creating additional hazardous waste streams. For stubborn rust deposits, consider using abrasive tools like sandpaper carefully to prevent creating additional contaminated waste. Regular maintenance with oiling the grates can prevent excessive rust accumulation that complicates disposal. Keeping a fire extinguisher nearby during any grill work ensures you have quick response capability in case of unexpected ignition. Immediately report any spills or exposure incidents to your supervisor. Develop cleanup procedures beforehand and verify emergency equipment accessibility at your work site. Train all personnel involved in grill disposal on first-aid skills and procedures for responding to chemical exposure before beginning the removal process. Create a safety strategy that identifies all potential risks associated with grill disposal and establishes clear objectives for managing each hazard throughout the removal process.

Rubber has the advantages of elasticity, wear resistance, cold resistance, and air leakage

Dual-Layer Heat Protection for Safe Grilling: ANBOSON grilling gloves combine 10mil nitrile gloves with cotton gloves BBQ liners for superior heat-resistant cooking, handling hot grills, smokers, and meat shredding gloves tasks, providing safe handling of greasy foods and hot utensils while maintaining excellent flexibility
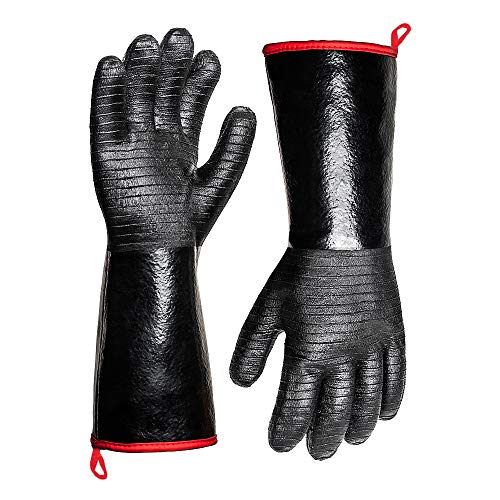
SAY GOODBYE TO BURNS! At 14” inches long, our BBQ gloves better protect fingers, hands and wrists from burns. And Our cooking gloves are heat resistant up to 932°F / 500°C .use this bbq accessories for your turkey fryer ,campfire,fireplace,charcoal,pit & barbecue gas grills as well
Disposal Options Available to You
After you’ve safely removed and handled all hazardous materials, you’ll want to explore disposal options that align with your grill’s condition, local regulations, and environmental standards. If your grill remains functional, consider donation coordination through charitable organizations or community resale networks via online marketplaces. You’ll recover financial value while extending the grill’s lifecycle responsibly.
For non-functional units, contact local waste management services about bulk pickup scheduling. Many municipalities host special disposal events accepting large items without requiring disassembly. Community drop-off centers and scrap metal recycling facilities accept separated grill components, potentially providing scrap compensation based on material condition. Before disposal, consider using stainless steel cleaner products to restore your grill’s appearance if you’re planning to donate or resell it. A well-maintained grill exterior can significantly improve its appeal to potential buyers or recipients, similar to how deep cleaning the interior enhances overall performance and longevity. Regular maintenance practices like avoiding rust buildup help preserve grill condition and appeal for potential resale or donation. Seasoning grates with high-temperature cooking oils before donation can demonstrate proper grill maintenance to potential recipients. Professional junk removal services offer full-service grill removal for those preferring comprehensive disposal solutions. For functional grills being donated, performing routine light cleaning beforehand can make a meaningful difference in how recipients perceive the grill’s quality and usability. Used gas grills can generate average scrap value around $5-$10, though the time and effort involved may outweigh this modest financial return.
Verify specific program details and availability with your local government and waste removal providers to identify the most compliant, efficient disposal pathway for your particular situation.
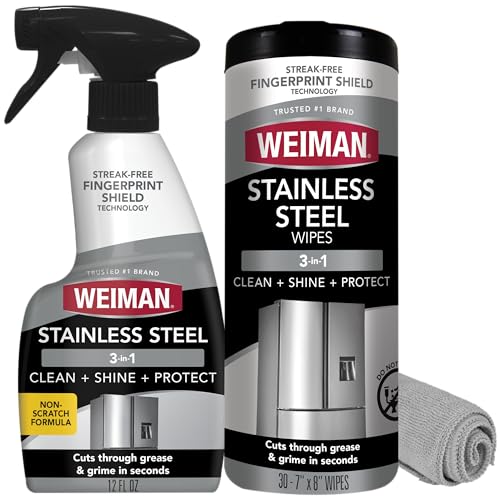
Cleans, polishes & protects stainless steel: Our stainless steel cleaner for appliances removes fingerprints, grease, residue, and water spots. This kit includes spray, which won a 2026 Good Housekeeping Cleaning Award, cloth & appliance wipes that leave a streak-free shine and a protective barrier that helps prevent future smudges.

Remove Stains & Tarnish: Bar Keepers Friend Cookware Cleanser & Polish is a kitchen stainless steel cleaner and degreaser for pots, pans and bakeware. This stain remover and glass cleaner cuts through heavy oil, hard baked-on food and rust stains

GREAT FOR MULTIPLE SURFACES: Clean & Ready Grill breaks down built-up grease, splatter stains, and burnt-on food on stainless steel, steel and porcelain enamel, leaving your grill looking clean and ready for the next BBQ, campout, or tailgate party.
Recycling and Scrapping Metal Components
Once you’ve identified a scrap metal recycling facility in your area, you’ll need to prepare your grill’s metal components for maximum value and facility compliance. Begin by separating ferrous metals (steel) from non-ferrous materials (aluminum, brass, copper) using a magnet test. This metal grading process directly impacts profit maximization at the scrap yard.
Disassemble your grill systematically, removing all non-metal components—plastic shelves, knobs, handles, and wood elements. For cleaning the grates before disassembly, consider using wooden grill scrapers which safely remove residue without the risks associated with wire brushes. When selecting your cleaning tool, prioritize bristle-free designs that eliminate safety concerns while maintaining cleaning effectiveness. Bristle-free grill brushes like the Grillaholics Bristle-Free Grill Brush feature specialized designs that prevent metal debris from contaminating your food. To optimize cleaning before disassembly, steam your grill grates to approximately 400°F temperature to soften stubborn grime and make residue removal easier. Clean residue thoroughly and extract small fasteners, rubber gaskets, and rivets. For safety during the disassembly process, protect your hands with grill mitts to avoid sharp edges and metal burrs. Remember to separate the propane tank at a specific drop-off point, as it requires specialized handling distinct from other metal components. Non-ferrous metals such as stainless steel and copper typically fetch higher prices than ferrous materials at most facilities. Weigh each metal type separately before transport, as recycling facilities pay different rates per pound based on composition and purity.
Proper preparation guarantees you’ll receive accurate payment while meeting facility safety standards and environmental regulations.
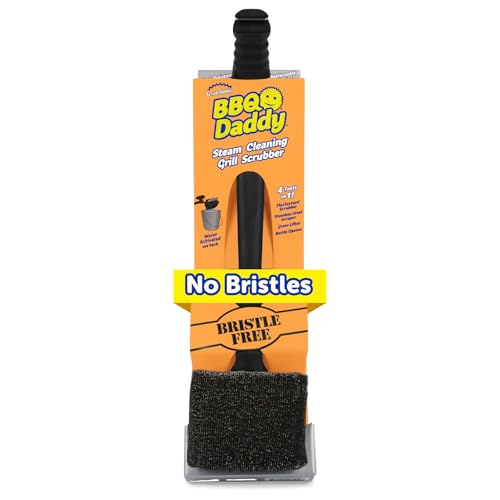
Clean with Steam, Not Bristles - Scrub Daddy Bristle Free Grill Brush for outdoor grills, uses a FlexTexture core that firms in cold water, and steam from the grill help the head soften to reach into grates for efficient grill cleaning.

【The Safest Bristle Free Grill Cleaner】:No wire bristles at all, no melting like nylon grill brushes; With this safe grill brush and scraper, your food will stay 100% Bristle Free. No more worry about swallowing some metal pieces, Let's free to gobble up some favorite barbecue! Save your effort and time, let’s just have fun! (PATENTED design)

【The Safest Grill Brush You Can Ever Find】: Once terrified by the horror news someone swallowed falling bristles? Or even the people around you have had such a terrible experience? Well, it's time for you to get rid of this fear completely. With our bristle free grill brush, there is no sharp, stiff and easy to fall short wire at all. Your food will always remain 100% bristle free, allowing you to go back to the happy time of free swallowing delicious barbecue! No more dread ever again!