
You’ll master pellet grill ribs using the proven 2-2-1 method: start low at 180–225°F for three hours, then wrap in foil with brown sugar and butter for two hours at 225–250°F. Finish unwrapped at higher heat until you’ve achieved that perfect mahogany bark and 205°F internal temperature. Spritz every 30–60 minutes, monitor pellet feed religiously, and you’ll uncover the specific techniques that transform good ribs into competition-level excellence.
Preparing Your Ribs for Smoking
How do you transform ordinary ribs into competition-grade barbecue? It starts with meticulous preparation. First, remove the membrane from the bone side—this tough layer blocks seasoning penetration and prevents crispy results. Pry it up halfway and peel it away completely.
Next, trim excess fat and silver skin using a sharp knife. This enhances smoke penetration and guarantees even cooking.
For seasoning application techniques, apply your dry rub to the bone side first, preventing it from rubbing off the meat. Use 2-3 tablespoons per side, leaving some meat visible for ideal bark development. This strategic approach maximizes seasoning penetration methods while avoiding over-saturation.
Finally, refrigerate your ribs for 30 minutes, then allow them to reach room temperature. This resting period lets seasonings set and sweat into the meat, dramatically improving flavor absorption before you fire up your pellet grill. After cooking, allow the ribs to rest, which further enhances tenderness and locks in flavor. Many pitmasters also use the 2-2-1 method for baby back ribs, which involves smoking uncovered for 2 hours, wrapping in foil with butter and honey for 2 hours, then finishing unwrapped with sauce for the final hour. Consider using a simple rub made with common spices to provide excellent flavor without complicated ingredients. For optimal results, apply a yellow mustard base before your dry rub to enhance adhesion and create a deeper flavor profile. When wrapping ribs, you can also use aluminum foil to lock in moisture and tenderness during the middle stage of cooking. If you prefer to pre-cook your ribs in the oven at 275°F to 350°F for 1.5 to 3 hours, you can finish them on the pellet grill for added smoke flavor and caramelization. During the final phase, apply sauce and increase temperature to caramelize the glaze, typically adding 30 minutes to an hour to your total cook time.
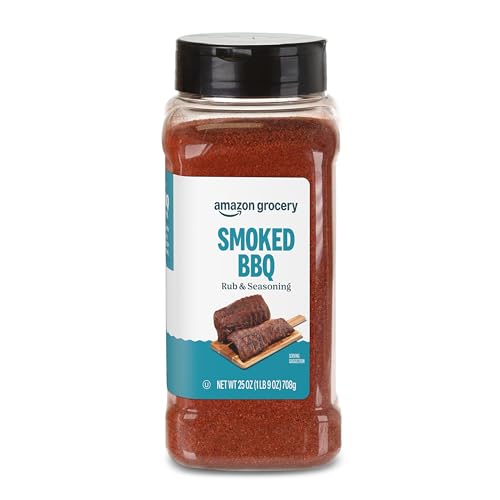
One 25 ounce container of Smoked BBQ Rub & Seasoning


One 4.76 ounce container of Pork Rub & Seasoning
Setting Up Your Pellet Grill
Before you can smoke those competition-grade ribs you’ve so carefully prepared, you’ll need to properly set up your pellet grill—and this setup phase is absolutely critical to your success. Start by positioning your grill at least 6 feet from structures and guaranteeing electrical access. Clear the hopper of debris, then fill it with quality pellets using proper pellet storage recommendations: keep opened bags in airtight buckets to maintain freshness and prevent moisture absorption. Fill the hopper to your desired level before starting to ensure you have adequate pellets for the smoking process.
Next, verify all components function correctly—auger, fan, and igniter must operate seamlessly. Preheat with the lid closed, targeting 225°F to 275°F for smoking. During this warm-up period, perform periodic grill maintenance by identifying hot spots with bread slices and cleaning any ash or grease buildup. Download any available apps for remote temperature monitoring to help you maintain consistent heat control throughout your smoking session. Consider using a smoke tube alongside your pellet grill to enhance the wood-fired flavor profile if you want deeper smoke penetration. The compressed wood pellets provide both heat and smoke, delivering enhanced smoky flavors while requiring less manual tending than traditional charcoal grills. Start on low or smoke mode for optimal ignition before gradually adjusting to your target smoking temperature. Many quality pellet grills feature digital temperature control that maintains precision within a tight range, ensuring your ribs cook evenly throughout the smoking process. Modern pellet grills excel at temperature stability, maintaining even heat despite challenging weather conditions to deliver reliably excellent results. This foundation ensures consistent temperature control and ideal rib-smoking results.
The Cooking Process and Temperature Management
Three critical hours await you as you begin the initial smoking phase—this is where you’ll build the flavorful bark that defines competition-grade ribs. You’ll maintain 180-225°F while positioning ribs meat-side up, spritzing every 30-60 minutes after the first hour for smoke enhancement. Target 160°F internally before progressing.
After this foundation, hold steady at 225-250°F throughout your cook. Monitor pellet feed and vents religiously to avoid temperature fluctuations that compromise results. Around hour five, probe every 30 minutes—you’re hunting for 195-203°F, with baby backs ideally landing at 198-202°F for fall-off-bone tenderness. For optimal results, wrap ribs in foil with brown sugar, honey, and butter during the middle phase of cooking. Place a water pan beneath the ribs to help regulate temperature and maintain moisture throughout the extended cooking process.
In your final unwrapped phase, maintain 225°F for proper sauce application and bark setting. Pull at 205°F maximum; overshooting destroys texture. Consider using apple or cherry wood to add a subtle sweetness that complements the pork perfectly. Remember to test for doneness by picking up the ribs with tongs to verify they bend properly before removing them from the grill. Look for visual cues like mahogany color and bone exposure to confirm the ribs are ready. If you’re using a traditional offset smoker, a quality charcoal basket can help maintain consistent temperatures and improve fuel efficiency during your extended cook. After removing from the grill, rest the ribs briefly before slicing to allow juices to redistribute throughout the meat. Total cook time spans 5-6.5 hours depending on rib size.

Replaces 3 speed smoker control, compatible with Traeger wood pellet grill models (except PTG)
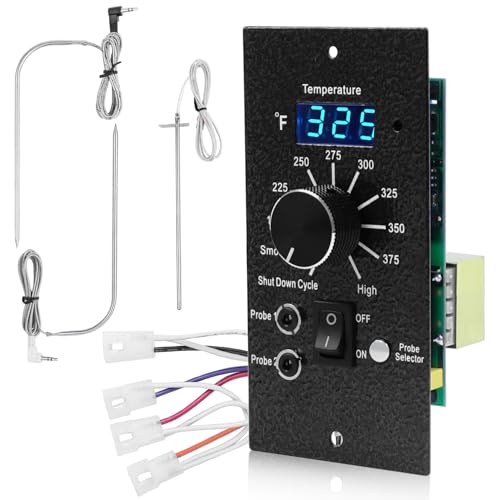
【COMPATIBILITY】: This Traeger Digital Controller kit replacement part compatible with most Traeger Wood Pellet Grills (except PTG), ideal replacement for Traeger Controller BAC365.

【Compatiable】: Our Traeger control panel fits most Traeger wood pellet grill models (except PTG), ideal Traeger Pro controller for Traeger parts replacement BAC236.
Wrapping and Tenderizing Techniques
Once you’ve established that key bark foundation during your initial smoking phase, shift becomes your strategic pivot point—it’s where you’ll dramatically accelerate tenderization and lock in moisture that transforms good ribs into competition-caliber results.
You’ll choose between three distinct approaches, each delivering different texture profile analysis outcomes. Aluminum foil traps steam aggressively, softening bark for fall-off-the-bone tenderness. Pink butcher paper balances breathability with moisture retention, preserving more bark character while maintaining juiciness. The no-wrap method extends cooking time but maximizes smoke penetration and bark development. Look for meat pull-back on bones, usually around 1/4 inch of bone showing, to identify the ideal wrapping moment.
Your moisture content control strategy matters equally. Add apple juice, honey, or specialized BBQ butter solutions before sealing foil wraps tightly—eliminating air pockets prevents hot spots. With butcher paper, beer or apple cider vinegar works exceptionally well, taking advantage of the material’s breathable properties. Spritz your wrapped ribs every 15 minutes to maintain consistent moisture levels throughout the cooking process. Time your wrapping change at the two-hour mark for ideal results. After unwrapping, allow your ribs to rest before serving to maximize juiciness and flavor delivery.

Multi-Purpose Use: The Traeger Pink BBQ Butcher Paper Roll is perfect for covering brisket, lining BBQ trays or tables, and even wrapping gifts. Its versatility makes it a must-have for any grilling enthusiast.

【PREMIUM NATURAL QUALITY】Made from premium virgin pulp, our butcher paper is unwaxed, uncoated, and unbleached for a natural and pure product. Ideal for grill masters seeking top-notch, food-safe paper to enhance their culinary creations.

【Upgraded Safe Carton Packaging】Carton with fixed dotted serrated cutter, small smooth edges (safe to touch, no cut risk), one-hand easy tear, no waste, neat storage.
Achieving the Perfect Finish and Doneness
All your precision wrapping and moisture control efforts converge at this critical juncture—nailing the finish separates competition-caliber ribs from mediocre results. You’ll achieve competition style tenderness by combining precise temperature management with strategic sauce application. Brush barbecue sauce generously on both sides after unwrapping, then return your ribs bone-side down initially. Alternate positioning—meat side up for thirty minutes, then bone side down for thirty minutes—ensures even caramelization and smoke exposure. Cook sauced ribs fifteen to thirty minutes for that signature sticky glaze, monitoring closely to prevent burning. Your bend test and toothpick probe confirm doneness with barely any resistance. The meat should pull slightly from bone ends, indicating you’ve achieved that perfect balance between juicy tenderness and structural integrity. For optimal results, aim for an internal temperature of 195-203 degrees to achieve that fall-off-the-bone texture. Wrap the ribs in foil to maintain moisture during the final stages of cooking for optimal results. Smoking at lower temperatures around 180°F requires extended cooking times of approximately 6 hours but allows the ribs to absorb more smoke flavor while breaking down connective tissues. After removing from the grill, resting the ribs for at least thirty minutes allows the juices to redistribute throughout the meat. Using indirect heat throughout the smoking process helps ensure even cooking and prevents the exterior from charring before the interior reaches proper tenderness. Monitoring internal temperature is critical rather than relying strictly on timing, as outdoor conditions and smoker temperature consistency can influence the actual cooking duration. Wrapping in butcher paper can be an alternative to foil, helping develop a good bark while maintaining moisture throughout the cook.