At 275°F, you’ll smoke baby back ribs for 4 to 4.5 hours until they reach 203°F internally. St. Louis cut racks finish in roughly 3 hours, while spareribs take 3 to 3.5 hours. You can accelerate tenderization by wrapping them in butcher paper at 165°F, which cuts about an hour off your total time. Using the spritz method every hour with apple cider vinegar and apple juice maintains moisture throughout the cook. The specifics of your method and cut will determine your exact timeline.
Total Cooking Time at 275°F
When you’re smoking pork ribs at 275°F, you’re looking at a total cooking time between 3 and 4.5 hours, depending on the cut and your preferred method. Baby back ribs typically require 4 to 4.5 hours to reach the target internal temperature of 203°F, while St. Louis cut racks finish in approximately 3 hours. Spareribs fall somewhere in between at 3 to 3.5 hours total.
Your perfect smoke duration breaks down into three phases: unwrapped smoking, wrapped cooking, and sauce application. Most pitmasters spend 2 to 2.5 hours unwrapped for smoke penetration, followed by 1 to 2 hours wrapped to accelerate fat rendering. For optimal results, mop your ribs with apple cider vinegar every 30 minutes during the unwrapped smoking phase to enhance flavor and moisture. Before you begin smoking, remove the membrane from the bone side of the ribs to ensure better seasoning penetration and more tender results. Hourly temp monitoring guarantees you’re tracking progress accurately and adjusting as needed to prevent overcooking or drying out the meat. The right balance of time and temperature prevents ribs from drying out while developing the flavorful bark that makes smoked ribs so desirable. Some methods incorporate a final high-heat step around 400°F for 10 to 15 minutes to create a crispy exterior after the low-and-slow smoking phase. During the wrapped phase, many pitmasters add butter, sugar, and honey to the foil packet to enhance moisture and flavor while the ribs finish cooking. Like grilled chicken, smoked pork ribs provide essential minerals including phosphorus, selenium, potassium, and zinc that support overall health. Throughout the smoking process, maintain consistent heat by managing airflow through your smoker’s vents to control oxygen supply and temperature.
The Unwrapped Smoking Phase
Since you’re building the foundation for quality bark and smoke penetration, you’ll want to maintain your smoker at a steady 275°F throughout the unwrapped phase—whether you’re adjusting up from a lower preheat or starting fresh.
During the unwrapped smoking phase, expect three to four hours before considering wrapping. Spritz every hour with an apple cider vinegar and apple juice mixture to support ideal bark formation while managing moisture on the surface. This technique keeps your ribs from drying out while the bark develops its characteristic texture. Baby back ribs are meaty and forgiving compared to spare ribs, making them ideal for this extended unwrapped smoking method. Arrange the ribs with the thickest part towards the fire to ensure even cooking throughout the pit.
Monitor internal temperature regularly using an instant-read thermometer. You’re targeting 200°F for doneness, though you’ll probe between bones for accuracy. The unwrapped method preserves bark integrity that foiling would otherwise compromise, delivering superior texture and smoke penetration. Grilling with indirect heat and rotating the ribs helps ensure even cooking throughout the process. Use a meat thermometer to monitor temperature accurately and ensure your ribs reach the proper doneness without overcooking. After smoking, allow the ribs to rest, which enhances tenderness and flavor before serving. Just as with beef kabobs, letting the meat rest after cooking allows the juices to redistribute throughout for optimal results. Before you start cooking, remove the membrane from the ribs to ensure better seasoning penetration and tenderness.
Preparing Your Ribs for the Smoker
Three critical prep steps—membrane removal, binder application, and dry rub seasoning—establish the foundation for superior smoke penetration and bark development.
Start by thoroughly rinsing your ribs in cold water, then begin removing silverskin from the bone side using a spoon or paper towel to slide underneath. This bitter membrane blocks flavor absorption, so complete removal’s essential before seasoning.
Next, you’ll apply your binder—yellow mustard works exceptionally well. Coat the bone side entirely, creating a wet base that helps your rub adhere properly. Once your binder’s in place, generously cover all surfaces with your dry rub, including edges, using a shaker dispenser for even distribution. Your dry rub should typically include salt and pepper as the base, along with complementary spices like garlic, onion powder, and smoked paprika for depth. Pat down the seasoning firmly.
Allow your ribs to rest 30 minutes minimum, though overnight refrigeration enhances flavor penetration considerably. For optimal results, wrap ribs in plastic and refrigerate for 2-4 hours before smoking to allow the seasonings to fully penetrate the meat. Removing the membrane from baby back ribs is crucial, as this step allows smoke flavor to absorb directly into the meat. Consider using wood choices like apple or cherry for a milder, fruity smoke flavor that complements pork ribs perfectly. After smoking, use a bristle-free grill brush to clean your grates and prevent any stray bristles from contaminating future cooks. The Grillaholics Bristle-Free Grill Brush features a triple helix design with an 18-inch handle that keeps your hands safely away from heat while its built-in scraper effectively cleans between grates.
The Wrapping Phase for Tenderness
After your ribs hit an internal temperature of 165°F—typically around the two-hour mark of smoking—you’ll shift into the wrapping phase, a critical technique known as the “Texas crutch” that dramatically accelerates tenderization. You’ll wrap your ribs tightly in butcher paper or aluminum foil, both excellent moisture retention techniques that prevent drying while the internal temperature climbs to 180-190°F within thirty minutes.
This wrapping phase breaks down connective tissues more effectively at 275°F than lower temperatures, delivering superior texture improvements. Consider spritzing your ribs with apple juice or broth before wrapping to enhance moisture and tenderness further. Most competition cooks rely on wrapping techniques to gain a competitive edge over their rivals. The tight seal traps steam, creating an ideal environment for achieving that coveted fall-off-bone texture. Wrapping in butcher paper helps develop a good bark while maintaining moisture, similar to how it’s used when smoking brisket at higher temperatures for efficiency without sacrificing quality. Removing the membrane from ribs before seasoning allows smoke flavor to penetrate the meat more thoroughly during the cooking process. After unwrapping, you can glaze your ribs with Cosmo sku original competition barbecue sauce to add flavor depth before the final smoking phase. For optimal fuel efficiency during longer smoking sessions, a quality charcoal basket helps maintain consistent temperatures and extends burn time. For even better temperature control and heat retention throughout your cook, consider upgrading to a ceramic Kamado grill that excels at maintaining steady smoking temperatures. Continue monitoring with a reliable thermometer until you reach 195°F for maximum tenderness.

【PREMIUM NATURAL QUALITY】Made from premium virgin pulp, our butcher paper is unwaxed, uncoated, and unbleached for a natural and pure product. Ideal for grill masters seeking top-notch, food-safe paper to enhance their culinary creations.

Designed specifically for the culinary enthusiast, our 18 paper roll dispenser is optimally crafted to handle barbecue butcher paper, thereby ensuring the authentic taste of your smoked meats is maintained. This is your ideal bbq wrapping paper for smoking

【Upgraded Safe Carton Packaging】Carton with fixed dotted serrated cutter, small smooth edges (safe to touch, no cut risk), one-hand easy tear, no waste, neat storage.
Final Unwrapping and Saucing
Once your ribs reach that ideal 195°F internal temperature within their foil or butcher paper cocoon, you’ll unwrap them to begin the final finishing phase. Careful temperature monitoring with a reliable thermometer is crucial throughout this stage to ensure optimal results. Carefully open the package bone-side down to preserve accumulated juices for your sauce.
During this essential hour, maintain steady temp management between 225-250°F to prevent uneven cooking and sugar burnout. Position ribs meat-side up to expose your rub layer directly to smoke and heat, developing perfect bark texture. Consider brushing on melting butter periodically during this phase to help your sauce adhere better to the ribs. This final unwrapped stage creates the sticky, irresistible glaze that defines perfectly smoked ribs.
Your sauce application timing matters greatly. Wait until the final 10-15 minutes before serving, applying a thin coat rather than heavy coverage. This prevents charring while allowing the glaze to set with a glossy, tacky finish. Multiple light coats work better than single heavy applications. For an elevated presentation, try a beer and mustard glaze inspired by gourmet grilling techniques that add depth to your flavor profile. Frequent turning and brushing during this stage ensures moist, tender ribs with even caramelization across the surface. For precise monitoring during this critical phase, an instant-read thermometer delivers the 1-second accuracy needed to catch your ribs at their peak doneness. After saucing, finish with a quick sear over direct heat to caramelize the sauce and lock in flavor.
How to Know When Your Ribs Are Done
Determining doneness requires you to rely on multiple indicators rather than a single method, since visual cues and temperature readings together provide the most reliable confirmation that your ribs have reached ideal tenderness. You’ll want to perform internal temperature checks using a meat thermometer in the thickest section, targeting 195°F to 203°F for baby back ribs. Simultaneously, use the bend test by lifting your rack with tongs—properly cooked ribs’ll bend sharply with a visible crack forming along the surface. The toothpick test confirms readiness when it slides through meat with minimal resistance. After cooking, allow a 3-minute rest time after cooking to let carryover cooking complete the process. You’ll notice meat pulling back 1/4 to 1/2 inch from bones, signaling proper collagen breakdown. Remember that color is not a reliable indicator of doneness, as smoke rings and myoglobin can create a pink hue even in properly cooked ribs. The color of your ribs should transition from pale pink to a reddish-brown appearance, indicating that the fat and connective tissue have properly rendered throughout the meat. For maintaining consistent long-session temperatures during extended smoking, quality charcoal grills with proper sealing and heat retention features help ensure even cooking throughout the process. Grills with adjustable dampers enable precise temperature control throughout the smoking session, keeping your heat steady in the optimal range. These dampers function by regulating airflow, which controls the charcoal’s burn rate and the resulting radiant heat that cooks your ribs. Creating a two-zone fire setup allows you to move ribs to a cooler area if temperature spikes occur, providing better control during the smoking process. Before you begin smoking, clean and oil the grates to prevent your ribs from sticking during the long cooking process.

AMPLE CAPACITY FOR OUTDOOR GATHERINGS: Effortlessly host family and friends with a spacious 302 square inch cooking surface. The expansive grate provides enough room to grill up to 16 burgers simultaneously, ensuring efficient meal preparation for outdoor parties and weekend cookouts.

AMPLE CAPACITY FOR OUTDOOR GATHERINGS: Effortlessly host family and friends with a spacious 302 square inch cooking surface. The expansive grate provides enough room to grill up to 16 burgers simultaneously, ensuring efficient meal preparation for outdoor parties and weekend cookouts.
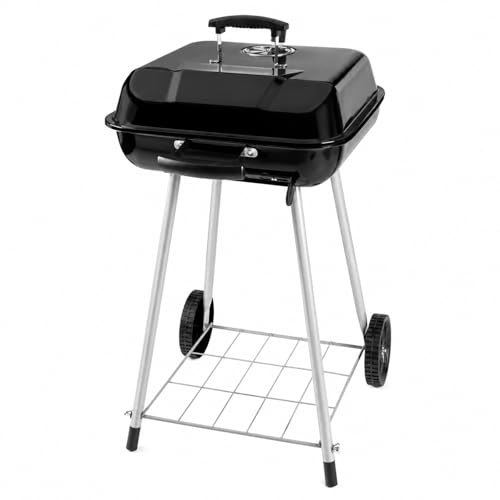
EFFORTLESS OUTDOOR GRILLING : Maximize your outdoor cooking experience without sacrificing valuable patio space. Featuring a generous cooking surface, this freestanding charcoal grill easily accommodates up to 16 standard burgers simultaneously. The grid design ensures edge-to-edge cooking efficiency, making it the perfect compact solution to feed family and friends during weekend cookouts.
Tips for Best Results
How can you consistently achieve competition-quality smoked ribs? Master your cooking technique variations by experimenting with wrap timing—start unwrapped for 1-2 hours, then wrap tightly to render fat efficiently at 275°F. Your wrapping adjustments should include building a flavorful base with butter, brown sugar, and BBQ sauce before sealing ribs in double-wrapped foil, which prevents moisture escape.
Apply your mop every 30 minutes with apple cider vinegar and spice blends, maintaining gentle pressure to preserve your seasoning. Consider using vinegar, apple juice, or beer as your spritz liquid to add humidity to the outside of ribs and prevent dryness. After unwrapping, sauce thinly and smoke bare for 10-60 minutes to set the glaze properly. Rest your ribs in foil for 30 minutes post-wrap, allowing residual heat to solidify the coating. Monitor the internal temperature to ensure your ribs reach 175-185 degrees for optimal tenderness and bone separation. For faster results, some pitmasters increase heat to 300°F near the end of cooking to caramelize the sauce and develop a glossy finish. Use a meat thermometer rather than relying solely on time to judge doneness, as factors like weather and smoker consistency can affect cooking duration. Some recipes employ the 3-2-1 method with distinct stages of unwrapped and wrapped cooking to ensure consistent tenderness and moisture retention. Allow your ribs to rest for at least 30 minutes after cooking to retain juices and ensure maximum flavor. Adding wood chunks like hickory or cherry can enhance the smoky aroma and deepen the flavor profile of your ribs. These precise adjustments yield consistently superior results.

Package Includes: One (1) Reynolds Wrap Heavy Duty Aluminum Foil Roll measuring 50 feet long by 12 inches wide (50 square feet total)

Package Includes: One (1) Reynolds Wrap Everyday Strength Aluminum Foil Roll measuring 30 feet long by 12 inches wide (30 square feet total)
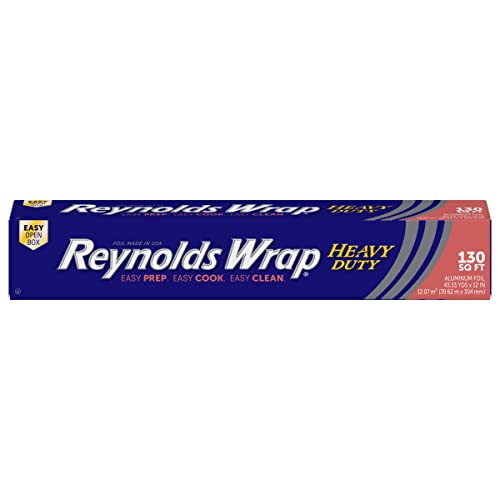
Package Includes-One (1) Reynolds Wrap Heavy Duty Aluminum Foil Roll measuring 130 feet long by 12 inches wide (130 square feet total)
Comparing 275°F to Other Temperatures
Why does temperature selection matter so markedly when smoking pork ribs? You’ll find that 275°F accelerates cooking noticeably compared to lower temperatures, reducing cook time from 5-6 hours at 225°F to just 2.5-3 hours for baby backs. However, this speed comes with trade-offs. Higher temperatures render fat faster but reduce smoke absorption levels, potentially diminishing that coveted smoke flavor. At 225°F, you’re investing more time but gaining superior smoke penetration. The 250°F sweet spot balances both factors effectively. Temperature fluctuations between 225-275°F remain acceptable, with most pitmasters finding negligible tenderness differences across this range. Maintaining consistent temperature control throughout your smoking session ensures optimal results regardless of which temperature you select. Proper airflow management through vents helps stabilize your cooking temperature and regulates smoke intensity during the entire cook. Similar to brisket smoking where evaporative cooling can cause temperature plateaus, ribs may also experience brief stalls during the rendering process. Using a water pan inside your grill helps regulate temperature fluctuations while adding moisture to prevent the meat from drying out during longer smoking sessions. A stainless steel smoker box placed over your charcoal enhances wood chip smoke infusion, delivering richer flavor to your pork ribs throughout the cooking process. Regardless of your chosen temperature, reaching the ideal internal temperature of 195°F to 203°F ensures your ribs achieve peak tenderness and juiciness. Your choice ultimately depends on prioritizing either faster results or maximized smoke character.

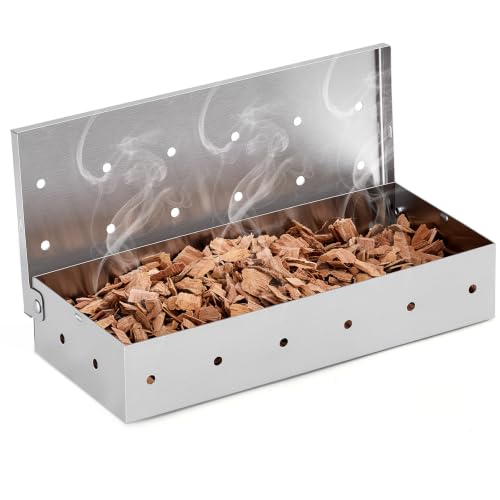
HEAVY-GAUGE STAINLESS STEEL BUILD: Made from thick stainless steel for reliable performance under high heat. Resists warping and rust for long-term use on gas grills and charcoal grills

Thicker sturdy stainless steel construction will hold up great under the heat of the grill. With the unique hinged design, you can easily add or remove wood chips from the smoker box while in use.