You’ll master charcoal grill brisket by maintaining 285-300°F consistently using the snake method with lump charcoal for superior heat stability. Trim your 4-6 pound packer to a quarter-inch fat cap, apply kosher salt and smoked paprika generously, then rotate every 30 minutes. Wrap at 160-175°F to preserve bark while managing moisture through the stall phase. Target 203-205°F for perfect collagen dissolution, then rest 2-3 hours in an insulated cooler. Slice against the grain at quarter-inch increments. The nuances separating good brisket from competition-grade reveal themselves in the technical execution details ahead.
Preparing Your Brisket and Grill
Before you fire up your charcoal grill, you’ll want to select a brisket that’s well-suited for your cooking setup and timeline. Choose a 4-6 pound cut or go larger with a 11-15 pound Double R Ranch packer brisket for whole flat and point sections. A whole brisket can weigh between 10-20 pounds and is best suited for low and slow cooking.
Start by trimming excess fat, leaving a quarter-inch even cap for moisture retention. Remove thick heel fat that insulates the meat, then pat everything dry with paper towels to enhance rub adhesion.
Next, apply your seasoning generously using kosher salt, cracked black pepper, garlic powder, onion powder, and smoked paprika. Consider spreading yellow mustard first for better rub adhesion. For enhanced flavor, many pitmasters also incorporate hickory pellets into their charcoal setup to achieve a bold smoky profile similar to traditional smoking methods. Proper resting allows the seasoning to penetrate the meat while the surface develops a pellicle formation that enhances smoke absorption and flavor development.
Allow proper resting time by bringing your brisket to room temperature one hour before cooking. Position it fat-side up, then set up your grill with a water pan between coal piles and a drip pan positioned below for indirect cooking. Using a meat thermometer to monitor the internal temperature throughout the cooking process will help you achieve the desired doneness. The fat cap will impart flavor and moisture during the long cooking process. Just as with smoking steaks, accurate temperature monitoring is critical for achieving perfect results with your brisket. Your brisket is done when it reaches an internal temperature between 190-205°F, which ensures optimal tenderness and juiciness.

Precision Fit for Enhanced Performance: this stainless steel drip pan is crafted to seamlessly compatible with 22 inch charcoal grill; Its custom design ensures optimal functionality; It provides a secure fit that enhances heat management and smoke distribution


SMALL FOOD CONTROL: Perforated grill topper is made to help keep chopped vegetables, shrimp, and delicate cuts from slipping between grill grates, so you can grill more variety without chasing pieces into the fire.
Setting Up Your Charcoal and Temperature Control
Once you’ve prepped your brisket and positioned your water and drip pans, you’ll need to establish the right charcoal configuration and temperature control system to achieve the low-and-slow cooking environment that transforms brisket into tender, flavorful results.
Start by lighting one or two charcoal chimneys until they’re completely ashed over. A charcoal chimney starter is the preferred, chemical-free method for reliably igniting your briquettes without the need for lighter fluid. Arrange your initial briquettes in a semi-circular snake method formation on one side of the grill. Layer unlit charcoal alongside the hot coals for sustained fuel consistency throughout your cook. Briquettes are favored for their consistent medium heat and long burns, making them ideal for the extended cooking times brisket requires. For optimal smoking results, consider adding smoking wood chunks to the beginning of your charcoal ring to impart desired smoke flavor. Kingsford Charcoal with Hickory provides a savory, smoky wood flavor that enhances your brisket’s taste profile. Models with superior charcoal retention capabilities help maintain steady temperatures and maximize fuel efficiency during extended low-and-slow cooks. High-quality kettle grill construction ensures reliable heat distribution and durability for consistent results across multiple brisket cooks.
Target temperatures between 225°F and 250°F using a reliable remote probe thermometer rather than relying on inaccurate dome gauges. Achieve this range through vent position tuning—gradually adjusting your bottom and top vents to balance airflow. Keeping your bottom vents fully open while modulating heat through the top lid damper gives you precise control over your cooking temperature. Small modifications create significant temperature differences, so experiment patiently until you’ve found your sweet spot for consistent heat maintenance.

Large Display: Features a 2 3/8 inches large face for clear visibility; Stem length of 2 7/8 inches enhances accessibility; Enables easy classification of food temperatures in various cooking environments

Compatibility: Compatible with Weber 22-inch charcoal kettle grill. Please check your grill model before ordering.
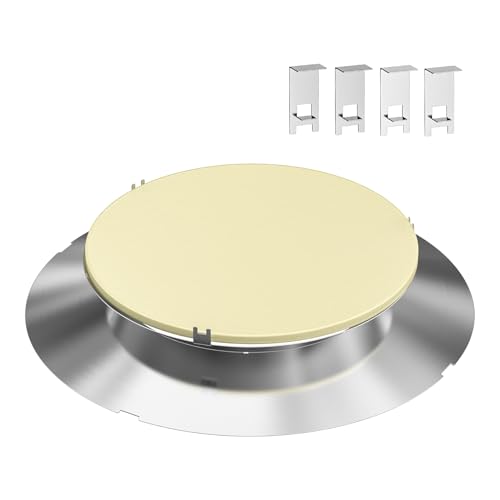
Compatibility: Compatible with Weber 22" Kettle Charcoal Grills, which is the good companion for your outdoor cooking needs.
The Initial Cook Phase
With your charcoal configuration locked in and temperatures stabilized between 225°F and 250°F, you’re ready to place your seasoned brisket on the grill—positioning it directly above your water-filled aluminum half pan with the point end closer to your heat source if temperature variations exist across the grill. Guarantee the brisket sits beneath your top vents for ideal airflow and smoke absorption. You’ll maintain this unwrapped phase until your internal temperature reaches 165°F, typically requiring 10+ hours depending on brisket size. Monitor progress around the 3-hour mark for bark development and visible color change. Fat rendering begins noticeably after this initial period. Use a remote thermometer to track both point and flat ends without lifting the lid, preserving heat and moisture critical for even cooking. During this low and slow cooking process, collagen breaks down gradually to transform the naturally tough brisket into a tender final product. The brisket may experience a temperature stall around 150–160°F where cooking slows due to moisture evaporation, but this is a normal part of the process. Consider spritzing with apple cider vinegar during the cook to maintain moisture and enhance flavor development. Aiming for a final internal temperature around 202°F ensures optimal tenderness in the finished brisket. For optimal results, consider using the boat method which consistently produces high-quality brisket with excellent bark development. A 13-16 lb brisket will cook more efficiently and evenly throughout the unwrapped phase compared to larger cuts.

Premium Charcoal Basket for Weber Kettle & Charcoal Grills: Heavy-duty charcoal FireBasket designed for Weber kettles, kamado-style grills, and other charcoal BBQ smokers. Perfect for indirect cooking, heat management, and high-performance backyard grilling.

Our 20 inch grill charcoal ash pan replacement part for Chargriller 5050, 5072, 2123,2223, 2823 and 5650. A perfect charcoal fire grate replace for Chargriller 200157. Charcoal tray dimension: 20"(L) x 12 3/4"(W).

【Ultimate High-Temperature Durability】- Our high-temperature powder-coated stainless steel charcoal tray is meticulously designed to withstand extreme heat, remaining unbent and unaltered. Whether it's intense grilling or prolonged smoking, it's up for the task. (Patent pending)
Wrapping Your Brisket for Optimal Results
When your brisket’s internal temperature reaches 155–170°F, you’ll enter the wrapping phase—a critical juncture that determines whether you’ll preserve that hard-earned bark or sacrifice it for accelerated cooking. Choose peach paper for breathability that maintains bark texture enhancement while advancing through the stall. Lay your brisket vertically on overlapped sheets, then apply 1/2 to 3/4 cup of liquid based on your brisket size—this liquid amount ratio balances moisture retention with bark preservation. Spritz apple cider vinegar beforehand, then add rendered beef tallow for richness. Overlap the short end, fold sides inward, and roll tightly with the seam facing down. Paper wrapping keeps your bark intact while foil accelerates cooking but softens texture—select accordingly based on your priorities. The charcoal’s radiant heat will continue to penetrate the wrapped brisket, cooking it from above while the heat circulates through convection within your grill chamber. Using hardwoods like pecan, oak, or mesquite throughout your smoking process will complement the enhanced flavors developed during the wrapping stage. Allow your wrapped brisket to continue cooking until the internal temperature reaches approximately 120°F to 125°F for optimal tenderness and doneness. A water pan placed beneath the brisket helps maintain humidity and temperature stability throughout the wrapping phase. Resting your brisket for at least 30 minutes after removing it from heat will help retain the juices that make for tender, succulent meat. Butcher paper wrapping allows brisket to breathe more and avoids over-steaming compared to full foil enclosure. Fold the sides in and roll it tight], tucking the end under to ensure the brisket stays securely wrapped throughout the remainder of the cooking process.

Designed specifically for the culinary enthusiast, our 18 paper roll dispenser is optimally crafted to handle barbecue butcher paper, thereby ensuring the authentic taste of your smoked meats is maintained. This is your ideal bbq wrapping paper for smoking

Enhance your smoking meat adventure with our 24-inch wide roll of butcher paper specially crafted to entrap the flavorful smoke, while simultaneously ensuring the release of steam for a superior taste experience

【PREMIUM NATURAL QUALITY】Made from premium virgin pulp, our butcher paper is unwaxed, uncoated, and unbleached for a natural and pure product. Ideal for grill masters seeking top-notch, food-safe paper to enhance their culinary creations.
The Secondary Cook Phase
After you’ve wrapped your brisket and it’s settled into the foil’s moist environment, you’ll shift your focus to managing the secondary cook phase—a period that demands vigilant temperature control and strategic rotation to push through the stall and reach your target doneness. Maintain your smoker at 285°F to 300°F consistently. Rotate every 30 minutes to prevent hot spots while the foil environment preserves meat moisture retention. Position the point end toward your heat source for balanced temperature distribution across both cuts. When internal temps approach 200°F, unwrap your brisket for the final hour. This critical unwrapped stage allows exterior crust development and bark formation as surface moisture evaporates. If time constraints are pressing, consider finishing the brisket in your oven or on your stovetop rather than continuing the full smoke, as smoke only adheres to the surface and the exterior crust will still develop properly with direct heat. For optimal temperature consistency during this extended cook, lump charcoal offers superior heat stability compared to briquettes, which can create temperature fluctuations that compromise your carefully managed secondary phase. Throughout this phase, lump charcoal and wood chunks will provide the high-heat, clean-burning foundation necessary to maintain your target temperature range without temperature fluctuations. Like the Slow N Sear Master Kettle, which is praised for its excellent heat retention and precise temperature control, your grill’s ability to maintain steady temperatures directly impacts the success of your secondary phase. Choosing a kettle-style grill with proven reliability ensures consistent performance throughout your extended brisket cook. To further stabilize your temperatures, adjust your grill’s vents and dampers to control oxygen supply and fine-tune your heat output throughout the cook. For maximum precision, consider upgrading to a grill with adjustable grates that allow you to raise or lower the cooking surface for exact heat control during critical temperature-sensitive phases. Monitor probe tenderness once you’ve reached 203°F to 210°F for ideal completion.


8 LB. BAG ALL-NATURAL HARDWOOD LUMP CHARCOAL FOR GRILLING, SMOKING & OUTDOOR BBQ COOKING – Upgrade your grilling experience with Mr. Bar-B-Q Lump Charcoal, made from a premium blend of 100% natural hardwoods for a clean, hot, and flavorful burn. Perfect for charcoal grills, smokers, kamado cookers, and portable BBQ setups, this high-quality lump charcoal delivers rich smoky flavor, consistent heat, and low ash for better performance and easier cleanup. Whether you're firing up a chimney starter, searing over high heat, or slow-smoking your favorite meats, poultry, seafood, or vegetables, this charcoal is the ideal choice for BBQ enthusiasts, grill masters, and outdoor cooks.

Dense Hardwood Performance: Made from dense South American quebracho blanco hardwood that burns hotter and longer than standard lump charcoal with consistent heat output and reduced wood consumption
Understanding Temperature Milestones
Temperature milestones serve as your navigational checkpoints throughout the brisket cook, each one signaling a critical phase shift that demands specific management strategies. You’ll encounter the stall at 150-165°F, where moisture rapidly exits the meat, halting temperature rise. This plateau requires spritzing every 45 minutes to prevent excessive drying while maintaining heat retention in your charcoal grill.
Wrapping at 160-175°F safeguards your developing bark while managing moisture loss through butcher paper or foil. Consider using various woods for smoke flavor to enhance the complexity of your brisket during the wrapping phase. For long beef cooks like brisket, oak and hickory provide the bold, sustained smoke profile that complements extended cooking times. Hickory chips specifically deliver a bacon-like flavor profile that adds savory depth to beef without competing with the meat’s natural richness. Post oak in particular produces thin, blue smoke that enhances beef without overpowering the meat. Avoid softwoods like pine, which create bitter residue that negatively impacts flavor. Finally, you’re targeting 203-205°F for ideal collagen dissolution and tenderness. Account for temperature variance across different brisket cuts and grill configurations. Your probe placed in the thickest section tracks these changes accurately, ensuring you don’t exceed 210°F, which risks dryness. For best results, aim for USDA Prime grade beef, which has superior marbling that maintains juiciness even at higher temperatures. The collagen converts to gelatin at these higher temperatures, allowing the brisket to hold significantly more moisture and develop the tender, juicy texture that defines perfectly cooked brisket.
Resting Your Brisket
Your brisket’s cook doesn’t truly end when you pull it from the grill—it’s just entering its most critical phase. Resting redistributes juices throughout the meat while residual heat evenly finishes the center. The ideal resting duration spans 2-3 hours, though 1 hour serves as your minimum if time’s constrained.
For your perfect resting location, wrap the brisket in foil and place it in an insulated cooler lined with towels. This method maintains temperature stability while allowing gradual cooling. If resting longer than an hour, begin with 30-60 minutes outside the cooler to initiate cooldown, then re-seal foil for continued resting. Resting ensures even cooking throughout the brisket, preventing raw or undercooked centers. Aim for your brisket’s internal temperature to reach between 195°F and 205°F before resting to ensure optimal doneness. At these temperatures, the brisket has rendered enough fat and collagen to achieve the ideal tenderness that makes smoking so effective.
Never cut immediately after cooking. Premature slicing releases juices, devastating your texture and moisture retention. Resting allows the brisket to cool down, lowering the pressure inside the meat and helping it hold onto moisture better for superior results. Similar to how a charcoal grill requires cutting off oxygen supply to safely extinguish, resting your brisket requires patience and proper containment to achieve the best outcome. Patience here determines whether you’ll achieve that perfectly juicy, tender result.
Slicing and Serving Your Perfect Brisket
Because brisket’s muscle fibers run in different directions across the flat and point sections, you’ll need to identify the grain before making your first cut. Examine the striations carefully to determine fiber orientation.
Start by slicing the flat perpendicular to its grain in 1/4-inch to 1/2-inch increments, maintaining consistent slice thickness throughout. Your ideal slicing angle guarantees you’re cutting against the grain, creating tender, chewable pieces rather than tough fibers. Slicing against the grain shortens the muscle fibers, ensuring each bite is easy to chew and maximizes the tenderness of your brisket. Using a sharp knife will help you achieve clean, precise cuts that showcase the smoke ring and demonstrate proper technique. Like searing a steak in cast iron, proper slicing technique is essential to achieving the desired texture and presentation of your final dish. For the most reliable results, use a meat thermometer to verify your brisket has reached the proper internal temperature before slicing. After slicing, allow the meat to rest briefly to redistribute the juices throughout each piece, enhancing flavor and texture.
Separate the point from the flat along the fat layer, then rotate it 90 degrees to align with its changed grain direction. Slice accordingly, adjusting thickness based on doneness—thicker for overcooked sections, thinner for undercooked areas. Letting the brisket rest after cooking allows residual heat to finish the cooking process and ensure even carryover cooking throughout the meat.
Arrange your slices neatly on a platter, showcasing the smoke ring and seasoned bark. Bisect lean from fatty sections to offer serving variety for your guests.