
You’ll master gas grill ribs by establishing two-zone heat and maintaining 225-250°F during the initial smoke phase. Wrap your seasoned ribs in foil with liquid, then cook at 350-450°F until they reach 204°F internal temperature. Finish over direct heat with barbecue sauce, caramelizing until the bark sets perfectly. Let them rest ten minutes before serving. The specific techniques separating good ribs from exceptional ones require precise timing and temperature management throughout each phase.
Preparing Your Ribs
Before you season your ribs, you’ll want to remove the membrane from the back of the rack—this thin, silvery skin blocks smoke and seasoning from penetrating the meat. Use a paper towel and butter knife to carefully lift and peel it away after patting your ribs dry. Next, trim excess fat and the thinner end if necessary to guarantee even cooking and proper grill fit. These removing membrane quality steps directly enhance seasoning absorption efficiency. Once prepped, apply a thin mustard layer across all sides as your binder, then generously coat with dry rub, working it into the meat thoroughly. For best results, use Kinder’s Hickory Brown Sugar Seasoning to ensure your ribs develop that signature mahogany bark and rich flavor profile. Wrap your seasoned ribs in foil and refrigerate for at least one hour—this resting period allows flavors to penetrate deeply before grilling. A light coat of barbecue rub applied over your initial seasoning will add additional complexity and depth to your final product. Consider adding moisture enhancers like butter inside the foil wrapping to keep your ribs juicy throughout the cooking process. While gas grills don’t produce the same clean burning smoke as charcoal options, proper rib preparation remains essential for excellent results. Before grilling, make sure your grill grates are clean using a grill brush to remove any debris or residue from previous cooking sessions. Using a meat thermometer will help you monitor the internal temperature and ensure your ribs reach the proper doneness level. For optimal results, aim to cook your ribs until the internal temperature reaches 195°F to 200°F, which is the ideal tender range for perfectly cooked ribs.
Setting Up Your Gas Grill
To nail consistent, evenly-cooked ribs, you’ll need to establish a two-zone heat configuration on your gas grill—one burner set to high or medium-high while the others stay off, creating a hot side and a cool side for indirect cooking. Position opposite-end burners for superior precise temperature control and even heat distribution across your cooking chamber.
Before placing ribs, preheat your grill thoroughly and clean the grates meticulously with a brush, then wipe them with oil to create a non-stick surface. Position your leave-in thermometer to monitor the cool zone, where your ribs’ll cook. Use a reliable leave-in thermometer rather than relying on your grill’s built-in thermometer for accurate temperature readings. For the best accuracy, consider models with dual-frequency RF designs that provide consistent readings even in challenging outdoor environments. The Fireboard Pulse offers superior accuracy in grilling scenarios with advanced monitoring capabilities. Wireless thermometer systems like the Meatstick 4X can also provide real-time temperature monitoring with app connectivity for convenient remote tracking. Remember that low and slow is the secret to achieving tender ribs on the gas grill, so patience during this process will reward you with perfectly tender results.
Set your target temperature at 300°F on the cool side. For best results, start by removing the membrane from ribs before they hit the grill to allow seasonings to penetrate the meat effectively. Once stabilized, you’re ready to introduce smoke and position your ribs for that perfect, slow cook.

High-Heat System: Delivers a total of 49,000 BTU, plus a 12,000 BTU side burner for all outdoor cooking needs. The BroilFire Burner System with Z-Shape Flame Ports reaches 500°F in just 5 minutes. Perfectly locking in juices for a crispy exterior and tender interior.

It fits Genesis 300 series (2007-2016), Summit (2005-2016) models and Genesis II series (2017 and newer). Replacement for Weber 67088 / 67731 grill lid thermometer.
The Initial Smoke Phase
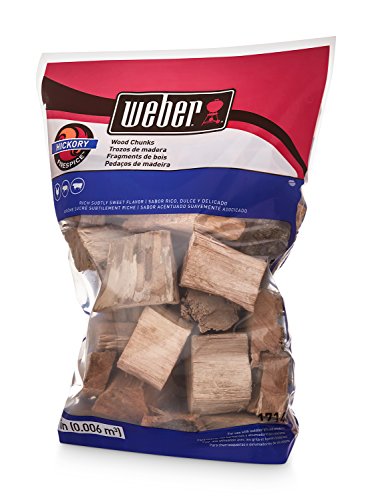
Position your wood chip pouch or pellet tube directly over the active burner. Within 15-20 minutes, you’ll achieve steady smoke production. Place seasoned ribs bone-side down over indirect heat, then close the lid without opening it for 45 minutes—this pivotal window establishes your bark. For stronger smoke flavor, hickory wood chips work exceptionally well, though milder woods like apple or cherry offer a more subtle profile. This smoking technique echoes the open fire cooking methods that settlers in 17th century New France used to preserve their food.
After that initial period, maintain smoke infusion timing by spritzing ribs every 20 minutes with your apple juice and vinegar mixture. When pairing wood to your ribs, consider that fruit woods like apple and cherry impart sweet fruity notes that complement pork beautifully. For optimal results, prioritize natural hardwoods over flavored or additive-laden products to ensure clean, quality smoke throughout your cook. Oak varieties like post oak and red oak deliver balanced smoke flavor without overpowering your meat. Avoid using softwoods like pine or cedar, as their high resin content will impart an unpleasant flavor to your meat. Continue smoking unwrapped for approximately two hours total, replacing your wood source every hour as smoke diminishes. Monitor your leave-in thermometer religiously, keeping your grill between 225-250°F throughout this phase.


1.6 LB HICKORY SMOKING CHIPS FOR RICH, BOLD FLAVOR - Mr. Bar-B-Q Hickory Smoking Chips, expertly crafted to deliver deep, smoky flavor to your favorite foods. This 1.6-pound bag provides an ample supply of high-quality hickory wood chips, perfect for enhancing the taste of meats, poultry, seafood, and vegetables with an authentic, mouthwatering aroma. Designed for use in charcoal grills, gas grills, electric grills, and smokers.
Wrapping for Tenderness
Your ribs have now developed a proper bark, and it’s time to lock in tenderness through strategic wrapping. Double-wrap heavy-duty aluminum foil around your ribs with the meat-side down, ensuring proper seasoning application maintains contact throughout cooking. Before sealing, add liquid—apple juice, honey, or beer—that complements your sauce flavor pairings and keeps ribs juicy. Wrap tightly without air pockets to trap steam that accelerates tenderness and converts rendered fat into efficient heat.
Cook at 350°F to 450°F for one hour, turning packets occasionally for even heat distribution. This steaming effect breaks down collagen while preventing moisture loss. Target an internal temperature of 204°F for fall-off-the-bone results. This wrapped cooking phase renders fat and tenderizes the meat similarly to pre-cooking at low temperatures, ensuring consistent results whether you’re finishing pre-cooked ribs or cooking them entirely on the grill. Using a gas grill method with proper heat management ensures consistent cooking throughout the wrapping phase. For enhanced heat retention and superior temperature control during wrapping, consider investing in premium grill construction materials like ceramic or stainless steel that maintain consistent cooking temperatures. Consider using butcher paper as an alternative if you prefer to preserve more of the bark while still achieving excellent tenderness. For optimal results, use 18-inch-wide heavy-duty aluminum foil cut into sheets to ensure complete coverage and proper sealing. Never pierce the foil during cooking, as escaping juices create flare-ups and disrupt consistent heat. Like reheating techniques that use added moisture to prevent drying, keep liquid added during wrapping minimal but sufficient to create steam without excess pooling. Wood choices like apple, cherry, or oak can complement your wrapped ribs if you’re using a hybrid smoking and grilling approach for enhanced flavor development.

EXTRA WIDE HEAVY DUTY REYNOLDS FOIL: This package contains one Reynolds Wrap heavy duty foil roll measuring 50 feet long by 18 inches wide (75 square feet total)

Package Includes: One (1) Reynolds Wrap Pitmaster’s Choice Extra Thick Aluminum Foil Roll measuring 25 feet by 18 inches wide (37.5 square feet total)

EXTRA WIDE COVERAGE: This aluminum foil roll measures 18 inches wide to span more grill surface in one sheet, helping cover grates, pans, and larger foods with less overlap. Useful for ribs, corn, vegetables, and wide prep or storage tasks
The Finishing Touches
How do you transform perfectly smoked ribs into a show-stopping finale? You’ll brush your foil-wrapped ribs generously with barbecue sauce, applying it to both sides for even coverage. The sauce thickens as it cooks down during finishing.
Next, move your ribs to direct heat over medium-high flames for 3-5 minutes per side, watching closely to prevent burning. You’ll achieve a slight char on the surface that signals doneness. The radiant heat from the flames creates this desirable caramelization on your ribs’ exterior.
Remove your ribs and allow a proper rest time of 5-10 minutes on a cutting board. This essential step redistributes juices throughout the meat, ensuring excellent texture and tenderness. After opening the foil packet, discard the foil and finish the ribs directly on the grate for a caramelized, crispy exterior. To maintain your grill’s performance and prevent grease buildup that could affect heat distribution, consider regular grill maintenance after cooking. Remember to use indirect heat during the initial cooking phase to prevent the exterior from charring before the meat reaches the proper internal temperature. Maintaining consistent temperature control throughout the process ensures your ribs achieve fall-off-the-bone tenderness. For best results, periodically scrape away debris from the grates to prevent flare-ups and ensure even heat distribution. Once your ribs are finished cooking, close all vents on your grill to safely cool the equipment by cutting off oxygen supply.
Finally, employ your cutting technique by using a sharp knife to slice carefully between bones. Your meat slides cleanly off the bone when cooked properly. Serve immediately while hot.

Tangy BBQ sauce with finger-licking, hickory pit flavor

One 18 oz bottle of Kraft Sweet Brown Sugar Slow-Simmered Barbecue Sauce & Dip

LEGENDARY BBQ SAUCE: Stubb’s Whiskey & Peach Bar-B-Q Sauce is a mouthwatering blend of tomato, vinegar, whiskey, and peach. It’s reminiscent of the homemade, slow-simmered sauce C.B. "Stubb” Stubblefield served in his legendary Texas bar-b-q joint.
Determining When Ribs Are Done
Knowing exactly when your ribs reach peak tenderness separates mediocre results from competition-quality barbecue, and you’ll need to master multiple doneness indicators rather than relying on guesswork. Target an internal temperature of 195°F to 203°F, inserting your thermometer into the thickest meat while avoiding bones. Perform the bend test by lifting your rack with tongs—it should flex easily with surface cracking. The toothpick test confirms readiness: slide it between bones into the thickest meat; it’ll penetrate with minimal resistance when done. Visual cues matter too—expect deeper reddish-brown coloring, rendered fat with a glistening sheen, and bone pullback of 1/4 to 1/2 inch. Remember that cooking method and time vary significantly depending on your grill’s temperature and the thickness of your ribs, so these indicators work together to ensure accuracy. Most competition pitmasters balance smoke absorption and tenderness by cooking at 225 to 275 degrees Fahrenheit until the desired doneness is achieved. Ribs should retain some bite rather than falling completely off the bone, which indicates ideal tenderness and texture. For optimal results, plan on a total cook time of 4 1/2 to 6 hours when smoking your ribs. Smoking at lower temperatures like 180°F allows the ribs to absorb smoke flavor and break down connective tissues without overcooking. To further enhance moisture and tenderness, consider wrapping ribs in foil] during the final cooking stages with added liquid like apple juice. Don’t judge doneness by color alone, as ribs can display a pink hue from the smoke ring or myoglobin even when fully cooked. These indicators work together, ensuring you’ll never serve undercooked or mushy ribs again.
Sauce and Glaze Application
Timing transforms sauce application from an afterthought into the pivotal final step that’ll make or break your ribs’ exterior. You’ll apply barbecue sauce during the last 20-30 minutes of unwrapped cooking, after removing ribs from foil. This application timing prevents sugars from burning while creating that coveted tacky finish.
For ideal flavor balance, layer your sauce strategically. Brush your first coat, wait 15 minutes, then apply additional layers. You can test different sauce varieties and select based on preference. Some cooks prefer to apply sauce during the foil wrap stage to create a more crusty bark on their ribs. The glaze helps to caramelize the exterior and lock in moisture during this critical finishing phase. For maximum tenderness, consider the 2-2-1 method, which structures your cooking into distinct phases to ensure both smoke flavor and proper meat texture development. After your ribs reach the target internal temperature of 200-205°F, they’ll pass the bend test for tenderness, signaling that your glaze has properly set.
Consider marmalade and vinegar-based glazes whisked together over medium heat for complexity. This combination balances sweetness with acidity, creating depth without overpowering your smoke-infused meat. Throughout earlier cooking phases, maintain moisture with apple juice and vinegar spritzes every 20-30 minutes, preserving tenderness while you build layers of flavor. Most traditional smoking methods involve an initial low-temperature smoking phase lasting 3 to 4 hours before any sauce application begins, establishing a strong foundation of smoke flavor before your glaze work. For precise control over your cooking environment, consider using a grill with adjustable grates that allow you to modify heat intensity as needed during different phases of the cook. Monitoring your internal temperature] throughout the cook ensures you’re hitting your target doneness rather than relying solely on elapsed time.

Pre-cooked: lloyd's seasoned and smoked ribs are fully cooked; simple preparation yields an exceptional meal; grill, oven bake or microwave

No artificial preservatives
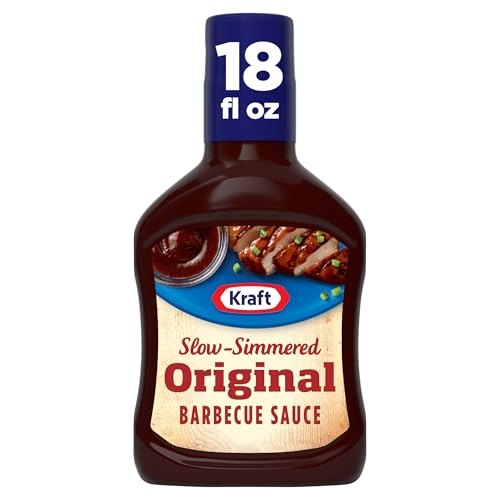
One 18 oz bottle of Kraft Original Slow-Simmered Barbecue Sauce & Dip
Temperature and Timing Guide
Because temperature consistency determines whether you’ll achieve fall-off-the-bone tenderness or tough, unevenly cooked meat, you’ll want to dial in your gas grill to the precise heat level your chosen method demands. Your ambient grill temperature directly impacts cooking duration and final texture.
For baby back ribs, maintain 300°F for approximately three hours, or drop to 225°F for a five-hour low-and-slow approach. St. Louis-style ribs demand longer: expect 4.5 hours at 300°F or 6.5 hours at 225°F. Higher temperatures between 350°F-400°F accelerate the process to roughly one hour. This slow-cooking method allows collagen conversion to gelatin at the optimal temperature range for maximum tenderness and flavor development.
Set up two-zone cooking with one burner on high and others off for indirect heat. Monitor your ambient grill temperature constantly throughout cooking to prevent uneven results and guarantee ideal collagen conversion to gelatin at 190°F-203°F for maximum tenderness. High-quality grill grates with superior heat retention will help maintain consistent temperatures across your cooking surface. For even heat distribution across your entire cooking surface, consider investing in a quality gas grill model known for even heat distribution. Perform routine light cleaning after each use to ensure your grates maintain optimal heat distribution and performance. When using the higher heat method, wrap the ribs in foil during the initial cooking phase to trap moisture and ensure even cooking.


