You’ll master perfect BBQ beef ribs by dialing in your grill to 225-275°F before cooking begins. Select Prime-grade beef with vibrant marbling and remove the bone-side membrane for better smoke penetration. Use indirect heat with hardwoods like hickory or oak, then wrap your ribs in foil with apple cider vinegar halfway through cooking. Apply your sauce during the final thirty minutes to develop that coveted caramelized bark. The technique’s nuances—from temperature monitoring to strategic resting—separate good ribs from exceptional ones.
Grill Preparation and Temperature Setup
You’ll want to dial in your grill’s temperature before your ribs hit the grates, and your setup depends on which equipment you’re working with. For charcoal blend selection, preheat to 250°F using indirect cooking methods. If you’re using a smoker, set it to 225°F initially with oak wood for optimal fuel source maximization. Gas grill users should heat to 356°F with the middle burner off, creating an indirect zone. For traditional charcoal setups, maintain one side at 275°F low while keeping the other side completely off. Regardless of your equipment choice, focus on establishing a two-zone cooking area. This indirect heat configuration prevents flare-ups and guarantees even, low-and-slow cooking that transforms tough beef ribs into tender, smoky perfection. A leave-in probe thermometer is essential to track the temperature throughout the cooking process and ensure your ribs reach the perfect doneness. Never rely solely on cooking time, as meat temperature varies depending on rib size and grill conditions, so always monitor internal temperature to achieve consistent results. Consider using an infrared surface thermometer to identify hot zones on your grill grates, ensuring you position your ribs in areas with the most consistent heat for even cooking. Charcoal grills with adjustable dampers allow you to maintain steady heat levels and fine-tune airflow for precise temperature control during long cooking sessions. The burning charcoal produces intense radiant heat that cooks your ribs directly while the hot grates create sear marks through conduction. Once your grill reaches the target temperature, avoid opening the lid frequently, as this releases valuable heat and smoke that are crucial for developing rich smoky flavor in your beef ribs. Keep the bottom vents fully open to ensure good airflow while adjusting the top lid damper to modulate heat levels throughout your cook.

Large Display: Features a 2 3/8 inches large face for clear visibility; Stem length of 2 7/8 inches enhances accessibility; Enables easy classification of food temperatures in various cooking environments
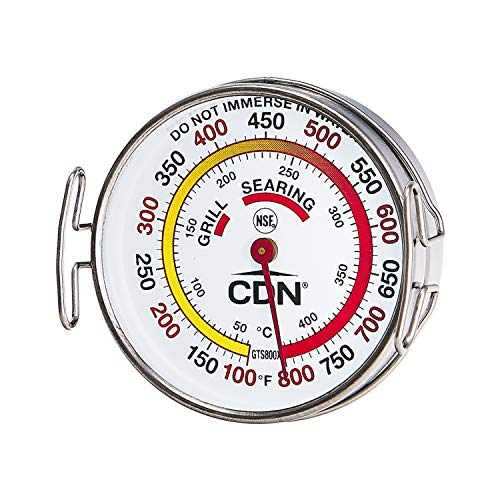
ACCURATE TEMPERATURE ZONES. The CDN GTS800X Grill Surface Thermometer features a color-coded scale that allows precise monitoring of temperature zones, providing optimal control over your grilling experience.
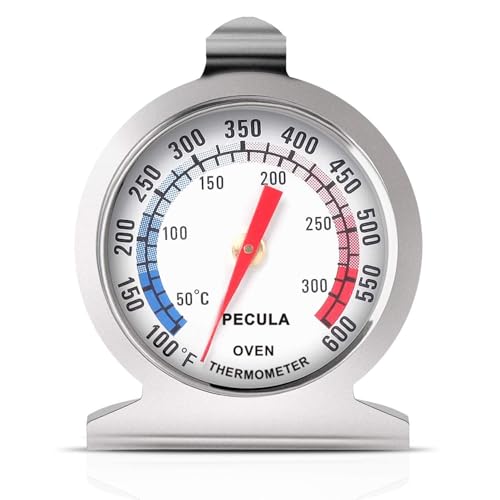
Clear Dial Display: PECULA's analog oven thermometer delivers precise, instant readings from 50–300°C / 100–600°F. Its dial features clear dual-zone blue and red indicators for at-a-glance temperature monitoring—perfect for ovens, grills, smokers, and deep fryers, ensuring you master every bake, roast, or fry.
Selecting and Preparing Your Ribs
With your grill dialed in and ready, the real magic starts with choosing the right ribs. You’ll want to select back ribs or flanken-style cuts for grilling—they cook faster and won’t demand excessive smoke time like short ribs do. Look for Prime-grade beef with vibrant dark red meat and visible marbling throughout.
Inspect the bone quality carefully; you’re seeking uniform thickness and sturdy, clean bones without discoloration. Choose racks with a high meat-to-bone ratio and minimal hard fat deposits. Beef back ribs have meat that tends to sit between the bones rather than on top, making them perfect for fast cooking over high heat. Since back ribs require simple seasoning due to their strong beefy flavor, you can skip complicated marinades and let the meat speak for itself.
For meat trimming, remove the silver skin and exterior fat from the meat side. On flanken-style ribs, avoid over-trimming to guarantee that thin meat layer for marinades. Many pitmasters also choose to remove the membrane from the bone side to improve smoke penetration and tenderness. Some cooks apply mustard as a binder before seasoning to help dry rubs stick to the meat surface. Removing the membrane allows the ribs to better absorb smoke flavor during the cooking process. After applying your rub, let the ribs rest to allow the seasoning to penetrate the meat before they hit the grill. A classic rub might include salt and pepper along with garlic powder and onion powder for a well-rounded flavor profile. Uniform trimming certifies even cooking across the entire rack, delivering consistent results on your grill.

Includes one 40 ounce package of LLOYD’S Signature Smoked Baby Back Ribs in Barbecue Sauce

One boneless beef ribeye steak weighing between 0.5 and 1.2 pounds

ORGANIC, GRASS-FED, REGENERATIVE: Our ribeye steaks are USDA Organic, 100% grass-fed & finished, sourced from regenerative farms, verified by Land to Market,100% pasture-raised, free range, humanely raised with no feedlots EVER. Always fresh, never frozen. Non GMO and never contains antibiotics or added growth hormones. Always fresh, never frozen.
The Initial Smoking Phase
Once your ribs are trimmed and ready, it’s time to set up your smoker for the initial smoking phase—the foundation of perfectly cooked beef ribs. Preheat your smoker to 275°F, arranging ribs bone-side down on grates with meat facing up. Place a water pan in the cook chamber to maintain moisture and aid smoke absorption.
Select your wood types strategically. Bourbon barrel wood pairs naturally with beef, while cherry and black walnut deliver complementary flavors. These options provide moderate smoke flavor intensity without overpowering the meat. For best results, choose hardwoods like hickory, apple, cherry, or pecan to infuse authentic wood-fired flavor into your beef ribs. Avoid softwoods like pine and cedar, which contain resins that can impart bitter, unpleasant flavors and burn too quickly for low-and-slow cooking. For the most tender and moist results, consider applying a rub to both sides of the ribs before the smoking phase begins.
Maintain your smoker’s temperature consistently, keeping the lid closed except during hourly mopping sessions. Spritz ribs with beef stock or apple cider vinegar to enhance moisture retention. After three hours, your ribs should reach an internal temperature of 160°F to 165°F, signaling readiness for the next phase. For extended smoking sessions like beef ribs, wood chunks are preferred over chips because they burn longer and provide more consistent smoke. Pair quality wood with natural hardwood charcoal that burns clean and produces minimal ash for optimal temperature control throughout your smoking session. Among hardwood choices, red oak and post oak stand out for their strong yet balanced smoke flavor that complements beef without overwhelming the meat’s natural taste. Consider blending woods such as oak with a fruit wood like apple to adjust smoke intensity and add subtle sweetness to your beef ribs.

THREE WOOD FLAVORS: Includes Hickory, Cherry, and Oak hardwood chunks for bold, sweet, and balanced smoke flavor profiles.

RICH, AUTHENTIC SMOKE FLAVOR: Our cherry wood chunks arrive naturally-cured and dry, so they ignite easily and deliver mellow, sweet and fruity wood-fired taste; smoking wood chunks enhance the overall flavor of meats, ribs, vegetables, poultry and fish

AUTHENTIC TEXAS BBQ SMOKE - Post oak is the signature wood of Texas barbecue and the preferred choice for brisket. These premium post oak wood chunks produce a clean, mild smoke that enhances meat flavor without overpowering it.
Wrapping and Mid-Cook Techniques
After your ribs’ve completed the initial smoking phase and reached that critical 160–165°F internal temperature, it’s time to move into the wrapping stage—a crucial step that’ll accelerate tenderization while locking in moisture and flavor. Lay your ribs meat-side down on heavy-duty foil, then apply added moisture and flavor options like apple juice, honey, or a BBQ butter bath. Use the double wrapping technique for durability and leak prevention, ensuring no air pockets remain. Roll the sides tightly and fold the top end twice, sealing everything securely. Wrapping tightly with no air pockets will hold in the heat and moisture essential for optimal results. If you prefer breathability, pink butcher paper works excellently, requiring minimal added moisture to maintain bark quality, and should be monitored every 15 minutes during the wrapping phase for optimal tenderness. Increase your temperature to 300°F post-wrap to continue the tenderizing process efficiently. This hot and fast method significantly reduces overall cooking time compared to traditional low and slow approaches. Similar to brisket smoking, wrapping helps push through the temperature stall that occurs when moisture evaporation slows the cooking process. Some pitmasters employ the 3-2-1 method with stages of unwrapped and wrapped cooking, often involving an initial smoke followed by wrapping with sauce for additional hours before resting.

EXTRA WIDE COVERAGE: This aluminum foil roll measures 18 inches wide to span more grill surface in one sheet, helping cover grates, pans, and larger foods with less overlap. Useful for ribs, corn, vegetables, and wide prep or storage tasks

Includes one 125 square foot roll of heavy duty aluminum foil
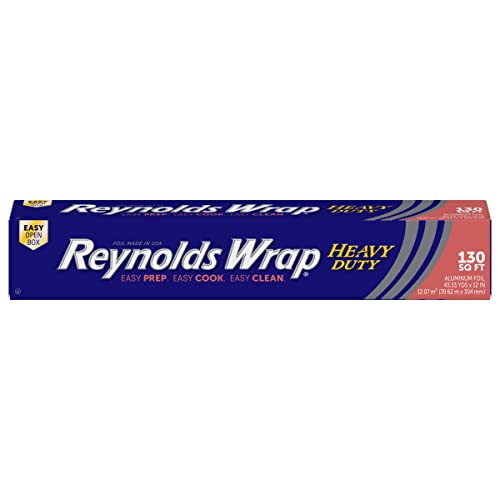
Package Includes-One (1) Reynolds Wrap Heavy Duty Aluminum Foil Roll measuring 130 feet long by 12 inches wide (130 square feet total)
Saucing and Achieving the Perfect Bark
The final hours of your cook will determine whether you’re pulling mahogany-colored ribs with a spectacular bark or ones that look underwhelming and taste one-dimensional. You’ll apply sauce only after achieving that deep mahogany color, typically during the final hours when your ribs reach 170°F internal temperature. Focus on adjusting sauce consistency to coat without drowning your meat—a light application prevents burning while maximizing caramelization.
For ideal bark development, use an extra 1/3 to 1/2 cup of rub per rack. Spritz sparingly with cider vinegar during the final 2-3 hours, avoiding excessive moisture that compromises bark formation. Since beef ribs shrink about 30%, select larger meaty ribs to ensure you have substantial portions after cooking. Mix your bourbon BBQ sauce with honey and butter to enhance caramelization and create deeper flavor complexity. Before placing ribs on the grill, brush them with olive oil to help the rub adhere and promote better bark formation. Cook meat-side up at 285°F for 8-9 hours. Just as with smoking brisket, maintaining precise temperature control is essential for developing the ideal bark without overcooking the meat. Managing your airflow through vents properly helps maintain stable temperatures throughout the long cooking process. Wrapping ribs in butcher paper can help retain moisture while still allowing bark development, similar to the technique used for smoking brisket at optimal temperatures. After removing from the grill, resting the meat for at least an hour allows juices to redistribute throughout the ribs for maximum tenderness. The combination of proper rub application, strategic spritzing, and timed saucing creates that coveted textured exterior that defines championship ribs.

TEXAS-MADE: Crafted by BBQ expert Jess Pryles, this activated charcoal rub delivers bold flavor for steak, brisket, and burgers. Proudly made in Texas with premium ingredients for authentic grilling.
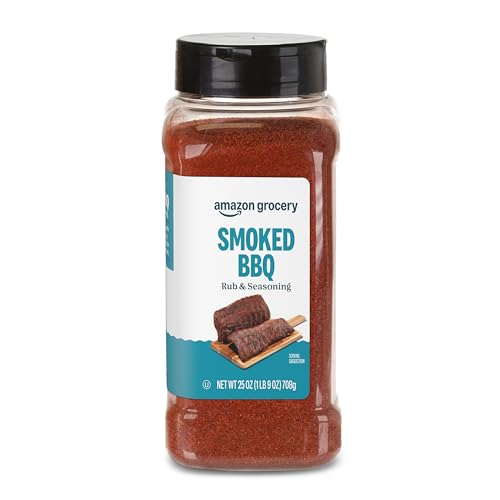
One 25 ounce container of Smoked BBQ Rub & Seasoning

Mouthwatering seasoning best paired with prime rib.
Testing Doneness and Resting Your Ribs
How do you know when your beef ribs have truly reached perfection? Insert your meat thermometer between two ribs in the thickest section, avoiding bone contact—proper probe positioning guarantees temperature accuracy. You’re targeting 203°F, which signals complete collagen breakdown and ideal tenderness.
Once you’ve hit that mark, don’t rush. Let your ribs rest unwrapped in the smoker for about an hour. This resting period allows carryover cooking to stabilize, redistributes juices throughout the meat, and resets your bark quality without compromising texture. Just as with other large cuts, internal temperature is the most reliable indicator of doneness rather than visual cues or predetermined cook times. Remember that color alone is not a reliable indicator of doneness—focus on your thermometer reading as the primary measure of success.
If you’re checking multiple spots, reposition your probe to locate cooler centers within thick ribs. Consistency between readings confirms uniform doneness. During longer cooks, be aware that meat can experience a stall phase where the internal temperature plateaus due to evaporative cooling, which is completely normal and requires patience. The rest period post-smoking is essential to retain juices and ensure your meat stays tender and flavorful. After resting, slice the ribs against the grain to maximize tenderness and ensure each bite delivers the perfect texture. Accurate temperature monitoring using a quality meat thermometer is critical whether you’re smoking ribs or applying other techniques like reverse searing. This methodical approach eliminates guesswork and delivers restaurant-quality results every time.