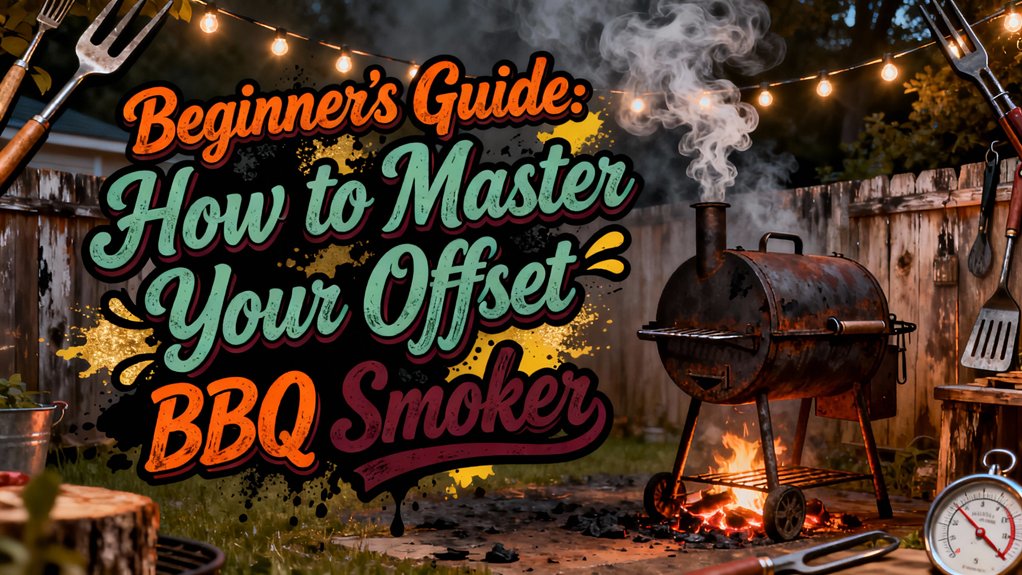
You’ll master your offset smoker by learning its two-chamber design, then seasoning it thoroughly with oil at 250-275°F. Build a solid coal bed using quality lump charcoal and seasoned hardwood. Control temperature through precise damper adjustments and airflow management—this is where competition-level results happen. Place meat away from the firebox, monitor internal temps with probe thermometers, and replenish wood consistently. The real magic emerges when you combine these fundamentals into a seamless smoking rhythm.
Understanding Offset Smoker Design and Function
Before you can master your offset smoker, you’ve got to understand how it actually works. Your offset smoker features two chambers: a firebox where fuel burns and a cooking chamber where food receives indirect heat. They’re connected by an opening that channels smoke and hot air across your grill grate toward the smokestack exit.
Material selection significantly impacts performance—steel pipes or propane tanks serve as durable, heat-conductive foundations. Your insulation performance depends on proper construction and wall thickness, which maintains consistent temperatures throughout cooking sessions. Dampers installed on the smoker allow you to regulate airflow and temperature for optimal smoking conditions. For additional smoke flavor enhancement, you can integrate smoker box attachments into your offset design to introduce wood-chip smoke alongside your primary fuel source.
Heat flows horizontally from the firebox through the cooking chamber, creating a natural temperature gradient. This design prevents direct flame exposure while delivering authentic smoke flavor. The primary cooking mechanism relies on radiation and convection as heat transfers through the chamber to cook food indirectly. The temperature differences between the firebox end and the far side of the food chamber can be compensated for with proper grate placement and airflow management. Different offset designs like reverse-flow and free-flow configurations offer distinct advantages in heat distribution and flavor control. Mastering your offset smoker requires practicing low and slow cooking techniques to achieve tender, flavorful meat with a rich smoky bark. Offset smokers are particularly valued for their flavor quality compared to other smoker types. The smokestack positioned at the chamber’s top draws air through the system, maintaining ideal airflow and temperature control.

EASY ASH MANAGEMENT: Unlike other charcoal grills, the firebox on this grill includes an ash cleanout pan and cool-touch handle for safer cleanup

Six height-adjustable cooking grates with a total of 1176 Square inches of cooking space

Are you an offset smoker who lives for stick burning, firebox management and the thin blue smoke? Stick Burner
Preparing Your Smoker: Initial Setup and Seasoning
Once you’ve grasped how your offset smoker channels heat and smoke, you’re ready to prepare it for its first cook—and this step’s critical because you’re fundamentally building a protective patina that’ll enhance flavor and prevent rust for years to come.
Start with thorough residue cleanup tips: remove all packaging, ash, and manufacturing debris from your firebox and cooking chamber. Wipe interior surfaces with mild soap and water, then dry completely.
Next, master oil application techniques by coating bare metal with high smoke point oil using a cloth or brush. Apply 2-3 thin, even layers across the firebox, chamber, and grates—never the exterior. Run 2-3 seasoning burns at 250-275°F, reapplying oil between cycles. Monitor temperature with a probe thermometer, maintaining thin blue smoke throughout. For precise temperature readings during your seasoning burns, consider investing in an instant-read thermometer to catch fluctuations quickly and ensure optimal results. Durable pit thermometers from trusted manufacturers work well for various grill types and ensure accurate ambient temperature monitoring throughout extended cooks. Repeating the seasoning cycle multiple times creates a durable non-stick coating that aids in cooking and prevents rust. This foundation transforms raw metal into a seasoned cooking surface. Before your first full cook, consider placing fire lighters on the charcoal grate to establish proper airflow and heat distribution patterns. After each seasoning burn, close the smoker lid and cut off the oxygen supply by closing all vents to allow the coals to cool safely and protect your grill’s interior.
Mastering Fire Building Techniques
Building a proper fire separates amateur pitmasters from those who consistently produce competition-level barbecue, and you’ll quickly discover that how you establish your coal bed and manage fuel directly determines temperature stability, smoke quality, and ultimately, the flavor of your finished product.
Start by loading your chimney starter with quality lump charcoal, waiting 10-15 minutes until red-hot and ashed over. Dump 1-2 chimneys into your firebox’s back section, creating proper coal bed layering that supports sustained heat without frequent reloading. With your intake damper properly positioned, you can control air flow to determine the exact fire height needed for your target temperature. Always preheat the grill with vents properly adjusted to ensure even temperature distribution across your cooking chamber.
Position ideal wood chunk sizes appropriately—larger pieces for substantial smokers, smaller for compact models. Place unlit wood on the cooler side to preheat, then add preheated logs every 45-60 minutes when previous logs burn to embers. For offset smokers, seasoned hardwoods like oak and hickory provide long, steady burns with balanced smoke flavor compared to softwoods. This cycle maintains consistent temperature while minimizing harsh white smoke, delivering the clean, efficient burn that separates exceptional barbecue from mediocrity. Kiln-dried split wood provides more consistent results and cleaner burning throughout your cook.

LARGE CAPACITY CHARCOAL CHIMNEY: Holds up to 6.6 pounds of charcoal, briquettes, or meat-smoking hardwoods such as hickory or applewood for outdoor charcoal grills, fire pits, and camping
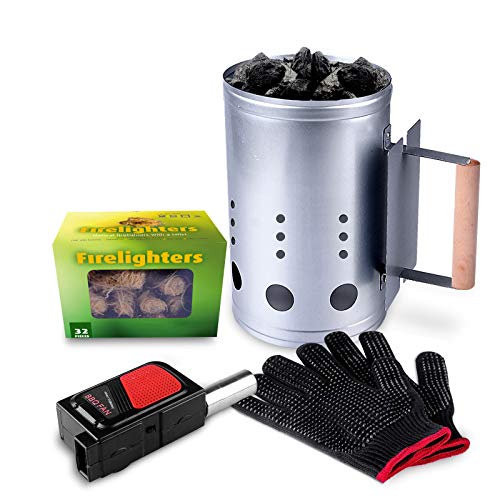
🔥HOMENOTE fireplace accessories include Charcoal Chimney Starter, Lighter Cubes, Portable Air Blower and heat resistant mitts, quickly produce hot coals, make your fireplace, BBQ to quickly produce hot coals for cooking

Porcelain-Enamel coating for Superior quality: double-enameled construction withstands extreme heat from while resisting deformation. Protects against thermal shocks and corrosion for long-term durability. simplifies cleaning
Achieving Temperature Control and Stability
You’ll find that mastering temperature control separates consistent results from frustrating fluctuations, and it all hinges on understanding how airflow, fire size, and smoker-specific variables interact to create the stable 250–275°F environment where competition-level barbecue happens.
Your startup procedures begin with establishing a baseline: fire one chimney of lit charcoal with vents wide open for thirty minutes. This reveals your smoker’s thermal signature and informs fuel load consistency going forward. Use the V-grate method, rotating your fire basket ninety degrees to concentrate coals and extend intervals to 28–30 minutes between splits. Many pit masters find that automatic temperature controllers with fan systems can further stabilize your heat output, though manual damper adjustments remain equally effective for those who prefer hands-on fire management. Maintaining a 100°F difference between your firebox and cooking chamber probes ensures optimal heat distribution throughout the smoking process.
Preheat logs before adding them—cold wood smothers flames and produces dirty smoke. Monitor grate temperature five minutes after splits to catch fluctuations early. For stationary offset smokers, consider pairing your setup with a heat-resistant tabletop nearby to keep monitoring equipment and fuel organized. For those seeking advanced wireless monitoring capabilities, explore Wi-Fi enabled thermometers that offer app-based temperature tracking similar to modern electric smoker systems. Consider pairing your offset smoker with remote thermometers like the Lavatools Javelin to achieve precise temperature monitoring from a distance. This disciplined approach transforms unpredictable equipment into a reliable instrument.

Fits Almost Any Grill with Easy Installation – Choose the Universal version for nearly all grills and smokers (Not for BGE), including Kamado Joe, other Kamado ceramic grills, Weber Kettle, Weber Smokey Mountain, Bronco, and offset smokers; select the BGE version for Big Green Egg or Primo XL Oval grills. Easily replace your existing dial gauge. Upgrade your grills or smokers with the ProTemp S1, turning your traditional grill or smoker into a high-tech cooking machine.

【5G Wi-Fi & Bluetooth5.0 Mode】Inkbird smoker controller fan supports two networking methods;can monitor the grill through smartphone; one smartphone can control multiple smoker controllers at the same time, or multiple people can monitor one smoker controller.

DOES NOT FIT Big Green Egg, Ceramic, or Kamado style smokers, gas grills or electric ovens. Please order our Ceramic version if you have those smokers. Fits Many Drum, Barrel, Cabinet and Offset Style Charcoal Grills and Smokers: Weber Smokey Mountain - All sizes Char-Griller offset & barrel Char-Broil charcoal grills and smokers Most drum smokers - Ugly and otherwise.
Producing Quality Smoke for Superior Flavor
With temperature stability established, your smoker’s output only matters if the smoke itself carries clean, desirable flavor—and that starts with understanding wood quality and combustion science.
You’ll recognize quality smoke by its light blue or clear appearance. Heavy white smoke signals incomplete combustion, tainting your meat with harsh, acrid flavors. This stems from two controllable factors: wood moisture management and fire oxygen regulation.
Kiln-dried wood under 15% moisture content burns cleanly and consistently. Preheat your logs on the firebox front before moving them to the coal bed—warmed wood combusts faster, minimizing harsh smoke production. This commitment to patience and skill separates BBQ purists who achieve superior flavor from those settling for mediocre results. Different fire management styles like the “jerky method” with tightly stacked logs or the “Z-shaped pattern” approach can significantly impact how efficiently your wood combusts and flavors your meat. For optimal results, prioritize natural hardwoods over treated or additive-laden products that compromise both flavor and burn quality. Among hardwoods, post oak and red oak are particularly prized for their balanced smoke flavor and slow, consistent burn that enhances beef and pork without overpowering the meat. Selecting the right wood species—such as hickory or oak—ensures you’re pairing the wood’s intensity and flavor profile with your meat for the best smoking results. While hardwoods excel in offset smokers, briquettes offer consistent medium heat and long burns ideal for low-and-slow cooking applications. Popular hardwoods like apple and cherry impart sweet fruity notes ideal for poultry and pork, while mesquite delivers intense earthy heat for steak.
Manage oxygen through your dampers and vents strategically. Excessive restriction creates acrid smoke and suffocates your fire, while proper airflow maintains hot, clean combustion. Position your fire closer to vents, away from preheating wood, optimizing the natural updraft that keeps your burn efficient and flavorful.
Adding and Managing Your Meat
Once your fire’s stabilized and you’re producing that clean, light blue smoke, it’s time to introduce the star of your cook. You’ll add unwrapped meat during this initial smoky phase to maximize flavor absorption. Position your brisket on the upper grate with the fat cap orientation facing upward—this shields the meat from direct firebox heat. Arrange pieces with adequate spacing for even smoke circulation, avoiding overcrowding your chamber. Remember that each pit is unique, so you’ll need to monitor your specific smoker’s temperature response throughout the cook.
Insert your probe placement into the thickest section, carefully avoiding bone for accurate temperature readings. You’re targeting 195-205°F for brisket completion. This low-and-slow method at around 225°F requires about 1.5 to 2 hours per pound, so plan your cook time accordingly. Spritz every 45-60 minutes post-stall with water or apple juice. Rotate your meat halfway through for uniform cooking. The stall phase occurs when the brisket’s temperature plateaus and requires careful monitoring to power through. Wrap at 160-170°F in pink butcher paper to preserve moisture and power through the stall, then rest 1-4 hours post-cook for ideal juice redistribution before slicing against the grain.
Fine-Tuning Airflow With Vents and Dampers
Your meat’s now locked in, the thermometer’s reading steady, but here’s where amateur pitmasters lose control: maintaining that perfect smoke and temperature balance requires mastering your damper system. Start both intake and outtake vents fully open, then gradually close the intake first for precise temperature management. This approach directly controls oxygen supply to your firebox, dictating fire intensity and fuel selection efficiency. Fine-tune smoke quality adjustments using your stack damper—partial closure promotes thin blue smoke while improving bark formation. Balance these vents strategically: intake controls temperature, outtake manages heat release. Remember, your firebox door offers superior smoke quality adjustments compared to swing dampers. Closing the damper to about two-thirds or three-quarters can reduce temperature differences from over 100 degrees to less than 40 degrees across your cooking chamber. Creating two-zone fire setups with separate temperature areas enhances your ability to manage both direct and indirect cooking simultaneously. Every thirty to forty-five minutes, use small sticks to maintain consistency, which follows the same principle as layering fuel strategically for gradual ignition and stable heat output. Tight seals guarantee stable control throughout your cook. For optimal performance, implement regular maintenance of your vent mechanisms, including cleaning and lubrication, to ensure vents operate smoothly without sticking or binding that could compromise temperature stability. Like your indoor kitchen equipment, protecting your smoker from the elements with a high-quality smoker cover prevents rust and grease buildup that could interfere with damper function. Between smoking sessions, maintain your grill’s exterior by wiping it down to keep seals intact and performance at its peak.

Package Includes: you will receive 2 pieces of grill vent damper, enough quantity to meet your needs and replacements, suitable for most grills, and you can also share one with your friends or family members

Premium Material: Our smoker air vents are made of stainless steel material reliable and reusable, sturdy and lightweight, not easy to break or rust, ensuring unparalleled performance that lasts.

For masterbuilt 40" "digital charcoal" smoker, home built wine barrel smoker
Post-Cook Maintenance and Best Practices
The real test of your commitment to smoking excellence happens after you’ve pulled your meat off the grates—what you do in those critical hours following your cook directly determines whether your smoker’ll serve you for decades or deteriorate into a rust-riddled shell. Start by removing ash immediately after cooling to prevent buildup that compromises your firebox. Drain grease while the smoker’s still hot; solidified grease becomes a nightmare to remove. Brush racks and surfaces with a wire brush, then hose down the interior thoroughly. For sanitizing surfaces, use a green scotchbrite pad on exterior and interior walls to eliminate rust. When maintaining internal components, apply thin linseed oil to hot steel surfaces for seasoning. To prevent water damage, keep your smoker tilted down to allow proper drainage of any moisture that accumulates inside. For deep cleaning your grates periodically, try making a baking soda and vinegar paste to break down stubborn grease and carbon buildup without harsh chemicals. You should also consider removing and soaking your grates in soapy water to loosen stubborn grime before scrubbing them with a stiff brush. For stubborn carbon and grease that resist standard brushing, specialized metal scrapers designed for grill cleaning offer superior removal without the bristle shedding risks of traditional wire brushes. After scrubbing, dry your grates thoroughly with a microfiber cloth to prevent streaks and water spots, following the same best practices for stainless steel that preserve shine and prevent corrosion. Reassemble all components and heat your smoker to burn off residual residues before your next cook. For best results, aim to recoat your smoker annually, or twice yearly if you live in coastal or saltwater areas where corrosion accelerates. This disciplined routine extends your smoker’s lifespan substantially.