You’ll assemble your Masterbuilt smoker with a Phillips screwdriver, then season it empty at 275°F for 2-3 hours with hickory chips added during the final hour. Next, preheat at your target temperature—typically 225°F—for 30-45 minutes while monitoring the display. Fill your water pan with cold water, load wood chips, and adjust intake and outtake vents for proper airflow control. Select your wood based on protein type: hickory for pork, mesquite for brisket, apple for poultry. Master these fundamentals, and you’ll unleash precision smoking capabilities.
Getting Your Smoker Ready: Assembly and Setup
You’ll need just a Phillips head screwdriver to assemble your Masterbuilt electric smoker—no additional tools required. The entire setup takes approximately 10 minutes.
Start by laying your smoker on its back to access the threaded holes in each leg. Adjust leg positions by turning them clockwise or counterclockwise until you achieve a level stance. Each leg features three threaded holes for height customization. Once leveled, tighten the tension nuts by hand.
Next, position your smoker upright and begin securing the control panel atop the smoker body. Align the slot on the control panel wire connector with the tab on the smoker connector, then insert the stabilizing screw head into the keyhole. Use your screwdriver to secure additional screws for a snug fit.
Finally, verify all components are properly positioned before your first use. Before cooking, clean the grates thoroughly and apply a thin layer of oil with a high smoke point to create a protective surface. After cleaning, rinse and air-dry all parts thoroughly to ensure no residue remains. Heat the smoker to allow the oil to bond and form a protective, non-stick layer that prevents food from sticking. If your smoker has stainless steel components, avoid using abrasive tools that can scratch the surface during cleaning. For optimal longevity, ensure your smoker is placed on a concreted area to prevent moisture damage and extend the life of your unit. Consider placing a heat-resistant grill mat beneath your smoker to protect your deck surface from grease spills and heat damage.

【Electric Whiskey & Cocktail Smoker Kit】Elevate your home bar experience with our electric smoker kit. It effortlessly infuses rich, smoky notes into whiskey, bourbon, old fashioneds, and a wide range of cocktails. An impressive addition for any whiskey enthusiast looking to explore craft cocktail creation.
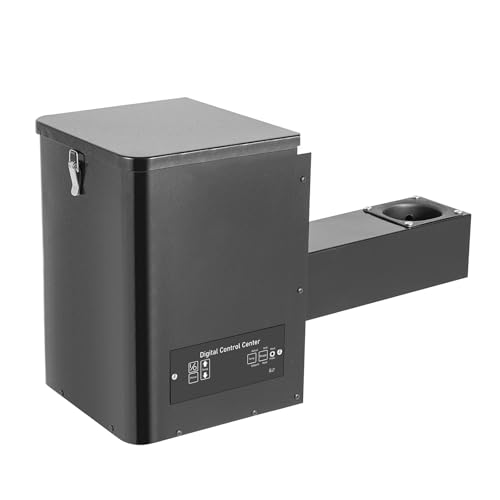
Durable & Sturdy: The cold-rolled plate shell with spraying 600 ℃ high-temperature black sand grain powder, the stainless steel firepot with a thickness of 1.88mm, and the square steel delivery screw stem offer corrosion resistance, heat resistance, and wear resistance.

Vertical digital electric smoker with 710 square inches of cooking space
Seasoning Your Masterbuilt Electric Smoker
Before you cook your first meal, seasoning your Masterbuilt electric smoker is essential for removing manufacturing residues, oils, and chemicals that accumulate during production. Wipe interior surfaces with a cloth, position your water bowl, and install all racks properly. Set the temperature to 275°F and run the smoker empty for 2-3 hours without wood chips. During the final 45-60 minutes, add 1/2 cup of hickory wood chips via the side loader. The chips burn to ashes, depositing protective flavor residue inside. For first time user tips, allow the smoker to cool completely afterward. Color changes in the metal indicate that the seasoning process is working effectively to build a protective layer. Post seasoning maintenance involves inspecting for residue buildup and applying light oil if rust appears. If you notice rust developing on your smoker, soaking with vinegar and salt overnight can help loosen it before scrubbing away the debris. After seasoning, wiping down the exterior with mild soap helps remove any residue from the outside surfaces. Preseasoning prevents rusting of the smoker and ensures no harmful substances remain inside. Regular cleaning schedules help prevent grease fires and maintain optimal performance of your smoker. After completing the seasoning process, running the smoker on smoke for about an hour helps dry and re-season the interior surfaces. For stubborn rust on grates, you can create a paste of baking soda and vinegar to apply on affected areas before scrubbing. Your smoker is now ready for cooking.
Preheating Your Smoker for Optimal Results
Now that you’ve seasoned your Masterbuilt electric smoker and prepared it for cooking, preheating becomes your next critical step. You’ll want to preheat for 30 to 45 minutes at your desired cooking temperature before loading food. Set the temperature to 275°F initially, allowing 8 to 10 minutes for wood chips to smolder properly. This smoke density adjustment guarantees robust flavor infusion throughout your expected cooking duration.
Press the temperature button, turn the knob to select 275°F, then press again to set. The red light indicates heating activation. Monitor your display as it alternates between actual temperature and timer readings.
Temperature spikes briefly after adding wood chips, then stabilizes. Proper preheating removes factory residues and ascertains even cooking, preventing dry, unevenly cooked meat while maximizing smoke penetration and tender results. The low-and-slow method at consistent temperatures allows fat and connective tissues to render properly, ensuring tender and flavorful results. Before loading your food, inspect and clean the interior surfaces to prevent residue from affecting food quality. Once preheated, you can identify hot spots on your cooking surface by performing a simple bread test to understand heat distribution. Fill the wood chip smoker box as part of the preheating process to ensure consistent smoke production throughout your cooking session. Preheating your smoker to the optimal 225-245 degrees range will provide more control and consistency for better results. Electric smokers like the Masterbuilt prioritize ease-of-use with digital controls that set and maintain temperature automatically. After your initial cook, perform a high-heat burnoff to eliminate any remaining residue and maintain optimal smoker condition.
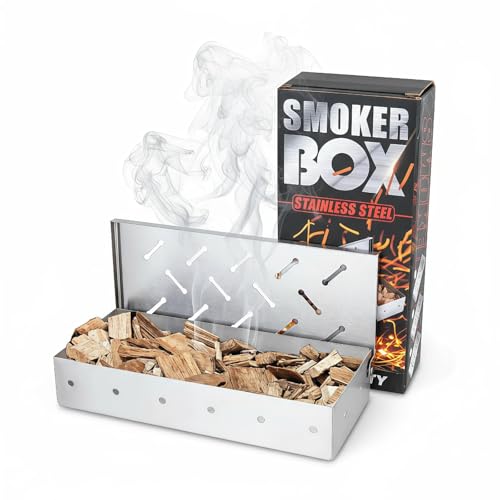
This smoker box is designed to WORK IN ANY GRILL (gas, electric or charcoal) and with any smokers. It ADDS GREAT FLAVOR for your meat or fish and exposes them to a tasteful smoke of smoldering wood. Perfect for smoke cheese.

Kaluns Smoker Box For A Scrumptious Smokey Flavor Using Any Grill - Add delicious smokey flavor to your favorite piece of meat. Position our heavy-duty smoker box right underneath the grill grates for best results. l The holes around and on the lid of the box release tons of smoke within 10 minutes of the smoker box burning on the grill. Choose your favorite wood chip flavor,have it smoked up, and enjoy tasty smokey flavored Ribs, Chicken, Turkey

Filling the Water Pan and Loading Wood Chips
Once your Masterbuilt electric smoker‘s preheating cycle completes, it’s time to fill the water pan and load wood chips—two essential steps that work together to regulate temperature, enhance humidity, and optimize smoke flavor throughout your cooking session. Position your water pan on the designated lower rack, away from direct heating element contact. Line it with aluminum foil for simplified cleanup. For typical smoking sessions, you’ll need to establish a refilling water pan frequency based on your cook duration. Maintaining water level consistency throughout prevents meat surface drying, especially during extended sessions. Use cold water to stabilize rising temperatures or hot water in cold weather to accelerate initial heating. Monitor levels periodically and replenish as needed for sustained humidity control. The drier heat produced by electric smokers makes water in the pan particularly valuable for moisture regulation. Consider that skipping the water pan entirely may allow for better low-temperature smoke generation, though this approach sacrifices the humidity benefits that prevent meat from drying out. For wood chips, start with mild wood chips such as apple or cherry to avoid overwhelming your meat with overly intense smoke flavors as you learn your smoker’s behavior. Different wood types can provide varying levels of smoky flavor intensity, allowing you to experiment as you gain more experience with your equipment. As you become more comfortable with your smoker, you can blend different woods to balance smoke intensity and create custom flavor profiles that complement specific proteins. While electric smokers excel in smoke-minimized performance compared to traditional charcoal models, they may not fully replicate the authentic smoky BBQ taste that outdoor grilling delivers. Unlike charcoal grills that rely on radiant heat from glowing embers, electric smokers use heating elements to generate consistent temperatures without the intense radiation that characterizes traditional outdoor cooking methods.

Fits Masterbuilt 30" Electric Smoker: Water bowl for Masterbuilt 30" electric smoker models, for Masterbuilt 30-inch Digital Electric Vertical BBQ Smoker. Replacement for Masterbuilt 9007170040 Water Bowl Part

Compatibility: 9007170040 Water Bowl Replacement Part is compatible with Masterbuilt 30" Digital Electric Smoker models 20071117, 20071217, 20071218, 20071317, 20071417, 20071517, 20074517, MB20070619, MB20071117, MB20071418, MB20071518, MB20072218, MB20072318, MB20072418, MB20072518, MB20073119, MB20073619, MB20073919, MB20075519, MB20075617, MB20077018, MB20077818, MB21071218, MB21072218, MB21072319, MB25071217, MB25073519, MB26071317, MB26073519, MB28071517.

Compatibility: 9007090067 Water Bowl Replacement Part is compatible with Masterbuilt 30" Electric Smoker models 20070111, 20070210, 20070410, 20070612, 20070712, 20071012, 20071612, 20071712, 20072012, 20074316, 20074416, 20074516, 20074616, 20075517, 20070410R, 20070610R, 20070610SD, 20070712R, MB20070111, MB20070210, MB20077618, MB21071012, and MB25075517.
Adjusting Temperature and Time Settings
With your water pan filled and wood chips loaded, you’re ready to power on the smoker and configure your cooking parameters. Press the on/off button to activate the control panel, which displays your current temperature.
For temperature adjustment, press the temperature button, turn the knob to your desired setting between 100°F and 275°F, then press again to confirm. Preheat at 275°F initially to encourage wood chip smoldering, then reduce to your target—typically 225°F for fish or meat. Set the temperature 10°F above your actual target to account for fluctuations. Maintaining stable temperatures prevents wood chips from stopping their smoke output intermittently throughout your cooking session. For example, smoking a whole chicken requires a target temperature of 235°F to ensure proper cooking throughout the bird. The chicken’s internal temperature must reach 165°F for safety, which you can monitor using a digital thermometer inserted into the thickest part of the thigh.
For time adjustments, press the clock icon button, then turn the knob to set up to 24 hours maximum. The timer displays in minutes:seconds format, then shifts to hours:minutes. Press to pause or resume; hold to reset. Always preheat 30-45 minutes before starting your timer. When smoking larger cuts like turkey, plan for approximately 20 to 35 minutes per pound at 225°F, though always rely on internal temperature rather than time alone to determine doneness.
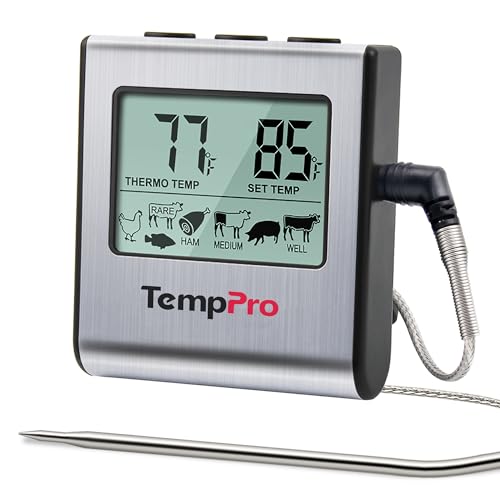
Cook mode with USDA preset temperature settings: TempPro cooking thermometer ideal for meat, oven, smoker or stove top; Programmable alert with preset temperatures for specific foods recommended by USDA; All of the preset temps can be reset to your desired tastes

BBQ HI/LOW temp range alarm: Set your desired food temp and HI/LOW temp range for your grill or smoker to know when to add more fuel smoker thermometer will flash and beep to remind you if the temperature ever goes out your set range; HI/LOW temp range alarm is specifically designed for usage with smokers, grills and BBQs

Smart Display Base with Control: The ThermoMaven G1 wireless meat thermometer features a versatile smart display base that offers real-time temperature readings and allows you to set temperatures directly on the device—no app required. With our user-friendly one-click setup, you can connect the probe, pair it with the base, and start cooking in seconds—no complicated setup needed!
Selecting the Right Wood for Flavor
The wood you choose fundamentally shapes your smoke’s character and flavor intensity. You’ll find that oak delivers medium smoke flavor intensity, working excellently alone or blended with apple, cherry, or hickory. Hickory produces a bacon-like sweetness with pungent smoke, making it your go-to for pork and ribs. For best results, source 100% natural chips from trusted retailers to avoid mold or pests that can compromise your smoke quality. Mesquite burns hot and quick, generating savory, earthy smoke ideal for steak and brisket when you want bold results.
Fruit woods offer milder profiles—apple suits poultry, beef, and fish, while maple complements vegetables and cheeses. Cherry wood provides sweet fruity notes that pair exceptionally well with poultry and pork. Select wood chips designed for your Masterbuilt’s side chip loader, adding them without opening the door to maintain smoke consistency. Customize your wood smoke intensity by adjusting chip quantity and type, achieving authentic wood-fired flavor in your electric smoker. Wood chunks are most common for low and slow cooking, burning for several hours when smoking larger meats. For pellet smoker enthusiasts, premium brands like Lumberjack and Bear Mountain BBQ offer gourmet blends of hickory, cherry, maple, and apple that deliver bold smoky flavors with minimal ash. When selecting hickory pellets specifically, prioritize options with low moisture content and no fillers to ensure clean burns and consistent smoke production. Experimenting with different wood varieties allows you to discover unique tastes that enhance the natural flavors of your smoked foods. Always avoid softwoods like pine and resinous species such as cedar or eucalyptus, which can impart unpleasant flavors to your meat.
Managing Airflow and Ventilation
Proper airflow management is critical to your Masterbuilt smoker’s performance, directly influencing temperature stability, smoke quality, and meat outcomes. Your smoker requires both lower intake and upper exhaust vents operating simultaneously; a single open vent produces minimal circulation.
Vent adjustment controls oxygen regulation essential for wood chip combustion. Open your intake vent to increase airflow and raise temperature; close it gradually to restrict oxygen and lower heat. Adjust your outtake vent to retain or release excess heat accordingly. Stale smoke buildup can lead to a sour, nasty taste from creosote accumulation, so proper ventilation is essential. Regular maintenance and inspection of your vent mechanisms ensures tight seals prevent uncontrolled airflow leakage. Periodically wash the exterior of your smoker with soap and water to remove buildup and maintain optimal performance. For stubborn grease and grime on grates, create a paste using baking soda and vinegar to naturally break down residue without harsh chemicals. For particularly tough residue, consider using lemon with aluminum foil as an effective natural cleaning method that cuts through baked-on grime.
Start both vents fully open, then incrementally close the intake vent until you achieve your target temperature. This methodical approach prevents temperature swings. For ideal smoke flavor and browning, maintain your air damper fifty percent to fully open. When finished smoking, closing all vents completely will cut off the oxygen supply and safely extinguish any remaining coals or wood chips. Guarantee door seals remain tight to prevent uncontrolled leakage. Allowing your smoker to reach room temperature before performing any deep cleaning or maintenance will ensure safety and more effective results.
Best Practices During the Smoking Process
Once you’ve mastered airflow management and achieved temperature stability, you’ll need to execute a disciplined smoking routine to maximize meat quality and consistency. Start by monitoring smoke levels consistently throughout your session, adding wood chips every hour during the first four hours to maintain steady smoke production. Control humidity during smoking by keeping your water pan filled above the heating element, which regulates moisture and prevents meat from drying out. Use a spray bottle to spritz your meat with apple juice or broth every 30-45 minutes. Resist opening the door frequently, as this disrupts temperature and smoke stability. Do not soak the wood chips before loading them into the tray to ensure optimal smoke production. For best results, select hardwoods like hickory which provide superior flavor profiles compared to softwoods. Match your wood selection to your protein—consider mild fruit woods like apple or cherry for delicate fish and poultry. For electric smokers, hickory chunks or chips work best, and if you find the flavor too intense, blend it with milder woods using a ratio like 60% oak to 40% hickory to prevent overpowering your meat. Red oak delivers a slow, steady burn that works exceptionally well for beef and pork without overwhelming the natural meat flavors. If your electric smoker struggles to produce enough smoke, consider using a hexagon-shaped smoke tube loaded with pellets to extend smoke output for up to 5 hours without interruption. Aim for thin blue smoke rather than thick white smoke, which indicates clean combustion and prevents harsh, bitter flavors from developing on your meat. Track internal temperatures with your digital thermometer, following target doneness levels: 165°F for poultry, 195°F for brisket. This meticulous approach guarantees tender, flavorful results consistently.
Maintaining Your Smoker for Longevity
Your commitment to disciplined smoking practices will yield outstanding results, but you’ll only sustain that quality through rigorous maintenance of your equipment. Establish a cleaning frequency of after each use to prevent creosote buildup and extend your smoker’s operational lifespan. Clean removable parts with mild detergent and warm water, then run your unit at 270-275°F for 1-3 hours post-cleaning to re-season the interior. For stubborn deposits, use Purple Power as a degreaser to make the cleaning process faster and more efficient. For flat cooking surfaces and steel grates, consider using pumice-based grill bricks that remove caked-on residue without scratching when dipped in water and scrubbed with light pressure. When cleaning grill grates, you can also use a heat-resistant sponge brush instead of traditional wire brushes to eliminate the risk of metal bristles breaking off and contaminating your food.
Your storage conditions dramatically impact longevity. Store your smoker in a covered, dry area using a fitted Masterbuilt cover to prevent mold, mildew, rust, and corrosion. Periodically inspect for moisture accumulation and wear signs. Before storing your smoker for extended periods, ensure the drain hole in the center is free from buildup to prevent water damage and rust formation. Always work with a cool grill before applying any degreaser or cleaning solution to avoid burns and ensure safe handling of your equipment. For stainless steel exterior surfaces, apply Trinova Stainless Steel Cleaner to remove smudges and streaks while leaving a protective finish that enhances your smoker’s appearance. If you need a powerful solution for heavy buildup on grates, Carbona’s 2-in-1 cleaner delivers mess-free action that cuts through grime on cold grates in just five minutes without extensive scrubbing. Weekly maintenance sustains performance even after years of regular use, ensuring your investment remains reliable and your smoked meats consistently exceptional.