You’ll transform your new grill by applying exceptionally thin oil layers to heated grates, then baking at 400-450°F for an hour. Repeat this process 3-5 times, allowing complete cooling between cycles. Watch for smoke signals confirming polymerization—that’s your seasoning bonding chemically. Each layer darkens your grates toward bronze, building an unbeatable nonstick surface. Thin coats are critical; excess oil creates sticky residue. Once you’ve mastered this foundation, you’re ready to uncover the maintenance secrets that’ll keep your grill performing flawlessly for years.
Getting Your Grill Ready for Seasoning
Before you fire up that new grill, you’ve got to prep it properly—and that starts with stripping away the factory gunk that’s coating those grates. Handling new grates demands thoroughness: soak them in warm, soapy water, then scrub with a grill brick or pumice stone while wet. Rinse completely and pat dry to prevent rust formation.
Next, inspect and remove dust, debris, or factory coatings from your grill body. Check for spiders, rodents, or insects hiding in components. Use a soft cloth for initial wipe-downs rather than rough materials that’ll scratch surfaces. Following the grill’s manual for setup ensures you don’t miss critical safety checks that could affect your grill’s performance.
For gas grills specifically, verify safety by checking your gas hose with a 50/50 soapy water solution before ignition. Remove and clean the drip pans to ensure they’re free of any manufacturing residues that could cause problems during your first cook. Allow your grill to cool completely before beginning these preparation steps. Thoroughly cleaning the grates first to remove debris or rust is essential before applying any seasoning oil. For stubborn buildup on older grates, you can soak them in a mixture of vinegar and baking soda to break down residue more effectively. If you notice any rust on the grates, scrub it away with steel wool to prevent it from affecting food taste or causing the grates to stick. Understanding how your grill transfers heat through conduction, convection, and radiation will help you maintain it properly from the start. This foundation guarantees ideal seasoning results.
Choosing the Right Oil for Your Grill
The oil you select makes or breaks your seasoning success—it’s not just about grabbing whatever’s in your pantry. You’ll want to prioritize factors affecting smoke point: peanut oil reaches 450°F, making it superior for high-heat grilling, while canola oil maxes out at 400°F. Sunflower oil also hits 450°F with subtle nutty undertones ideal for searing.
Consider health benefits of oils too. Olive oil boasts high monounsaturated fats and antioxidants, with premium California varieties achieving 400°F smoke points that contradict seasoning myths. Many cooking oils contain healthy monounsaturated and polyunsaturated fats that can bring nutritional value to your grilling experience. For budget-conscious grilling, canola and vegetable oils offer affordable, accessible alternatives with neutral profiles. Lodge recommends vegetable oil or canola for cast-iron seasoning thanks to their reliable performance and widespread availability. Pair your chosen oil with quality grilling equipment like the Big Green Egg to ensure optimal heat distribution and seasoning results.
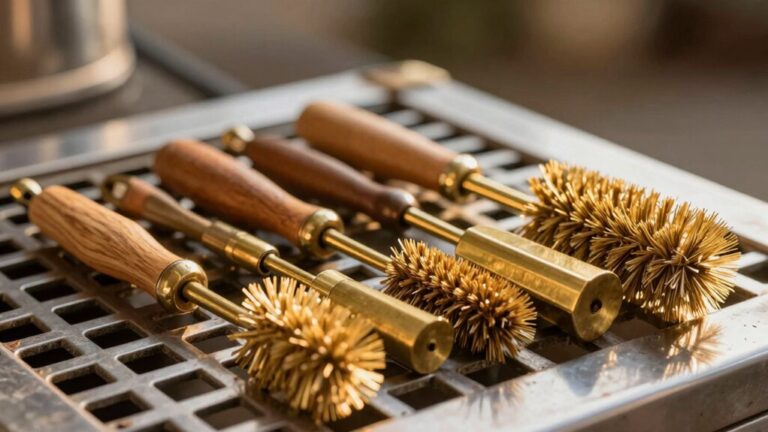
Skip expensive peanut oil for routine seasoning; Crisco provides cost-effective practicality. If you’re working with a flat cooking surface, outdoor griddles like the Traeger Flatrock can benefit from the same oil seasoning techniques. Apply your chosen oil thinly across entire grates, then wipe away excess with paper towels. For versatile cooking options, consider equipment with dual adjustable temperature zones that allow you to control heat for different cooking methods simultaneously. To protect your outdoor cooking area from grease and spills during the seasoning process, consider placing a grill mat underneath that extends beyond your grill’s footprint. Just as with choosing a grill, prioritize build quality when selecting seasoning tools and accessories that will withstand regular high-heat use.
Deep Cleaning the Interior Surfaces
Once you’ve selected your oil and prepped your grates, it’s time to tackle what lies beneath—the interior surfaces that truly define your grill’s performance and longevity. You’ll want to apply a wire brush to side walls and firebox walls, working from top down so debris falls into your drip pan. Proper tool usage matters here; detail brushes and old toothbrushes access those hard-to-reach crevices where carbon buildup hides. Pay close attention during inspection for deterioration on interior surfaces—corrosion or damage compromises your grill’s integrity. After scrubbing carbon deposits from the hood interior, rinse everything with warm soapy water and a hose. Before reassembling components, thoroughly dry all cleaned surfaces to prevent moisture from causing rust and corrosion. For any rust spots you encounter, apply a protective layer of cooking oil after cleaning to seal the surface and prevent future oxidation. Regular maintenance through deep cleaning prevents food debris and grease from creating a breeding ground for bacteria. If you’re concerned about wire brush bristles, consider using a crumpled ball of aluminum foil with baking soda paste as a safer scrubbing alternative. Don’t forget to pull out and clean the grease tray, which accumulates drippings and should be washed or replaced to maintain proper hygiene. Just like grilling over medium-low heat prevents burning while ensuring even cooking, maintaining steady temperatures during the seasoning process will create an optimal protective coating. For stubborn grease buildup on interior surfaces, use a stainless steel sponge with a quality degreaser to break down residue effectively. This methodical approach removes stubborn residue while preparing your grill’s interior for the seasoning process ahead.
Applying Oil to Your Grates and Components
With your grill’s interior now scrubbed clean and ready, you’ll move into the seasoning stage—where oil transforms bare metal into a protective, non-stick surface.
Master oil application thickness by applying an exceptionally thin layer—so thin you’re virtually wiping it off. Use folded paper towels as your primary tools for spreading oil evenly across grates and components, ensuring no thick puddles or dry spots remain. A few tablespoons suffice for complete coverage. For precision dispensing, employ a squirt bottle to dab oil onto your towel before spreading. When working with cast iron heated to 200°F, your hands become viable tools as warmth opens the metal’s pores. Tongs or heat-resistant gloves prevent burns during application. This meticulous approach prevents sticky gunk buildup while maximizing the seasoning layer’s effectiveness. Choose oils with high smoke points, such as vegetable or canola oil, which can withstand the intense heat required for proper seasoning. The repeated heating cycles trigger free radical polymerization, which creates the tough, hard seasoning film that protects your grill long-term. Once seasoned, your grill will deliver clean-burning performance whether you’re using traditional charcoal or premium wood pellets for smoking. Repeat the oil application and heating process 4-5 times to build a durable seasoning that will protect your griddle surface and prevent rusting.
The Heating Process Explained
Heat’s the catalyst that transforms your oil application into a durable, non-stick seasoning layer—and you’ll need to dial in the right temperature and duration to get it right. Target 350–400°F for gas grills and maintain that heat for 30–60 minutes to bond oil into metal pores.
You’ll monitor temperature fluctuations closely, adjusting burners as needed to prevent thermal swings that compromise seasoning. Start by evaluating smoke signals emerging from your grates—this indicates oil burning off and bonding occurring. Little light smoke signals process completion per cycle; dense smoke means you’re on track. This protective layer reduces rust formation during storage and regular use. Regular seasoning maintains your grill in top condition and ensures protection during extended storage periods.
Repeat heating cycles 3–5 times, each lasting 10–15 minutes, until smoke diminishes completely. Your grates’ shiny finish darkens to bronze, confirming the non-stick coating’s hardened properly. Once seasoned, wipe down grates with a microfiber cloth after each use to preserve the coating and prevent buildup. Just as pellet grills require proper temperature control for smoking meats, maintaining consistent heat during seasoning ensures optimal results. For charcoal grill users, keep the bottom vents fully open during the seasoning process to ensure optimal airflow and consistent heat distribution. After completing the seasoning process, allow your grill to cool by closing all vents to safely extinguish the coals before covering. For ongoing maintenance, brush the cooking grates before and after each grilling session to remove food particles and maintain the seasoned surface.
Understanding Color Changes During Seasoning
As your grill’s surface transforms through the heating cycles, you’ll witness a dramatic visual progression that tells you exactly how your seasoning’s developing. The center browns first—your ideal browning indicator—signaling readiness for oil application. Don’t worry if you notice uneven coloring patterns initially; hotspots create variation that’ll even out with repeated layers. Smoke billowing immediately after oiling confirms polymerization’s underway. Watch the surface darken from brown to black across 2-3 applications. Edges typically lag behind the center, so focus extra oil there. This patchiness is completely normal and temporary. Each thin layer of oil creates a durable, stick-resistant coating that builds upon the previous application. After 3-6 thin layers, you’ll achieve that stable, blackened finish that creates superior nonstick properties and enhances flavor retention. The sulfur in onions helps bond the seasoning oils more effectively to the steel surface. Allow the grill to cool completely after your final application so the coating can set properly and harden. Patience yields perfection.
Building Layers for a Superior Nonstick Finish
The real magic happens when you layer your seasoning—each application builds upon the last, transforming your grill’s surface into a genuinely nonstick powerhouse. You’ll need three to four repetitions of oiling and baking to develop patina thickness that truly resists food sticking. Each successive layer chemically bonds to the previous one, creating a durable, glassy carbon network. Even distribution of oil coating across the surface is critical to ensure consistent seasoning development and prevent thin spots.
Balancing oil application remains critical throughout this process. Apply thin coats—excess oil creates sticky residue rather than smooth protection. After each 30-60 minute session at 350-400°F, cool completely before applying your next layer. This methodical approach builds a robust, glossy finish that improves with continued use. The polymerized oil layer protects your grill from rust and corrosion while developing superior nonstick properties. The accumulated polymerized layers develop superior nonstick properties while simultaneously preventing rust formation, creating a surface that performs better with every seasoning cycle. Patience and applying thin layers evenly rather than thick coatings will help you avoid uneven seasoning and chipping. Once seasoned, you can maintain your grill’s surface with effective cleaning methods like vinegar with bicarbonate of soda or specialized scrapers that preserve the protective coating you’ve worked to build. For deep maintenance between grilling sessions, you can use natural degreasers like lemon juice or salt-based scrubs to remove buildup without damaging your seasoned finish. For stubborn exterior stains on stainless steel grills, products like Bar Keepers Friend powder mixed into a paste can restore shine without compromising your cooking surfaces. For light cleaning between uses, you can also rub a halved onion along the grates to remove carbonization and food particles in a chemical-free way.
Cooling and Setting Your Seasoning
Why rush perfection? You’ve applied your oil layers—now you’ll let natural cooling set your seasoning’s foundation. The importance of natural cooling can’t be overstated; forced methods like water cause warping and compromise your work.
Turn off all burners on gas grills or let charcoal dissipate gradually. Avoid acceleration techniques entirely. Your grill’s size and ambient temperature determine cooling duration, but patience pays dividends. Regular maintenance with light oil applied after each use while grates are still warm helps preserve the nonstick coating established during this cooling phase.
Watch for that dark brown or bronze hue signaling completion. The benefits of complete cooling are substantial: the protective layer bonds permanently, resists rust and corrosion long-term, and delivers a genuine nonstick surface immediately ready for cooking. Applying a thin layer of high-smoke point oil before heating ensures proper seasoning and long-term protection of your grates.
Once fully cooled, inspect grates for uniform color and verify no smoke remains. After your initial seasoning is complete, light cleaning after each grill session prevents buildup and maintains the protective coating you’ve just created. A bristle-free brush helps safely remove debris without damaging your carefully seasoned surface. For tougher grime that accumulates over time, a mess-free oven rack and grill cleaner can tackle buildup on cold grates without requiring heavy scrubbing. When selecting your cleaning tools, consider coil or chainmail designs that offer effective cleaning while eliminating the risk of stray bristles embedding in your food. Your seasoning’s complete—optimal performance starts now.
Post-Use Maintenance Tips
Now that your grill’s seasoning has set, you’ll need to maintain it with deliberate post-use care to preserve that protective layer you’ve worked to establish. After each cooking session, brush away debris with a brass grill brush while the grates remain warm—this prevents stubborn residue buildup that compromises your seasoning. Wipe surfaces with a light oil application using a silicone basting brush, creating thin, even layers that reinforce protection. Remember to always dry the grill completely after any cleaning to prevent rust formation.
Checking for rust stains demands regular inspection. Address emerging corrosion immediately with steel wool during deeper maintenance cycles. For more persistent rust issues, create a paste of baking soda and vinegar to apply on affected spots before scrubbing clean. For flat-top griddles and steel surfaces, consider using pumice-based grill bricks that remove grease and caked-on food residue without scratching when combined with water and light pressure. If rust has already formed on your flat top, heat the surface on medium-high for 20 minutes to loosen it before scraping clean. When facing heavy grease buildup between deep cleanings, match your cleaner strength to the job—mild dish soap for routine maintenance or stronger degreasers for baked-on carbonization. Invest in a grill cover to shield your grill from rain, snow, and UV rays that accelerate rust formation. Store your grill in a dry location, ensuring maintaining proper storage conditions protects your investment during off-season months. Position your grill in a well-ventilated outdoor space away from flammable materials to ensure safe operation and longevity. Consistent post-use protocols extend your seasoning’s durability and optimize your grill’s performance throughout the year.
Seasonal Care and Long-Term Protection
While consistent post-use maintenance keeps your grill performing well throughout the season, you’ll need a more thorough approach to guarantee your investment during extended periods of dormancy. Your off season storage strategy demands elevation off ground level, a breathable cover, and propane tank removal stored separately indoors. Before hibernating your grill, apply protective oil coats to all metal components and drain water from gas lines to prevent freeze damage.
Conduct an annual rust inspection upon retrieval, sanding lightly and re-oiling any oxidized spots. If you discover significant rust damage or flaking paint on exterior surfaces, consider applying high heat spray paint rated for temperatures up to 1200°F after proper surface preparation. Test your ignition system, verify lid seal integrity, and lubricate wheels. Heat your grill to 400-450°F for 30-60 minutes to set seasoning effectively. Following the seasoning process multiple times ensures optimal non-stick surface development and long-term protection. Covering the grill when not in use protects the chromium oxide layer that provides corrosion resistance. Regular grease tray cleaning prevents dangerous flare-ups that can quickly escalate during grilling sessions. Inspect and replace heat shields if they show warping or heavy corrosion to maintain proper burner protection and heat distribution. Keep a multipurpose dry chemical extinguisher rated for Class B and Class C fires within easy reach of your grilling area to handle any potential flare-ups or propane incidents. This multi-layered protection strategy assures your grill emerges season-ready and rust-resistant, maintaining superior performance and flavor development year after year.