You’ll create the perfect grilled ham and cheese sandwich by starting with quality ingredients: crusty bakery bread, premium Black Forest ham, and excellent melting cheese like Provolone or Gruyère. Butter your bread generously for a golden crust, then layer your cheese and ham strategically before grilling on medium heat. Cook each side until the exterior turns crispy and golden while the cheese melts perfectly inside. The techniques that elevate this classic sandwich from ordinary to exceptional await you.
Gathering Your Ingredients
Before you fire up the griddle, you’ll want to assemble your components carefully, as the quality of each ingredient directly impacts your sandwich’s final result. Start by selecting bread varieties that can withstand heat without becoming soggy—sturdy options work best for even toasting.
For protein, choose shaved Black Forest deli ham or quality leftover baked ham slices. Next, pick your cheese: Provolone, Cheddar, Swiss, or Gruyère all melt beautifully. Consider layering multiple varieties for complexity.
Adjusting butter consistency is essential; use room temperature unsalted butter at approximately 1/2 tablespoon per sandwich for ideal spreading and golden crust development. Grease the cooking surface well with butter to achieve a crisp, golden exterior that seals in the melted cheese. Stack at least six ham slices for optimal flavor and texture throughout your sandwich. Gather optional enhancements like Dijon mustard, caramelized onions, fresh spinach, or tomato slices. Prepare any condiments ahead of time, including spicy mayo dip if desired, ensuring everything’s ready for efficient assembly and cooking. If you’re using a flat top griddle outdoors, protect it between uses with a heavy-duty polyester or ripstop cover to maintain its cooking surface. For indoor grilling on a gas stove, consider using a non-stick grill mat to prevent cheese drips and simplify cleanup while still achieving excellent grill marks. When investing in outdoor cooking equipment protection, look for covers with UV-resistant materials that prevent fading and cracking from prolonged sun exposure.

You'll get one 20 oz loaf of Nature's Own Butter Bread

You'll get one 20 oz loaf of Wonder Classic Sliced White Bread

You'll get one 20 oz loaf of Nature's Own Honey Wheat Bread
Preparing the Bread
Since your sandwich’s success depends on sturdy bread that’ll withstand direct heat without falling apart, selecting the appropriate loaf is essential. You’ll want crusty, hearty bread from a bakery—sourdough delivers a crispy golden brown texture, while ciabatta or baguette offers a flavorful base. Whole wheat adds nutritional value, though white bread serves as a simple, versatile option.
Next, have your bakery slice the bread to uniform thickness around ½ inch, ensuring even grilling and preventing uneven cuts. Proper bread storage maintains quality until you’re ready to assemble. Apply softened butter—softer than room temperature—to both exterior sides of your two slices. This creates an even golden brown crust without tearing the bread. Alternatively, use real mayonnaise on the outside surfaces for comparable crispness. Avoid using cold, hard butter that will tear and damage the delicate bread structure. For added flavor, you can season the butter with garlic powder or a pinch of salt before spreading. Sourdough French bread provides an excellent foundation for your grilled sandwich with its distinctive tangy flavor and sturdy crumb structure. For superior searing and excellent grill marks, consider using a pre-seasoned cast iron grill pan that retains heat evenly. A reversible griddle with smooth and ridged sides offers cooking versatility for achieving the perfect sandwich texture. Butter the bread generously on both sides to ensure a golden, crispy crust when cooking. If grilling outdoors, protect your deck surface by placing a heat-resistant mat beneath your grill to catch any butter drips or grease splatters.
Selecting and Layering the Cheese
With your bread properly buttered and ready for the griddle, you’ll now focus on the cheese—the component that’ll make or break your sandwich’s texture and flavor.
Select cheeses based on their cheese melting performance and flavor profiles. Provolone offers a mild, nutty semi-firm texture that pairs exceptionally well with ham. Sharp cheddar provides classic flavor with superior melting capability. Gruyère contributes a warm, sweet nuttiness and melts smoothly due to its high water-to-oil ratio. For optimal results, use block cheese rather than pre-packaged slices, as whole blocks offer superior melting consistency compared to bagged alternatives.
Layer multiple thin slices rather than one thick slice to guarantee even melting and optimum heat distribution. Fresh-sliced cheese from whole blocks outperforms pre-packaged alternatives. Consider combining cheeses—equal parts American and yellow cheddar create balanced flavor and ideal melting consistency. The Calabrian chili pepper aioli can be spread on the bread before adding cheese for enhanced flavor complexity. Position cheese directly between bread and ham to maximize flavor integration during grilling. If using a grill pan for stovetop cooking, preheat it thoroughly to ensure the cheese melts evenly while the bread develops perfect grill marks. A stovetop griddle can provide even heat distribution across the entire sandwich surface, making it an excellent choice for achieving consistent browning and thorough cheese melting. For those who prefer mayonnaise over butter, the higher heat tolerance can prevent burning while delivering a crisp, golden exterior. After cooking, clean your griddle by scrubbing in circular motions from the center outward with a degreaser or vinegar solution to prevent grease buildup. Just as monitoring internal temperature is crucial for perfectly smoked meats, watching your sandwich’s heat ensures the cheese melts completely without burning the bread.

Toasts the face of Jesus on every sandwich

Made with HORMEL honey ham

DELICIOUS DELI MEAT: One 16 oz pack of Oscar Mayer Ham & Cheese Lunch Meat Loaf
Adding the Ham
Now you’ll add the ham, the protein layer that’ll anchor your sandwich’s savory foundation. For standard sandwiches, use three slices of thinly sliced Black Forest ham, which guarantees even cooking and ideal melting. Proper ham placement is essential: arrange the slices on the cheese layer, positioning them centrally to avoid overhang and promote uniform heat distribution.
Use room-temperature, high-quality ham slices like Applegate Naturals Black Forest or slow-cooked varieties. These fresh options melt beautifully without drying out. Layer your ham carefully to achieve balanced ham quantities across both bread slices, creating an even protein distribution. Similar to how ribs benefit from medium heat grilling, your ham will cook evenly when the pan maintains consistent temperature. La Brea Bakery Country White Sourdough Loaf provides the perfect foundation for this classic combination when toasted to golden brown. For open-faced sandwiches, arrange ham on toasted bread before adding cheese to establish proper layering order.
If you’re incorporating caramelized onions or mustard-based spreads, place these accompaniments directly on the ham. Just as caramelized onions enhance the flavor of pan-fried bratwurst, they add a sweet depth to your grilled ham and cheese when layered properly. This strategic layering ensures flavors meld together as your sandwich grills, creating a cohesive, delicious final product. After cooking, let your sandwich rest for 5 minutes to allow the cheese to set and the juices to redistribute throughout the layers. When grilling, maintain the pan at a gentle heat to prevent the bread from charring while ensuring the cheese reaches an internal temperature around 150°F for optimal melting. Before serving, slice your sandwich against the grain for the cleanest cut and most appealing presentation.

Brought to you by Whole Foods Market. Our standards are what set us apart, and our quality is what keeps us stocking pantries, fridges and freezers with the best natural and organic 365 Everyday Value products every day.
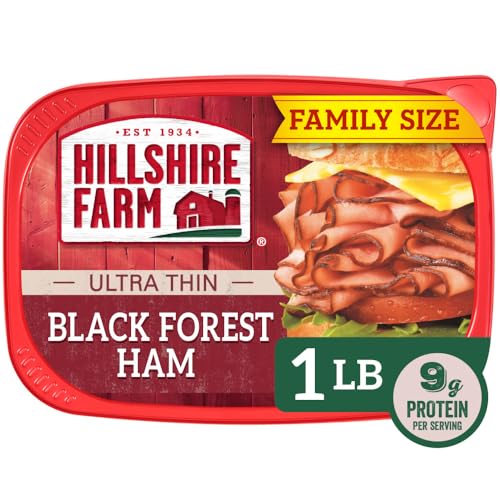
One 16 oz pack of Hillshire Farm Ultra Thin Sliced Black Forest Ham Sandwich Meat

One 9 oz package of Hillshire Farm Ultra Thin Sliced Deli Meat, Black Forest Ham
Setting Up Your Cooking Station
Your layered sandwich is ready, and you’ll want your preheating equipment prepared before you place it on heat. Select your cooking surface based on your needs: a skillet or sauté pan serves as your primary method, while a Blackstone flat top griddle guarantees even heating. If you’re cooking multiple sandwiches, the George Foreman grill accelerates the process efficiently. A grill pan creates appealing grill lines, and an outdoor grill offers an alternative option.
Organize your tools strategically. Position a spatula within arm’s reach for flipping. Have a lid ready to accelerate cheese melting and a plate prepared for resting your finished sandwich. Gather butter, your bread slices, ham, and room-temperature cheese at your station. The large cooking capacity of a Blackstone griddle makes it particularly useful when preparing multiple sandwiches for a group. The smooth cooking surface of flat top griddles retains food juices better than traditional grills with grates. For optimal results, consider pairing your grilled ham and cheese with tomato soup to complement the meal. If you’re considering investing in a dedicated outdoor griddle, the Solo Stove Steelfire offers excellent performance with its 486 square inch cooking surface and dual-burner system. When evaluating griddle options, consider the tradeoff between usable cooking area and grease trough space to maximize your cooking efficiency. Premium griddles like the Traeger Flatrock provide exceptional temperature consistency with minimal variance during cooking. Set your chosen surface to medium or medium-high heat, depending on your equipment. This preparation ascertains smooth execution and prevents interruptions during cooking.

Double Burner Configuration: The Lodge Double Play Reversible Cast Iron Grill/Griddle covers two burners, offering a generous breakfast grill plate for family breakfasts or meal prep with ease

【SAFE-TO-USE COOKWARE】Crafted with pure iron and oil, just as traditional seasoned cast iron should be — our cookware is free of harmful PFOA and PTFE. We’re dedicated to creating products that keep you and your loved ones safe: every stage of our manufacturing process prioritizes the well-being of our employees and our customers.

Mastering the Grilling Technique
Once you’ve arranged your station, controlling heat becomes your primary focus for achieving the ideal grilled ham and cheese sandwich. Start with medium heat to warm your skillet, then reduce to medium-low to prevent burning while cheese melts. You’ll want to master optimizing butter application by spreading it evenly on both bread slices, placing the buttered side down first in the pan.
Grill for 2-2.5 minutes until the bottom turns golden brown, then flip using your spatula. Check the color change around cheese edges before flipping to guarantee proper melting. For maintaining uniform heat distribution, cover your pan with a lid for one minute, which accelerates cheese melting considerably. American cheese creates the creamiest melted texture and is ideal for this classic sandwich. Use a meat thermometer to verify your sandwich has reached a safe internal temperature if you’ve added any protein fillings. If using an outdoor grill, ensure it’s positioned in a well-ventilated outdoor space away from any flammable materials. If you’re using an outdoor gas grill, allow 10-15 minutes for preheating with the lid closed and burners on high to reach optimal cooking temperatures. Regular cleaning of your grill grates between uses helps maintain consistent heat transfer and prevents flavor contamination. For best results, clean while still warm to easily remove any grease and food residue from the grates. Remove when both sides are golden and cheese has fully melted. Let your sandwich rest one minute before serving for perfect settling.

11" Square Griddle Pan--make breakfast easy with a large surface, flat pan for your eggs, bacon, hash browns and more.

MINI AND TRENDY: Introducing the Tasty Hot Sandwich Maker, a quick and mini solution for hot sandwiches, paninis, quesadillas, grilled cheese, and breakfast sandwiches.

MINI AND TRENDY: Introducing the Tasty Hot Sandwich Maker, a quick and mini solution for hot sandwiches, paninis, quesadillas, grilled cheese, and breakfast sandwiches.
Achieving the Perfect Finish
The difference between a good grilled ham and cheese sandwich and an exceptional one lies in mastering those final moments after the pan. You’ll want to rest your sandwich for one to two minutes, allowing the cheese to set slightly while maintaining structural integrity. This brief pause prevents the filling from sliding during slicing and enhances flavor integration.
When you’re ready to cut, use a sharp knife to make a diagonal slice, which exposes the gooey interior and creates visual appeal. The diagonal technique guarantees even browning is visible and consistent texture remains intact throughout each half. The mayonnaise creates a buttery texture that enhances the overall mouthfeel of each bite. For a healthier alternative, consider using whole-grain bread to add extra fiber to your sandwich. If you’re looking for alternatives to butter, options like olive oil or avocado oil can create an equally crispy exterior with complementary flavors. If you need to prepare sandwiches ahead of time, remove them from refrigeration to reach room temperature before reheating to ensure even warming and avoid sogginess. For maintaining crispness during reheating, consider using a preheated baking sheet in your toaster oven to recreate that desirable griddle effect. To prevent sticking and simplify cleanup, you can place oiled aluminum foil on your cooking surface before grilling. Serve immediately post-slice to preserve that crisp exterior you’ve worked to achieve. This finishing sequence transforms your sandwich from satisfactory to exceptional.
Serving and Enjoying Your Sandwich
Now that you’ve perfected the grilled ham and cheese sandwich right down to that diagonal slice, it’s time to ponder how you’ll serve and savor it. The ideal serving temperature is immediately after cooking, when the cheese remains melted and the bread retains its crispy exterior. Serve your sandwich while it’s still warm to maximize flavor and texture contrast.
Complementary beverage pairings enhance your experience tremendously. Cold milk provides a classic pairing that balances the richness of melted cheese and cured ham. Alternatively, consider tomato soup—a traditional accompaniment that complements both the savory elements and the toasted bread’s warmth. The tangy, creamy combination of tomato soup creates a harmonious pairing with the rich flavors of your grilled sandwich. Fresh citrus beverages or iced tea offer lighter options if you prefer. For a more substantial meal, you can also add a cup of soup to round out your dining experience. This satisfying meal doesn’t require heating up your kitchen while still delivering warmth and comfort.
Pair your sandwich with simple sides: fresh vegetables, fruit, or crisp pickles. These additions provide textural variety and palate cleansing between bites.