You’ll start by selecting vibrant pink mutton chops with creamy-white fat and ample marbling. Next, marinate them for at least four hours in an oil-herb or yogurt-based mixture to guarantee tenderness. Set up your grill with two zones: indirect heat at 275°F and direct heat at 500°F+. Sear the chops over high heat for a caramelized crust, then finish over indirect heat to your desired doneness. Rest them before serving, and you’ll reveal the techniques that transform ordinary chops into restaurant-quality cuts.
Selecting Quality Mutton Chops
When you’re selecting mutton chops for grilling, colour is your first visual indicator of quality. Look for vibrant pink or deep reddish-pink meat—these signal prime cuts perfect for your grill. Avoid pale or greyish options, which suggest improper storage or age.
Examine the marbling and fat content carefully. Ample marbling guarantees tenderness, while creamy-white, firm fat indicates ideal grading. Reject yellowish fat, signalling an older, poorly nourished animal.
Press the meat gently; it should spring back with a fine-grained texture. Uniform thickness across chops enables even cooking. Check the aroma—fresh, clean scents confirm proper handling. Sourcing your mutton chops from reputable halal suppliers ensures you receive expertly trimmed cuts with quality assurance.
Consult your butcher about precise trimming and cuts properly hung for five days. Their expertise confirms you select mutton chops with exemplary fat-to-lean ratios for juicy, flavourful results. Consider pairing your quality meat selection with lump charcoal for high heat searing that locks in the natural flavors. For the best results, use stainless steel construction grills known for their durability and heat retention. If you’re grilling in coastal areas, prioritize 304 stainless steel for superior resistance to salt-air corrosion. Check that your grill’s ignition system functions reliably before firing up to ensure a smooth start every time. A wood pellet smoke box can deliver authentic smoky flavors from premium hardwoods to elevate your mutton chops beyond traditional grilling methods.
Preparing the Marinade
Since you’ve selected prime mutton chops with excellent marbling and fat content, a well-crafted marinade will amplify their natural richness and tenderness. Choose from five proven formulas: Classic herb-oil, Mediterranean vinegar-based, Asian umami, Indian-spiced, or Braai-style marinades. Each delivers distinct flavor profiles through strategic ingredient combinations.
For enhancing flavor depth, combine your chosen base—whether olive oil, vinegar, or soy sauce—with complementary aromatics like fresh garlic, ginger, or herbs. Achieving perfect consistency requires balancing liquid components with dry spices or pastes. Mix ingredients thoroughly in food-safe containers, ensuring even distribution. The marinade should consist of garlic, herbs, oil, salt, and pepper combined in proper proportions for optimal flavor development. For best results, add your marinade ingredients to a zip-top bag for convenient mixing and storage.
Marinade your chops minimum thirty minutes; overnight produces superior penetration. Use plastic storage bags for efficient coating and space-saving refrigeration. While your mutton marinates, consider placing a grill mat beneath your grill to protect your deck surface from grease drips and heat damage. When selecting oils for your marinade, opt for high-smoke-point options like refined avocado, canola, or grapeseed oil that can withstand the intense heat of grilling without burning. Avoid lining your grill grates with aluminum foil, as high grilling temperatures can cause aluminum particles to leach into your food and create uneven cooking. Before you begin grilling, ensure your grates are properly maintained by oiling your grates with high-temperature cooking oil both before and after use. This preparation stage transforms ordinary mutton into exceptionally flavorful, tender grilled meat.
Marinating Your Chops
Precision in marinade application determines whether your mutton chops’ll absorb maximum flavor and achieve ideal tenderness. The proper marinating sequence starts with coating both sides evenly, ensuring complete coverage. Your choice of marinade directly impacts results: yogurt-based options provide tenderizing effects through acidity, while oil-herb combinations enhance flavor intensity over extended periods.
Ideal marinade pH levels—achieved through yogurt, vinegar, or lemon juice—penetrate meat fibers effectively. Refrigerate your chops for at least four hours; overnight marination yields juicier, more flavorful results. Seal them in plastic bags or cover with plastic wrap to maintain consistent moisture and prevent oxidation. Spices and herbs like garlic and ginger are key to flavoring the meat and should be evenly distributed throughout the marinade. A balanced marinade combining distilled white vinegar, salt, and pepper with minced garlic and thinly sliced onion creates an acidic environment that breaks down proteins while infusing rich flavor.
For garlic-rosemary mixtures, marinate one to twenty-four hours depending on intensity preferences. Minimum coverage requires just one hour, though longer durations maximize flavor infusion and tenderness. When ready to grill, a stainless steel flat top ensures even heat distribution across the entire cooking surface for perfectly seared chops. Consider using porcelain-enameled cast iron grill plates for superior heat retention that creates bold sear marks on your mutton chops. A carbon steel griddle provides exceptional durability and naturally non-stick properties when properly seasoned, making it ideal for achieving restaurant-quality results on your gas grill. For indoor preparation, a pre-seasoned cast iron grill pan delivers excellent searing performance and builds natural non-stick properties over time with simple maintenance. A heavy-duty stainless steel spatula becomes essential for flipping thick mutton chops without damaging their seared crust.
Setting Up Your Grill
Your grill’s configuration makes or breaks your mutton chops’ final result—you’ll need a two-zone setup that separates indirect heat for smoking from direct heat for searing. Maintain your indirect zone at 275°F and crank your hot side to 500°F+. Close bottom vents to control intensity and prevent uncontrolled charring.
Select premium black bag charcoal for quick ignition and sustained high temperatures. Proper fuel load management guarantees you won’t experience temperature drops during extended cooking. Plan charcoal replenishment before starting; you’ll need adequate quantity for both smoking and searing phases. Using tongs, not a fork, handle your setup preparations to avoid damaging grate integrity. For optimal results, light FOGO premium charcoal to ensure consistent heat throughout your cooking process.
Get your grates to 600°F for caramelized crust formation. Use your meat thermometer throughout cooking to track progress from initial smoking at 90°F internal temperature through final searing phases. This staged approach prevents charring your exterior before your interior reaches target doneness. Add a water pan to your indirect zone to help regulate temperature and maintain moisture during the smoking phase. The burning charcoal embers generate intense radiant heat that cooks your mutton chops directly from below. A charcoal chimney starter provides chemical-free ignition and acts as a measuring cup to help you dial in the precise grill temperature for both zones. Keep a grill brush or scraper nearby to clean grates between the smoking and searing phases for optimal surface contact. Allow 20–30 minutes preheating for your charcoal to reach white-hot readiness with evenly spread coals before placing mutton chops on the grates.

【Master Two-Zone & Indirect Cooking】 Designed in a perfect half-moon shape, this charcoal basket fits snugly against the side of your kettle grill. It instantly creates a dedicated "Hot Zone" for searing and a "Cool Zone" for slow roasting or keeping food warm. This setup is essential for cooking ribs, whole chickens, or pork butts without burning, giving you restaurant-quality results.
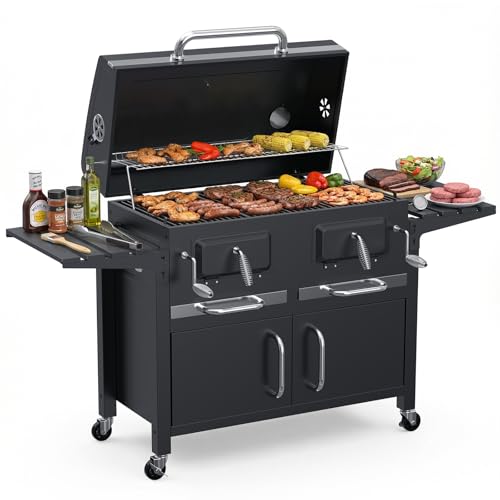
EXTRA LARGE CAPACITY FOR BACKYARD FEASTS: Feeding a crowd of 15+ has never been easier. This oversized charcoal grill features a heavy-duty main cooking grate and an elevated warming rack, providing a sprawling surface for steaks, burgers, and ribs. Whether you are looking for charcoal grills on clearance or a premium barbecue grill, our station delivers the space of a professional outside grill.

LARGE DUAL-ZONE INDEPENDENT COOKING:Unlock ultimate grilling versatility with 778 sq.in. cooking space. 2 separate charcoal chambers with air vent create create large Charcoal Grills space.Functions as a heavy-duty outdoor smoker grills that rivals professional-grade stationary units, allowing you to cook for different diets simultaneously. A tray of hot dogs for the kids on one side and a gourmet steak for adults on the other—all in one bbq charcoal grill-a professional outdoor kitchen. Stainless warming rack keeps cooked and raw food safely separated, making your BBQ more efficient and user-friendly.
Preparing the Grill Surface
Before you fire up your grill, you’ve got to prepare the cooking surface to guarantee proper heat distribution and prevent flavor contamination from factory residue or previous cooking sessions. Start with deep cleaning grates using hot soapy water and a grill brick to remove production oils and grime. Rinse thoroughly with clean hot water, then immediately dry with a towel to prevent rust formation on cast iron surfaces. Next, wipe down interior surfaces—the cover, sides, and bottom—using old dish towels soaked in hot water and dish soap. For stubborn deposits, apply a 1:3 vinegar-to-water solution on the inside top. Remove debris from the tray underneath to prevent burnt residue from transferring onto your mutton chops. Don’t forget to empty and wipe the drip pan to prevent grease buildup that can attract pests and affect your grill’s performance. For stainless steel exterior components, use a stainless steel cleaner and buff with a microfiber cloth to restore shine and prevent water spots. You can also use baking soda and vinegar on interior surfaces to effectively loosen stubborn grease buildup before wiping clean. For a natural alternative, try a lemon juice and salt scrub to break down tough grime without harsh chemicals. If you notice rust spots on your grates, create a vinegar and salt mixture to soak them overnight, which will help loosen the rust before scrubbing. Properly seasoning your grates with high smoke point oil after cleaning will build a non-stick, rust-resistant surface that extends the lifespan of your grill. Once your grill is clean, preheat it with the lid closed for 10 to 15 minutes to ensure the grates reach optimal temperature for searing your mutton chops.

[Safe Wire Brush & Scraper ] - Grill cleaning brush with sharp stainless steel grill scraper can easily scrub stubborn grease and dirt effortless. Our bbq brush tools reuseable after clean.It's also the perfect Father's Day gifts for dad, family, friends, and barbecue enthusiasts.

🛡 UPGRADED 100% BRISTLE-FREE SAFE GRILL BRUSH — Protect your family from loose wire bristles in your food. Our upgraded SteelStrike woven mesh head is designed for powerful cleaning without the risks of traditional wire-bristle brushes. Tough on burnt-on grime yet gentle on grill grates, it safely cleans cast iron and stainless steel surfaces without scratching them. The best grill brush without wire bristles for worry-free grilling.

Efficient 2-in-1 Grill Scraper: Cut cleaning time with this dual-action tool. The sharp stainless steel scraper chips away stubborn residue, while thick bristles remove heavy grease instantly. The ultimate solution for restoring dirty gas or charcoal grills quickly
Understanding Temperature Zones
Successful mutton chop grilling hinges on mastering two distinct heat zones that’ll give you control over both the cooking progression and the final result. Your heat source selection determines the flavor profile—charcoal delivers superior smokiness compared to gas alternatives. Establish an indirect smoking zone at 275°F (±25°F variance) on one side of your grill grate positioning, leaving the opposite side empty for temperature differential management. This reverse searing approach pulls meat 15–20°F below target doneness during the smoking phase. Movement from the smoking zone to the direct heat zone at 450–500°F for 2–3 minutes per side, creating characteristic grill marks and exterior crust development. Double-cut mutton chops provide additional thermal mass that slows the cooking process and makes it easier to achieve consistent medium-rare results across each chop. The rendered fat from mutton chops drips onto the heat source, intensifying the smoky flavors while the fat in the meat keeps it moist throughout the cooking process. Monitor internal temperatures religiously, pulling chops when they reach 90°F to account for carryover cooking’s 10–15°F rise during resting. Use a quick-read meat thermometer to check for the desired internal temperature and ensure precision throughout the grilling process. For optimal heat retention and temperature control during extended grilling sessions, consider using grills with adjustable dampers that maintain steady high-heat conditions. Keep your grill lid closed as much as possible between flipping to stabilize temperature and prevent heat fluctuations that can lead to uneven cooking. Remember that internal temperature is the most reliable indicator of doneness rather than relying solely on cooking time, especially when working with varying thicknesses of mutton chops. If you’re looking for a more moderate approach that prevents burning while still achieving proper browning, medium heat between 300 and 400 degrees Fahrenheit works well for finishing thinner cuts or maintaining consistent temperatures during longer cooking sessions.

Stainless steel 50 - 550 F adjustable BBQ thermometer

BBQ / Grill pit thermometer, safe and environmentally friendly.

𝐕𝐞𝐫𝐬𝐚𝐭𝐢𝐥𝐞 𝐓𝐨𝐨𝐥𝐬: Infrared technology allows you to measure various objects at home and outdoors; Use it for 𝒎𝒆𝒂𝒕, 𝑫𝑰𝒀 𝒄𝒂𝒏𝒅𝒚, 𝒐𝒗𝒆𝒏𝒔, 𝒈𝒓𝒊𝒍𝒍𝒊𝒏𝒈, 𝒇𝒐𝒐𝒅, 𝒄𝒐𝒐𝒌𝒊𝒏𝒈, 𝒂𝒖𝒕𝒐𝒎𝒐𝒕𝒊𝒗𝒆 𝒖𝒔𝒆, 𝑨/𝑪, 𝒓𝒆𝒇𝒓𝒊𝒈𝒆𝒓𝒂𝒕𝒐𝒓𝒔, etc.
Smoking and Searing Techniques
Once you’ve established your temperature zones, you’re ready to build layers of flavor through smoking and searing. Start with grill grate preparation by lightly oiling your grates using canola or grapeseed oil—both have high smoke points that won’t burn. Apply oil immediately before placing meat to prevent sticking.
Position your mutton chops directly on the grates at 225-250°F for 45-60 minutes, flipping once at the midway point. This smoking phase creates depth. To ensure your mutton remains tender and juicy, cook to an internal temperature of 140°F for medium-rare, allowing for carryover cooking to 145°F. Like the herb paste seasoning used in traditional preparations, the smoking process builds complex flavors that enhance the final dish. After smoking concludes, increase heat to 450-500°F for direct searing. Apply quick two-minute sears per side, maintaining minimal movement to develop characteristic crust and grill marks. Resting the meat after cooking allows the juices to redistribute throughout the chops, ensuring maximum tenderness and flavor. For precise temperature monitoring throughout the cook, consider using a wireless probe thermometer with remote connectivity to track both meat and ambient grill temperatures. High-heat capable probes like the RFX Meat thermometer withstand temperatures up to 1000°F, making them ideal for both smoking and searing phases. For quick temperature verification during the searing stage, an instant-read thermometer like the ThermoWorks Thermapen ONE provides the fastest and most accurate readings. Models using radio frequencies like 433 MHz or 900 MHz offer superior range compared to Bluetooth-only thermometers, ensuring reliable connection even when monitoring from inside your house. This two-stage approach combines low-temperature smoking’s flavor complexity with high-heat searing’s textural contrast, delivering juicy, flavorful results.

Bluetooth Monitor Remotely: Govee Bluetooth meat thermometer lets you check the temperature of your grill, smoker, or oven from your phone. With this smart BBQ thermometer, you can multitask while grilling.

Smart Display Base: Unlike other thermometers that require an app to function, the P2’s smart base provides direct target temperature setting and real-time readings display. For advanced features like cooking history and AI-guided cooking, the free ThermoMaven APP (iOS/Andriod) is also available, giving you the best of both worlds.
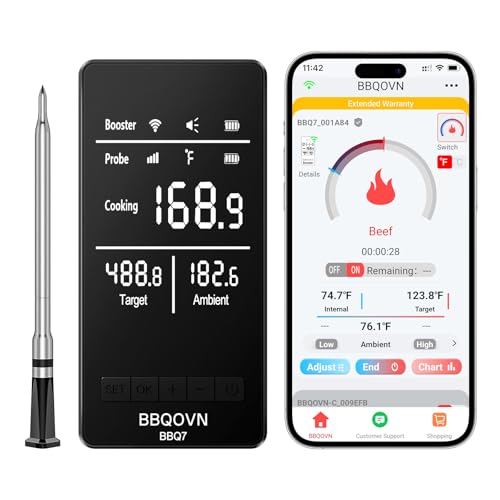
BBQOVN Smart WiFi Wireless Meat Thermometer, Sub-1G Long Range 1000FT, 7 NIST Certified Sensors in 1 Thinner Probe ±0.5℉ Accuracy, Standalone Base with App
Monitoring Internal Temperature
After you’ve completed the searing phase and your mutton chops have developed that characteristic crust, a meat thermometer becomes your most reliable tool for determining doneness. Insert the thermometer into the thickest part without touching bone for accurate readings. Digital thermometers provide faster, more dependable results than analog versions.
Proper thermometer placement at the center of the meat, away from fat pockets, delivers precise internal temperature measurement. Check multiple chops individually since thickness variations affect cooking times. For lamb cuts, internal temperatures of 145°F for medium-rare ensure optimal tenderness and flavor development. Beyond using a thermometer, you can also test doneness with finger pressure techniques to gauge the firmness of the meat.
Account for carryover cooking management by pulling your chops 5°F below your target temperature. Lamb continues cooking 5°F-10°F after removal from heat due to residual thermal energy. Rest meat under foil for five minutes, allowing temperature stabilization while maintaining juiciness. This resting period helps retain moisture in the meat, similar to how foil packets preserve juiciness when grilling other proteins. For medium doneness, aim for an internal temperature of 135°F, which represents the ideal endpoint for tender, flavorful mutton chops. Using a meat thermometer is crucial to ensure proper doneness without overcooking, just as it is essential when grilling chicken or other meats. This strategic approach prevents overcooking while ensuring consistent, ideal doneness throughout your batch. Accurate temperature monitoring helps you avoid overcooking and maintain the juiciness that makes perfectly grilled meat so satisfying. Monitoring temperature helps prevent the gray band of overcooked meat that can result from excessive heat exposure.
Resting Your Cooked Chops
Remove your mutton chops from heat and let them rest on the counter for five minutes—this critical step allows carryover cooking to complete while redistributing juices throughout the meat. Don’t cover them; airflow prevents steaming and unwanted moisture retention.
During the ideal rest duration, your chops’ll rise approximately 12°F through carryover cooking. Use a probe thermometer to verify you’ve reached your target doneness—aim for 130–135°F for medium-rare, or 145°F if you’re following USDA guidelines. For optimal results, pair your rested chops with garlic mashed potatoes or roasted vegetables to complement the rich flavors. Remember that mutton chops, like other lamb cuts, should reach 145°F with 3 minutes rest time according to food safety standards.
Temperature monitoring guarantees you’ve achieved even moisture distribution. Once resting completes, slice between the bones and serve immediately while heat’s retained. Just as resting allows connective tissues to break down in larger cuts like brisket, this brief rest ensures your mutton chops achieve maximum tenderness and flavor. If you have leftover cooked chops, store them in airtight containers or freezer bags and freeze on the same day to maintain quality and prevent freezer burn. Similar to how pellicle formation creates a tacky surface on salmon before smoking, allowing meat to rest uncovered develops a better exterior texture. Before grilling your next batch, ensure your grill is positioned in a well-ventilated outdoor space to maintain proper airflow and safety. To keep your grill performing at its best, regularly maintain your grates by removing rust and re-seasoning them with high-smoke point oil. This fundamental technique transforms your grilled chops from merely cooked to genuinely succulent.
Plating and Serving Suggestions
Your plating strategy should draw inspiration from the principles that elevated your mutton chops during cooking: intentional technique and respect for the ingredient.
Position your rested chops with the textured side facing up to showcase the charred crust you’ve developed. Arrange them off-center on your plate, creating visual interest through asymmetrical placement. Layer complementary elements—vibrant pea mash, pureed vegetables, and crispy potato rings—to establish textural contrast and depth. Consider using clean white porcelain with subtle textured rims as your base to allow vibrant colors to stand out without appearing chaotic.
Incorporate garnish presentation thoughtfully by adding charred microgreens or herb oils that echo your cooking technique. Embrace sustainable practices by utilizing vegetable trimmings in your purees and minimizing plate waste. Just as reinforced seams strengthen grill covers for durability, proper plating technique reinforces your dish’s visual impact and structural integrity.
Keep your composition dynamic yet balanced, ensuring the mutton chops remain the focal point. Much like selecting a grill cover with fire-retardant materials ensures long-term protection, choosing heat-resistant serving platters preserves your presentation’s integrity from kitchen to table. If you’re using a stainless steel platter, ensure it’s made from 304 stainless for superior corrosion resistance and longevity. When storing your outdoor cooking equipment after the meal, ensure you’ve measured properly for custom-fit covers that protect your grill investment between uses. For side dishes that complement your mutton chops, consider serving alongside vegetables that have been wrapped in aluminum foil and grilled using indirect heat. This approach transforms your grilled chops into a restaurant-quality presentation that respects both ingredient and craftsmanship.