
You’ll pre-cook your ribs in the oven for 180 minutes total at 250°F. Start by placing your prepared ribs on a wire rack with one cup of apple cider below, then cook for 90 minutes. Add more apple cider and continue cooking for another 90 minutes, rotating racks midway through. This two-stage process guarantees even cooking before you transfer them to your grill for that final bark and smoke flavor—though there’s more technique involved in achieving perfect results.
Preparing Your Ribs for the Oven
Before you season your ribs, you’ll want to prepare them properly so they cook evenly and absorb flavors effectively. Start by rinsing your rib racks thoroughly under water to remove surface debris and excess blood. Pat them dry with paper towels, which prepares the surface for seasoning application. Next, remove the membrane from the bone side of the rack—this imperative step improves tenderness and allows seasonings to penetrate deeper into the meat. Trim any excess fat and hanging pieces to reduce flare-ups during grilling and enhance presentation. Finally, allow your ribs to reach room temperature before cooking. This guarantees even heat distribution throughout the meat, preventing cold spots that compromise texture and flavor development. For optimal results, consider applying a dry rub of spices like brown sugar, paprika, salt, and pepper to enhance flavor before your oven pre-cooking process. Low temperature cooking around 225°F to 275°F will tenderize the meat and prepare it for finishing on the grill. Many pitmasters use the 2-2-1 method to achieve a balance of smoky flavor and meat tenderness during the cooking process. Reaching an internal temperature of 180-200°F ensures the ribs are properly cooked through before moving to the grill. For optimal results, you should wrap precooked ribs in foil before refrigerating them to maintain moisture and prevent drying out during storage. For best results, use 2 racks of Pork Spare Ribs that are trimmed to a uniform size for easier handling and consistent cooking throughout the oven pre-cooking process. Once your ribs are ready to move to the grill, consider using a non-slip grill mat underneath your grill to protect your deck and catch any drippings. Proper preparation sets the foundation for perfectly pre-cooked ribs.

[REMOVE RIB MEMBRANES CLEANLY] Designed to lift and pull the tough silver skin from pork ribs, spare ribs, baby back ribs and beef ribs, helping seasonings and smoke reach the meat for better BBQ flavor and texture.

Premium 304 Stainless Steel & Safety: Constructed from 1mm thick 304 food-grade stainless steel, this rib membrane removal tool offers exceptional strength that prevents bending during rigorous use. The carefully polished edges ensure complete safety, making it a durable and reliable kitchen tool for all your rib prep needs

DEEP-GROOVE JAWS FOR CLEAN, COMPLETE MEMBRANE REMOVAL – Precision-machined jaws grip slippery silver skin firmly and hold it securely, letting you peel the entire membrane off pork ribs, beef ribs, and baby back ribs in one smooth, continuous pull. No more struggling with butter knives or paper towels.
Recommended Oven Temperatures and Times by Rib Type
Three primary rib types require distinct temperature and timing protocols to achieve ideal tenderness at the target internal temperature of 195°F to 203°F, where collagen fully breaks down. Baby back ribs cook fastest at 275°F to 300°F for 2 to 3.5 hours due to their smaller size. Spare ribs and St. Louis-style ribs benefit from lower temperatures of 225°F to 250°F, requiring 5 to 6 hours and 4 to 5 hours respectively. Cooking temperature consistency directly impacts your results—temperature fluctuations extend cooking duration unpredictably. Rib thickness variation also affects timing; thicker ribs demand longer exposure. St. Louis-style ribs’ uniform shape guarantees even heat distribution, while spare ribs’ collagen-rich structure requires extended cooking for maximum tenderness. Many pitmasters enhance moisture and tenderness by wrapping ribs in foil with butter and brown sugar during the cooking process. After reaching the initial target temperature, ribs can be further braised in a foil-covered pan with BBQ sauce and liquids to continue tenderizing the meat. Common practice also involves smoking unwrapped for an initial period before wrapping to develop surface bark and smoke flavor. To prevent burning the exterior, apply BBQ sauce only in the final 15 to 20 minutes of cooking to preserve the sugars and maintain optimal color. External factors such as outside temperature, wind, and rain can influence your oven’s internal environment and cooking performance. Using a meat thermometer to verify doneness ensures you achieve the ideal tenderness without overcooking or undercooking your ribs. The bend test for tenderness provides an additional method to confirm when your ribs have reached optimal doneness without relying solely on temperature measurements.

Package Includes: One (1) Reynolds Wrap Pitmaster’s Choice Extra Thick Aluminum Foil Roll measuring 25 feet by 18 inches wide (37.5 square feet total)

Package Includes: One (1) Reynolds Wrap Heavy Duty Aluminum Foil Roll measuring 50 feet long by 12 inches wide (50 square feet total)

Step-by-Step Pre-Cooking Process
Once you’ve selected your rib type and determined the appropriate cooking temperature, you’ll execute the pre-cooking process in distinct phases that build upon each other to develop flavor and tenderness. Begin by whisking together your dry rub blending techniques—brown sugar, cumin, smoked paprika, garlic powder, coriander, and salt. Generously coat both sides of your ribs, then refrigerate for 4 hours or overnight to allow flavors to penetrate deeply. Next, place a wire rack on your baking sheet and add 1 cup of apple cider below it to establish proper oven humidity. Position your ribs on the rack, then cook at 250°F for 90 minutes, add more apple cider, and bake for another 90 minutes to achieve the low and slow cooking method that keeps ribs juicy and tender. Baby back ribs typically require 1.5 to 2 hours of total baking time at 300°F, though the specific duration depends on your preferred level of tenderness. This hot and fast method significantly reduces cooking time compared to traditional smoking techniques. Rotate racks midway through cooking to compensate for uneven heat distribution, ensuring consistent tenderness throughout. For optimal results, consider wrapping the ribs during the latter stages of cooking to further enhance tenderness and retain moisture. Many pitmasters use the 3-2-1 method which involves distinct stages of unwrapped and wrapped cooking to achieve bite-through or fall-off-the-bone results. An adjustable grate] on your charcoal grill allows you to fine-tune the distance between your heat source and ribs for better control during the finishing phase. After pre-cooking in the oven, transfer your ribs to a two-zone fire on your charcoal grill to finish with smoke and achieve the perfect bark and flavor development.
How to Know When Your Ribs Are Ready
Determining doneness requires you to bring together multiple indicators rather than relying on a single method, since visual cues and texture tests complement temperature readings for the most reliable assessment. Insert your thermometer probe between bones into the thickest meat section, targeting 201°F to 210°F for ideal cooking doneness. You’ll notice meat pulling back approximately ½ inch from bones while developing a deeper reddish-brown color—flavor profile indicators of proper rendering. Test flexibility by bending the slab into a U-shape; it should bend easily without meat separating from bone. Take temperatures in multiple locations to account for hot spots that may affect your results. Slide a wooden skewer between bones; it should pass through without resistance. Like brisket smoking, achieving the right internal temperature requires balancing tenderness and texture to avoid overdrying the meat. During the cooking process, your ribs may experience a temperature stall where cooking slows due to moisture evaporation, similar to what happens when smoking brisket. For fall-off-the-bone tenderness, aim for the higher end of your target range around 205°F, which allows collagen to fully break down into gelatin, similar to how indirect heat cooking transforms tough cuts into tender, succulent results. Overcooked ribs become dry and stringy, so monitor your cooking progress carefully to avoid exceeding the target temperature range. These combined methods guarantee you’ve achieved tender, buttery texture that characterizes perfectly pre-cooked ribs ready for grilling.

【Fast & Accurate】Our meat thermometer digital delivers accurate readings within ±1°F in just 1–2 seconds, with a wide temperature range of -58°F to 572°F (-50°C to 300°C). No more waiting over the heat - know your food's exact temperature instantly.
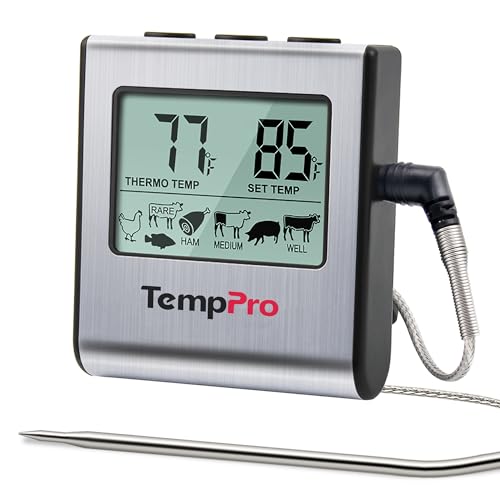
Cook mode with USDA preset temperature settings: TempPro cooking thermometer ideal for meat, oven, smoker or stove top; Programmable alert with preset temperatures for specific foods recommended by USDA; All of the preset temps can be reset to your desired tastes

Instant Read Meat Thermometer | Our instant read thermometer features a temperature probe and advanced, highly accurate technology with a 1-2 second response time. Our instant read food thermometer comes pre-calibrated with instructions and a meat temperature chart, plus a recalibration feature if needed.
Finishing Your Ribs on the Grill
Your pre-cooked ribs need just a brief stint on the grill to develop a caramelized bark and set the sauce. Begin by positioning your ribs on the indirect heat side of your grill preheated to 275-300°F. Apply saucing techniques strategically: brush a thin layer initially, allowing heat penetration without burning. After 10-30 minutes, transfer your ribs to direct heat for the critical direct heat finishing phase. Grill 3-5 minutes per side, watching carefully to achieve charring without scorching. The sauce sets and caramelizes during this brief exposure. For optimal results, cook low and slow to ensure the meat remains tender while the exterior develops that desirable smoky flavor. Low temperature smoking breaks down the connective tissues in ribs, resulting in a more tender final product. This efficient finishing method allows you to achieve a caramelized crust similar to 30-minute gas grill techniques while maintaining the tenderness from your oven pre-cooking. Consider using hickory or pecan pellet flavors to complement your pork and enhance the final bark. When selecting your grill, choose one with adjustable vents and dampers to maintain precise temperature control throughout the cooking process. Offset smoker designs offer versatile two-chamber configurations that allow you to switch between direct grilling and smoking for enhanced flavor development. Check for tenderness by seeing if meat separates from bone easily to confirm proper doneness. Rest your ribs 5-10 minutes post-grill before slicing between bones. Properly executed direct heat finishing guarantees meat that slides cleanly from the bone with a flavorful, caramelized exterior.

Made In the USA: Celebrate homegrown quality with these premium wood chips made in Arkansas and Missouri

SIGNATURE BLEND WOOD FIRED FLAVOR: The flavors of hickory, maple, and cherry hardwoods combine for in our Traeger Signature Blend Hardwood Pellets for flavor that can take on just about anything you cook; From classic BBQ meats, to fish and veggies, this versatile blend gives you full-bodied flavor you'll go back to time and time again
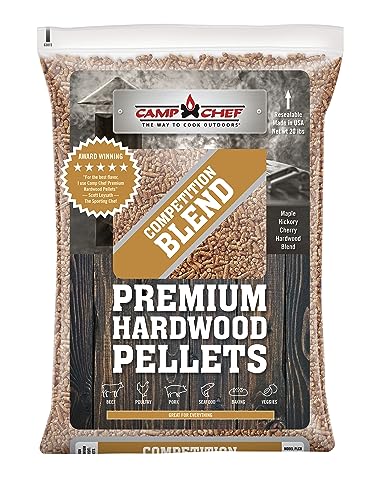
Maple, Hickory, and Cherry Blend: Competition blend is the Jack of All Trades. It's great with poultry, pork, baking, veggies, beef, and seafood. HARDWOODS: Camp Chef Hardwood bbq pellets are not a byproduct. They are 100% pure virgin hardwoods.
Storage and Make-Ahead Options
Because pre-cooked ribs are susceptible to drying out and bacterial growth, you’ll want to refrigerate them immediately after they’ve cooled slightly. Wrap them tightly in plastic wrap and aluminum foil, or use a vacuum sealer to maintain freshness up to four days.
For freezer preparation, vacuum sealing eliminates air and prevents freezer burn, preserving quality approximately two months. If you lack a vacuum sealer, wrap ribs in plastic wrap followed by foil. Never thaw frozen ribs at room temperature, as this can promote bacterial growth and compromise food safety. Store your refrigerator at around 0-3°C to maintain optimal food safety conditions. Additionally, ensure your grill grates are clean and free of rust buildup before reheating ribs to prevent contamination and off-flavors. Consider using a grease catcher to keep your grill clean during the reheating process. Regular maintenance and oiling the grates will help prevent future rust formation on your cooking surface.
When planning post storage reheating, thaw frozen ribs in your refrigerator for at least twenty-four hours. Remove them from vacuum packaging, wrap in foil sprayed with cooking spray, and reheat at 350°F until reaching 155°F internal temperature. Slicing ribs into smaller pieces helps them cool quickly before storage, reducing the risk of moisture loss. To further minimize moisture loss during storage, store ribs in zip lock bags to create an airtight seal. This methodical approach guarantees moisture retention and food safety.