You’ll smoke country style pork ribs at 225°F for approximately 4–5 hours total. Start with a 60-minute initial smoke to develop the bark, then wrap at 155°F internal temperature for roughly 60 minutes at elevated heat. Finally, unwrap and continue smoking until you’ve reached 195–205°F, where the connective tissue fully dissolves into that prized tender texture. Several factors—humidity, thickness, and airflow—can shift your timeline, so understanding these variables will help you nail consistent results.
Understanding Country Style Pork Ribs
Despite their name, country style pork ribs aren’t actually ribs—they’re meaty strips cut from either the pork butt or the anterior portion of the loin, and they’ll transform your smoking technique once you understand their unique structure. You’ll find country style rib variations sourced from the posterior of the pork shoulder anatomy, specifically near the blade bone and first few rib bones preceding the back ribs. Some versions include bone, while boneless options come from the shoulder blade roast. You’re working with meat that’s leaner than typical shoulder cuts but contains rich marbling and connective tissue. This composition makes them ideal for low-and-slow smoking, as the collagen breaks down into gelatin, creating that decadent flavor you’re after. Like brisket, the key to perfectly tender country style ribs is allowing internal temperature rather than cook time to guide your doneness. Maintaining a consistent temperature around 225°F helps ensure even cooking and optimal collagen breakdown. The meat may experience a temperature stall during smoking where cooking slows due to moisture evaporation, similar to what occurs with larger cuts. Testing for tenderness by probe] ensures your country style ribs have reached the desired texture before serving. Country ribs can also be cooked efficiently on the stovetop, in the Instant Pot, or in the oven with BBQ sauce for faster meal preparation. Country ribs are better for grilling or roasting compared to western shoulder ribs, which require longer cooking methods to break down their additional connective tissue.
Preparation and Seasoning Your Ribs
Now that you’ve selected your country style ribs and understand their composition, it’s time to build the flavor foundation through proper preparation and seasoning.
Start by patting your ribs dry—this critical step secures ideal adherence. Next, focus on dry seasoning blending by combining garlic powder, onion powder, smoked paprika, brown sugar, kosher salt, and black pepper in a small bowl. Consider adding ground mustard and cayenne pepper for complexity. For best results, cook low and slow to ensure the dry rub fully penetrates the meat during the smoking process.
For rubbing application methods, you’ve got two effective options: spread ribs on a sheet pan in a single layer and massage the mixture evenly across all sides, or use a gallon zip-top bag to seal and shake the ribs with seasoning for one minute. Either approach guarantees thorough coverage. Yellow mustard serves as an excellent binder, helping your dry rub adhere permanently during the smoking process. The radiant heat from smoking will work with the seasoning to develop deeper flavors. Standard sized ribs typically require about two per person for an adequate serving portion. For extended smoking sessions, briquettes are favored for their consistent medium heat and long burn times, making them ideal for low-and-slow cooking. To maintain optimal temperature throughout your smoking session, consider managing airflow by adjusting vents to control oxygen supply and heat consistency, following the guidance of maintaining a steady temperature range between 225–250°F for even results. Keeping your grill lid closed as much as possible will stabilize the temperature and ensure even cooking throughout the smoking process.
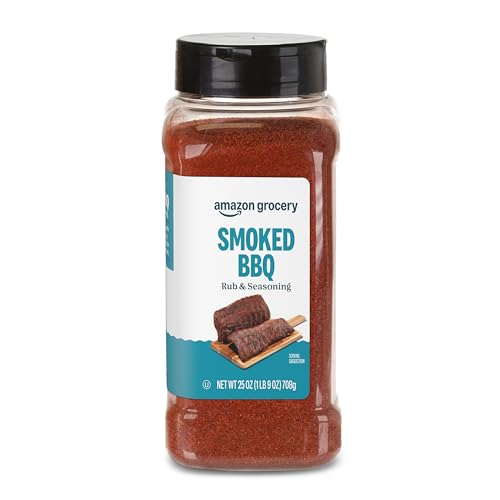
One 25 ounce container of Smoked BBQ Rub & Seasoning

For any dish from big to small, this pork seasoning rub will be your ticket to fame. Hypnotize taste buds and tantalize the senses with the Notorious P.I.G. rub, and earn your right to be called a Pitmaster.

Pork rub with the right amount of sweetness
Optimal Smoking Temperature and Setup
You’ll want to preheat your smoker to 225°F before placing your ribs on the grates—this baseline temperature guarantees consistent smoke penetration and allows the meat’s surface to develop a proper bark without drying out. Position ribs one inch apart on metal cooking grates for optimal grate space utilization and uniform heat exposure. Insert a thermometer probe into the thickest rib section to monitor internal temperatures accurately. Maintain steady smoke regulation throughout the initial phase, keeping heat consistent to prevent overcooking. Smoking is believed to incorporate the most flavor into country ribs, making it the most delicious cooking procedure. For pellet grills, set the smoker to Lo Smoke for 1 hour then switch to Hi Smoke to achieve optimal results. Pellet grills require less manual tending compared to charcoal or gas alternatives, allowing you to focus on meal preparation while maintaining consistent results. Consider using cherry pellets to add a subtle, fruity smoke character that complements pork ribs beautifully. Before your smoking session begins, make sure to season your pellet grill before first use to burn off any manufacturing residues. Models like the Z Grills 700D3 maintain consistent temperatures even in cold weather, ensuring reliable performance throughout your smoking session. Plan for approximately three hours of direct smoking before shifting to the wrapping phase. Flip ribs every 45-60 minutes for even exposure, ensuring your target internal temperature reaches 175°F before wrapping commences. After wrapping, continue monitoring the meat until it reaches the target internal temperature of around 200-205°F to break down collagen and fat for optimal tenderness.

The Weber Searwood 600 Pellet Smoker Grill has a full temperature range from 180° to 600°F; Lets you smoke, sear, and roast on the same grill; A full grate Sear Zone heats evenly and makes the most of every inch, so you get more food on the flame

Unidanho thermal insulated blanket replacement part for Pit Boss Charleston Onyx Grill, this smoker insulation blanket is compatible with Pit Boss Charleston 1020 PB1020NX Pellet Grill Gas Griddle Combo Onyx Edition, and fits other pellet gas combo grill with similar sizes.

【Effectively Reduces Pellet Consumption】Unidanho insulated smoker blanket for Traeger Westwood XL pellet grill has been designed with a heat-resistant, thermal insulated surface that acts as a buffer between the elements, which can minimize heat loss, even grilling in the winter can use fewer pellets and maximize fuel efficiency.
The Initial Smoke Phase Timeline
The initial smoke phase represents the foundation of your smoking process, where ribs develop their characteristic color, smoke ring, and bark formation. You’ll smoke for the first 60 minutes at 225°F to establish that vital smoke ring and allow surface drying. Monitor your ribs hourly, spritzing with apple juice if needed to maintain moisture. Expect bark development within the first 60-90 minutes as the rub sets and the surface hardens.
Flip your ribs after 10-20 minutes if you’ve applied rub to both sides. By the 1.5-2 hour mark, you’ll notice the mahogany color shift, indicating proper smoke absorption. Use your probe thermometer in the thickest section to track internal temperatures. Country style pork ribs typically require about 4 hours to reach an internal temperature of 155 degrees during this initial smoking phase. Many pitmasters employ periodic spritzing throughout the smoke to enhance moisture retention and bark development. As your ribs develop color and texture, aim to reach an internal temperature between 175°F and 205°F depending on your desired tenderness level. Wood choices like apple, cherry, or oak will influence the flavor profile of your ribs throughout the smoking process. This initial phase establishes the foundation for achieving that steak-like tenderness you’re targeting, which develops further once ribs reach the 180°F internal temperature threshold. Remember that using a meat thermometer rather than relying solely on time ensures accuracy, as factors like weather and smoker consistency can affect your cooking duration.
Internal Temperature Milestones
Once your ribs hit that mahogany color and you’ve established your smoke ring, internal temperature becomes your primary guide for the remaining cook. Understanding internal temperature ranges guarantees you’ll achieve optimal tenderness. Target 165°F when you’re ready to wrap—this marks where collagen breakdown initiates. Continue smoking until you reach 180-190°F for mid-range tenderness, then push toward 195-203°F for that melt-in-your-mouth texture where connective tissue fully dissolves into meaty goodness.
Don’t overlook considering post-cook carryover effects. Your ribs will rise 5-10°F during a 20-minute rest, allowing juices to redistribute throughout the meat, similar to how resting allows juices to redistribute in smoked poultry. Like beef tenderloin, using a meat thermometer to monitor internal temperature throughout the cook ensures you achieve your desired results. Use an instant-read thermometer to verify your target temperature accurately before removing from heat. For the fastest and most accurate temperature verification, consider a 1-second read time thermometer that delivers reliable results in demanding smoking conditions. Wireless models with app connectivity allow remote monitoring throughout your cook, keeping you informed without constant grill-side checks. If you prefer long-distance temperature monitoring without worrying about Bluetooth range limitations, radio-frequency thermometers provide superior reliability across your entire yard. Pull your ribs at 193-198°F, letting carryover temperature carry them to that ideal 195-203°F finishing range. Remember that safe temperature for pork ribs is 145°F, but the ideal range for tenderness and juiciness extends to 195-203°F. This technique delivers perfectly tender, juicy country-style ribs every time.
Wrapping and Mid-Cook Techniques
Mastery of the mid-cook wrap technique separates mediocre results from exceptional country-style ribs, and timing’s your critical variable here. You’ll wrap your ribs at 155°F internal temperature in a roasting dish, adding ½ cup apple juice and four tablespoons butter before sealing tightly with foil wrapping application. Insert your smoke probe through the foil and set an alarm for 180°F. This wrapped phase runs approximately 60 minutes at elevated smoker temperatures around 275°F.
Once ribs reach 180°F, you’ll unwrap and return them directly to the grates. Increase temperature to 250°F for the final phase. Apply sauce application timing strategically post-unwrap, then continue smoking until you hit 195°F for perfect tenderness. For optimal results, aim for a meat finish temperature between 185-190°F to ensure the ribs are cooked through while maintaining juiciness. No need to wrap the ribs during the final smoking stage, as the process creates a juicy interior with a crispy exterior. This unwrapped phase lasts 30-45 minutes, completing your mid-cook transformation. Similar to brisket smoking, resting your ribs after the cook allows the juices to redistribute throughout the meat, enhancing flavor and tenderness. The final caramelization of barbecue sauce during this unwrapped phase creates the signature sticky finish that distinguishes well-smoked country-style ribs.
Final Phase and Tenderness Rendering
Your ribs’ final transformation hinges on hitting precise internal temperatures while allowing fat to render completely. You’ll want to probe for doneness between 180-195°F, using the bend test once you’ve reached 185°F. When meat pulls easily from the bone at 195°F, you’re ready to remove them from the smoker.
The resting period considerations matter greatly—let your ribs rest after hitting 195°F so juices redistribute throughout the meat, enhancing tenderness. Testing for doneness involves spot-checking with your thermometer after the alarm sounds. You should aim for that 195°F sweet spot where collagen breaks down completely and fat rendering finishes. For fall-off-the-bone tenderness, some pitmasters push temperatures up to 203°F for maximum collagen breakdown. Using a thermal probe to ensure accurate temperature readings will help you avoid false readings from fat veins. Like brisket smoking, resting the meat after reaching target temperature is essential for best results and allows juices to redistribute evenly. This final phase typically takes 1.5-2 hours beyond your initial smoke, delivering perfect tenderness and texture, similar to how baby back ribs require careful monitoring to achieve optimal doneness at their recommended internal temperature range. Maintaining consistent temperature control throughout your smoking process helps ensure even fat rendering and collagen breakdown. Once your ribs finish resting, a finishing phase on the grill with low to medium heat for 5 to 25 minutes can add caramelization and enhance the final crust.
Factors That Impact Your Cook Time
Now that you understand what doneness looks like, you’ll realize cook time isn’t fixed—it varies based on several controllable and uncontrollable factors. Meat thickness directly impacts duration; a 3.75-pound rack requires up to six hours, while a 2.5-pound finishes in four to five. Smoker temperature matters considerably—225°F extends time for deeper smoke flavor, though lean ribs dry faster and prefer 275°F instead. Environmental conditions play a substantial role; humidity exceeding 75% adds 20-30 minutes, and Gulf Coast climates extend times by 18% according to KCBS research. Air circulation effects within your smoker influence heat distribution consistency. Adding aromatics through wood selection—hickory for strong flavor or applewood for sweetness—shapes your cooking strategy. Properly trimmed ribs, with excess fat removed, will cook more evenly and develop better smoke penetration throughout the meat. Fresh ribs cook more predictably than frozen alternatives. Similar to brisket smoking, monitoring internal temperature with a thermometer ensures precise doneness rather than guessing based on time alone. Higher temperatures like 300°F can significantly reduce smoking time to 1.5 to 2.5 hours compared to the extended duration needed at lower temperatures. Resting your meat after smoking, much like the 10-15 minute rest recommended for whole poultry, allows carryover cooking and ensures optimal texture. Using a remote temperature probe minimizes the need to open your smoker and maintains consistent heat during the cooking process. When finished cooking, allow your smoker to cool safely by closing all vents to cut off the oxygen supply to any remaining coals. Using temperature as your guide rather than relying solely on elapsed time ensures your ribs reach the critical 195-205°F internal temperature needed for proper collagen transformation and optimal tenderness.

More Stable Than Bluetooth: Our advanced RF technology ensures a stronger, more reliable connection than Bluetooth. This smoker thermometer provides the freedom to move around without losing connection! Monitor your BBQ from up to 1,000 feet away!
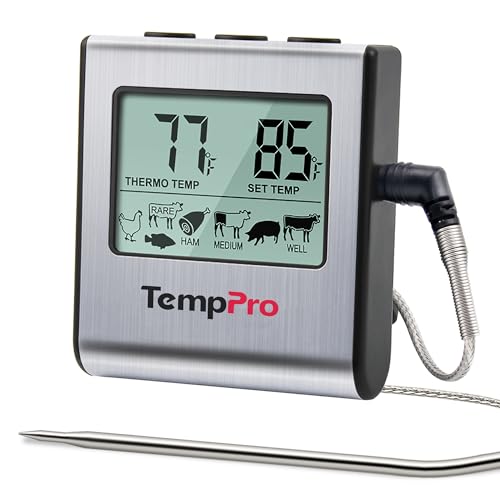
Cook mode with USDA preset temperature settings: TempPro cooking thermometer ideal for meat, oven, smoker or stove top; Programmable alert with preset temperatures for specific foods recommended by USDA; All of the preset temps can be reset to your desired tastes

Bluetooth Monitor Remotely: Govee Bluetooth meat thermometer lets you check the temperature of your grill, smoker, or oven from your phone. With this smart BBQ thermometer, you can multitask while grilling.
Troubleshooting Common Smoking Issues
Even with solid technique, smoking country-style pork ribs‘ll throw you curveballs—and most stem from temperature management, timing, or moisture control gone awry.
Your smoker’s thermometer might read 225°F but actually run 50+ degrees hotter, causing overcooking within five hours. Verify actual chamber temperature before committing to a full cook. White billowing smoke overwhelms meat with bitter flavors; maintain thin blue smoke for smoke flavor consistency instead. Wood chunks should be selected carefully to produce the desired smoke intensity, with hardwoods like hickory and oak offering stronger flavors while fruit woods provide lighter, sweeter smoke for more balanced results. Consider using a charcoal chimney starter to achieve consistent initial temperatures and reliable heat control from the beginning of your cook.
Excessive liquid in foil wraps steams ribs into mushiness, so minimize spritz amounts. Conversely, dry rubs burn after prolonged heat exposure—scrape charred bits to prevent bitterness and avoid over seasoning compensation. The 3-2-1 method provides a proven framework for managing both smoke exposure and moisture at different cooking stages. Preheating your smoker with opened vents ensures even cooking temperature throughout your entire cook. Arranging charcoal in a pyramid shape underneath your heat source promotes optimal airflow and temperature stability. For extended cooks, select a charcoal basket designed with proper perforations to maintain consistent heat without burning through fuel too quickly.
Temperature fluctuations from frequent lid opening disrupt even cooking. Stabilize your smoker for an hour, then minimize interruptions. Aim for internal temperatures of 160°-165°F to signal the smoking phase’s end.

Compatibility: Compatible with Weber 22-inch charcoal kettle grill. Please check your grill model before ordering.

Compatible: This Control Panel,Temperature Probe and 2pc Meat Probes Kit replacement for Masterbuilt Gravity Series 560/800/1050 XL Charcoal grills & smokers.Directly replaces controller parts 9904190036, 9904200043, 9904200004. Ensuring a perfect fit for models including MB20041220, MB20041320, MB20040220, MB20041020, MB20040221, and MB20040122.Please note: This is a standard replacement control panel without Wi-Fi or Bluetooth functionality.

Product Applications: 1650W Universal Electric Heating Element for Electric Smokers and Electric Grills. Compatible with Smoke Hollow, Masterbuilt, Char-Broil, Cuisinart, and Dyna-Glo. Please ensure it matches your model number