You’ll achieve succulent country-style ribs in 45 minutes using a two-zone setup with lump charcoal. Start by searing bone-side down at 300-325°F, then move to indirect heat at 225-250°F. Employ the Texas crutch technique—wrapping ribs with butter, honey, and brown sugar—for 45 minutes at 325°F. Spritz regularly with apple juice to maintain moisture. Remove foil for final caramelization. This high-heat methodology delivers smoky crust and tender interiors typically requiring hours; the strategic sequencing fundamentally alters your timeline.
Preparation and Temperature Setup
Before you fire up your grill, you’ll need to establish a two-zone setup that gives you precise temperature control throughout the cooking process. Fill your chimney with charcoal and position the coals to one side, enabling indirect heat capability. For best results, consider using lump charcoal for its high heat output and clean burning properties. Lump charcoal generally burns hotter and cleaner than briquettes, making it ideal for achieving the searing temperatures needed in quick-cooking applications. Preheating to consistent temperatures is easier with 100% charcoal pellets, which offer superior heat output compared to blended options. Choose a sturdy chimney design with a secondary handle to ensure safer pouring and better control when transferring hot coals to your grill. Preheat your grill to 350 degrees F, targeting 300 degrees F for the indirect zone. For optimal results, select dense, large-piece brands that minimize sparking and allow for better temperature responsiveness.
Meanwhile, prepare your ribs by applying your binder selection—yellow mustard works exceptionally well—coating all sides generously. Layer your seasoning rub liberally with salt, pepper, and garlic powder. Space ribs one inch apart on the grate.
Add smoke wood chunks directly to the coals for optimal flavor infusion. Allow your seasoning to adhere for at least fifteen minutes before placement. Country-style ribs benefit from slow cooking at low temperatures to break down their tougher muscle fibers and render the intermuscular fat. This methodology guarantees proper smoke penetration and superior crust development during your accelerated cooking window. The direct heat sears the surface of the ribs while indirect heat allows for even internal cooking similar to an oven. Prioritizing natural hardwoods over flavored charcoal ensures your ribs develop authentic smoke flavor without overwhelming the meat’s natural taste.

Hand-Selected BBQ Charcoal Briquettes: Each hardwood charcoal lump piece is meticulously chosen for consistent size and quality, ensuring an exceptional grilling experience.
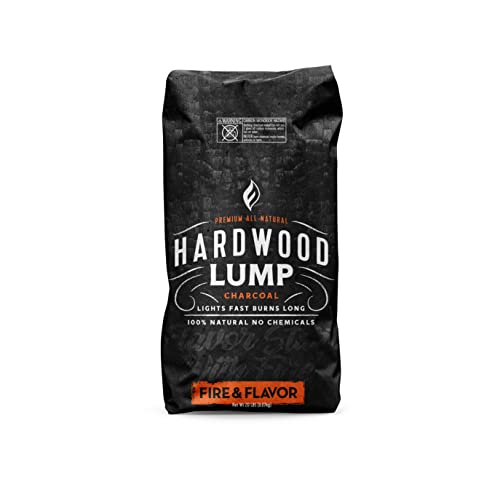
QUALITY LUMP CHARCOAL: Not all fire is created equal. Our premium, hand-picked lump charcoal is kiln-fired and packed in its natural shape for professional-level results on the grill and in the smoker.

128 ounce bag of hardwood lump charcoal
Direct Heat Searing Technique
Position ribs bone-side down initially, protecting the meat while allowing the membrane crispy handling to occur. The fat band beneath the membrane feeds continuous moisture to the meat as rendering begins. When fat drips onto 300-325°F coals, it generates smoke that creates your distinctive flavor profile. The intense radiant heat from the burning coals cooks the food directly while the searing occurs. After achieving proper caramelization on the bone side, flip the ribs to sear the meat surface. For optimal results, maintain a temperature of 300-325°F throughout the searing process to ensure consistent crust development. Bringing your ribs to room temperature before searing can help achieve more even browning and better crust development across the meat surface. This fat rendering technique produces the speckled appearance and color development characteristic of direct heat cooking, eliminating smoke rings while maximizing crust formation. Remember to use a meat thermometer to verify your ribs have reached the proper internal temperature range during this accelerated cooking method. Keep your grill lid closed as much as possible between flips to stabilize the temperature and maintain consistent cooking conditions throughout the searing process. To preserve your grill’s performance and ensure optimal heat distribution during this high-temperature searing, consider performing regular grill maintenance on your equipment before beginning the cooking process. Additionally, adjusting vents and dampers will help you control oxygen supply and maintain the precise heat level needed for successful direct heat searing.
Indirect Heat Cooking Phase
Once you’ve developed a caramelized crust through direct heat searing, you’ll move your ribs to the indirect heat zone where low temperatures and gentle convection’ll break down connective tissue and render fat throughout the meat. Position your ribs bone-side down with the meaty side facing upward on grates opposite your active burner. Maintain grill temperature consistency between 225-250°F for ideal results. Rotate the meat placement orientation 180° at the halfway point to compensate for hot spots across your grill surface. This strategic repositioning guarantees even cooking throughout all rib sections. The indirect methodology prevents sugar-laden seasonings from burning while allowing collagen gradual conversion to gelatin, achieving tender, succulent results in your accelerated cooking timeline. This collagen to gelatin conversion process is similar to the fat rendering that occurs during traditional low-temperature oven pre-cooking methods. To maintain moisture and prevent drying, consider spritzing with apple juice and vinegar periodically throughout the cooking process. A high-quality meat thermometer will help you verify that your ribs have reached the target internal temperature for optimal doneness. Using a fire-resistant grill pad underneath your cooking surface can help protect your deck or patio from heat damage and drips while you focus on achieving perfect results. For best results, ensure your ribs have even thickness throughout to avoid uneven cooking and drying out thinner sections. Consider periodically checking for doneness to ensure your ribs reach the ideal tenderness before completing the cooking process. Wrapping the ribs in foil for the final phase will help lock in moisture and accelerate the tenderizing process during the latter portion of indirect heat cooking.

BBQ / Grill pit thermometer, safe and environmentally friendly.
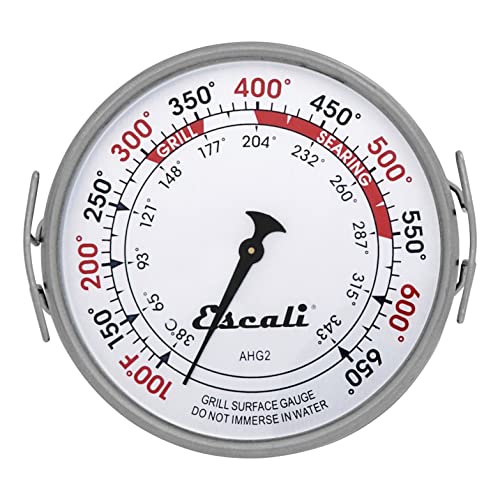
Temperature Range: 100° to 650°F / 38° to 343°C. Dial Diameter: 3.5 inches

Fast & Accurate: Get precise readings in just 1 second with ±0.9°F accuracy. NSF Certified for trusted food safety, this digital food thermometer features a 4.3 inches food-grade stainless steel meat probe, perfect for grilling, frying, baking, making candy and more
Foiling and Finishing Methods
After your initial hour of indirect cooking, you’ll employ the Texas crutch technique—a strategic foiling method that accelerates tenderness while locking in moisture and flavor. Layer butter, honey, and brown sugar onto your foil base, adding Tiger Sauce for depth. Wrap your ribs tightly and cook 45 minutes at 315°F until they reach 200-204°F internally.
During your revealing process, unwrap the ribs carefully and return them to the grill for 15 minutes. This develops surface bark and evaporates excess moisture. Your sauce application follows immediately: brush your ketchup mixture over the ribs, charring lightly for 2-3 minutes per side. Country-style ribs cook much faster than traditional ribs, so monitor them closely to avoid overcooking. Unlike low and slow smoking methods that require longer cooking times to break down connective tissues, high-heat grilling demands careful attention. The hot and fast method used at elevated temperatures significantly reduces overall cook time compared to traditional smoking approaches. Checking for doneness with a meat thermometer ensures you achieve the ideal tender range without overdrying the meat. For best results, pat the ribs dry before grilling to ensure proper browning and crust development. To maintain optimal grill performance during this critical cooking phase, ensure your grill grates are clean before beginning. Prioritize moisture retention strategies like spritzing to prevent the meat from drying out during the high-heat finishing phase. Finally, rest your ribs 15 minutes before serving, allowing juices to redistribute throughout the meat.
Seasoning and Flavor Building
Building a superior dry rub for country-style pork ribs requires understanding how individual components work synergistically to develop complexity and depth. You’ll combine brown sugar as your primary sweetener with smoked paprika, garlic powder, onion powder, and black pepper as foundational elements. Layer heat through cayenne pepper and chili powder, adjusting intensity to your preferences. Ground mustard and cumin add savory complexity, while a mere three cinnamon dashes enhance warmth without overpowering. The dry rub marinade transforms tough country ribs into tender, flavorful meat through the absorption of seasonings into the meat fibers.
Alternative rub recipes reflect regional flavor influences—incorporate smoked salt for deeper profiles or experiment with mustard powder for tanginess. Apply approximately ½ teaspoon kosher salt per pound of meat, then generously coat all rib surfaces using a two-sided application method. Remember that country-style ribs are pork shoulder, so the fattier cut benefits tremendously from thorough seasoning penetration. Similar to smoking methods that use wood chunks like hickory for added aroma, your dry rub application should be comprehensive for maximum flavor development. Allow your seasoned ribs forty minutes of sitting time, enabling complete rub penetration before grilling begins. For optimal results, consider that low-temperature slow cooking at around 225°F to 275°F helps break down connective tissue while your seasoning continues to penetrate the meat. For quick grilling applications, fruitwoods like apple or cherry can complement your dry rub by adding mild, sweet smoke notes that enhance the pork’s natural flavors. When properly seasoned hardwoods like post oak or red oak are available, they provide a balanced smoke flavor that won’t overpower your carefully crafted rub. For optimal tenderness similar to low-and-slow smoking methods, consider that resting meat after cooking helps retain juiciness and further tenderizes the protein fibers.