You’ll transform your chuck roast into fork-tender perfection by selecting a well-marbled 4-5 pound cut and dry-brining it 12-48 hours beforehand. Build a Texas-style rub with kosher salt, pepper, garlic, and onion powder, then marinate for 8-24 hours using vinegar, soy sauce, and Worcestershire for maximum tenderization. Set up indirect heat at 325-350°F with hickory smoke, maintaining a beef broth pan underneath for moisture. Cook covered until you’ve reached 195-210°F internally. The techniques behind achieving that perfect crust and tender texture deserve deeper exploration.
Preparing Your Chuck Roast
How you start determines how you’ll finish—and with chuck roast, that begins with selecting the right cut. You’ll want a nicely marbled chuck roast weighing 4-5 pounds whole, or 3.5-4 pounds boneless for even cooking. The intramuscular fat is essential for tenderness and flavor. Consider opting for a bone-in roast as the bones will add considerable depth and richness to your cooking juices.
Once you’ve selected your roast, remove it from the refrigerator and let it reach room temperature for about an hour before grilling. This guarantees even cooking throughout the meat. If you’re planning to dry brine early, remove it 12-48 hours prior, placing it exposed on a rack over a sheet tray in your refrigerator. After refrigeration, bring it back to room temperature before applying final seasoning. Before you begin grilling, ensure your grill is in safe working condition by checking all gas connections and fuel lines for leaks or damage. This critical preparation step confirms superior results on the grill. Precise temperature control with a meat thermometer will help you monitor doneness throughout the cooking process. For optimal tenderness, plan to cook your roast covered to lock in moisture throughout the entire process. Target an internal temperature of 195-210°F for the best results in achieving that tender, juicy texture.

One boneless beef chuck center roast weighing between 1.79 and 4 pounds

One bone-in beef chuck flanken style short ribs weighing between 0.5 and 1.15 pounds

Meets standards for animal welfare, feed, and more, so you can know about what you're buying (and eating)
Building Your Flavor Profile With Seasonings and Rubs
Once your chuck roast reaches room temperature, you’re ready to build the flavor foundation that’ll transform it into something memorable. Start with a Texas-style base: kosher salt and black pepper establish your primary layer, then layer garlic powder and onion powder for aromatic depth. Your spice blend ratios matter—use roughly equal parts of these four components, applying them liberally so seasoning remains visible on the surface.
Consider adding herb combinations like Italian seasoning to enhance natural beef flavors without overpowering the meat. For extra complexity, incorporate Worcestershire sauce, which adds umami depth while breaking down connective tissue through its acidic content. The combination of oil and seasonings should be whisked together in a small bowl before pouring over the roast to ensure even distribution. When preparing your oil component, choose a high-smoke-point oil like refined avocado or canola oil to withstand the intense heat of grilling without burning. For optimal results on a freestanding LP grill, ensure your propane tank is properly connected and your grill’s BTU output matches the cooking demands of a large chuck roast.
Remember: multiple seasoning applications at different cooking stages prevent flavor dilution and maximize impact. This layered approach guarantees every bite delivers balanced, memorable taste. Apply SPG seasoning liberally across all surfaces of the roast before it hits the grill to establish your foundational flavor profile. Like steaks cooked over charcoal, proper grill temperature maintenance ensures your seasonings develop into a flavorful crust rather than burning off during the cooking process. Consider using a quick-read meat thermometer to monitor internal doneness while your chuck roast cooks, allowing you to make seasoning adjustments if needed. For extended cooking sessions with a chuck roast, consider using a standard 20 lb tank with an appropriate adapter to maintain consistent heat output throughout your grilling time.
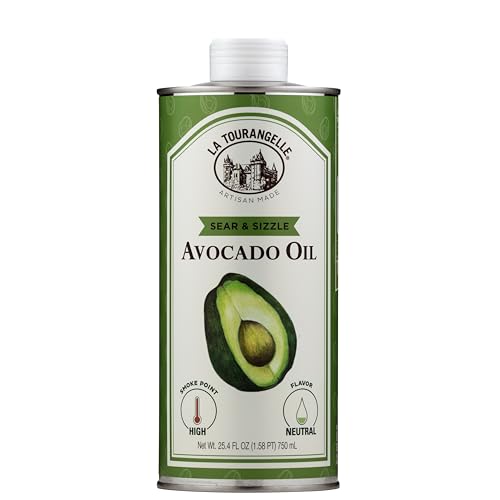
Healthy High Heat Oil: Expeller-pressed from fresh avocados and protected in our iconic light-blocking tin, this smooth, neutral oil preserves freshness and flavor. Fire up the grill, sear the perfect steak, or master a golden, crispy fry — all without losing the natural taste of your ingredients. With a high smoke point and everyday versatility, Sear & Sizzle should be every kitchen’s secret weapon.

GREAT FOR COOKING: Our refined avocado oil is the perfect all-purpose cooking oil. It is great for fried dishes, and it makes a nice base for a homemade salad dressing when cold

America's #1 Avocado Oil - We test every batch of oil to make sure our products only contain 100% Pure Avocado Oil. Additionally, our oil’s purity was confirmed in an independent study done by UC Davis, and we were one of the two brands that passed the purity test. We encourage you to explore and learn more about our unwavering commitment to purity.
Marinating for Maximum Tenderness
While your seasoning rub‘s already laid important groundwork, marinating takes your chuck roast’s tenderness to another level entirely. You’ll want to focus on marinade composition—combine red wine vinegar, soy sauce, Worcestershire sauce, Dijon mustard, and olive oil. These ingredients work synergistically: acids break down collagen, enzymes degrade proteins, and oil locks in moisture.
For best results, refrigerate your roast in the marinade for 8-12 hours minimum, though 24 hours transforms economical cuts greatly. Temperature control matters considerably—keep everything refrigerated to inhibit bacterial growth while enzymes work their magic. Massage the marinade into all surfaces for uniform coverage. An instant-read thermometer allows you to monitor internal temperature during marinating to ensure optimal enzyme activity occurs at safe temperatures. Using a meat thermometer ensures you achieve your target internal temperature while marinating and grilling. For precision monitoring during the marinating process, consider using wireless meat thermometers with app connectivity to track temperature changes remotely. Pat the meat dry before grilling to achieve a superior sear and crust formation, similar to how resting meat after cooking helps retain juices and develop optimal texture. Chuck roast’s higher fat content makes it particularly responsive to marinating, as the fat helps retain the moisture and flavors the marinade imparts throughout the cooking process. However, chuck roast and other slow cooking cuts do not typically benefit from this marinade, as the extended cooking time infuses the flavor naturally.
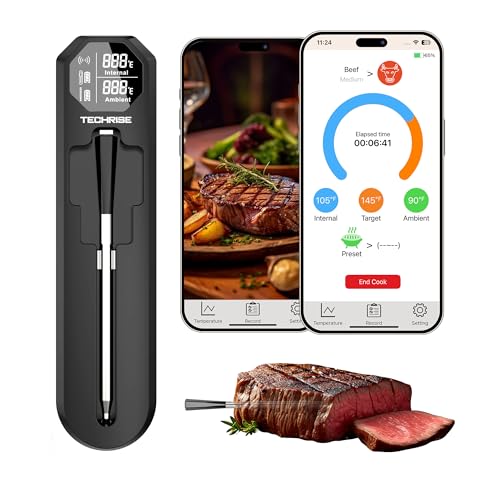
📱 Smart APP Control – Hands-Free Cooking with Precision CustomizationConnect via Bluetooth to our intuitive APP (iOS & Android) – a standout feature of this smart meat thermometer Bluetooth. Digital meat thermometer in real time from your phone, freeing you from hovering by the grill or oven. Set custom alerts for perfect doneness every time, and tap into data storage with 9 preset meat options (plus room for personalized additions) – making it a top-tier wireless digital thermometer with app control for effortless, restaurant-worthy results.Download the APP by scanning the QR code in the manual or searching for "Temprobe" in the App Store (iOS) or Google Play (Android)

Anywhere Remotely Monitor Temperature: Our smart meat thermometer sends instant notifications to the Govee Home App and your digital thermometer when any temperature goes outside your presets.(Note: not support 5G.)

3 Connectivity Modes for Total Freedom-Bluetooth, WiFi, & Local Mode: Select different connection methods based on different scenarios. Monitor your cook from your backyard via Bluetooth, from the office using WiFi, or rely on the stable Local Mode in areas with weak signals. Stay connected and in control up to 300 feet away. This meat thermometer allows you to monitor your cooking progress no matter where you are
Setting Up Your Grill for Success
Your grill’s configuration makes or breaks the final result, so don’t skip this critical phase. Start by filling one large chimney with charcoal and preheating your kettle-style grill to 400°. Once stabilized, add hickory or pecan chunks for wood chunk placement during this initial heat phase—this timing guarantees optimal smoke absorption during the first 45 minutes.
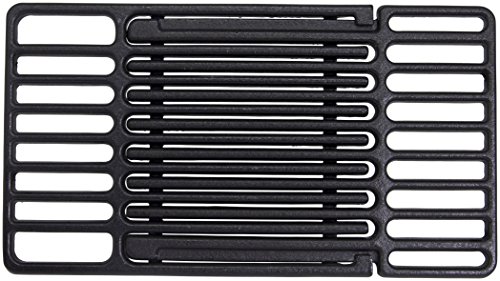
Lower your temperature to 325°-350° and position charcoal on one side only for indirect heat. Place your grate above a foil tray filled with beef broth, securing proper air circulation. Close the lid immediately after positioning your roast over the unlit side. Using indirect fire prevents flare-ups and ensures even cooking across the entire roast surface. The radiant heat emitted from the charcoal coals will cook your roast gently and evenly through the grill chamber. For superior heat retention and even cooking performance, consider upgrading to cast iron grates if your current setup allows. Cast iron’s exceptional heat retention makes it ideal for maintaining consistent temperatures throughout your cook. Keep your bottom vents fully open while modulating heat via the top damper to maintain consistent temperature stability throughout the cooking process.
Monitor your grill thermometer consistently throughout cooking. Plan for charcoal replenishment if you’re cooking beyond 45 minutes, maintaining your target temperature range. When selecting grates for long cooks like this, prioritize models with strong durability and rust resistance to ensure reliable performance over many seasons. Marinating your chuck roast for at least 12 hours before grilling will significantly enhance both flavor and tenderness. This setup prevents charring while promoting even, tender results.

Fits For Chargriller 2121, 2123, 2222, 2828, 3001, 3008, 3030, 3072, 3232, 3725, 4000, 4001, 4008, 4208, 5050, 5072, 5252, 9020 Gas Grill Models

【Fits Home Depot Nexgrill】13 x 17 grill grates for Nexgrill 4 Burner 720-0830H, 5 Burner 720-0888, 720-0888N, 720-0830X, 720-0888S. Also Fits Nexgrill 720-0830D, 720-0958A, 720-0783E, 720-0783C, 720-0341, 720-0549, 720-0670A, 720-0670C, 720-0697E 720-0719R 730-0958A 720-0670 720-0670D. grates for 720-0830h, 720 0830h nexgrill grill grates
Porcelain coated Cast iron
Grilling Techniques and Temperature Management
Precision in temperature control separates a tender, succulent chuck roast from a dried-out disappointment. You’ll maintain your grill at a steady 225-250°F after placing the meat inside, utilizing charcoal fire management through the snake method for consistent, slower burns. Position your thermometer horizontally above the charcoal to achieve temperature monitoring accuracy without guesswork. Close your bottom vents to half-open, adjusting independently to draw heat across the roast for maximum smoke flavor. Keep the lid closed—frequent openings destabilize your chamber. Mist your meat every 30-45 minutes with apple juice or vinegar to maintain moisture. For best results, select a higher grade chuck roast with adequate marbling to ensure the fat renders properly during the long, slow cooking process. Removing as much silver skin as possible will reduce shrinkage of the meat during the extended cooking time. Consider using natural hardwood charcoal like B&B or Jealous Devil for cleaner burns and minimal ash production during your extended cook, as lump charcoal’s low ash ensures your temperature remains stable throughout the entire smoking session. Modern wood pellet grills like the Ninja Woodfire Grill offer electric convection functions that deliver consistent temperature management without the manual adjustments required by traditional charcoal methods. Kettle-style grills like the Weber Original Kettle Premium excel at maintaining consistent temperatures and even heat distribution for extended smoking sessions. An adjustable grate allows you to raise or lower your cooking surface to fine-tune heat intensity and move between direct and indirect cooking zones without repositioning your charcoal bed. When internal temperature reaches 170°F, wrap tightly in pink butcher paper with stock and oil, then return to your smoker until reaching ideal doneness.

Compatibility: Compatible with Weber 22" kettle charcoal grills and other similar size kettle grills, which is the companion for your outdoor grilling.( Comes with 4pcs clip supports to hold the grill grate.)

【2.4GHz Wi-Fi & 5.0 Bluetooth Suppor】Bluetooth 5.0 function and supports 2.4GHz Wi-Fi networking, which can control and monitor the grill from smartphone. One smartphone can simultaneously control multiple controllers, and several people can monitor the same controlle.

Easily set up your grill for high-heat searing or low-and-slow cooking. Comprised of a cone and diffuser ring, it reduces the guesswork for less experienced grillers and adds a new level of mastery for backyard pros.
Achieving the Perfect Internal Temperature
How’s your thermometer positioned? Place it in the thickest section for the most reliable reading. You’ll want to track your chuck roast‘s progression carefully since temperature precision matters significantly with tough cuts.
Begin monitoring when your roast hits 170 degrees Fahrenheit—that’s when beautiful color develops and signals time for foil wrapping. This change marks your shift from smoking to braising. Continue cooking under foil, maintaining a 275-degree Fahrenheit ambient temperature in your Dutch oven. Similar to smoking techniques, low and slow temperature cooking allows connective tissues to break down properly. Consider using a remote temperature probe to minimize opening your cooking vessel and maintain consistent heat. Using wood chips like hickory or apple can add additional smoke flavor during the initial cooking phase. After cooking, allow your chuck roast to rest for several hours to enable the connective tissues to break down fully.
Push past food safety minimums to your target of 210 degrees Fahrenheit for ideal shredding consistency. At this temperature, connective tissue fully breaks down, and you’ll easily pull the meat apart with a fork. Connective tissue and dense fats begin breaking down around 195 degrees Fahrenheit, but reaching 210 degrees ensures maximum tenderness. Your total braising duration should reach 4 to 5 hours, allowing collagen to break down completely through proper foil wrapping techniques and excellent braising temperatures. Chuck roast’s tough meat texture requires these extended cooking times to achieve the tender, fall-apart results you’re aiming for.
Resting and Slicing for Optimal Results
Once you’ve pushed that chuck roast to 210 degrees Fahrenheit, the work isn’t finished—it’s just shifting into a different phase. Your wrapping technique matters here—maintain that butcher paper or foil intact while the meat rests for 1-2 hours. This preserves moisture and continues tenderizing your roast as internal temperature gradually drops to around 145°F.
During rest, you’re allowing muscle fibers to relax and reabsorb juices that’d otherwise spill across your cutting board. When you’re ready to slice, unwrap carefully and position your knife against the grain. This slicing order guarantees maximum tenderness. Your roast will remain sliceable between 203-210°F, yielding juicy results perfect for sandwiches or serving whole. For optimal results, allow the wrapped roast to rest in an empty cooler or oven at 150-170°F to maintain warmth while the fibers fully relax. For the best texture and moisture retention, let the wrapped roast rest for about 1 hour before unwrapping to minimize juice loss. Similar to low-and-slow smoking methods, resting allows the connective tissue breakdown to complete its tenderizing process. Wrapping your roast in butcher paper] during the rest phase helps maintain moisture while the internal structure continues to relax. Using a meat thermometer to monitor when your roast reaches optimal tenderness ensures you achieve the same precision results as smoking methods. Proper resting transforms a good roast into exceptional eating.