You’ll smoke your brisket flat for 10-14 hours, starting at 225°F-235°F for the first 30 minutes to maximize smoke absorption. Maintain 250°F unwrapped for 4-5 hours until the meat reaches 165°F internally, then wrap it and increase heat to 275°F. Continue cooking until you hit that pivotal 203-205°F target where collagen transforms into gelatin for ultimate tenderness. Temperature consistency throughout’s your key to success, and there’s much more technique to master for perfect results.
Setting Up Your Smoker: Temperature Range and Preparation
How do you know what temperature to set your smoker to when smoking a brisket flat? You’ll want to aim for 250°F as your baseline, though the ideal range spans 225°F to 275°F depending on your equipment and preferences. Starting at 225°F-235°F for the first 30 minutes allows optimal smoke absorption before shifting to 250°F, then increasing to 275°F prevents meat trauma.
Temperature consistency proves critical throughout your cook. Let your smoker reach the target temperature before placing your brisket inside, ensuring predictable cooking times and even results. The water pan importance can’t be overstated—it adds vital humidity to your cooking environment while stabilizing temperatures. Add wood every 25-30 minutes to maintain steady heat and smoke production. For best results with brisket flat, oak wood provides a steady burn and classic smoke flavor that complements the leaner meat. Hickory smoke is the preferred choice for brisket flat due to its intensity and ability to work well with the shorter cook time. Monitor everything with an instant-read thermometer, keeping that lid closed to minimize temperature fluctuations. Smoking at 225°F is particularly effective as it allows the fat and connective tissue to break down properly, creating tender, juicy meat. Many pitmasters aim for an internal temperature around 197°F before removing the brisket from the smoker to ensure optimal tenderness. Remember that internal temperature rather than cook time is the best gauge of doneness when smoking brisket. Adding coals and wood chunks as needed every hour helps maintain the steady temperature essential for proper smoking. Expect the stall phase where the brisket’s temperature plateaus, requiring careful monitoring with your thermometer.

Precise Temperature Control: Automatically regulates airflow to maintain consistent ambient temperatures in your smoker or grill, eliminating manual vent adjustments for perfect cooking results every time.

【Restores OEM Precision】-- Replaces worn-out Masterbuilt smoker control panels with factory-matched temperature accuracy—set and hold steady 100°F to 275°F via intuitive buttons, and monitor real-time chamber temp on bright LED display

Product Applications: 1650W Universal Electric Heating Element for Electric Smokers and Electric Grills. Compatible with Smoke Hollow, Masterbuilt, Char-Broil, Cuisinart, and Dyna-Glo. Please ensure it matches your model number
The Initial Smoking Phase: Building Flavor and Bark
Once your smoker’s stabilized at temperature, you’re ready to begin the critical first phase of smoking—the unwrapped period where bark develops and smoke flavor penetrates deepest. Position your brisket flat fat side up on the grates to guarantee even smoke exposure across the meat’s surface. Insert your probe into the thickest section for accurate monitoring.
Maintain consistent temperature control by holding your smoker steady at 250°F. This balance promotes tasty bark formation while rendering the interior without drying out your lean cut. You’ll smoke unwrapped for approximately 4–5 hours until your internal temperature reaches 165°F. Watch for good bark development and color acquisition—visual cues signaling readiness alongside your thermometer readings. Leaving the fat cap on provides insulation and moisture during this critical phase. The flat’s leaner portion requires careful attention to prevent overcooking during the smoking process. Season your meat beforehand with a simple rub of salt and pepper or add optional spices to enhance the natural beef flavor. Various woods for smoke flavor can enhance the taste profile during this unwrapped smoking stage. During this phase, you may notice a temperature stall around 150–160°F where cooking slows due to moisture evaporation. If you need to speed up the cooking process, consider adding a water pan to help maintain moisture and prevent the meat from drying out. Wrapping the brisket in butcher paper during the cook can help maintain moisture and develop a good bark. This initial phase builds the flavor foundation your brisket needs.
Wrapping Your Brisket: Moisture Retention and Second Phase Cooking
After you’ve built a solid bark and your brisket’s internal temperature hits 165°F, you’ll wrap it to lock in moisture and power through the cooking’s second phase. Choose butcher paper to preserve bark formation while retaining juices, or foil for maximum moisture retention and faster cooking. You can also use the boat method—scrunching foil edges outward for partial openness—to balance both benefits.
Once wrapped, increase your smoker to 275°F and continue cooking until the probe slides through the thickest part with minimal resistance. This indicates connective tissue breakdown, not just temperature. After reaching probe tenderness, unwrap and firm your bark for 10-15 minutes if desired. The foil wrap method will produce a juicier, more tender brisket compared to butcher paper, though you’ll sacrifice some of the natural beef flavor. Consider adding liquid like beef broth or tallow inside your foil wrap to enhance the flavor profile while the meat finishes cooking. Similar to the steaming phase in smoking ribs, wrapping with apple juice or butter can help tenderize the meat during this critical cooking stage. This wrapping technique is commonly known as the Texas Crutch, which helps retain moisture and speeds up the cooking process. Adding a water pan to your smoker setup helps maintain consistent moisture levels throughout the entire cook. Throughout the wrapping phase, continue monitoring the smoke quality to ensure clean combustion and optimal flavor development. Rather than relying solely on internal temperature, test doneness by how easily a probe penetrates the meat, which is the most reliable indicator of proper tenderness. Finally, rest your brisket wrapped in butcher paper for adequate resting duration before slicing and serving.

Designed specifically for the culinary enthusiast, our 18 paper roll dispenser is optimally crafted to handle barbecue butcher paper, thereby ensuring the authentic taste of your smoked meats is maintained. This is your ideal bbq wrapping paper for smoking

【PREMIUM NATURAL QUALITY】Made from premium virgin pulp, our butcher paper is unwaxed, uncoated, and unbleached for a natural and pure product. Ideal for grill masters seeking top-notch, food-safe paper to enhance their culinary creations.
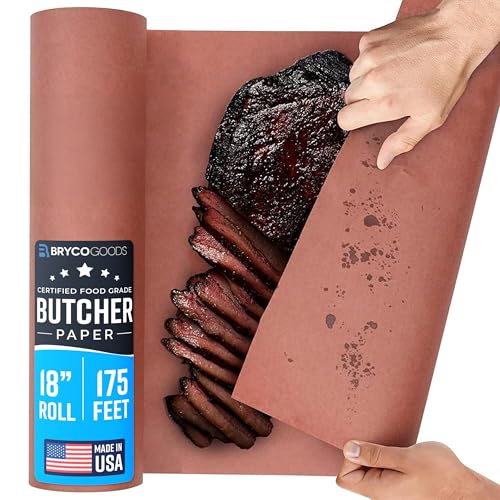
Butchers Paper is ultra durable and strong; does a superior job trapping smoke while releasing steam
Total Cooking Time: What to Expect
Timing’s the variable that’ll either make or break your brisket flat, and it hinges entirely on your temperature choice and the meat’s size. At 275°F, you’re looking at roughly 6 hours total for a 4-5 lb flat, hitting the stall around 4 hours. Drop to 250°F, and you’ll extend that to 6-9 hours, allowing superior bark formation without excessive drying. Your smoke duration depends on maintaining steady temperature throughout—fluctuations force timeline adjustments.
Expect the unwrapped phase to consume 5 hours reaching 170°F internal. Post-wrap, you’ll need another couple hours pushing toward 200°F. Lean flats demand vigilant monitoring to prevent drying out. For best results, apply a binder like mustard all over the brisket before your rub to help lock in moisture during the long cook. Use a meat thermometer to accurately track internal temperature rather than relying on guesswork. Like smoking ribeye, monitoring internal temperature proves far more reliable than relying solely on cooking time for achieving perfect doneness. Similar to the reverse-sear technique used for steaks, smoking low and finishing hot can enhance both flavor and texture. After cooking, resting the meat wrapped in foil inside a cooler helps tenderize and retain juiciness. The resting period also allows for carryover cooking, which continues to tenderize the meat even after removing it from heat. Don’t rely solely on elapsed time; probe tenderness confirms when you’ve achieved perfect results.

【Easier to Use】Equipped with 2 meat probes, this BBQ thermometer for grill allows you to monitor separate meats or the grill temperature simultaneously, a real comfort in grilling several pork loins for large groups with different tastes
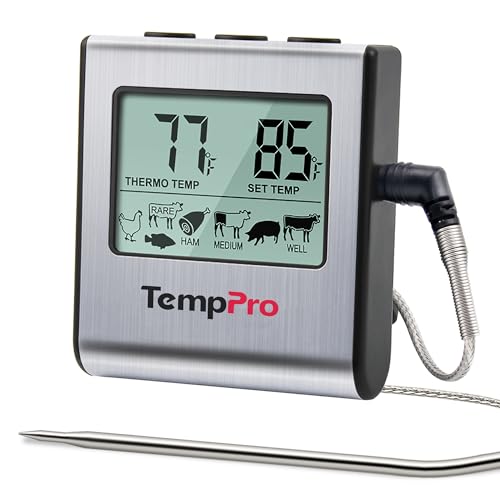
Cook mode with USDA preset temperature settings: TempPro cooking thermometer ideal for meat, oven, smoker or stove top; Programmable alert with preset temperatures for specific foods recommended by USDA; All of the preset temps can be reset to your desired tastes

Bluetooth Monitor Remotely: Govee Bluetooth meat thermometer lets you check the temperature of your grill, smoker, or oven from your phone. With this smart BBQ thermometer, you can multitask while grilling.
Achieving Target Internal Temperature: 203-205°F
Your brisket flat’s success hinges on reaching an internal temperature of 203-205°F, with 205°F marking the ideal endpoint where collagen fully converts to gelatin and the meat becomes genuinely tender. You’ll monitor temperature continuously by inserting an instant-read thermometer into the thickest portion, checking progress every 30-45 minutes once you’ve wrapped at 170°F. Temperature monitoring throughout the cook prevents overshooting and guarantees even heat distribution. Once you’ve hit your target, resist the urge to slice immediately. Instead, rest your wrapped brisket for a minimum of 30 minutes—extended periods up to two hours work equally well. However, true doneness isn’t determined by temperature alone; check tenderness with a wooden skewer to ensure the meat has no resistance when pierced. Keep in mind that different sections of your flat may reach varying temperature zones, so verify multiple spots across the thickest areas before declaring the cook complete. For consistent results, invest in a pellet smoker with PID temperature control that maintains temperatures within tight ranges throughout your low-and-slow cook. High-end options like the Yoder Smokers YS640S deliver exceptional performance and temperature stability for serious barbecue enthusiasts. Budget-conscious pitmasters can achieve reliable outcomes with the Pit Boss 440 Series, which offers digital temperature control and rust-resistant construction ideal for frequent smoking sessions. WiFi-enabled models like the Traeger Pro 575 allow you to monitor and adjust your cook remotely through smartphone apps, ensuring you maintain optimal temperatures without constantly tending the smoker. Pellet grills feed hardwood pellets via an auger into the fire pot, where they’re heated by an igniter and regulated by digital controls for precise temperature management. This resting phase allows carryover cooking to stabilize while the meat retains its moisture, delivering the tender, juicy results you’re after.
Testing for Tenderness: Reliable Methods Beyond the Thermometer
While a meat thermometer confirms you’ve hit the target temperature zone, it won’t tell you if your brisket flat’s actually tender enough to slice cleanly. You’ll need to verify tenderness through tactile testing.
Start with the finger probe test. Once your flat reaches probe tenderness at the thickest point, press your finger into the meat’s center bottom. It should separate muscle fibers easily, indicating collagen’s properly broken down. Remember that the probe through butter extreme will result in dry brisket, so aim for resistance that yields to pressure without complete mushiness. Testing for true tenderness requires the finger method as a more reliable indicator than temperature alone.
Next, perform the bend test slices on finished brisket. Hang a slice over your finger; it should hang loosely without breaking, then tear apart with slight resistance when pulled. This confirms proper tenderness throughout your flat, ensuring moist, sliceable results without mushiness or toughness. After removing your brisket from the smoker, top it with compound butter and let it rest tented with foil for 5-15 minutes to allow the juices to redistribute before slicing. Smoking brisket relies on convection and radiation to cook the meat evenly, with hot air circulating around the flat while radiant heat penetrates from the heat source below. Before you begin smoking, ensure your grill grates are properly cleaned and oiled to prevent meat from sticking during the long cooking process. Apply oil using a paper towel, brush, or spray method, wiping off excess and allowing the grill to heat until the oil reaches its smoke point, which typically takes 15–30 minutes. Regular maintenance includes cleaning the drip pans after each smoking session to prevent grease buildup and potential fires.