You’ll smoke a whole chicken at 250°F for approximately 50–60 minutes per pound. A 3–4 pound bird typically requires around 3 hours total. Pull your chicken when the thickest breast reaches 160–163°F, then tent it with foil for a 5–10 minute rest to prevent carryover cooking and dryness. For ideal tenderness, dark meat benefits from reaching 180–185°F. Use a leave-in probe thermometer throughout the process for precision. However, several techniques can greatly improve your results and prevent common pitfalls.
Smoking Time Guidelines for Whole Chicken
Since smoking times vary based on bird size and your smoker’s temperature, you’ll want to plan for roughly 50–60 minutes per pound at 250°F, though this can shift depending on your specific setup. A 3-pound chicken typically requires about 3 hours, while a 4-pound bird needs approximately the same duration.
Your smoke duration guidelines depend on maintaining consistent heat. Keep your smoker temperature range between 225–250°F, preheating to 250°F before placing the chicken inside. Start monitoring at the 2.5-hour mark, checking the thickest breast or thigh area with a probe thermometer. Legs and thighs should reach 180˚F, and the white meat should hit 165˚F. Patting the chicken dry before smoking helps ensure the rub adheres properly and promotes better smoke penetration.
Remember that cook time correlates directly to doneness, not clock time. Every smoker performs differently, so adjust accordingly. You’re finished when the internal temperature reaches safe levels, then rest the bird 5–10 minutes before serving. Allowing the chicken to rest for 10-15 minutes ensures juices redistribute throughout the meat for optimal moisture and tenderness. For crispier skin, finish the chicken at a high-temperature finish of 375°F to 400°F for 10-15 minutes with added butter or oil. Applying BBQ sauce near the end of cooking adds extra flavor and creates a beautiful glaze on the skin. Using a reliable meat thermometer is essential for accurately determining doneness rather than relying solely on estimated cooking times. Wood choices such as hickory or fruitwoods like cherry or apple add distinct smoky flavors that complement the chicken perfectly.
Internal Temperature Requirements and Safety
Once you’ve got your timing down, the real indicator of doneness comes from hitting the right internal temperatures. You’ll want to insert a digital thermometer into the thickest breast portion, avoiding bone contact, to verify poultry doneness requirements are met. Breast meat requires 165°F for instant bacteria destruction, while dark meat benefits from reaching 180-185°F for ideal tenderness and texture.
Don’t rely solely on surface temperature monitoring—probe the thickest thigh section without touching bone to guarantee thorough cooking throughout. Pull your chicken at 160-163°F in the breast, then tent with foil during a 5-10 minute rest; carryover heat will push it safely to 165°F. Using a leave-in probe thermometer like the Smoke X2 allows you to monitor internal temperature throughout the cooking process without repeatedly opening the smoker. A digital thermometer helps ensure accuracy when checking multiple spots on the chicken. For those seeking precision with quick readings, the Thermapen ONE delivers one-second temperature checks with its auto-rotating backlit display. Wireless probes with apps provide hands-off grilling precision, allowing you to track temperatures remotely while managing other cooking tasks. For extended smoking sessions, consider models with radio-frequency transmission rather than Bluetooth-only designs, as they provide reliable through-house range even when you step away from the grill. Maintaining consistent smoker temperature is essential for even cooking and helps ensure your chicken reaches the proper internal temperature without drying out. Insert your thermometer in the thickest part of the chicken to ensure proper doneness without overcooking. Always verify this final temperature before serving.
Essential Preparation and Setup Steps
Before you fire up your smoker, you’ll need to prepare your chicken properly to guarantee even seasoning, smoke penetration, and consistent cooking. Remove your chicken from the refrigerator and pat it dry with paper towels to certify optimal rub adhesion. Stuff the cavity with fresh thyme, garlic, and quartered onion for enhanced flavor profiles. Drizzle the bird with olive oil or butter across the entire surface. Apply your seasoning blend customization generously—use ¼ to ⅓ cup of quality chicken rub inside and out. Whether you’re employing hickory, pecan, or maple-based blends, proper chicken marinade application requires 4-12 hours advance preparation when feasible. Position your chicken breast-side up directly on the grill grates in the smoker’s center, avoiding pans that block smoke penetration and heat circulation. For optimal results, use hardwood such as cherry, apple, or maple to provide clean, sweet smoke flavor that complements your seasoned chicken. Hickory delivers a sweet, bacon-like note that pairs exceptionally well with chicken when you want a more pronounced smoke ring and deeper flavor. For best results with hickory chips, add 1/2 to 1 cup per hour to maintain consistent smoke throughout your cook. Avoid softwoods like pine that produce bitter residue and can ruin your poultry’s delicate flavor.

Made In the USA: Celebrate homegrown quality with these premium wood chips made in Arkansas and Missouri

ALL NATURAL HICKORY WOOD CHUNKS: These smoking wood chunks are crafted from 100% hickory hardwood without any harsh chemicals. They naturally enhance chicken, pork, beef, and seafood with a slightly sweet, powerful smoke flavor and a deep color.

【Sweet Fruity Smoke with Rich Color Enhancement】 Cherry wood chips create a smooth, sweet smoke with a delicate fruity aroma while helping enhance the natural color of smoked foods. Perfect for adding an appealing finish and balanced BBQ flavor.
Preheating Your Smoker to 250°F
Getting your smoker to a stable 250°F is critical for consistent results, and the preheat duration varies greatly depending on your equipment type and conditions. Bradley smokers need one hour, while digital models require 2–3 hours at 250–275°F. Charcoal methods reach 250°F in 30–45 minutes using 20 lit briquettes.
Ambient temperature impacts your preheat tremendously. Cold days at 35°F demand preheated bricks for heat recovery, whereas 90°F heat still limits vertical gas smokers to 210–215°F. Position your smoker away from wind to maintain steady temperatures. Trapped moisture in the smoker can prevent it from reaching your desired temperature and cause black rain on your food, so keep the vent wide open during preheating. If your smoker lacks precise temperature control features, you may need to manually adjust your gas regulator and damper throughout the cooking process to maintain consistent heat.
Vent adjustments needed include keeping your damper nearly closed after preheat to retain heat. Increase air intake if temps dip too low, and restrict oxygen if fire spikes dangerously. Fire your empty pit first, controlling dampers until you achieve stabilization at your target temperature. Adjusting the grill’s vents regulates airflow to control the charcoal’s burn rate and the amount of heat generated. Wood pellet grills use a digital controller with temperature sensors to automatically regulate pellet feeding and airflow for more consistent heat management. For pellet grills, always start on low or smoke mode to ensure proper ignition before gradually adjusting to your target temperature. When preheating a pellet grill, you’ll notice heavy white smoke during startup, which is completely normal as the igniter heats the pellets in the burn pot. Regular maintenance includes emptying the pellet hopper and vacuuming wood dust from the firepot to ensure optimal performance.
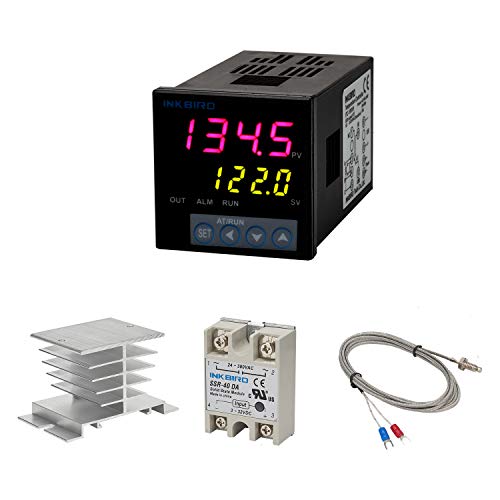
Alarm Output: With 1 alarm relay output, AC250 V, 3 A (Resistive load), ON or NC, you can wire a buzzer

Pellet Grill Hopper: It adopts an automatic delivery system, which can eliminate the need to add fuel frequently and manually, making it continuous and uninterrupted. Also, dual RTD sensors make temperature control and auto-ignition easier.
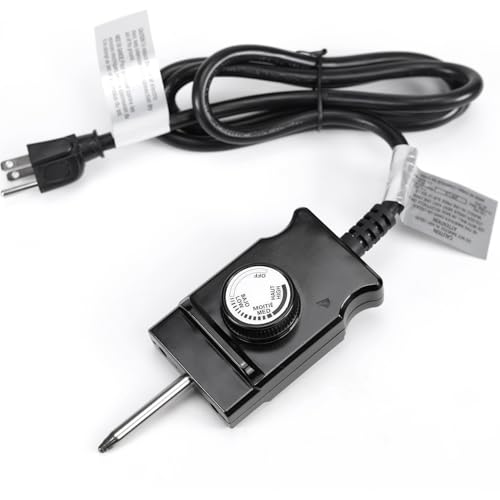
【APPLICATION】Our adjustable controller thermostat probe cord fits most of the electric smokers, grill heating elements,electric skillets etc. Masterbuilt: 20070712, 20100809, 20070812, 20070909, 20071012, 20072817, 20072917, 20073017, 20073716, 20074116, 20075517, 20078516, 20078616, 20150112, 20150210, 20150211, 20150209, 20070210, 20070410, 20070610, 20070612, 20150213, 20150309, 20150311, 20150514, 20150611, 20150613, 20150614, 20150713, 20150716, 20150813, MB25075517, MB20070210, 20150411, 20150414, 20150511, 20150513,
Monitoring Temperature Throughout the Cook
You’ll want to invest in a reliable thermometer—either wired or wireless—to track your chicken’s internal temperature without constantly opening the smoker door and losing heat. Position your probe in the thickest part of the thigh, avoiding bone contact that skews readings. For continuous monitoring, insert the probe deep into the meat without penetrating the cavity.
Start checking at the 2.5-hour mark for a 4-pound chicken, then monitor hourly. Use a high-temp alarm to signal when your bird reaches target temperatures: 165°F for white meat and 180°F for dark meat. Insert the meat thermometer into the deepest part of your chicken to ensure accurate readings throughout the smoking process. For instant-read accuracy, models like the ThermoWorks Thermapen ONE deliver ±0.5°F precision with 1-second read times when spot-checking doneness. This probe positioning strategy combined with continuous monitoring guarantees accuracy while maintaining consistent smoker temperature throughout your cook.
Wood Selection and Smoke Flavor Profiles
Since the wood you choose fundamentally shapes your chicken’s final flavor, understanding each variety’s characteristics will help you dial in the exact taste profile you’re after. Apple and cherry woods deliver mild, fruity notes that won’t overpower poultry. Oak provides balanced smoke penetration without dominating your bird’s natural flavors. Hickory suits those craving bold, robust smokiness, while pecan offers nutty undertones with gentle sweetness. Mixing different wood types can add layers of complexity to your chicken’s flavor profile.
Your wood chip sizes directly impact smoke intensity and duration. Smaller chips produce quicker, more aggressive smoke penetration, while larger chunks burn slower for sustained flavor development. For whole chicken, medium-sized chips work ideally. Match your wood selection to your heat level—medium heat works best with apple, cherry, or pecan. Consider your protein’s preparation method too; brined or marinated chicken pairs exceptionally well with fruit woods. Hickory is a southern favorite that works best for pork and chicken, making it an excellent choice for traditional poultry smoking. When using apple wood, aim for thin blue smoke rather than thick white smoke to prevent harsh, bitter flavors from overpowering your chicken. Cherry wood also imparts an attractive mahogany color to the meat, making it both visually appealing and delicious. If you prefer oak, red oak and post oak stand out as top choices for their strong yet balanced smoke flavor that enhances poultry without overpowering it. For pellet grill users, premium brands like Lumberjack, Bear Mountain BBQ, and CookinPellets offer 100% natural hardwoods without fillers or additives that burn cleanly and deliver consistent smoky flavor. Avoid softwoods like pine or cedar, as their resins can create acrid smoke and unpleasant flavors that will ruin your chicken.


1.8 LB APPLE WOOD CHIPS FOR SWEET & FRUITY SMOKE FLAVOR – Elevate your grilling and smoking with this 1.8-pound bag of premium apple wood chips, ideal for infusing meats, poultry, seafood, and veggies with a mild, sweet, and fruity aroma. Perfect for use in charcoal grills, gas grills, electric grills and smokers, these high-quality smoking chips deliver consistent flavor and slow, even smoldering for delicious results.
Techniques for Even Cooking and Basting
Once you’ve locked in your wood choice and smoke profile, controlling heat distribution and moisture retention becomes your primary focus for achieving evenly cooked, tender results. Spatchcock your chicken to expose maximum surface area, then pat it dry—a critical safe handling practice that promotes even heat penetration. Position the bird breast-side up directly on grates for uniform smoke circulation.
Flip halfway through cooking to guarantee bone-in thighs receive balanced exposure. Rotate periodically if your smoker has hot spots. Apply oil or butter baste every hour, combining it with apple juice spritzed applications for enhanced evenness. Consider using a water pan in your smoker to maintain moisture and enhance the smoke flavor throughout the cooking process. During the final 30 minutes, brush BBQ sauce for a sticky exterior. Baste after flipping to coat all surfaces uniformly, maximizing moisture retention throughout the cook. Adding sauces later in the cooking process prevents burning and allows flavors to set properly. For a butterflied chicken, the total cooking time can range from 1.5 to 4 hours depending on whether you maintain a consistent temperature or finish at higher heat. The low-and-slow method helps keep the chicken moist by allowing fat and connective tissues to break down slowly. Cook the chicken until it reaches 165 degrees Fahrenheit to ensure proper food safety and doneness. Use wood pellets to intensify the smoky flavor profile and add depth to your finished chicken. Let the chicken rest 10-15 minutes after removing it from the smoker to allow the juices to redistribute throughout the meat.

Winco products are made to meet the high demands of a kitchen


Fits Masterbuilt 30" Electric Smoker: Water bowl for Masterbuilt 30" electric smoker models, for Masterbuilt 30-inch Digital Electric Vertical BBQ Smoker. Replacement for Masterbuilt 9007170040 Water Bowl Part
Resting and Finishing Your Smoked Chicken
After pulling your chicken from the smoker at 157°F in the breast (with thighs hitting 180°F), the real magic happens during the rest period. Your ideal rest period spans 15-20 minutes, allowing carryover cooking to push breasts to 165°F while juices redistribute throughout the meat. Proper covering methods matter greatly—tent aluminum foil over your chicken to prevent moisture loss during this critical window. This technique mimics brisket resting principles, locking in tenderness and succulence. The redistribution process equalizes temperatures across hot and cool spots, ensuring consistent juiciness. During this resting phase, the juices reabsorb into the muscle fibers, which is why skipping this step often results in a drier final product. Much like the resting period recommended for grilled chicken thighs, this 5 to 10 minute window allows the meat to retain maximum moisture and flavor. This rest also helps connective tissues break down further, contributing to the exceptional tenderness you’ll experience in the darker meat portions. Temperature monitoring throughout both smoking and resting ensures you avoid dryness while achieving that perfect balance of safety and flavor. Just as brining helps retain moisture in smoked turkey, proper resting ensures your chicken stays juicy and flavorful. If you have leftovers, properly stored smoked chicken can be safely refrigerated for three to four days when kept at or below 40°F. After resting, you’re ready to carve and serve. Your patience here directly determines whether you’ll bite into dry, stringy meat or perfectly moist, flavorful chicken that justifies your smoking efforts.
Troubleshooting Common Smoking Issues
Even with meticulous technique, smoking a whole chicken presents distinct challenges that’ll test your temperature management and timing instincts. You’ll encounter rubbery skin when smoker temperatures remain too low without a finishing step—the collagen won’t break down properly. Simultaneously, you’re battling uneven meat doneness: breasts overcook while dark meat lags behind. Probe your breast at 157°F to prevent dryness from carryover cooking‘s 5-10°F climb, then finish at 350-375°F for skin quality. Your thighs need 180°F+ for tenderness, requiring patience whole-bird shapes demand. Stabilize smoker fluctuations at 250°F to eliminate hot spots that burn exteriors while cores remain underdone. Spatchcocking flattens your bird for uniform heat exposure and faster, more predictable cooking results, though smoker size constraints may prevent this option for larger models. Using a meat thermometer is essential to ensure your chicken reaches safe internal temperatures rather than relying solely on cook times. Allowing the chicken to rest after smoking permits carryover cooking to complete without drying out the meat. Brining your chicken before smoking adds moisture and enhances flavor, though this technique may compromise the crispiness you’re working to achieve with your finishing temperature boost. Consider using wood chips like apple or cherry to add a complementary smoke flavor without overpowering the chicken’s natural taste. Keep a water pan in the smoker to maintain moisture levels and prevent your chicken from drying out during the extended cooking process. Avoid opening your smoker lid frequently, as this causes heat and smoke loss that disrupts consistent cooking temperatures and extends overall cooking time.

BBQ / Grill pit thermometer, safe and environmentally friendly.

FAST & ACCURATE INSTANT READ: Get temperature readings in just 2-3 seconds with ±1°F accuracy. Whether you're grilling steaks, roasting turkey, smoking brisket, or baking bread, this digital meat thermometer helps you monitor food temperature quickly and confidently
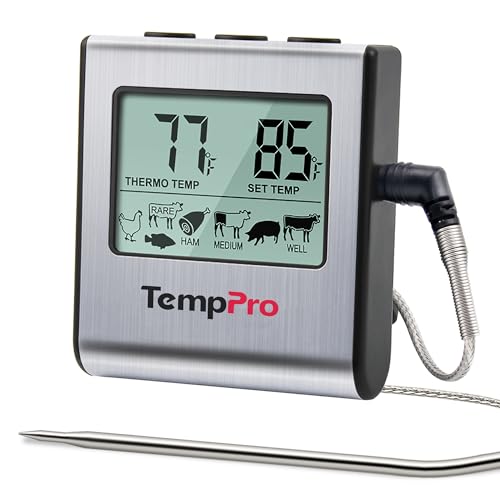
Cook mode with USDA preset temperature settings: TempPro cooking thermometer ideal for meat, oven, smoker or stove top; Programmable alert with preset temperatures for specific foods recommended by USDA; All of the preset temps can be reset to your desired tastes
Storage and Reheating Methods
Your smoked chicken’s journey doesn’t end when you pull it from the smoker—proper storage and reheating determine whether you’ll enjoy that smoky tenderness for days or watch it deteriorate within hours. Cool your chicken completely before refrigerating to prevent bacterial growth. In an airtight container, you’ll achieve a storage duration of up to 4 days under standard refrigeration conditions. For extended preservation, maintain ideal temperature and humidity to stretch this to 1-2 weeks past the best-by date. Freeze whole chickens in gallon zip lock bags for up to 3 months, or vacuum-seal halves and quarters. Always thaw overnight in your refrigerator, never at room temperature. The acidic film from smoke naturally inhibits bacterial growth, allowing properly stored smoked chicken to last longer than fresh poultry. The smoking process primarily kills surface bacteria temporarily, so proper refrigeration remains essential for food safety. Store your smoked chicken at temperatures just above freezing (around 0–3°C) to maximize freshness and prevent harmful bacteria from developing. Leftover smoked chicken can be transformed into delicious dishes like Lemon Pasta Salad, adding convenient meal options to your weekly rotation. Transform your leftovers into wraps and tacos by combining the smoked chicken with fresh vegetables and flavorful sauces for quick, satisfying meals. When freezing cooked chicken, use airtight containers or freezer bags to prevent freezer burn and maintain quality for up to four months. Reheat to 165°F internal temperature using your oven or smoker to preserve that signature smoky flavor you’ve worked hard to develop. For best results, reheat in a covered roasting pan with a little water or broth to create steam and prevent the meat from drying out.