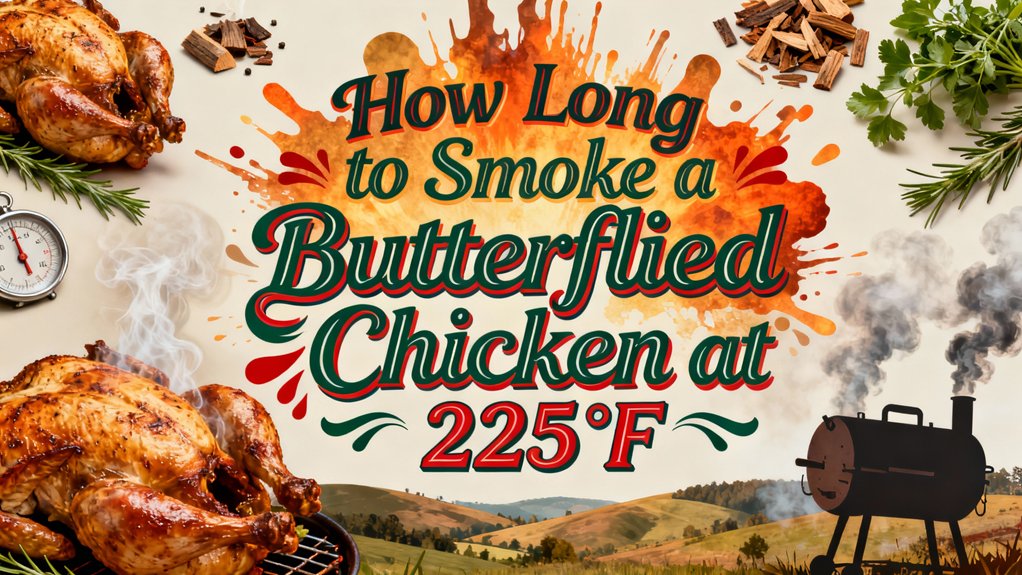
You’ll smoke your butterflied chicken at 225°F for 2–4 hours until the thickest breast section reaches 165°F. Timing depends on your bird’s size and smoker type; expect 2–3 hours for smaller chickens and 3–4 hours for larger ones. Check internal temperature after the first hour, then monitor consistently. Air-dry your chicken beforehand and let it reach room temperature for even cooking. The details below’ll show you how to nail perfect results every time.
Preparing Your Butterflied Chicken
Butterflying’s the foundation of even cooking and crispy skin, so you’ll want to nail this technique before anything else. Position your chicken breast-side down with the spine facing up, then use kitchen shears to cut along both sides of the backbone and remove it completely. Slice through the membrane covering the keel bone and lever it out with your fingers. Open the chicken like a book and flatten it by pulling the legs outward.
Next, lightly season both sides with fine sea salt—about two tablespoons total. Add ground white pepper or paprika for depth, then rub lemon juice over the skin to cleanse and tenderize. Insert salted butter under the breast skin to retain moisture. After seasoning, refrigerate the chicken uncovered for 2-8 hours to air-dry the skin for maximum crispiness. Once removed from the refrigeration, let the chicken sit at room temperature for about 2 hours before smoking to ensure even cooking throughout. The conduction from hot grates will create the characteristic sear marks on the skin. Before placing your chicken on the grill, clean your grates thoroughly and consider applying a thin layer of oil] with a high smoke point to prevent sticking and create a non-stick surface. For optimal grate preparation, use a grill brush to remove any residue and buildup from previous cooks. If you’re smoking on a deck or composite surface, consider using a grill mat for decks to protect your outdoor space from heat damage and grease splatters. Wood choices like almond, pecan, apple, or maple impart distinct flavors that complement chicken beautifully. These marinating methods and basting techniques prep your chicken for ideal smoking results.
Setting Up Your Smoker at 225°F
You’ll want to dial in your smoker to 225°F before your butterflied chicken hits the grate, and getting this baseline temperature right sets the tone for everything that follows. Start with quality fuel selection—dry wood burns more consistently than moisture-laden varieties, giving you better temperature stability. Position your thermometer at grate level where your chicken will actually sit, not at the dome, since temperature variance can exceed 100 degrees between these points. For even better accuracy, use a wireless thermometer with both smoker and meat probes to monitor conditions throughout your cook.
Make fine airflow adjustments by modulating your vents and dampers gradually. Small vent tweaks create meaningful temperature responses without wild swings. Document each adjustment and resulting temperature change in a notebook; this data becomes invaluable for future cooks. Consider using pit thermometers designed for various grill types to ensure reliable readings across different smoker configurations. For long cooks away from your smoker, radio-frequency thermometers provide superior range compared to standard Bluetooth models. The Thermapen ONE delivers exceptional ±0.5°F accuracy for verifying your smoker’s internal temperature stability. Cooking within a temperature range of 30 degrees allows you to add fuel when temperatures dip toward the lower end while maintaining excellent results. Steady airflow generates the consistent heat distribution you need to maintain that critical 225°F baseline throughout your smoking session. Allowing your chicken to rest after smoking helps juices redistribute throughout the meat, improving both texture and flavor.

More Stable Than Bluetooth: Our advanced RF technology ensures a stronger, more reliable connection than Bluetooth. This smoker thermometer provides the freedom to move around without losing connection! Monitor your BBQ from up to 1,000 feet away!

Bluetooth Monitor Remotely: Govee Bluetooth meat thermometer lets you check the temperature of your grill, smoker, or oven from your phone. With this smart BBQ thermometer, you can multitask while grilling.
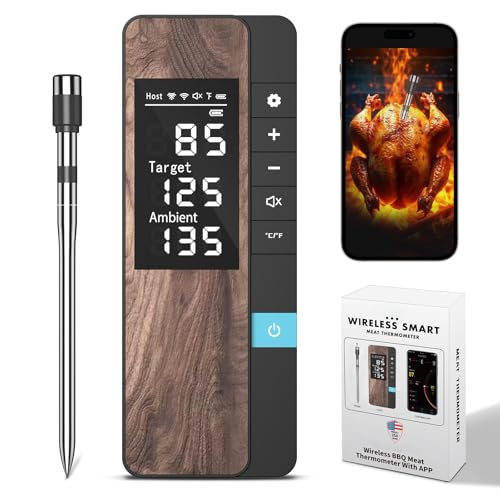
Instant Precision, Perfect Results Every Time: High-precision sensors deliver accurate temperature readings (32°F to 212°F) in seconds. Achieve flawless doneness for steaks, poultry, ribs, and more – your reliable partner for home kitchens, travel BBQs, and outdoor adventures.
Understanding Smoking Times and Duration
Smoking a butterflied chicken isn’t an exact science—it’s a variable process governed by several interconnected factors that’ll determine whether you’re finished in 90 minutes or pushing toward 5 hours. Your fuel source selection directly impacts cooking duration; pellet grills typically achieve 165°F in 3-4 hours at 225°F, while offset smokers may require longer. Wood chip placement affects smoke penetration and flavor development without extending time considerably. Most butterflied chickens reach doneness in 2-4 hours at constant 225°F, though larger birds demand additional time. You’ll always prioritize internal temperature over elapsed time—target 165°F in both breast and thigh. Temperature ramping methods compress total duration; smoking 45 minutes at 225°F then increasing to 425°F completes cooking in roughly 90 minutes total. For optimal results, allow the seasoned chicken to rest uncovered in the refrigerator for a few hours before smoking to ensure even heating and better seasoning penetration. After smoking, let the chicken rest for 10 to 15 minutes before serving to allow juices to redistribute, ensuring moist meat. Hickory, pecan, apple, and cherry wood are excellent choices for imparting fantastic smoke flavor to your butterflied chicken. Avoid using softwoods like pine as they contain resins that can impart unpleasant flavors and burn too quickly. Consider trimming excess skin and fat before smoking to promote better smoke penetration and bark formation on your chicken’s exterior. Applying BBQ sauce during the final stages of cooking enhances flavor complexity and creates a flavorful glaze on the exterior. To achieve crispy skin after smoking, raise the smoker temperature to 375-400°F for 10-15 minutes to dry and brown the exterior.
Monitoring Internal Temperature Throughout
Accurate temperature monitoring is what separates a perfectly smoked butterflied chicken from an undercooked or dried-out bird. You’ll want to insert your digital thermometer into the centermost thickest part of the breast without touching bone, as contact with bone produces false high readings.
Implement real-time temperature monitoring by checking progress after the initial hour at 225°F, then consistently throughout the smoking process. Consistent temperature tracking matters because chicken size and weather conditions greatly affect how quickly internal temperatures rise. For dark meat sections like thighs, you can safely allow temperatures to reach 175-180°F without compromising texture or safety. Using a wireless meat thermometer allows you to monitor progress without frequently opening the smoker and losing heat. Models like the MEATER Plus offer dual sensors for both internal and ambient temperature monitoring with extended Bluetooth range. Boneless, skinless chicken breasts should reach an internal temperature of 165°F to 170°F for optimal safety and juiciness. Just as smoked salmon requires careful attention to prevent albumin leakage and dryness from overheating, butterflied chicken benefits from precise temperature control throughout the smoking process.
Rather than relying on time estimates, use your thermometer to guide you toward the target 165°F in the thickest section. Continue monitoring until you hit your target, ensuring food safety while maintaining ideal juiciness and texture throughout your butterflied chicken. For butterflied chicken specifically, the flattened preparation allows for more even heat distribution across the meat, which can reduce overall smoking time compared to whole birds. Letting the smoked chicken rest for a few minutes after reaching target temperature will seal in juices and enhance the final tenderness of your meat.

Instant Read Meat Thermometer | Our instant read thermometer features a temperature probe and advanced, highly accurate technology with a 1-2 second response time. Our instant read food thermometer comes pre-calibrated with instructions and a meat temperature chart, plus a recalibration feature if needed.

SMART BASE CONTROL: Set temperatures, monitor progress, and receive alerts directly from the base without needing your phone nearby.
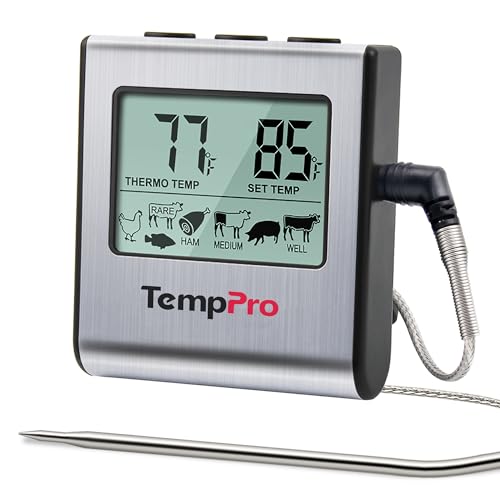
Cook mode with USDA preset temperature settings: TempPro cooking thermometer ideal for meat, oven, smoker or stove top; Programmable alert with preset temperatures for specific foods recommended by USDA; All of the preset temps can be reset to your desired tastes
Managing Smoke Flavor and Heat Control
Everything hinges on balancing your smoker’s temperature and smoke output to achieve that coveted thin blue smoke without imparting bitter, ashy flavors. Start by opening both vents fully, then gradually close your intake vent to reach and maintain 225°F. This temperature maintenance prevents the incomplete combustion that produces harsh, creosote-laden smoke.
For smoke density adjustment, load three pans of alder chips initially, allowing 2 hours of active smoking. After that window closes, remove the chips entirely to let your butterflied chicken finish cooking smoke-free for 3-4 hours. This approach maximizes your smoke ring and flavor development while preventing over-smoking. Alder provides a mild, subtle smoke that pairs exceptionally well with poultry without overpowering the delicate meat. Unlike soaked chips that can create excessive steam and bitter flavors, dry alder chunks provide cleaner smoke output and more consistent burning rates. Hardwoods like alder are preferred because they produce a clean, mild smoke compared to softwoods that contain high resin content. For consistent results, source kiln-dried chunks free of mold and insects to ensure reliable smoke output throughout your cook. When pairing woods to meats, consider that fruit woods and milder options like alder complement chicken and other poultry exceptionally well. Top wood pellet brands like Lumberjack and Traeger offer 100% natural hardwoods that deliver the clean-burning performance needed for optimal smoke quality. When preparing your smoker setup, consider using high-smoke-point oils if you need to season any grates or equipment before the cook.
Monitor your chamber consistently, using the door as a temperature tool—crack it open to release excess heat if needed. Balance intake and outtake vents precisely, as proper airflow management directly impacts both heat control and smoke quality throughout your cook.
Techniques for Even Cooking Results
Once you’ve mastered smoke management, achieving uniform cooking throughout your butterflied chicken depends on three critical elements: proper spatchcocking, accurate thermometer placement, and consistent temperature monitoring.
You’ll flatten the breastbone and spread the legs outward to maximize grate contact. This positioning reveals even heat distribution between white and dark meat sections. For managing rub application, you’ll apply olive oil first, then separate the skin from meat with your fingers to attain ideal seasoning penetration techniques. Pre-salt overnight and refrigerate without covering, then wrap and refrigerate again before smoking.
Insert your meat thermometer into the thickest thigh without touching bone. Monitor both breast and thigh temperatures separately—they cook at different rates. You’ll maintain 225-250°F consistently while keeping the lid closed, allowing carryover cooking to reach final doneness temperatures safely. Injecting hot honey butter under the skin before smoking will infuse the meat with moisture and enhance tenderness throughout the cooking process. Consider using mesquite, signature, or hickory wood pellets to enhance the flavor profile of your smoked chicken.
Achieving Crispy Skin While Smoking
Three foundational techniques’ll deliver the golden, crackling exterior you’re after: dry brining to remove surface moisture, strategic oil application to facilitate fat rendering, and a final high-heat blast to crisp the skin. Start by patting your butterflied chicken completely dry, then salt it generously for an overnight refrigeration. This process pulls initial moisture out while maintaining skin moisture through salt reabsorption, priming your skin for crisping. Before smoking, coat the skin and underside generously with olive oil—this accelerates fat rendering during heat exposure. Control smoke exposure by shifting from your initial 225°F smoke phase to 400°F after reaching 130°F internal temperature. This progression concentrates heat where you need it most, creating that coveted crispy finish without drying out your meat. Always clean and oil the grill grates before smoking to prevent sticking and ensure optimal heat transfer to your chicken. For best results, choose bristle-free grill brushes to avoid leaving residues on your cooking surface that could affect food safety. Performing routine light cleaning after each smoking session will help maintain your grates and prevent flavor contamination from buildup on subsequent cooks. A high smoke point oil like olive oil forms a protective layer that promotes even browning and prevents sticking during the cooking process. The spatchcocking technique of butterflying the whole chicken by removing the backbone and flattening it ensures that white and dark meat cook at a similar pace, contributing to more even browning and crisping across the entire surface.

Graza Frizzle Oil Made from 100% Olives: A neutral-flavored, high heat cooking oil made from 100% peak harvest olives. With a smoke point of up to 450 degrees, Frizzle is your high-heat kitchen hero. 1 bottle/750ml.

【 The Highest Quality Cold-Pressed Moroccan Olive Oil】 The Atlas Mountains of Morocco help grow the most perfect olives in the world, thanks to the rare climate and the geographical advantage of the high-reaching area. We, at Atlas Olive Oils, pride ourselves on producing the highest quality cold-pressed Moroccan olive oil, which is sustainably sourced and ethically produced.

One 32 fl oz bottle of Bertolli Non-GMO Certified Cooking Olive Oil
Adjusting Cook Time Based on Chicken Size
How much you’ll adjust your smoking time ultimately depends on your chicken’s weight, since mass directly affects heat penetration and cooking duration. For smaller 2-3 pound birds, you’re looking at 2-3 hours at 225°F. Standard 3-4 pound chickens typically finish in 3-4 hours, while larger 4-5 pound birds demand 4-5 hours.
Your timing adjustments for weight become more predictable when you maintain steady smoker temperature. The butterflied format itself reduces total cooking time compared to whole birds, but altering spatchcock preparation—ensuring even thickness—promotes consistent heat distribution. To further enhance your results, use indirect heat techniques to avoid flare-ups and ensure even cooking throughout the smoking process. Quality pellet grill models like the Traeger Grills Pro 22 offer reliable temperature control to maintain the steady 225°F needed for consistent results. For optimal results, consider dry-brining your chicken for 4-24 hours beforehand to enhance moisture and tenderness throughout the smoking process. Different wood choices like hickory or pecan can add depth to your chicken’s flavor profile. Tucking the wingtips under the breasts will further ensure even cooking across all sections of the bird. Incorporating a water pan during the smoking process helps maintain moisture and enhances the overall smoke flavor.
Rather than relying solely on these estimates, you’ll want to verify doneness with a meat thermometer inserted into the thickest thigh portion. This 165°F internal temperature reading remains your most reliable indicator, regardless of size.
Resting Your Smoked Chicken Properly
Pulling your butterflied chicken off the smoker isn’t the final step—what you do immediately after matters just as much as the hours spent smoking. Your minimum rest period is five minutes, though ten to fifteen minutes yields superior results. Tent your chicken loosely with aluminum foil to preserve the smoked exterior while juices redistribute throughout the meat. This resting phase prevents dryness in breast tissue and completes pasteurization safely. During rest, carryover cooking gradually raises the ideal resting temperature, tenderizing dark meat further while maintaining juiciness. The foil covering preserves those hard-earned smoky flavors you’ve developed, particularly when smoking at lower temperatures like 225°F where smoke flavor penetration requires extended cook times. Similar to smoking ribs, you can enhance moisture retention by placing butter and brown sugar inside the foil during the resting phase. For optimal flavor development, consider using digital probe thermometers to monitor your chicken’s internal temperature throughout the resting process. For optimal flavor development, consider using medium-smoking woods like pecan or hickory to enhance your chicken’s taste profile. Allowing the juices to redistribute throughout the meat during this critical resting period ensures every bite delivers maximum tenderness and flavor. Monitor the internal temperature with a thermometer to confirm your butterflied chicken reaches 165°F in white meat and 180°F in the thighs before considering it fully done. Once rested, your butterflied chicken is ready to carve, slice, or serve with confidence.
Using a Thermometer for Perfect Doneness
While resting guarantees your chicken finishes cooking perfectly, you’ll need a reliable thermometer to know exactly when to pull it from the smoker in the first place. Before smoking, verify thermometer accuracy verification to confirm reliable readings throughout your session.
Master probe positioning techniques by inserting your digital thermometer horizontally into the thickest breast section, avoiding bones and fatty areas that skew measurements. Check multiple locations to identify any cold spots. For butterflied chicken, position your probe where the two breasts meet, capturing the slowest-cooking area. For even cooking results similar to skewering vegetables, consider using probe positioning strategically to monitor the thickest sections. Just as regular maintenance extends grill performance, consistent thermometer monitoring ensures optimal smoking results. Smoking at 250-275°F provides good smoke flavor and texture compared to lower temperatures that can result in a rubbery exterior. Maintaining the correct temperature and time is crucial for achieving perfectly smoked chicken breast. Using bristle-free grill brushes before smoking helps ensure a clean cooking surface for optimal heat distribution and flavor development. Letting your smoked chicken rest after cooking allows residual heat to finish the cooking process for juicy, perfectly cooked results. The resting period works similarly to the technique of finishing over indirect heat, which ensures even carryover cooking throughout the meat.
Set your high-temperature alarm to 160°F. This pull temperature accounts for carryover cooking during your 10-15 minute rest, safely reaching the 165°F USDA standard. Verify doneness with a secondary thermometer before removing your chicken from the smoker.

【Fast & Accurate】Our meat thermometer digital delivers accurate readings within ±1°F in just 1–2 seconds, with a wide temperature range of -58°F to 572°F (-50°C to 300°C). No more waiting over the heat - know your food's exact temperature instantly.

Fast and Accurate Reading: Kitchen thermometer for cooking features a 1 second readout speed and high accuracy of +/-0.9 degrees Fahrenheit, ensuring you receive the most delicious results every time

【Fast & Accurate】Our meat thermometer digital delivers accurate readings within ±1°F in just 1–2 seconds, with a wide temperature range of -58°F to 572°F (-50°C to 300°C). No more waiting over the heat - know your food's exact temperature instantly.