You’ll grill boneless, skinless chicken breasts for 6 minutes over direct medium-high heat (425-450°F) without moving them, then flip and cook 3-4 minutes more until reaching 165°F internally. Bring your chicken to room temperature first and pat it dry for ideal searing. Use a meat thermometer to verify doneness, then rest for 5 minutes before serving. There’s considerably more technique involved in mastering this process.
Preparing Your Grill for Chicken
You’ll want to start by preheating your grill to medium-high heat, between 375-450°F, which takes about 10-15 minutes to ascertain even heat distribution across the cooking surface.
While your grill heats, begin your grate preparation process. Use a grill brush to scrape away debris and burned-on food particles from previous sessions. These remnants compromise heat conduction and flavor transfer to your chicken. Burn off leftover bits from the previous grilling session to ensure optimal flavor. For safety, consider using nylon-bristle grill brushes instead of metal wire brushes, which can shed dangerous bristles that contaminate food. After brushing, inspect your grates carefully to ensure no stray bristles remain that could transfer to your food. Bristle-free coiled designs offer a safer alternative that won’t leave residues in your food while still effectively tackling stubborn grime.
Next, apply oiling before heating occurs. Using high-heat oils like vegetable, canola, or grapeseed oil, coat your grates with paper towels held by tongs. This prevents sticking and enables proper searing. Never oil a hot grill, as this risks dangerous flare-ups. Oiling the grates helps prevent the chicken from sticking and allows for proper searing and char marks. For cast iron grates, this oiling step is particularly important as it helps create a protective coating that prevents rust between cooking sessions. These high-smoke-point oils can withstand grilling temperatures without burning, making them ideal for grate preparation.
Verify your grill’s temperature using a thermometer before placing chicken on the grates. This methodical preparation confirms ideal cooking conditions and professional results.

NYLON BRISTLE GRILL BRUSH: Designed for cleaning cooled grill grates, the durable nylon bristles help scrub away residue after cooking, making this brush a practical tool for routine grill maintenance at home or outdoors.

MATERIAL: Emerald, grit-infused nylon bristles—5X thicker for safe, high-visibility cleaning
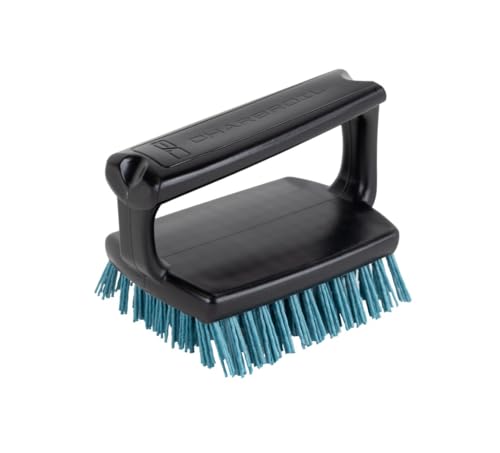
MATERIAL: Emerald, nylon bristles are 5X thicker for high visibility
Getting Your Chicken Ready
Before your grill reaches temperature, prepare your chicken breasts through a combination of marination, brining, and pounding to maximize tenderness and flavor retention. Start with brining considerations by soaking your breasts in saltwater for 30 minutes to one hour, which enhances juiciness and prevents drying during high-heat cooking. Next, apply your chosen marinade—whether balsamic vinegar and garlic or Italian dressing—for a minimum of one hour, preferably four hours, using Ziploc bags for even distribution. Employ pounding techniques using a meat tenderizer to break down fibers and achieve uniform thickness across medium to large breasts. This promotes moisture retention and guarantees consistent cooking. Finally, pat your chicken dry to encourage optimal searing, then reserve 1/4 cup marinade separately for basting. Allow the chicken to rest for several minutes after removing it from the grill to help it retain the juices before slicing or serving. Bring chicken to room temperature before grilling to ensure even cooking throughout the meat. Use a meat thermometer inserted in the thickest part to check that your chicken reaches an internal temperature of 165°F for safe consumption. Pounding the chicken to even thickness ensures that all parts cook at the same rate, preventing some areas from drying out while others finish cooking. Proper preparation also helps preserve the essential vitamins and minerals like B vitamins, selenium, and phosphorus that make grilled chicken a nutritious protein choice. For best results, preheat the grill to the proper temperature before adding your prepared chicken breasts to ensure proper searing and cooking. If you’re working with bone-in chicken breasts, be prepared to adjust your cooking time significantly, as they require grilling over moderate heat for about 30 to 35 minutes compared to the faster boneless variety.
Direct Heat Grilling Times
The grill’s temperature is your foundation for success—set it between 425-450°F for medium-high direct heat, which creates the ideal conditions for searing chicken breasts without drying them out. Before preheating methods take effect, thoroughly oil your grates with a folded paper towel and tongs using appropriate oil selections to prevent sticking.
Place boneless, skinless breasts directly above the heat source for 6 minutes undisturbed, allowing golden-brown grill marks to develop. Flip once and cook the second side for 3-4 minutes. Total direct heat cooking time averages 9-10 minutes, reaching an internal temperature of 155-160°F in the thickest portion. Use meat probes to monitor internal temperature throughout the grilling process for accuracy. For optimal results, apply sugar-based glazes during the final minutes of cooking to enhance flavor without burning. Flipping halfway through ensures even cooking on both sides and prevents one side from overcooking while the other remains undercooked.
For even heat distribution, you can alternatively flip every 60-90 seconds. Monitor temperature after your second rotation to prevent overshooting 165°F. Rest your chicken for 5 minutes before serving to seal in juices. Allowing the chicken to rest helps the juices redistribute throughout the meat for maximum juiciness and flavor. Like with other proteins, grilling with the lid closed helps maintain consistent heat and reduces overall cooking time. Maintaining proper grill airflow ensures consistent temperature control and promotes even cooking throughout the grilling process. Using an instant-read thermometer provides the precision needed to ensure your chicken reaches the safe internal temperature without overcooking.
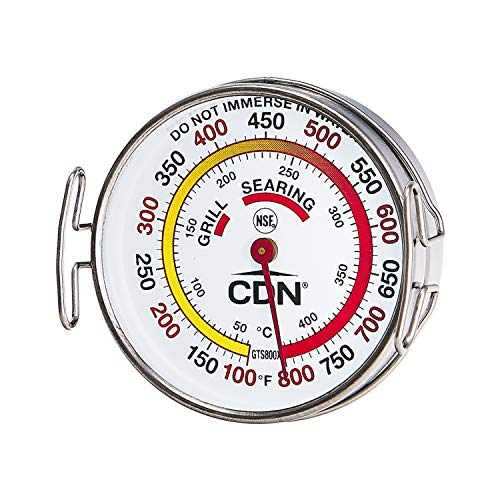
ACCURATE TEMPERATURE ZONES. The CDN GTS800X Grill Surface Thermometer features a color-coded scale that allows precise monitoring of temperature zones, providing optimal control over your grilling experience.
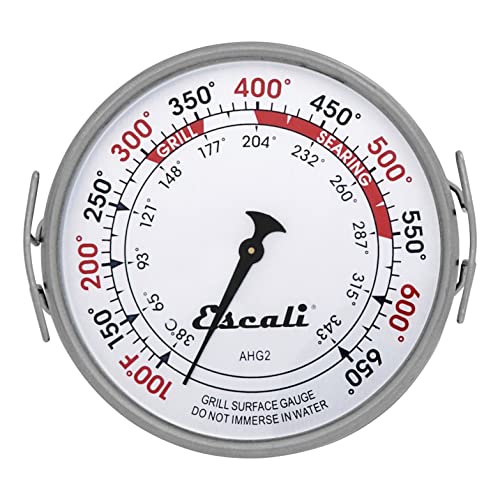
Temperature Range: 100° to 650°F / 38° to 343°C. Dial Diameter: 3.5 inches

Material:This Grill Temperature Gauge is made of stainless steel to maximum durability and reliability.That is not only safe but also environmentally friendly
Understanding Indirect Heat Cooking
While direct heat grilling creates those desirable caramelized exterior marks in just 9-10 minutes, indirect heat cooking takes over to finish the job without drying out your chicken. You’ll shift your seared breasts to the cooler zone after achieving proper sear, maintaining a consistent grill temperature between 350-425 degrees F. Close the lid to trap heat, mimicking an oven environment for even cooking throughout. You won’t need to flip during this phase—simply rotate pieces periodically for uniform results. Depending on thickness and bone content, indirect cooking requires 5-40 minutes. This methodical approach prevents moisture loss while allowing you to apply sauces or mop glazes without burning. Monitor internal temperature until it reaches 165°F to ensure food safety and optimal doneness. For the juiciest results, consider using bone-in chicken thighs instead of boneless breasts, as they retain more moisture during the indirect cooking phase. Thighs generally need 10-15 minutes over indirect heat after an initial sear to reach the safe internal temperature. Some grills benefit from trussing the chicken to ensure more even cooking across all parts of the meat. After cooking, let the chicken rest for 5-10 minutes to allow juices to redistribute throughout the meat for maximum flavor and tenderness. Using a meat thermometer is strongly recommended to ensure accuracy and avoid under- or overcooking. The combination of direct searing and controlled indirect heat guarantees juicy, perfectly cooked chicken breasts.

Fast & Accurate: Get precise readings in just 1 second with ±0.9°F accuracy. NSF Certified for trusted food safety, this digital food thermometer features a 4.3 inches food-grade stainless steel meat probe, perfect for grilling, frying, baking, making candy and more

BBQ / Grill pit thermometer, safe and environmentally friendly.
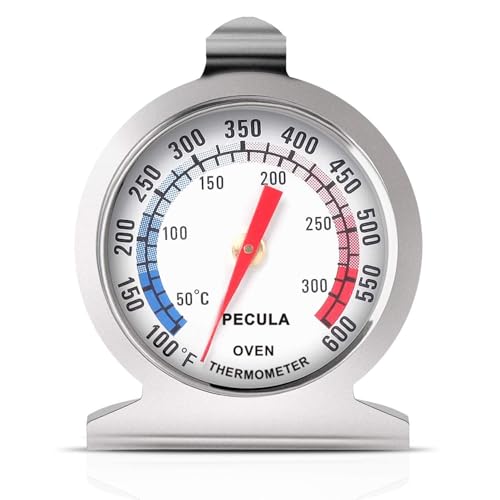
Clear Dial Display: PECULA's analog oven thermometer delivers precise, instant readings from 50–300°C / 100–600°F. Its dial features clear dual-zone blue and red indicators for at-a-glance temperature monitoring—perfect for ovens, grills, smokers, and deep fryers, ensuring you master every bake, roast, or fry.
Checking Internal Temperatures
How do you know when your chicken’s actually done? You’ll rely on a digital meat thermometer for temperature accuracy—it’s your most dependable tool for monitoring doneness. Insert the probe into the thickest part of the breast, avoiding bone and fat, after approximately 9 minutes of grilling. For boneless skinless breasts, you’re targeting 165°F (74°C). Check every couple minutes if you’re below target temperature. Consider withdrawing your chicken at 155°F, since carryover cooking will raise it to 165°F during the 1-5 minute rest period. This methodical approach guarantees you won’t serve undercooked poultry while avoiding dry, overcooked results. Use a Thermapen to measure the lowest temperature in the meat for the most accurate reading. Golden-brown searing signals readiness for your initial temperature check. Bone-in chicken breasts require monitoring to 170°F internal temperature for optimal food safety. If you’re working with frozen chicken, note that total cooking time will increase by approximately 50% compared to thawed chicken. For serious pitmasters seeking ±0.5°F accuracy, the ThermoWorks Thermapen ONE delivers professional-grade precision with 1-second read times. For hands-off monitoring during longer grilling sessions, consider wireless meat thermometers that connect to your smartphone and eliminate the need for constant manual checks. Budget-conscious grillers can achieve reliable results with the ThermoPro TP20, which features dual probes and an impressive 300-foot wireless range for under $45. Using a digital meat thermometer helps you accurately monitor internal temperature and avoid overcooking your chicken.
Thickness and Marinating Guidelines
Before you place chicken on those preheated grates, you’ll want to prepare your breasts for even, predictable cooking. Pound each breast to a consistent ½-inch thickness, ensuring variations don’t exceed ¼-inch differences. This uniformity prevents thin sections from drying while thick sections undercook.
Next, apply your marinade. Brining in salt solution for 30 minutes to one hour considerably improves moisture retention during grilling. Ideal marinade ratios use Italian dressing, BBQ sauce, or simple olive oil preparations. These browning techniques enhance exterior searing while developing robust flavor profiles. Allow the chicken to come to room temperature before grilling to ensure even cooking throughout. Chilling breasts before grilling slows cooking and prevents burning when you’re working with particularly thick pieces.
Proper marinating directly correlates with juicy, tender results. The salt solution breaks down muscle fibers, improving overall texture quality. Combined with consistent thickness, strategic marinating creates predictable cooking outcomes and eliminates the dry, tough chicken breast problem entirely. After grilling, let the chicken rest before slicing to allow juices to redistribute throughout the meat. If you have leftovers, reheat to 165°F using methods that retain moisture, such as covering with foil or adding broth. For longer storage, ensure chicken is completely cooled before wrapping tightly and freezing for up to three months. Store cooked chicken in airtight containers or freezer bags to prevent freezer burn and maintain quality. Refrigerated grilled chicken should be consumed within three to four days when kept at proper temperature to maintain safety and quality.

LOCKS IN MOISTURE FOR JUICY RESULTS: Kosmos Q Chicken Soak Brine delivers a balanced mix of brown sugar, Worcestershire, and savory spices that draws moisture deep into the meat. Whether you're cooking whole birds or just tenderloins, this soak helps you get that juicy, flavorful bite in every piece without complex prep.

AUTHENTIC ORIGINAL CHICKEN INJECTION & BRINE: Our secret combination of ingredients capture the true taste of Memphis-style championship BBQ with the perfect balance of sweet & heat to take your BBQ to the next level.

CHAMPIONSHIP BIRD BRINE - This Bird Brine seasoning was developed by our award winning Killer Hogs Championship BBQ team.
Flipping and Timing Techniques
Once you’ve seared your chicken on direct heat, you’ll need to master the flip to guarantee even cooking and moisture retention. Start by searing five minutes per side at high temperature. Flip when the meat releases easily from grates—typically after 4-5 minutes on medium-high heat. Limit direct heat flipping to 3-4 total rotations to prevent juice loss and sticking.
After your initial 8-10 minutes direct cooking, move to indirect heat. Here, flip 2-3 additional times over 30-35 minutes while maintaining a closed lid between flips. This circulation locks in consistent temperatures. Avoiding over-flipping retains moisture and ensures the chicken cooks evenly without burning. For thicker chicken breasts, consider cutting them lengthwise to promote even cooking throughout. Using a leave-in thermometer helps you monitor the internal temperature without repeatedly opening the grill lid. If you’re using a Kamado-style charcoal grill, you can achieve faster cooking times and crispy skin by maintaining temperatures around 400°F. For cooking whole chickens or multiple pieces simultaneously, vertical chicken holders can maximize your grill space while ensuring even heat distribution. You can also test doneness using finger pressure techniques, which experienced grillers use to gauge when meat has reached the proper internal temperature. Before placing your chicken on the grill, make sure to oil the grates to prevent the meat from sticking and tearing when you flip it. Pull your chicken at 160 degrees internal temperature, then rest five minutes to reach the safe 165-degree threshold. Check the thickest section for accuracy.
Moving Chicken Between Heat Zones
Now that you’ve mastered the flip and understand timing mechanics, you’ll want to set up your grill strategically to prevent overcooking. After achieving initial browning and reaching 140-150°F internal temperature—typically after 5-8 minutes—transfer your chicken to the low heat zone for temperature monitoring and precise heat management.
This shift prevents exterior carbonization while allowing thorough internal cooking. Continue cooking until your lowest internal temperature reading reaches 155°F. Remove the chicken immediately rather than relying on time estimates alone. Use a meat thermometer to verify doneness and ensure food safety. For enhanced convenience during longer cooks, consider wireless grill thermometers that allow remote monitoring without lifting the lid and losing heat. Tent with foil for one to two minutes, allowing carryover cooking to push the final temperature to the safe 165°F without additional grill exposure. The residual heat will continue cooking the chicken even after removing it from the grill, ensuring it reaches the proper temperature without drying out. Place the resting chicken on a rack to prevent steaming and maintain those attractive grill marks you’ve worked to achieve. A quality pair of long-handled tongs ensures safe handling when moving chicken between heat zones without risking burns from flare-ups. Look for tongs with inward-facing teeth that provide superior grip on chicken pieces, especially when transferring between heat zones. This meticulous approach guarantees perfectly cooked, juicy chicken breasts every time.

More Stable Than Bluetooth: Our advanced RF technology ensures a stronger, more reliable connection than Bluetooth. This smoker thermometer provides the freedom to move around without losing connection! Monitor your BBQ from up to 1,000 feet away!

Bluetooth Monitor Remotely: Govee Bluetooth meat thermometer lets you check the temperature of your grill, smoker, or oven from your phone. With this smart BBQ thermometer, you can multitask while grilling.

Smart Display Base with Control: The ThermoMaven G1 wireless meat thermometer features a versatile smart display base that offers real-time temperature readings and allows you to set temperatures directly on the device—no app required. With our user-friendly one-click setup, you can connect the probe, pair it with the base, and start cooking in seconds—no complicated setup needed!
Resting Your Grilled Chicken
As your chicken reaches 155°F on the grill, you’ll immediately transfer it to a rack and tent it loosely with foil—a pivotal step that allows carryover cooking to push the internal temperature to the safe 165°F while you’re completely removed from the heat source. The ideal resting duration spans 5-7 minutes, during which thermal gradients equalize throughout the meat’s thickness. This methodology prevents moisture loss when you eventually slice.
The foil tent moderates cooling rates while facilitating that essential 5-7°F temperature rise. Positioning your chicken in a warm location during this resting phase further supports maintaining juiciness. Once you’ve reached 165°F internally, the proteins contract and seal, trapping flavorful juices that would otherwise escape upon slicing. Just as turkey benefits from resting to allow juices to redistribute, chicken requires this same critical window to achieve optimal texture. Using a probe thermometer ensures you’ve hit the precise internal temperature before removing the chicken from heat. Allowing the chicken to rest ensures the juices redistribute properly throughout the meat, creating a more flavorful and succulent final product. This resting period mirrors techniques used for other proteins, where letting the meat rest for a few minutes before serving enhances overall quality. Before your next grilling session, remember to oil your grates with high-temperature cooking oils like vegetable or canola oil to prevent sticking and ensure easy cleanup. This methodical approach delivers restaurant-quality results with the best texture and moisture retention.
Tips for Perfectly Cooked Chicken Every Time
What separates consistently juicy, properly cooked chicken from disappointing, dried-out results? You’ll master temperature verification and methodical heat management. Insert your meat thermometer horizontally into the thickest portion, checking every 8-10 minutes during indirect heat cooking. Remove breasts at 160-165°F—accounting for 5-10 degrees of carryover cooking. You’ll achieve ideal results using two-zone cooking: sear 4-5 minutes per side on direct heat, then finish 5-10 minutes on indirect heat. Adjust timing based on thickness; thinner breasts cook faster. Preparation matters equally—pat breasts dry, season generously, and marinate appropriately. Let the chicken rest for 5-10 minutes after removing it from the grill to allow the juices to redistribute throughout the meat. Consider seasonal flavor infusions through acidic marinades like balsamic vinegar. For enhanced flavor profiles, apply a dry rub before grilling or consider brining beforehand to maximize juiciness and tenderness. Brining the chicken helps lock in moisture and enhances flavor by allowing the meat to absorb seasoned liquid before cooking. Just as with grilling steaks, using a meat thermometer is the most reliable indicator for doneness rather than relying solely on cooking time. Indoor grills with superior temperature control like the Philips Smokeless Grill can deliver evenly cooked chicken breasts with excellent caramelization. Complete your meal with versatile side dishes like pasta salads with fresh vegetables or protein-rich baked beans that complement the savory flavors of grilled chicken.