You’ll achieve restaurant-quality results by patting your steak dry and seasoning it generously with salt. Bring it to room temperature, then preheat your cast iron skillet to 425°F. Add high smoke-point oil like avocado or algae oil, then sear your steak without moving it for 3-4 minutes to develop a perfect crust. Flip once, baste with butter and garlic, then rest for 10-15 minutes. The techniques for mastering internal temperature and finishing touches will elevate your stovetop steak even further.
Preparation and Temperature Control
You’ll find that mastering steak on a stovetop hinges on two fundamentals: precise temperature management and proper preparation. Start by patting your steak dry and seasoning it generously with salt—this prevents moisture from interfering with crust formation. Allow your meat to reach room temperature before cooking, ensuring even heat distribution and preventing meat fibers tightening unevenly.
Preheat your cast iron or heavy skillet to 425°F using a surface thermometer, allowing 30 minutes for complete heating. This controlled temperature produces a predictable sear without burning. When you place your steak in the pan, you’ll establish your target internal temperature baseline. Remember that carryover cooking adds approximately 5°F during the essential 3-5 minute rest period, so plan your doneness accordingly. After cooking, allow the steak to rest so juices can redistribute throughout the meat, ensuring maximum tenderness and flavor development. The fattier your cut, the more salt should be applied to balance the richness and enhance flavor development. Using a meat thermometer is the most accurate way to verify your steak has reached the desired internal temperature throughout the cooking process. Choose cuts with good marbling like New York Strip or Ribeye for the best flavor and texture results. Use high-smoke-point oils like grapeseed or avocado oil to prevent burning and achieve a perfect sear. You can also test doneness using finger pressure techniques, which involve comparing the firmness of the steak to different parts of your hand. This approach helps you avoid the gray band of overcooked meat that can develop between the crust and the interior.
Selecting the Right Pan for Stovetop Cooking
What separates a mediocre stovetop steak from a restaurant-quality result often comes down to your choice of cookware. Your pan material composition directly impacts heat retention and searing capability. Cast iron skillets excel here—they retain exceptional heat and develop superior crusts thanks to their rough surface characteristics. If you prefer lighter handling, carbon steel combines cast iron’s heat retention with easier maneuverability. Stainless steel clad versions heat evenly but won’t match cast iron’s performance. Stainless clad pans can withstand temperatures up to 800F, making them suitable for consistent searing performance. Avoid non-stick pans; their smooth surface characteristics and lower heat tolerance prevent proper crust formation. For indoor grilling simulation, specialized grill pans with raised ridges deliver authentic grill marks. The Lodge Chef Collection features tall ridges that produce excellent grill marks while maintaining the heat retention benefits of cast iron construction. Larger pans allow you to cook multiple steaks without overcrowding the surface, which would cause steaming rather than searing. Like outdoor grills with cast-iron grates, your skillet will require seasoning and rust prevention to maintain its nonstick properties and longevity. Consider your cooktop compatibility when selecting a pan, as certain materials like hard‒anodized aluminum work on gas and electric ranges but may not function on induction stovetops. When evaluating grill pans, pay attention to ridge height, as taller ridges create better grill marks and allow fat to drain away from the meat. Enameled cast iron offers superior heat retention with the added benefit of easier maintenance since it doesn’t require seasoning like traditional cast iron. Ultimately, prioritize pan material composition that supports sustained high temperatures and surface characteristics that promote excellent browning.


Secure Dual Assist Handle: The Lodge Seasoned Cast Iron Dual Handle Pan features dual assist handles for a secure grip when moving this cast iron skillet
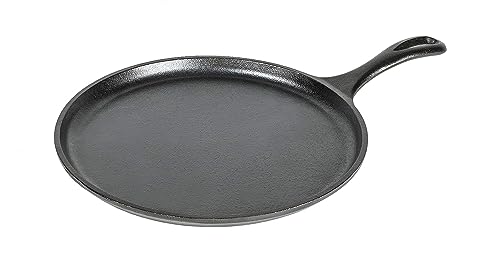
Pre-Seasoned & Ready to Use: The Lodge Cast Iron Griddle comes naturally pre-seasoned and ready to use for tortillas, pancakes, and more right from the box
Choosing and Applying Oil Correctly
Why does oil selection matter as much as your pan choice? Your oil determines whether you’ll achieve a perfect crust or trigger your smoke alarm.
You’ll want a high smoke point of at least 400°F—preferably higher. Avocado oil (375–520°F) and algae oil (535°F) excel here, offering neutral flavors that won’t compete with your steak. Canola and vegetable oils provide budget-friendly alternatives at 400–450°F. Clarified butter, or ghee, offers a rich, nutty flavor while maintaining a smoke point between 375°F and 485°F for reliable high-heat cooking.
Before searing, heat your oil to 375°F minimum for proper crust development. This smoke point awareness prevents degradation and unwanted flavors. Avoid extra-virgin olive oil and butter—they’ll burn quickly, creating bitter tastes. Algae oil’s excellent heat stability maintains oil quality during high-heat cooking, preventing off-flavors and unhealthy compounds from developing. High smoke point oils also polymerize into a durable layer when used repeatedly in cast iron pans, enhancing your cooking surface over time.
For storage considerations, keep refined oils in cool, dark places away from heat sources. Proper storage maintains stability and extends shelf life, ensuring consistent results for your next steak preparation. While 400°F works for cooking steak, grilling experts recommend higher temperatures between 450°F and 500°F for optimal sear and flavor development. Stainless steel’s corrosion resistance makes it an excellent material for high-heat cooking surfaces that need to withstand repeated exposure to oils and moisture. If you prefer outdoor cooking, stainless steel grills like the Monument Grills Mesa 415BZ excel at high-heat searing without creating hot or cold zones. After achieving your sear, let the steak rest for 10-15 minutes to allow the juices to redistribute throughout the meat for maximum tenderness.

Graza Frizzle Oil Made from 100% Olives: A neutral-flavored, high heat cooking oil made from 100% peak harvest olives. With a smoke point of up to 450 degrees, Frizzle is your high-heat kitchen hero. 1 bottle/750ml.

Light Buttery Flavor That Elevates Every Meal: Algae Cooking Club Chef-Grade Algae Oil enhances every dish with subtle richness. Its neutral profile makes it ideal for searing, baking, and dressings, transforming everyday meals into gourmet experiences.

Light Buttery Flavor That Elevates Every Meal: Algae Cooking Club Chef-Grade Algae Oil enhances every dish with subtle richness. Its neutral profile makes it ideal for searing, baking, and dressings, transforming everyday meals into gourmet experiences.
Mastering the Searing Technique
Now that your oil’s heated and ready, it’s time to execute the searing technique that transforms quality beef into restaurant-grade perfection. Place your room-temperature steak into the screaming hot pan without moving it for 3-4 minutes. This undisturbed contact creates the deep brown crust formation you’re after. Flip once, then sear the second side identically.
Here’s where edge control matters: use tongs to stand the steak upright, searing each edge for one minute. This renders the white fat along the sides, ensuring uniform browning across all surfaces. After flipping, add butter, garlic, and herbs, tilting the pan to baste continuously until you’re nearing your target doneness. This final technique infuses aromatic flavor while perfecting your crust without overcooking the interior. Using a meat thermometer eliminates guesswork and ensures your steak reaches the exact internal temperature you desire. Patting the steak dry with paper towels before cooking prevents excess moisture from interfering with the searing process. Pull your steak from the heat slightly before it reaches your desired doneness, as carryover heat will continue raising the temperature during the resting period. A digital meat thermometer provides the most accurate reading to help you avoid overcooking and maintain optimal tenderness. This high-heat searing process triggers the Maillard reaction, which develops the complex flavors and rich brown color that define a perfectly cooked steak. Once your steak is done, top it with butter and let it rest tented with foil for 5-15 minutes to allow the juices to redistribute. For an even juicier result, some chefs recommend placing a small ice cube on top of the steak during the resting period to help lock in moisture.
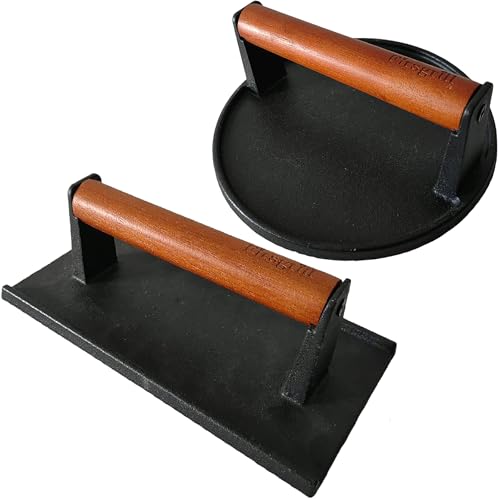
BURGERS – Perfect for smash burgers with beautiful grill marks BACON – Keeps strips flat and cooks evenly STEAKS – Helps sear and cook evenly THIN MEATS – Works great on any flat-top griddle or outdoor grill.
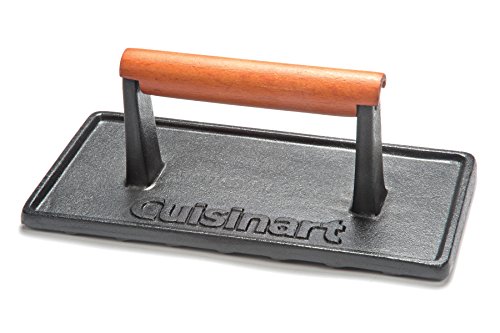
DURABLE: Heavy-duty 2.4-pound cast iron for even heat distribution and durability.
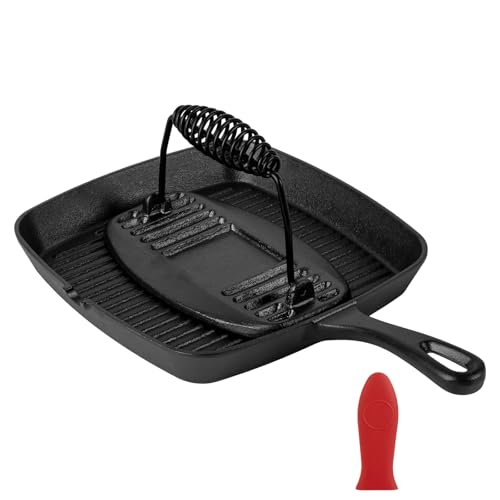
【Heavy-Duty Cast Iron Grill Pan】This tastedeli 9.25 inch cast iron grill pan is crafted from premium heavy-duty cast iron, ensuring excellent durability, superior heat retention, and even heat distribution. Perfect for everyday use as a frying pan, skillet, or searing pan, it works great for grilling steaks, burgers, fish, vegetables, or chicken indoors and outdoors.
Achieving Perfect Internal Temperature
The difference between a mediocre steak and an exceptional one often comes down to a single factor: nailing your target internal temperature. You’ll achieve perfect doneness by utilizing temperature probes effectively—insert your digital instant-read thermometer horizontally into the thickest part, avoiding bone and fat. Stabilize your reading for several seconds to guarantee accuracy. For best results, consider using a smart meat thermometer like MEATER, which monitors internal temperature and calculates carryover cooking automatically through its app.
For measuring correct doneness, remember that carryover cooking raises temperature 5°F–10°F during resting. Pull rare at 115°F, medium rare at 125°F–130°F, medium at 135°F–140°F, and medium well at 145°F. This strategic early removal prevents overcooking while allowing residual heat to reach your target. A 5–10 minute rest redistributes juices, delivering both ideal texture and safety. Your final steak temperature should fall within the ideal doneness ranges of 120°–165°F depending on preference. Never rely on color alone—precision thermometry ensures results. Quality thermometers like the budget-friendly ThermoPro TP20 offer reliable accuracy without breaking the bank. For the fastest and most reliable temperature readings, the ThermoWorks Thermapen ONE leads in both speed and consistency testing. If you need a reliable mid-range option, the Lavatools Javelin PRO Duo provides excellent value and performance. For extended monitoring without constant attention, wireless thermometers using radio frequencies like 433 MHz deliver superior range compared to Bluetooth-only models. The reverse-sear technique can also be adapted for stovetop cooking by starting steaks in a low oven before finishing with a high-heat sear.

【Fast & Accurate】Our meat thermometer digital delivers accurate readings within ±1°F in just 1–2 seconds, with a wide temperature range of -58°F to 572°F (-50°C to 300°C). No more waiting over the heat - know your food's exact temperature instantly.

【8X Faster + 4X More Precise】: Upgraded with an industrial-leading professional thermocouple sensor, Themomonster meat thermometer digital with NIST certified ±0.5℉ precision provides you the accurate temperature of your food in just 0.5 Seconds.

Instant Read Meat Thermometer | Our instant read thermometer features a temperature probe and advanced, highly accurate technology with a 1-2 second response time. Our instant read food thermometer comes pre-calibrated with instructions and a meat temperature chart, plus a recalibration feature if needed.
Understanding Doneness Levels
Once you’ve mastered temperature measurement, understanding how internal heat transforms your steak’s texture and flavor becomes essential to consistently achieving your desired result. Bring your steak to room temperature before cooking to ensure even heat distribution throughout the meat. Rare steaks reach 120°F to 130°F, delivering a cool, crimson center with exceptional juiciness—ideal for lean cuts like filet mignon. Medium-rare, the most popular choice, ranges from 130°F to 135°F, offering a warm red center with dark pink edges and rich flavor. Medium doneness reaches 135°F to 145°F, developing a firmer texture while retaining some moisture. Medium-well (145°F to 155°F) presents minimal pink and suits high-marbling steaks. Well-done steaks exceed 160°F, eliminating pink entirely but risking dryness. Using a meat thermometer is highly recommended to accurately verify your steak has reached the perfect internal temperature for your preferred doneness level. Allow your steak to rest after cooking so the juices are reabsorbed throughout the meat. For those who enjoy adding a smoky dimension to their steak, consider finishing it on a grill with integrated smoking capability to layer wood-fired flavor over your perfectly seared crust. Match your internal temperature ranges to your preferred texture and flavor profiles for consistently excellent results. If you’re looking to expand your outdoor cooking options, propane gas grills offer exceptional versatility with features like high BTU output and infrared burners for restaurant-quality searing. Ensure even thickness across your steak to promote consistent cooking and prevent some areas from overcooking while others remain underdone. Season your steak simply with salt and pepper to enhance the natural flavors without overpowering the meat’s inherent taste.
The Critical Resting Period
After you’ve nailed your target temperature, you’ll discover that removing your steak from heat doesn’t mean cooking stops—residual warmth continues transforming the meat’s interior for several minutes. This carryover cooking effect raises internal temperatures 3-6°F for steaks, so you’ll remove your meat several degrees below your target.
Transfer your steak to a warm plate and cover it loosely with aluminum foil. This resting period—typically 5-10 minutes depending on thickness—allows protein redistribution throughout the meat while muscle fibers relax. The result? Juices optimized for retention rather than loss during slicing. During this time, the juices redistribute throughout the meat, ensuring even moisture distribution from edge to center. Cooked meat should not sit out for more than two hours to avoid bacterial growth in the danger zone.
Don’t skip this critical step. Resting guarantees even cooking from edge to center, delivering the moist, flavorful steak you’ve worked to achieve. Just as overheating can cause albumin leakage in fish, excessive heat can compromise your steak’s texture and moisture. Similar to grilling, using medium-low heat during cooking helps achieve even doneness without burning the exterior. For precision during cooking, an instant-read thermometer helps you monitor internal temperature accurately and avoid overcooking. Just as with poultry, using a meat thermometer inserted in the thickest part ensures you hit your target doneness without guesswork. If you have leftover steak, ensure it cools completely before storing to prevent condensation and maintain quality. Remove your foil only after resting completes.
Finishing Touches and Serving
Your steak’s final moments—from pan to plate—determine whether all your effort culminates in an exceptional dish or merely a competent one. Master your butter application technique by spooning herb-infused compound butter over the resting meat, allowing residual heat to gently enhance aromatics without scorching delicate ingredients. For seasoning finalization, apply finishing salts like Maldon after cooking concludes—this timing preserves aromatic profiles while providing textural contrast that complements the meat’s richness. The crunchy salt crystals at your slice’s center create visual definition and burst of flavor. Remember that resting the steak is crucial for retaining moisture and enhancing flavor before plating. Consider using a probe thermometer to verify your steak has reached the target temperature before removing it from heat, ensuring you’ve achieved your desired level of doneness. Plate your steak immediately to maintain warmth, allowing butter to continue melting across the surface during consumption. If you’re serving outdoors and concerned about protecting your deck from grease splatters, a heat-resistant grill mat can catch drips and prevent staining on composite or wood surfaces. Sharp knives with minimal sawing strokes prevent juice loss, ensuring each portion delivers layered, concentrated flavors you’ve meticulously developed throughout cooking. Choose a mat with a raised lip design to contain spills and prevent grease from seeping onto your deck boards, particularly important for composite materials that can discolor from oil exposure. Premium grill mats with PTFE layers deliver superior non-stick performance when handling greasy foods, preventing buildup and simplifying post-meal cleanup. For outdoor grilling enthusiasts, investing in a durable grill cover with UV-resistant and waterproof properties helps protect your equipment from weather elements and extends its lifespan significantly. When grilling outdoors becomes a frequent pursuit, portable charcoal grills like the Weber Go-Anywhere offer lightweight construction and dependable performance for achieving restaurant-quality char on steaks in any setting.

If you like herb butter on your steak, look no further. This is an expertly mixed seasoning with herbs and spices that match the rich taste of butter. Simply soften the butter, add the seasoning, churn and refrigerate again. Then add a slice of the herb butter to your meats, sausages or corn. Great for any BBQ dish.
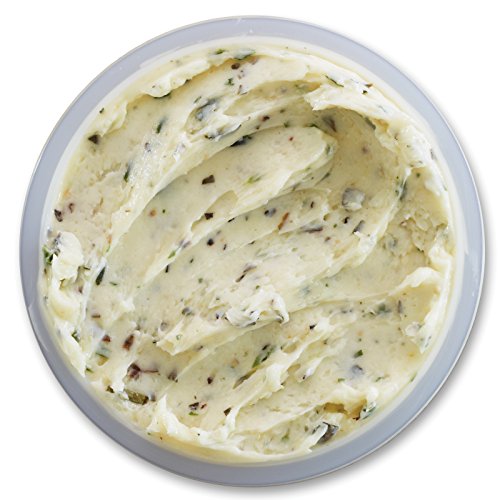
RICH AND SAVORY FLAVOR: Immerse your taste buds in the decadent taste of roasted garlic paired with a delightful blend of oregano, basil, and parsley in every luxurious bite of our compound butter.