You’ll nail thick-cut steaks by starting with Choice or Prime grade cuts at least 1.5 inches thick, then applying kosher salt either immediately or 40+ hours ahead. Set up dual heat zones—225–275°F indirect and 450–550°F direct—then reverse sear: cook low until your steak hits 110°F internally, rest ten minutes, then sear hard for that caramelized crust. The specifics of timing, temperature precision, and technique will elevate your results considerably.
Selecting Quality Meat and Cut Thickness
Before you fire up the grill, you’ll want to understand how USDA grading works and why thickness matters for achieving that perfect steak. The USDA grading system evaluates marbling and maturity—critical factors influencing tenderness and flavor. Choice grade offers the ideal balance of marbling, tenderness, and affordability for grilling. Prime delivers abundant marbling that melts during cooking, creating exceptional buttery flavor.
Regarding cut preferences, ribeye and NY strip rank among top choices for their rich marbling and firm texture. Thickness considerably impacts your results; aim for 1.5 inches minimum. Thicker steaks retain moisture, develop superior beef-forward flavors, and cook more evenly than thin cuts. You’ll achieve a flavorful crust while maintaining a juicy interior—the hallmark of perfectly grilled steak. For grilling specifically, 1.5 to 2 inches thick represents the optimal thickness range to balance crust development with interior tenderness. Grills equipped with cast iron grates excel at searing thick-cut steaks, providing the high heat retention and consistent surface temperature needed for an exceptional crust. Consider investing in a stainless steel grill designed for even heating and high-heat searing to complement your thick-cut preparation, as superior construction grades like 304 stainless steel ensure durability and consistent performance for years of reliable grilling. For compact spaces or budget-conscious grilling, models like the Weber Spirit E-310 deliver reliable performance with durable cast-iron grates suitable for thick-cut steak preparation. Consider dry-aging or wet-aging your steaks in advance, as these processes enhance both flavor and tenderness before you begin grilling.

ORGANIC, GRASS-FED, REGENERATIVE: Our ribeye steaks are USDA Organic, 100% grass-fed & finished, sourced from regenerative farms, verified by Land to Market,100% pasture-raised, free range, humanely raised with no feedlots EVER. Always fresh, never frozen. Non GMO and never contains antibiotics or added growth hormones. Always fresh, never frozen.

USDA Certified Organic Steak: Organic Rancher Beef Ribeye Steak (Boneless) comes from cattle raised on certified organic pastures with lifetime traceability. Free from antibiotics, added hormones, synthetic chemicals, and GMOs

One boneless beef ribeye steak weighing between 0.5 and 1.2 pounds
Preparation Techniques: Seasoning and Dry Brining
Why does timing matter so much when you’re seasoning steak? The answer lies in osmosis. Salt applied 5-40 minutes before cooking draws moisture to the surface, compromising crust formation. You’ll achieve ideal results by salting either immediately before searing or 40 minutes to 24 hours in advance.
Extended dry brining transforms your steak. Over 24 hours, salt penetrates the meat, enhancing flavor depth while surface moisture evaporates completely during refrigeration. This moisture control is critical—dry surfaces enable superior browning through the Maillard reaction. Smoked paprika makes steak taste like it was cooked over an open fire, adding complexity to your dry-brined exterior. Using quality kosher salt instead of iodized table salt prevents the risk of oversalting your meat. For additional depth of flavor, consider basting your steak with butter, garlic, and fresh herbs during the searing process. Bringing the steak to room temperature before cooking ensures even heat distribution throughout the thick cut. For thick-cut steaks, using internal temperature as your guide rather than time alone ensures perfectly cooked results. A meat thermometer provides the accuracy needed to achieve your target doneness without guesswork.
For your seasoning order, start with kosher salt at 2 tablespoons per batch, then add black pepper and garlic powder at 2 tablespoons each. Apply smoked paprika (1-2 tablespoons) and dried rosemary and thyme (2 teaspoons each). Season from height for even distribution across thick cuts. After seasoning, allow the steak to rest on indirect heat briefly to ensure the surface is completely dry before searing.

No additives; Only pure kosher salt

Versatile - This coarse salt for cooking is perfect for brining, rimming glasses, grilling, marinades, rubs and more

𝐋𝐚𝐫𝐠𝐞 𝐅𝐥𝐚𝐤𝐲 𝐂𝐫𝐲𝐬𝐭𝐚𝐥𝐬 𝐟𝐨𝐫 𝐏𝐫𝐞𝐜𝐢𝐬𝐞 𝐒𝐞𝐚𝐬𝐨𝐧𝐢𝐧𝐠: The coarse, diamond-shaped flakes provide excellent coverage and control, perfect for curing meats, rubs, marinades, and finishing dishes. These versatile crystals allow precise seasoning and consistent flavor, enhancing both professional recipes and everyday meals with a natural, bold taste
Temperature Control and Grill Setup
Temperature control makes or breaks your thick-cut steak, so you’ll want to nail your grill setup before you start cooking. Preheat your grill for 15 minutes to reach your target zone of 450–550°F for direct heat cooking. Avoid temperatures exceeding 500–600°F, which dries out steaks excessively. Keep your bottom vents fully open and modulate heat through the top lid damper to maintain consistent airflow and stable temperatures throughout the cooking process.
For temperature monitoring strategies, use a reliable meat thermometer to track internal doneness precisely. Create an indirect heat zone around 225–275°F for slow, even cooking. Remove your steak from heat at 110–115°F to account for carryover cooking, which adds 5–10°F after removal. The two-zone grilling method allows the meat to cook through without overcooking the exterior while you transition between heat zones. Thick steaks benefit from the reverse sear method, which prioritizes gradual cooking on indirect heat before finishing with a quick sear. Consider using hardwood pellets like oak or cherry to infuse your steak with subtle smoke flavor during the low-temperature cooking phase. After searing, allow your steak to rest for 5–10 minutes to maximize juiciness before serving.
This two-zone setup—direct heat for searing and indirect heat for gradual temperature rise—ensures perfectly cooked thick cuts without overcooking the exterior. Models like the Slow N Sear Master Kettle feature built-in systems designed specifically for this precise temperature control during searing. The charcoal’s radiant heat from glowing embers provides the intense direct heat needed for an excellent sear while the indirect zone allows for gentle, even cooking throughout the meat.

Material:This Grill Temperature Gauge is made of stainless steel to maximum durability and reliability.That is not only safe but also environmentally friendly
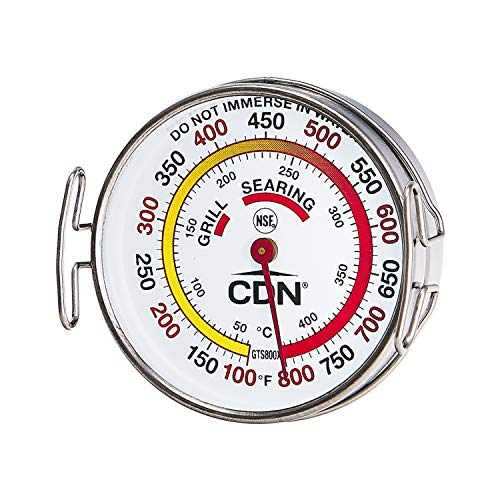
ACCURATE TEMPERATURE ZONES. The CDN GTS800X Grill Surface Thermometer features a color-coded scale that allows precise monitoring of temperature zones, providing optimal control over your grilling experience.

The 2 3/8" large face of the temperature gauge makes it easy to read and classify the temperature of your food. The Stem is 2 7/8"
Reverse Sear Method and Zone Cooking
When you’re working with thick-cut steaks—those glorious cuts at least 1.5 inches thick—the reverse sear method fundamentally changes how you’ll approach grilling. You’ll start with low-temperature cooking around 225°F to 275°F until your steak reaches 105°F to 110°F internally, ensuring edge-to-edge doneness without gradient cooking. Rest time optimization becomes critical here; allow 10 to 15 minutes under foil post-oven before searing. This resting period lets carryover cooking stabilize while moisture redistributes throughout the meat. Meat aging considerations matter too—prime or choice grades with superior marbling perform best. The gentle, slow cooking of reverse searing also seals the liquids inside the meat, resulting in a juicier final product. For maximum precision throughout the process, use a reliable meat thermometer to monitor internal temperatures rather than relying on touch methods. Consider using thermometers with one-second temperature readings to ensure accurate monitoring during your reverse sear process. Instant-read thermometers like the ThermoWorks Thermapen ONE offer the accuracy and speed needed for consistent results when checking your steak’s internal temperature. The initial high-heat sear should trigger the Maillard reaction, which develops that essential flavorful crust on the exterior of your steak. After resting, you’ll finish with a scorching cast iron sear for one minute per side, developing that essential crust while preserving your perfectly cooked interior.

Nonstick & Easy to Clean: The Switzerland ILAG nonstick coating is very effective in preventing anything from sticking to the surface, even with minimal oil, and also makes cleaning a breeze, just wipe it with a paper towel or rinse it with water. Free of PFOA and PFOS.

Enameled Cast Iron delivers superior heat distribution and retention; Nests with other Alpine Outdoor Collection products for enhanced storage

Steakhouse Sear At Home: The Lodge Square Cast Iron Grill Pan delivers high-heat searing and bold grill marks while channeling excess grease away
Searing and Achieving the Perfect Crust
All the careful low-temperature cooking you’ve done means nothing without a proper crust, and that’s where searing becomes your most critical final step. Your grill should reach 400°F with a clearly defined hot zone. Place your steak over direct heat, flipping every 45 seconds for five minutes to develop an even base color. Don’t shy away from edge searing—rotate the steak to char the sides thoroughly. This direct heat method creates the foundation for the gray band prevention that allows edge-to-edge doneness throughout your steak.
Now execute your timed basting strategy. Brush melted butter across the surface, searing butter-side down for 15-20 seconds. Flip and repeat, applying two butter bastes per side. This timed basting technique builds layers of caramelization while the butter’s milk solids accelerate browning. The result: a magnificent, mahogany crust that seals in your steak’s perfectly pink interior. Allow the steak to rest for approximately 5 minutes after removing it from the grill so the crust continues to develop while the juices redistribute throughout the meat. For optimal results, use a quality meat thermometer to confirm your steak has reached the desired internal temperature before the final sear. Consider finishing with compound butter for enhanced flavor and richness. Resting your steak after grilling ensures the juices redistribute throughout the meat, resulting in tender, flavorful results. If you prefer, you can apply oils with a high smoke point directly to the steak rather than the grill grates for additional flavor development.

Graza Frizzle Oil Made from 100% Olives: A neutral-flavored, high heat cooking oil made from 100% peak harvest olives. With a smoke point of up to 490 degrees, Frizzle is your high-heat kitchen hero. 1 bottle/750ml.

Light Buttery Flavor That Elevates Every Meal: Algae Cooking Club Chef-Grade Algae Oil enhances every dish with subtle richness. Its neutral profile makes it ideal for searing, baking, and dressings, transforming everyday meals into gourmet experiences.

Light Buttery Flavor That Elevates Every Meal: Algae Cooking Club Chef-Grade Algae Oil enhances every dish with subtle richness. Its neutral profile makes it ideal for searing, baking, and dressings, transforming everyday meals into gourmet experiences.