You’ll nail the perfect T-bone by selecting a steak 1.5–2 inches thick and letting it reach room temperature. Preheat your gas grill to 450–550°F and create a two-zone setup. Sear the T-bone directly over maximum heat for 1–3 minutes per side, maintaining surface temperatures above 285°F to develop that perfect crust. Use a meat thermometer throughout cooking. Rest for 5–10 minutes before slicing against the grain. Master these fundamentals, and you’re ready to explore the nuances that’ll elevate your technique further.
Selecting the Right Cut and Thickness
You’ll want to start by understanding that T-bone thickness directly determines your grilling success. Aim for steaks between 1.5 to 2 inches thick—this essential range ensures even heat distribution while creating a perfect sear without overcooking the interior.
When selecting your cut, you’ll face a choice between grass-fed and grain-fed beef. Grass-fed selection delivers leaner texture and robust flavor, while grain-fed selection offers superior marbling and tenderness. Both work excellently for T-bones.
Verify your steak meets USDA standards with at least 0.5 inches of filet thickness. The bone itself becomes pivotal—it aids moisture retention and enhances flavor throughout cooking. Thicker cuts retain considerably more juice during grilling, directly impacting your final result. Rest your steak before cooking to allow it to reach room temperature, which promotes even cooking throughout the meat. Allowing the meat to rest also helps redistribute juices before you begin the searing process. For best results, apply oil with a high smoke point directly to the steak rather than the grill grates. For optimal grilling performance, choose refined avocado or peanut oil for their elevated smoke points that prevent burning during high-heat searing. The Maillard reaction] during the high-heat sear phase creates the flavorful crust that distinguishes a perfectly grilled steak. Using an instant-read thermometer during grilling ensures precise temperature control for optimal tenderness and flavor. Consider dry-aged beef for enhanced flavor and texture that elevates your grilling experience. This foundation determines everything that follows.

One bone-in beef loin t-bone steak weighing between 0.7 and 2 pounds

TWO-IN-ONE DELIGHT: Indulge in the best of both worlds with T-bone steak, 4 count, 16 oz, from the Kansas City Steak Company - featuring the robust Strip Steak and the succulent Filet Mignon, all in a single, mouthwatering cut.

Proudly hand-crafted in America, Buckle-Down's premium guitar straps are constructed with hearty, durable materials and display your favorite characters with the highest-quality printing industry-wide.
Preparing Your Steak Before Grilling
Proper preparation separates a mediocre T-bone from an exceptional one, and it all begins the moment you remove the steak from your refrigerator. Pull your T-bone 30–60 minutes ahead of grilling to achieve even internal cooking. Place it unwrapped on a wire rack for consistent air circulation and warming. Our master butchers recommend seasoning your steak generously with Omaha Steaks Signature Salt and Pepper for optimal flavor development.
Ensuring surface dryness is critical—thoroughly pat the meat with paper towels to eliminate moisture that blocks proper Maillard browning. Trim excess fat only when necessary to prevent flare-ups while preserving flavor. A meat thermometer is recommended to monitor that your steak reaches the proper internal temperature throughout the cooking process. For the most accurate results, consider an instant-read thermometer that provides quick temperature readings to ensure your steak is cooked to your desired doneness. Wireless thermometers with app connectivity allow you to monitor your steak’s temperature remotely while managing other aspects of your grill setup.
Controlling seasoning timing depends on thickness. For a thick T-bone, dry-brine with salt alone for 12–24 hours on a wire rack, then pat dry. Alternatively, season generously with coarse salt and cracked pepper immediately before grilling. Allow ten minutes for surface re-equilibration before placing on grates. Having quality grilling tools and equipment] nearby will ensure smooth execution once your steak is ready for the grill. High-heat searing requires consistent even heat distribution, which premium gas grills like the Weber Genesis SX-335 are specifically engineered to provide. Investing in an even heat distribution setup, similar to what premium gas grills like the Weber Genesis SX-335s provide, can significantly enhance your cooking results.
Setting Up Your Gas Grill for Success
Before your T-bone ever touches the grates, your gas grill’s setup determines whether you’ll achieve that perfect crust or end up with an unevenly cooked steak. Start by turning burners on high and preheating with the lid closed for 10-15 minutes, targeting a grill temperature range of 450-550°F. Use your thermometer to dial in 500°F precisely, then reduce to medium-high if you’ve exceeded that threshold.
Next, create a two-zone setup by lighting only one side for your indirect zone at 250-300°F, keeping the other side at high heat for direct searing. Clean your grates thoroughly after preheating to prevent sticking and guarantee even heat distribution. Gas grills are better suited for hot and fast grilling, which makes them ideal for achieving that perfect T-bone crust. For premium searing capabilities, consider models with dedicated sear burners that achieve significantly higher center temperatures. The Weber Spirit II E-210/310 offers quick recovery and consistent heating for reliable temperature maintenance during your cook. High-performance grills like the Grilla Primate can reach temperatures up to 953 degrees with minimal variation for superior searing results. Prioritizing even heat distribution across your cooking area ensures your steak won’t develop hot spots that lead to uneven doneness. Models like the Weber Spirit II E-310 offer reliable performance and tank gauges for consistent temperature control throughout your cooking session. Before searing, pat your T-bone dry and season with salt and pepper to enhance flavor and browning. This preparation assures optimal searing conditions and prevents charring during the preheat duration.
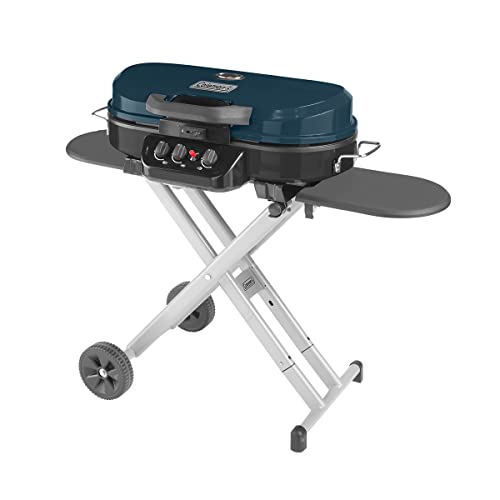


QUICK & EASY SETUP: The Cuisinart Chef's Style Tabletop Portable Propane Grill gets you grilling in less than 10 minutes. This outdoor grill is designed for a fast, hassle-free setup—no tools required.
Mastering the Searing Technique
Place your T-bone directly over maximum heat. You’ll hold it for 1–3 minutes per side, adjusting sear duration adjustment based on thickness and desired crust depth. The key is sustaining surface temperatures above 285°F to accelerate Maillard reactions efficiently.
Flip once at the midpoint, or employ the flip-frequently method—rotating every 40–60 seconds—for even browning and controlled heat penetration. Both approaches work; choose based on your comfort level. Frequent flipping exposes one side to high heat, then allows excess heat to vent, resulting in more even cooking throughout the steak. Remember that internal temperature is the most reliable indicator of doneness rather than relying solely on cooking time.
Throughout searing, monitor surface moisture manipulation by ensuring your steak’s exterior remains dry. Any residual moisture will inhibit browning. For optimal results, blot moisture from steak before placing it on the grill to maximize crust development. Consider using oils with high smoke points to enhance your searing process and prevent unwanted flavors from burned oil. Using an instant-read thermometer will help you verify your steak has reached the desired internal temperature with precision. Once you’ve achieved a dark, caramelized crust, move the steak to cooler zones if the interior needs additional cooking. After searing is complete, allow your steak to rest for several minutes to permit the juices to redistribute throughout the meat for optimal tenderness and flavor.

Light Buttery Flavor That Elevates Every Meal: Algae Cooking Club Chef-Grade Algae Oil enhances every dish with subtle richness. Its neutral profile makes it ideal for searing, baking, and dressings, transforming everyday meals into gourmet experiences.

America's #1 Avocado Oil - We test every batch of oil to make sure our products only contain 100% Pure Avocado Oil. Additionally, our oil’s purity was confirmed in an independent study done by UC Davis, and we were one of the two brands that passed the purity test. We encourage you to explore and learn more about our unwavering commitment to purity.

Light Buttery Flavor That Elevates Every Meal: Algae Cooking Club Chef-Grade Algae Oil enhances every dish with subtle richness. Its neutral profile makes it ideal for searing, baking, and dressings, transforming everyday meals into gourmet experiences.
Managing Heat Zones During Cooking
How you manage your grill’s heat zones determines whether you’ll end up with a perfectly cooked T-bone or an unevenly charred disappointment. After adequate preheating duration—roughly 10–15 minutes for a gas grill—perform a hot-spot mapping test using a surface thermometer to identify temperature variations across your grates.
You’ll want your sear zone consistently at 500–550°F and your finish zone at 300–400°F. Achieving sear consistency requires strategic burner control: activate outer burners on low for indirect cooking and center burners on high for direct searing. If wind or ambient conditions drop your sear-zone temperature, increase flame immediately.
Position your T-bone where heat distribution remains most uniform. While gas grills rely primarily on convection and conduction through the metal grate, understanding radiant heat transfer helps you optimize your searing technique. For those seeking maximum temperature control and consistency, consider converting to charcoal with specialized equipment that offers adjustable trays for precise heat management. Consider installing heat shields to prevent flare-ups and ensure more consistent temperature distribution across your cooking surface. Monitor zones throughout cooking, rotating the steak if localized hot spots emerge. Two-zone grilling accommodates the different cooking times needed for your T-bone’s varying thickness, ensuring the thin tenderloin section doesn’t overcook while the thicker strip side reaches ideal doneness. Letting the steak rest after grilling allows residual heat to finish the cooking process for a juicy result. Invest in a reliable meat thermometer to verify internal temperatures throughout the cooking process. This deliberate zone management prevents overcooking thin sections while developing proper crust.
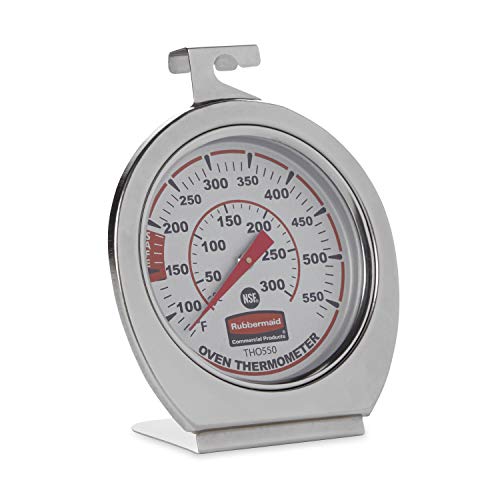
FOOD SAFETY: Thermometer displays true oven temperature instantly to ensure safe food preparation

BBQ / Grill pit thermometer, safe and environmentally friendly.

The 2 3/8" large face of the temperature gauge makes it easy to read and classify the temperature of your food. The Stem is 2 7/8"
Monitoring Internal Temperature Accurately
Why do so many grilled steaks end up overcooked despite careful attention to timing? You’re likely not monitoring internal temperature accurately. Insert your instant-read thermometer into the strip-side center, measuring the thickest part while avoiding bone and fat. Perform frequent temperature checks every flip or rotation to navigate hotspots on your gas grill, which accelerates carryover cooking unpredictably. Regular cleaning of your grill’s heat plates and burners prevents uneven heating that can create dangerous temperature variations across the cooking surface.
Reading thermometer accurately requires probing without excessive steak movement. Check after the initial 4 minutes, then every 2-4 minutes post-flip. Remember: carryover heat adds 5-10°F after removal, so pull your T-bone 10°F below target. For medium-rare, remove at 105-123°F; it’ll rise to 130-135°F during rest. A Thermapen ONE delivers fast, precise readings essential for consistent results, though wireless grill thermometers with Bluetooth connectivity offer hands-free monitoring from greater distances. For extended cooks or larger cuts, consider probes with high-heat tolerance up to 1000°F to ensure accuracy throughout the entire grilling process. Allow your steaks to rest for at least 5 minutes after removal from the grill, which stabilizes the internal temperature readings and ensures accurate final doneness. Unlike chicken, which requires reaching 165°F to 170°F for boneless cuts, steaks have different temperature targets based on desired doneness levels. Since prime-grade beef has superior marbling and tenderness, it requires less cooking time than lower grades, making accurate temperature monitoring even more critical to avoid overcooking. Using a meat thermometer helps ensure steaks cook evenly throughout, which is especially important for larger cuts like T-bone steaks that have varying thickness.

【8X Faster + 4X More Precise】: Upgraded with an industrial-leading professional thermocouple sensor, Themomonster meat thermometer digital with NIST certified ±0.5℉ precision provides you the accurate temperature of your food in just 0.5 Seconds.

2.0 inches large auto-rotating backlit display: Digital food thermometer has a 180° auto-rotating backlit display, making this kitchen thermometer perfect for left-hand users and allows you to use it in low light conditions

UPGRADED PROBE FOR FASTER, MORE STABLE READINGS - This meat thermometer features a precision-upgraded probe with higher sensitivity and enhanced thermal conductivity, delivering more accurate and stable readings in just 0.5 seconds. Unlike standard probes, the upgraded design transfers heat faster from first contact, giving you a more reliable and consistent temperature measurement every time—no more guessing, only perfect meals!
The Importance of Proper Resting
Once you’ve pulled your T-bone from the grill at the correct temperature, you’re not finished cooking—you’ve just entered the resting phase, where the steak completes its transformation. During this critical period, carryover cooking raises your steak’s internal temperature by 3–5°F, so removing it 3–5°F below target guarantees proper doneness. For a T-bone, proper rest duration of 5–10 minutes allows temperature equilibration from edge to center, eliminating hot spots and creating uniform doneness throughout. Concurrently, muscle proteins relax, redistributing juices toward outer fibers—you’ll notice less liquid loss when slicing and improved juiciness across each bite. The amount of carryover cooking depends on the size, shape, and cooking time of your steak, so monitoring these factors ensures you remove it at precisely the right moment. Tent your steak loosely with foil to retain warmth without trapping steam that degrades your crust. This resting approach is similar to the indirect heat method used when initially cooking larger cuts like a Tomahawk steak to ensure even temperature distribution. Just as searing locks in juices, proper resting redistributes those juices throughout the meat for optimal flavor and tenderness. Letting the steak rest also allows the muscle fibers to relax completely, which further enhances the tenderness of each bite. The redistribution of juices during resting is particularly important because a well-developed crust can trap moisture, making the resting period essential for achieving a juicy, flavorful steak throughout. For best results, use a meat thermometer to verify your steak has reached the target temperature before beginning the resting period. Cooked meat should not sit out for more than two hours to prevent bacterial growth in the temperature danger zone. This measured approach transforms a well-grilled T-bone into a perfectly finished steak.
Finishing Touches and Presentation
Your perfectly rested T-bone deserves a presentation that honors the skill you’ve invested in its preparation. Select a neutral-colored plate or wooden board with a 1–2 inch border to frame your steak and showcase its crust. For plate presentation, arrange sliced meat in a fanned pattern beside the bone, revealing the doneness gradient across the cross-section.
Apply a compound butter dollop centrally to create gloss and complementary flavor. Add a warm reduction sparingly along one side, preserving the crust’s integrity. Your garnish arrangement should include coarse sea salt, cracked pepper, and a rosemary sprig for aroma and color contrast. A small pile of microgreens provides peppery freshness and visual brightness. Consider serving your T-bone on a hot plate similar to professional steakhouses to maintain optimal temperature throughout the meal. For outdoor entertaining, a hardtop grill gazebo provides weather protection and an elegant setting that enhances the dining experience. A rust-resistant aluminum frame ensures your gazebo withstands the elements while you focus on creating memorable meals. Pairing your gazebo with integrated countertops and built-in storage allows you to keep serving platters, utensils, and accompaniments within arm’s reach during the meal service. For those hosting frequent outdoor dinners, a grill table with storage can similarly keep all your serving essentials organized and accessible. Placing your outdoor dining setup on a grill mat protects your deck surface from heat and grease splatters while maintaining a polished appearance. Proper steak presentation can create a more enjoyable dining experience for your guests and family. These finishing touches transform your grilled T-bone into an elegant, restaurant-quality presentation.
Common Mistakes to Avoid
Even experienced grillers frequently sabotage their T-bone by overlooking fundamental technique, and understanding these common pitfalls will elevate your results dramatically.
Insufficient preheat duration leaves grates cool, causing sticking and uneven cooking on thick cuts. Aim for 450-550°F with adequate time for heat transfer. Proper preheating ensures even cooking and helps achieve desired sear marks. You’ll also compromise flavor by oiling hot grates with low smoke point oils like extra virgin olive oil, which breaks down and releases bitterness above 450°F. Instead, apply oil directly to the steak or use high smoke point options like canola. Allow meat to come to room temperature for 15-20 minutes before grilling to ensure the interior cooks evenly without charring the exterior. Neglecting to clean your grates before grilling introduces ash and debris that interferes with the searing process. For the most effective cleaning, consider using specialized metal scrapers designed to remove buildup efficiently. To maintain your grill long-term and prevent corrosion on stainless steel components, follow up mechanical cleaning with appropriate grill maintenance products. Bristle-free designs like coiled metal scrapers eliminate safety concerns while maintaining powerful cleaning performance. Using a grill brush to scrub the grates removes buildup and ensures better contact between meat and heat for optimal sear marks.
Running all burners on high burns exteriors before centers cook. Create separate direct and indirect heat zones for proper searing and finishing control. Finally, avoid sugar-heavy rubs that char at high temperatures, masking the Maillard reaction that develops your crust.