You’ll start by buttering two slices of crusty bread and assembling ⅓–⅔ cup shredded cheese—combining medium cheddar with mozzarella for ideal melt. Preheat your toaster oven to 400°F, then place your sandwich on the lowest rack. Toast the first side for four minutes until golden, flip carefully, and bake another five minutes while monitoring closely. The key’s maintaining consistent temperature to achieve a crispy exterior with evenly melted, non-greasy cheese. For elevated results and creative variations, there’s much more to explore.
Essential Ingredients for the Perfect Sandwich
Because a grilled cheese’s success hinges on ingredient quality, you’ll want to start with cheese that melts evenly and doesn’t separate. Building effective cheese blend options requires combining cheeses strategically. Medium cheddar delivers sharp flavor and reliable melt, while mozzarella guarantees stretchy texture without greasiness. Add Gruyere for nutty intensity or Havarti for smooth, buttery creaminess. Fresh grating prevents anti-melting coatings that compromise your results.
For bread, select thick-cut sourdough at 1.3–1.5cm or Texas toast to maintain structure and prevent sogginess. Use room-temperature unsalted butter at 1–2 tablespoons per sandwich, or combine butter with mayonnaise for enhanced crispiness and melty texture techniques that deliver golden-brown exteriors. Mayonnaise offers higher heat tolerance compared to butter alone, making it less prone to burning during the toasting process. American cheese provides a classic diner-style option that also melts reliably in a toaster oven. A combination of sliced medium cheddar, gouda, and Havarti cheese creates the optimal flavor and texture balance for superior results. Cast iron’s heat retention properties make it ideal for achieving consistently golden, evenly-cooked results. Keep in mind that high fat and sodium content in certain cheese varieties can pose health risks to pets.
Aim for 30g cheese per sandwich to achieve ideal melting without excess grease, though be aware that traditional grilled cheese tends to be calorie-dense and high in saturated fat depending on your ingredient selections.
Equipment You’ll Need
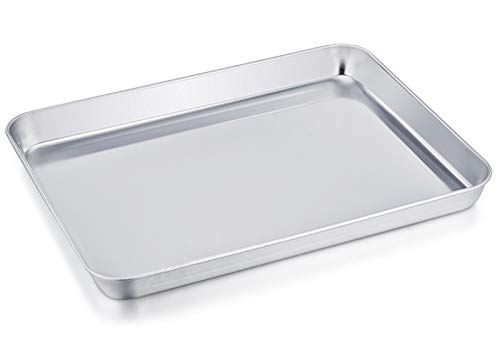
You’ll need just a few key pieces of equipment to master grilled cheese in your toaster oven. Start with an oven-safe baking tray or pan—preheating it creates evenly distributed heat that crisps your bread perfectly. Darker pans toast faster, so adjust timing accordingly.
For ideal rack placement, position your rack at the middle level to guarantee even toasting. Use aluminum foil or parchment paper on your tray to catch cheese drips and prevent sticking. If you prefer a more specialized approach, consider using a panini grill press for perfectly pressed and evenly heated results.
Gather these essential tools: oven mitts for handling the hot pan, a spatula for flipping mid-cook, a butter knife for spreading, and a timer set to 8-10 minutes. A cutting board simplifies sandwich assembly. A quality toaster oven, preferably a Breville model, ensures consistent results with precise temperature control. Just as monitoring temperature carefully is essential when cooking meats over extended periods, keeping close attention to your toaster oven temperature will help you achieve consistent browning. For even browning and enhanced flavor, consider spreading mayonnaise on the bread in addition to butter. For the best results, layer your cheese using a blend of white cheddar and mozzarella to achieve the perfect melt and tangy flavor. Remember that shredded cheese] is not recommended since it melts faster than sliced bread toasts, so opt for sliced cheese instead. Salted butter should be applied to both bread slices to achieve optimal browning and crispiness. Most recipes recommend baking your assembled sandwich at around 375-450°F on your prepared sheet pan for approximately 5-10 minutes, flipping halfway through for the best results.

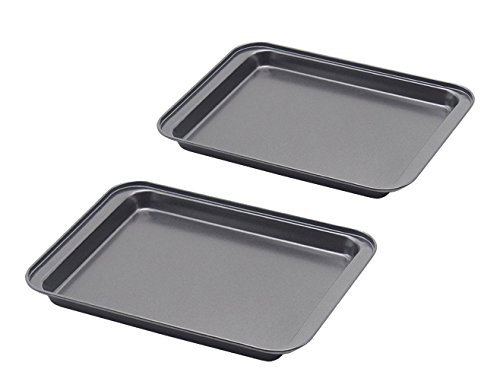
Ideal Baking Dimension:This 2-piece set of small cookie sheets measures 9 x 11 x 1.26 inches each. The 1.26-inch depth helps prevent spills and promotes even heating. These pans fit comfortably in most standard and toaster ovens, requiring a minimum interior dimension of 12 inches wide, 10 inches deep, and 3 inches high.

【PERFECT KIT】2 Pieces- Including 2 baking sheets:Outer size 11 x 9 x 1 inch, Inner size: 10.3 x 8.3 x 1 inch, perfect for your regular oven and toaster oven. Set of two which gives you options of toasting in one while preparing the other for baking.
HEALTHY – Made of high grade material 430 pure stainless steel, NO any other material
Preparing Your Sandwich
The foundation of an exceptional grilled cheese starts with quality bread—crusty, hearty varieties from your local bakery deliver the ideal texture that’ll hold up to melting cheese without becoming soggy. Request bakery slicing to guarantee even bread slice thickness, then lightly toast both sides for crust formation.
Soften your butter to room temperature and spread 1-2 tablespoons generously on the exterior of each slice. For toppings assembly order, place your buttered slice butter-side down first, then pile ⅓–⅔ cup shredded cheese on the unbuttered side. Add any secondary fillings—Dijon mustard, thin ham, or apple slices—directly onto the cheese layer. If you prefer alternatives to traditional butter, mayonnaise and aioli can create equally crispy and flavorful results with complementary taste profiles. Top with your second slice, butter-side up, and press lightly to secure everything together. You’ll also need a skillet or toaster oven to cook your sandwich to golden brown perfection. Consider mixing cheeses like cheddar with asiago to enhance the melting quality and create a more complex flavor profile that elevates your grilled cheese beyond the ordinary. For extra convenience, briefly cover the pan during cooking to speed up cheese melting and ensure even distribution throughout your sandwich. If you’re looking for an automated option, sandwich grill machines like the George Foreman Grill offer consistent results with minimal hands-on cooking time. Use an instant-read thermometer to verify your sandwich reaches the proper internal temperature for food safety. Finish your sandwich by pairing it with a complementary side like creamy tomato soup for a classic comfort meal experience.
Preheating Your Toaster Oven
Once you’ve assembled your sandwich, preheating your toaster oven becomes essential for achieving that perfectly crispy exterior and evenly melted cheese. Set your toaster oven to 450°F on the Bake setting—this high-heat environment guarantees optimal melting and browning. Digital toaster ovens typically require just 5 minutes for preheat duration, signaling completion with an audible beep. Non-digital models need the same timeframe, though you’ll monitor manually.
For accurate temperature monitoring, place a quality oven thermometer on the center rack. Older toaster ovens may run hot or cold, so verifying actual temperature prevents burnt or undercooked results. Like electric griddles, toaster ovens require attention to heat distribution and retention to ensure consistent cooking results. Keep in mind that toaster ovens preheat faster than traditional ovens, so you won’t need to wait long before your sandwich is ready to cook. However, relying solely on the beep can be misleading, as the interior surfaces may not have fully stabilized at the target temperature. To achieve the best results, apply thin, even layers of heat management principles to prevent hot spots that can burn your sandwich. Unlike electric heating elements found in modern cooking appliances, older toaster oven coils may have uneven heat distribution. When using a toaster oven on an electric range, consider how burner-matching for even heat principles apply to positioning your appliance for optimal performance. Similar to maintaining a grill brush for outdoor cooking equipment, keeping your toaster oven clean ensures consistent heat distribution and performance. Once your thermometer confirms you’ve reached 450°F, your toaster oven is ready. This brief preheat duration sets the foundation for exceptional grilled cheese sandwiches.
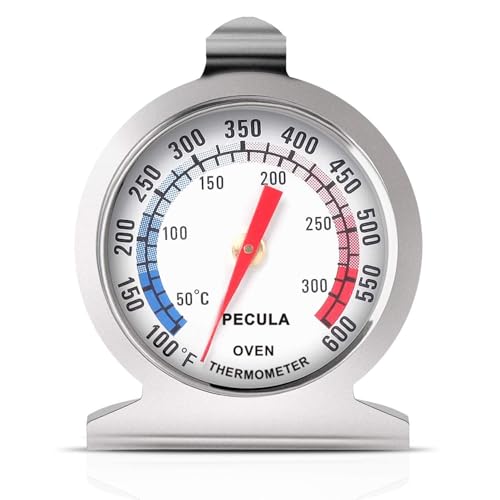
Clear Dial Display: PECULA's analog oven thermometer delivers precise, instant readings from 50–300°C / 100–600°F. Its dial features clear dual-zone blue and red indicators for at-a-glance temperature monitoring—perfect for ovens, grills, smokers, and deep fryers, ensuring you master every bake, roast, or fry.

Oven and grill safe for leave-in use while cooking
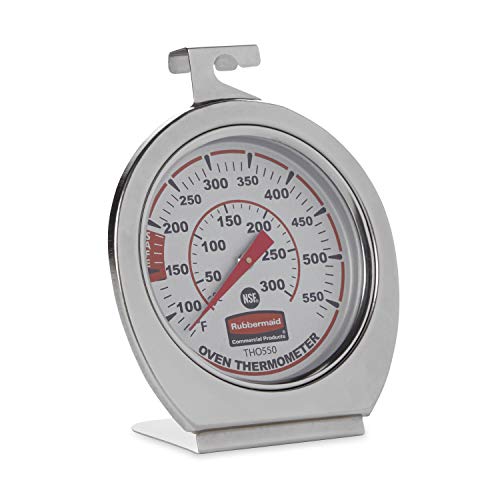
FOOD SAFETY: Thermometer displays true oven temperature instantly to ensure safe food preparation
Cooking Your Grilled Cheese
Now that your toaster oven’s reached the proper temperature, it’s time to position your sandwich for cooking. Place your baking sheet on the lowest rack closest to the heat source—this optimizing cooking method guarantees even crisping and golden browning on the bread bottom.
Bake for 4 minutes at 425°F until the bottom toasts thoroughly. Monitor closely, rotating the tray if you detect hot spots. Using oven mitts, carefully remove the hot pan and flip your sandwich with a spatula, pressing any escaped melted cheese back toward the bread. The direct heat from the hot baking sheet transfers warmth to your sandwich through conduction, creating those desirable crispy edges.
Return it to the oven immediately for 5 additional minutes. Watch closely during this final stage, avoiding overcooking by checking at the 4-minute mark. For toaster ovens that run hot, consider lowering the temperature to 400°F as some models may require adjustment from the standard settings. Just as temperature control is critical for achieving consistent results in grilling, precision with your toaster oven settings ensures your cheese melts evenly without burning. Thicker and denser bread varieties may require an additional 2-3 minutes of cooking time to achieve proper toasting. Your grilled cheese achieves the perfect golden-brown exterior with melted cheese when you maintain precise temperature control throughout. For best results, ensure your toaster oven has even heat distribution across the cooking chamber to prevent any cold spots that could leave portions of your sandwich undercooked. Much like how digital temperature controllers enable smokers to maintain consistent heat for long cooks, toaster oven grilled cheese demands careful monitoring to prevent the cheese from burning while ensuring the bread reaches optimal crispness.
✔LITTLE PANS - Perfect size for a two-person household--frozen rolls, few cookies, etc. Outside SIZE: 9.5inch X 7.1inch X 0.8inch, Actual use inside SIZE:7.5inch X 6inch X 0.5inch. These little pans are great for one person or small items for two.
This size of this baking sheet is as versatile as they come, fitting inside both compact ovens as well as standard ovens, even fits inside of air fryers with shelves

【HEALTHY & NONTOXIC STAINLESS STEEL】 Made of food-grade stainless steel that is safe to baking with all kinds of dishes and without leaching anything harmful, Strong stability, good heat and corrosion resistance, Healthier alternative to aluminum pans for everyday baking use
Achieving the Ideal Texture and Melt
Why does distance from your toaster oven’s heat source matter so much? You’ll achieve a uniform melt temperature by positioning your sandwich 18cm from the heating element. This distance secures consistent heat distribution across your cheese without creating hot spots that cause uneven melting or burnt edges.
Set your oven to 400°F and preheat it thoroughly. Place your toasted bread on the rack at the appropriate distance, then monitor for exactly four minutes. The pre-toasted bread accelerates cheese melting while blocking moisture that causes sogginess. The Maillard reaction in the toasted bread also creates the crunchy, flavorful exterior that makes grilled cheese so appealing.
Medium heat initially prevents scorching, then reduce to low for gradual, even cooking. Using a meat thermometer can help verify your cheese has reached the ideal internal temperature for perfect melting. Just as soft brushes and microfiber cloths protect delicate surfaces from scratching during cleaning, gentle heat management protects your sandwich from burning. For best results, use an oil with a high smoke point if you’re buttering your bread before toasting. Similar to how heat evenness affects cooking performance across different surfaces, proper temperature management in your toaster oven ensures consistent results. Bringing your ingredients to room temperature before cooking allows for more uniform melting throughout the sandwich. After removing your sandwich, allow a 60-second rest before serving. This technique guarantees your cheese reaches the ideal 155°F melt point with perfect gooey consistency throughout. Research using sliced hard cheese demonstrates superior melting performance compared to grated or cubed varieties.
Creative Variations and Add-Ins
You’ve mastered the classic grilled cheese—now it’s time to elevate your toaster oven technique with strategic add-ins that enhance rather than compromise your cheese’s melt quality. Layer savory vegetable blends like caramelized onions and roasted red peppers between your cheese slices, ensuring they’re moisture-free to prevent soggy bread. For bold spice combinations, pair pepper jack cheese with pickled jalapeños—the cheese’s inherent heat complements tangy peppers without overwhelming your palate. Add crispy bacon or ham for savory protein that won’t release excess moisture during toasting. Keep your toaster oven at 400°F, checking at the three-minute mark. Just as retaining moisture is crucial when grilling salmon in foil, keeping your ingredients dry will prevent your grilled cheese from becoming soggy. Remember: drier ingredients layer directly with cheese, while juicy components go on bread surfaces to prevent seepage and maintain that perfect, creamy melt. Like a grill pan, your toaster oven’s heat distribution creates optimal browning and melting when ingredients are properly arranged. Similar to how preheating your cooking surface ensures even heat performance, warming your toaster oven thoroughly before cooking your grilled cheese will maximize browning consistency. If you’re reheating a grilled cheese sandwich later, use the stovetop method to restore its crispness and melted cheese quality. To complete your meal, consider pairing your grilled cheese with classic side dishes like tomato soup or crispy fries for a satisfying dining experience. Using real butter instead of margarine on your bread’s exterior will ensure superior browning and flavor development throughout the toasting process.

Take Your Toaster to the Next Level: The ultimate cooking gadget for chefs and foodies, this sandwich and quesadilla maker slips neatly inside your toaster and allows you to quickly create tantalizing toasties, melts and more; elevate your breakfast, lunch, dinner or snack time with this kitchen essential

🍞 Food-Safe & BPA-Free – Made from premium, certified BPA-free materials to keep every melt perfectly safe and delicious.

ACCOMMODATES 9-INCH PIZZA OR 4 SLICES OF BREAD – Designed to maximize utility within a compact footprint, the curved interior fits a 9-inch pizza or 4 slices of bread. Place items evenly for best results when toasting, baking, or reheating.
Perfect for Any Setting
Once you’ve perfected your add-in strategy, you’ll discover that toaster oven grilled cheese adapts beautifully to virtually any cooking environment and lifestyle. Whether you’re in a dorm, RV, or office, compact toaster ovens deliver consistent results with minimal equipment—just a baking tray and spatula. You’ll appreciate the faster preheat times compared to full-sized ovens, essential for busy professionals needing quick meals post-meetings.
Temperature control remains your precision tool across varied appliances. Lower settings to 425°F for hot-running models or reduce convection temps by 25°F for ideal melting. Adjustable timers guarantee hands-off cooking around 10 minutes, letting you manage personalized flavor profiles effortlessly. These versatile cooking options mean you’re never limited by your kitchen setup or schedule—perfect grilled cheese waits wherever you are. Remember that even cooking ensures your cheese melts uniformly without burnt edges or cold spots.

Toaster Oven Accessories for Breville :Our Toaster Oven Pan size is 10.6" x 10.4" x 1.18", Design for Breville Compact Smart Oven and the Mini Smart Oven

BAMBOO CUTTING BOARD compatible with air fryer oven TOA-70 / TOA-65 / TOA-60 series. Sits steadily on the oven, protects cabinets, countertop, oven surface from getting damaged; protects family and pets from getting hurt.

Optimal Protection & Safety: Protect the bottom of your toaster oven or air fryer with our premium, heavy-duty toaster oven liners that catch spills and prevent odors. Designed with rounded corners to enhance safety and handling