
You’ll achieve restaurant-quality tilapia by mastering three essentials. First, prepare your grill to 375°F–450°F with properly ashed coals and oiled grates. Pat your thawed fish dry, apply high-heat oil, and season with kosher salt. Sear fillets directly on hot grates for 3–4 minutes per side without moving them. Confirm doneness at 145°F internally using the flake test—flesh should separate easily. Rest for 3–5 minutes, then finish with fresh lemon juice. The techniques that separate novice from expert grilling await your exploration.
Preparing Your Grill for Success
The foundation of grilling perfect tilapia starts with proper temperature management. You’ll want to achieve 375°F to 450°F for ideal results, which determines your fuel source options and preheating duration.
If you’re using a charcoal grill, load approximately 50 coals—about half a chimney—to reach proper cooking heat. Allow adequate time for coals to ash over completely before cooking begins. For superior results, opt for a charcoal grill option like the Weber Summit Kamado S6, which is frequently recognized in grilling awards for its consistent performance.
Next, scrape your grill grates clean with a brush to remove debris and residue. Once cleaned, apply high-heat oil like grapeseed or peanut oil directly onto hot grates using spray or rubbing methods. Refined oils with elevated smoke points allow them to reach grilling temperatures without burning. This prevents sticking and guarantees proper fish release. Greasing the grill grates is essential to prevent your tilapia fillets from falling apart during cooking. For superior heat retention and even cooking, consider using a cast iron grill pan which provides excellent searing capabilities for delicate fish fillets due to cast iron’s superior heat retention properties. Pre-seasoned cast iron options like those from Lodge excel at producing defined grill marks while building natural non-stick seasoning over time.
Finally, adjust your dampers if temperatures run excessive, maintaining medium-high heat throughout your preheating phase. According to expert guidance, no need to oil grates specifically for tilapia since the fish’s natural properties allow it to release without additional lubrication once properly seared.
Getting Your Tilapia Ready
Once you’ve prepped your grill to the proper temperature, you’ll shift your focus to preparing your tilapia for ideal results. Begin with proper thawing techniques if you’re using frozen fish—ensure complete thawing for even cooking throughout. Pat your tilapia dry using clean kitchen towels, addressing moisture concerns that prevent prime/excellent/superb crust formation and grill sticking. For whole fish, remove scales with a sharp knife and score shallow horizontal incisions across the skin to enhance seasoning penetration. Apply a light, even coating of high-heat oil like avocado or grapeseed oil to all surfaces, then generously sprinkle kosher salt before additional seasonings. According to USDA guidelines, cold water or refrigerator thawing is the safest method to maintain both food safety and quality. Tilapia’s mild flavor makes it versatile enough to pair with various seasoning profiles while still maintaining its natural taste. Allow your prepared fish to rest at room temperature for approximately fifteen minutes, ensuring consistent doneness across the fillet’s thickness.
Seasoning Techniques and Flavor Options
Since your tilapia’s now prepped and rested, you’ll want to apply seasoning strategically to maximize flavor development during grilling. You’ve got several ingredient blends to consider. The Lemon Herb Dry Rub offers bright, herbaceous notes, while the Smoked Paprika Blend delivers deeper, smoky flavor profiles. For simplicity, the Simple Citrus Seasoning combines kosher salt, pepper, garlic powder, and fresh lemon zest. Homemade seasoned salt is also a perfect choice for enhancing your tilapia’s natural flavors.
Apply your chosen seasoning methodically. First, brush tilapia lightly with Dijon mustard or olive oil to help seasonings adhere. Sprinkle your selected blend evenly across both sides, pressing gently to guarantee contact. For more adventurous palates, Cajun or Blackened seasonings provide moderate to intense heat. After grilling, finish with a drizzle of fresh lemon juice to brighten all flavor profiles and complement the delicate fish perfectly.

AUTHENTIC JAMAICAN FISH SEASONING– Bring bold Caribbean flavor to your kitchen with Blue Mountain Country Fish Seasoning, crafted with traditional island-inspired spices perfect for seafood dishes and everyday cooking.


Floating 3.5mm pellets for tilapia & cichlid pond fish
Grilling Tilapia Fillets Direct Over Heat
With your seasoned fillets ready, you’ll now move to the heat source where proper grill setup and technique‘ll determine your success. Place fillets directly on hot grates and resist the urge to move them. The high heat searing method requires you to cook the first side undisturbed for 3-4 minutes, allowing natural release and browning. Monitor for sticking; add 1-2 minutes if necessary. Using a thin metal spatula, flip once with gentle precision. Grill the second side identically, targeting 3-4 minutes. Indoor grilling techniques demand consistent temperature maintenance around 400°F. Check doneness at six minutes total using an instant-read thermometer, aiming for 145°F internal temperature. Flip only once to minimize crumbling and maintain texture integrity. To prevent sticking and ensure even cooking, wipe the grill grates with a paper towel dipped in vegetable oil before placing your fillets—this technique mirrors the protective care recommended for maintaining stainless steel surfaces to prevent corrosion and ensure optimal cooking performance. Regular grill maintenance by cleaning grates while hot with a soft brush helps reduce buildup and keeps your equipment in top condition. For optimal results, consider using a heat-resistant sponge head to clean your grates thoroughly before cooking. Avoid wire brushes when cleaning your grill, as safer alternatives like aluminum foil] or natural cleaning methods effectively remove debris without the risk of metal bristles contaminating your food. For thinner fish like tilapia, you can generally achieve perfect results in about 4-5 minutes when using a grill basket or grill pan.

Lifetime Assurance: We stand behind the quality of our oil dispenser for kitchen. If you experience any issues or are not completely satisfied, simply reach out to us—anytime. Our lifetime support ensures you can use this kitchen essential with confidence and peace of mind.

Graza Frizzle Oil Spray Made from 100% Olives: A neutral-flavored, high heat cooking oil made from 100% peak harvest olives. With a smoke point of up to 490 degrees, Frizzle is your high-heat kitchen hero. 1 can/5 oz.
One - 8 ounce aerosol of Happy Belly Non-Stick Vegetable Oil cooking spray
Cooking Whole Fish and Foil Packet Methods
Two primary techniques’ll elevate your tilapia grilling beyond fillets: whole fish grilling and foil packet cooking.
For whole fish preparation, descale and gut your tilapia if not pre-prepared. Pat it dry, then score each side 2-3 times with your knife. Clean the fish with water mixed with lemon juice. A charcoal grill is preferred over an oven for superior flavor when cooking whole tilapia. Kettle-style grills, such as Weber kettle models, are particularly effective for maintaining consistent heat during whole fish cooking. Look for grills with non-stick grates to prevent your fish from adhering to the cooking surface. Features like adjustable charcoal pans help achieve even cooking across the grill surface. High-quality grill covers made from PVC-lined Oxford material will protect your equipment from weather damage between cooking sessions.
When seasoning whole fish, brush both sides and cavity with extra-virgin olive oil, then season generously with garlic salt, salt, and pepper. Apply a blended marinade of onions, ginger, garlic, and oil into scored areas. Stuff the cavity with lemon slices, green onions, dill, or butter. Let your tilapia reach room temperature before placing it on the grill to ensure even cooking throughout.
Grill your whole fish at 450°F for 5-15 minutes per side, depending on size. The fish releases naturally when ready to flip. Use oiled fish grill baskets to prevent sticking and guarantee even cooking until flaky and opaque. Tilapia is an excellent source of protein at 91.3g per serving, making it a nutritious choice for grilled meals.

Package includes 1 grill basket and 1 silicone brush.
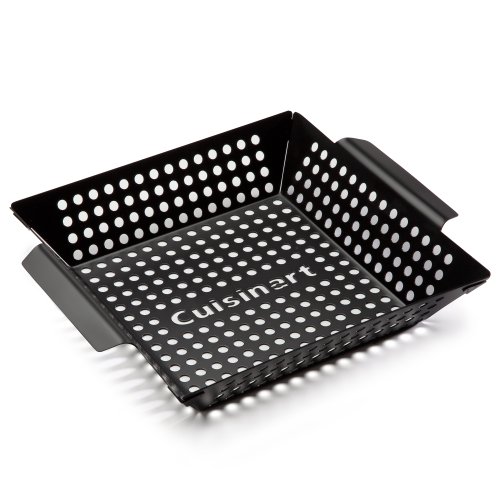
AVOID THE GRATE ESCAPE: Perforated design keeps the open-flame flavors while preventing small ingredients from falling through grill grates.

Large grilling surface ideal for grilling ample portions of fish, seafood and other delicate foods
Determining When Your Fish Is Done
How’ll you know when your grilled tilapia reaches perfect doneness? You’ll employ multiple assessment methods to verify completion. First, observe visual cues: raw tilapia’s translucent, pinkish-white flesh transforms into completely opaque, pearly white when cooked. Check the thickest section for remaining translucency—none should be visible.
Next, conduct the flake test by inserting a fork into the thickest portion and twisting gently. Perfectly cooked tilapia flakes easily with minimal resistance. Stringy or stubborn flesh indicates undercooking; excessive crumbling signals overcooking. To maintain your grill’s performance during the cooking process, ensure your grill grates are clean and well-maintained. Regular maintenance with mild detergents keeps your grill in optimal cooking condition. Removing rust buildup through proper grill grate maintenance prevents structural corrosion and ensures consistent cooking results.
For internal temperature indicators, use a thermometer to confirm 145°F (63°C) at the thickest part—the most accurate measurement available. Combine this with fish texture guidance: the flesh should feel firm yet springy, yielding slight give without hardness. Quality tilapia sourcing ensures better texture results when grilled. Remove your fillets just shy of full opacity and rest them 2–3 minutes before serving. Remember that carryover cooking will continue to gently cook the fish after you remove it from the heat source. Like all cooked proteins, leftover grilled tilapia should be properly refrigerated and consumed within three to four days to maintain food safety.
Resting and Garnishing Your Tilapia
Your grilled tilapia’s journey toward the plate isn’t quite complete—you’ll want to rest it first. Allow your fillets 3-5 minutes of resting time to achieve ideal internal temperature equilibrium and consistent moisture retention. This brief pause lets juices redistribute throughout the flesh, preventing dryness and ensuring a flaky texture. Like grilling in foil, resting your fish helps retain moisture and prevents the flesh from drying out during plating. For optimal results, aim for an internal temperature of 125°F to 130°F before allowing the fish to rest.
Once rested, apply your garnish strategically. Squeeze fresh lemon juice over each fillet immediately, enhancing brightness on the hot fish. For a richer finish, top with lemon butter—a combination featuring zest, juice, wine, shallot, and cream. Season with salt and pepper to balance flavors. Serving your tilapia with adequate resting time ensures the juices have fully redistributed before the butter and garnishes are added. The heavy cream in your sauce prevents the butter from separating and creates a stable, luxurious coating. To preserve any leftover tilapia, cool it completely before freezing to prevent condensation and maintain quality. For maximum safety and quality, freeze cooled tilapia in airtight containers or freezer bags to prevent freezer burn and bacterial growth. Store your frozen tilapia at 0°C or below to extend shelf life and prevent the growth of harmful bacteria.
Consider additional flourishes: sprinkle capers for textural contrast or fresh parsley for color. Serve your tilapia atop herbed orzo, allowing the butter to pool elegantly around the presentation. The natural grill marks provide visual appeal without extra embellishment.
Serving Suggestions and Pairings
What truly elevates grilled tilapia from a simple protein to a complete dining experience isn’t just the fish itself—it’s the thoughtful accompaniments you’ll pair alongside it. You’ll find creative vegetable combinations enhance your presentation: grilled broccolini and charred corn offer complementary sweetness, while roasted asparagus with lemon and parmesan adds umami depth. For starch foundations, wild rice pilaf provides textural contrast, and lemon risotto delivers creamy richness with herbal brightness. Consider elevated condiment ideas like strawberry jalapeño salsa or grilled pineapple salsa for unexpected flavor complexity. Fresh guacamole contributes healthy fats that balance the fish’s delicate profile. Alternatively, homemade tartar sauce delivers traditional briny notes. Air fryer vegetables like crispy Brussels sprouts can be prepared in minutes, making them an efficient option for busy weeknights without sacrificing restaurant-quality results. For those seeking lighter carbohydrate options, coconut rice offers tropical flavor notes that beautifully complement tilapia’s mild taste. You can also prepare vegetables using the foil packet method on your grill, which seals in moisture and flavor while requiring minimal cleanup. A stainless steel grill basket with adjustable dividers allows you to organize multiple vegetables simultaneously, ensuring even charring and preventing smaller pieces from falling through the grates. Similar to grilling vegetables, timing and heat management are essential—aim for medium-high heat to achieve tender results with optimal charring. These strategic pairings transform your grilled tilapia into a sophisticated, well-composed meal that satisfies both nutritionally and gastronomically.
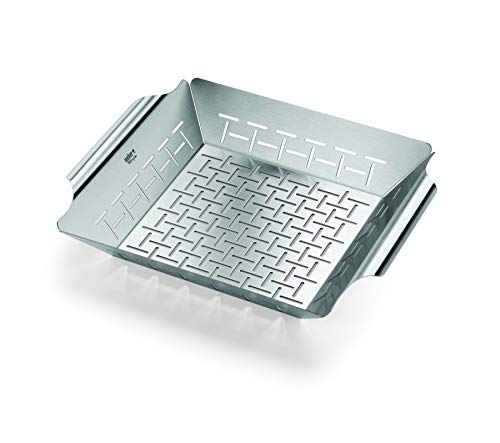
Ideal for vegetables and smaller pieces of meat

【TO BE A PROFESSIONAL CHEF】-Grilling is an art. And when you’ve mastered that art…your friends double in numbers. JY COOKMENT Grill basket can help you to the master of grilling.

Storing Leftover Grilled Tilapia
After you’ve savored that perfectly grilled tilapia and composed meal, proper storage of any leftovers will preserve both safety and quality for days to come. Cool your fish to room temperature within two hours, then transfer it to proper food storage containers—airtight containers or heavy-duty zip-top bags work best. Place paper towels beneath the fish to absorb excess moisture and extend freshness.
Store your tilapia on your refrigerator’s bottom shelf, where temperatures remain most consistent. Maintain refrigerator temperature control at 40°F (4°C) or below, ideally setting it to 37°F to compensate for frequent door openings. Cooked tilapia remains safe for three to four days under these conditions. Discard any leftovers that show signs of spoilage before consuming them.
For extended storage, freeze your leftovers up to three months using flash-freezing techniques and properly labeled containers. The cooking process deactivates spoilage enzymes that would otherwise break down the fish tissue and accelerate decomposition. When reheating frozen tilapia, consider using a 350°F oven to restore its quality and texture similar to freshly prepared fish. Just as grill covers protect your cooking equipment from oxidation and damage, proper food storage containers shield your tilapia from freezer burn and contamination. Using natural degreasers in your grill maintenance routine can help ensure that residual oils and buildup don’t affect the flavor of future meals prepared on your cooking surface. Proper grill maintenance and storage practices, similar to the care needed for outdoor BBQ grill longevity, help preserve the quality of your cooking equipment and the food prepared on it. Avoid storing frozen tilapia in containers lined with aluminum foil, as this can affect food quality over time.

Help Organize Your Kitchen and Pantry— Imagine every time walking to your kitchen or pantry, found everything is neatly organized. No longer messy, you can get everything you want very quickly. With the stackable and space-saving design, these containers will make more efficient use of every inch of your kitchen pantry cabinets.
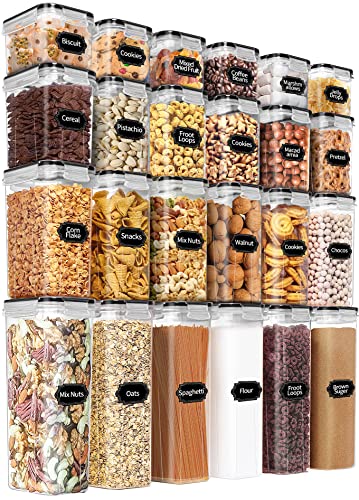
Bundle Set: This kitchen & pantry organizers and storage set comes with 24 containers, they are inlaid together, so at first glance you may think there is only the same size, but when you take it apart, you will find FOUR different sizes. Includes 6 Large Tall Containers (2.5 quart /2.8 liters), 6 Large Containers (1.8 quart /2.0 liters), 6 Medium Containers ( 1.3 quart /1.4 liters), 6 Small Containers (0.7 quart /0.8 liters). Perfect for storing flour, sugar, spaghetti, rice, nuts, cereal, snacks, pasta, and more
3 Sizes for Different Purpose: Our 10 pack flour sugar storage container set includes 3 different sizes, including 2 extra-large rice containers (6.5L/220fl oz/6.8qt) that can hold 10lb rice; 2 large flour containers (5.2L/176fl oz/5.5qt), each holding 5lb flour; and 6 medium sugar containers (2.5L/84.5fl oz/2.6qt), each holding 2lb sugar. The pantry organizers and storage containers also includes 20PCS label, a measuring cup and a marker, making it the perfect canister set for bakers and home organizers to store flour and sugar