You’ll nail perfect burgers by starting with 80/20 ground beef chuck, forming 150–220g patties with a thumb indent to prevent swelling. Preheat your gas grill to 450–500°F with cast iron grates, then season patties right before cooking. Place them on hot grates and resist pressing—you’ll lose valuable juices. Flip once, monitor internal temperature with a thermometer, and remove at your desired doneness. Master these fundamentals, and you’ll uncover advanced techniques that elevate your results even further.
Selecting the Right Meat and Grind
Because the quality of your finished burger depends entirely on what you start with, you’ll want to prioritize beef chuck as your foundation—it’s got that classic 80/20 lean-to-fat ratio that delivers both flavor and the juiciness you’re after on the grill. Consider experimenting with blend ratios by adding brisket for deeper beefiness or short rib for intense umami, but avoid using short rib alone—it’ll overpower your patty. Round works well to balance fattier cuts and reduce shrinkage. Request a coarse grind from your butcher; it’s essential for maximizing textural experience. Keep meat cold throughout grinding, and grind fresh within 24 hours of cooking to preserve flavor. Ground beef should be created by passing beef through a grinder, often multiple times, to achieve the ideal texture and consistency. Minimal handling when forming patties prevents dense, tough results. Using a digital meat thermometer during cooking helps you monitor doneness accurately and ensures your burger reaches the right internal temperature without overcooking. Season your patties with salt and pepper before grilling to ensure the flavors penetrate the meat and create a flavorful crust. If you’re exploring different burger styles, a cast-iron grill press can help achieve restaurant-quality searing and those coveted crispy edges on your patties. For smashed-burger enthusiasts seeking ultra-thin patties with maximum crust, consider a stainless steel press that offers rust resistance and easier cleanup between grilling sessions. While gas grills offer convenience and temperature control, switching to lump charcoal in a kamado or kettle grill can impart natural smoky flavor and achieve the high searing heat that creates exceptional burger crusts. Combining different cuts of beef can create a unique flavor profile that elevates your burger beyond the standard option.
Preparing and Forming Your Patties
Now that you’ve selected your meat and grind, proper patty preparation determines whether you’ll achieve juicy, tender results or dense, tough disappointments. Start by lightly mixing your ground beef by hand for under one minute, ensuring even mixing consistency without compacting the meat. Break apart the package gently first, then handle minimally throughout. For optimal flavor and juiciness, consider using 80/20% ground beef which provides the best balance for most burger enthusiasts. Many burger experts recommend mincing your own beef for superior flavor compared to store-bought options.
Shape the mixture into equal-sized balls—150g for thin patties, 220g for thick ones. Use dampened hands to prevent sticking. Press balls gently with flat tools or plastic lids into circles, achieving 3/4-inch thickness at edges and 1/2-inch at center. Create a small thumb indentation in each patty’s center to prevent swelling during cooking while maximizing juiciness. For an extra boost of moisture, try placing an ice cube in the center of each raw patty before grilling, which will melt slowly and release moisture into the meat as it cooks.
Refrigerate formed patties covered for at least one hour before grilling. Cold patties maintain their form on the grill’s heat. Just as with grilling steaks, use proper seasoning with salt and pepper before your patties hit the grill to enhance their natural flavors. If you’re using a gas grill, ensure it has cast iron grates for optimal heat retention and searing capability when cooking your burgers. Cast iron’s excellent heat retention creates the intense, consistent temperatures needed for developing a flavorful crust on your burger patties. When selecting your equipment, look for models with high BTU output to ensure your grill generates sufficient heat for achieving that perfect sear on your burger patties.
Seasoning for Maximum Flavor
When should you season your burger patties? Right before grilling. This timing prevents moisture loss while preserving juiciness—critical for ground beef.
Use kosher salt at roughly 0.5–1% of meat weight, applied alongside freshly ground black pepper for ideal crust formation. Season only one side before your initial sear, then the other when flipping.
For minimalist seasoning, this salt-and-pepper foundation delivers beef-forward flavor without complexity. If you’re pursuing umami enhancement, add a light brush of Worcestershire sauce or soy sauce (≤1 tsp per pound) to amplify savory notes. Alternatively, incorporate small amounts of tomato paste or miso directly into your patties for deeper complexity. For the best results, start with naturally aged beef that has been properly aged to develop optimal tenderness and flavor before seasoning. You can also create a homemade burger seasoning blend using paprika, brown sugar, onion powder, salt, and black pepper mixed together and stored in an airtight container.
Avoid long dry-brining. Keep liquid additions minimal—excessive moisture compromises structure. High-heat searing locks flavors quickly, preventing steaming. Before grilling, lightly oil your grill grates with a high-smoke-point oil like refined avocado or canola to prevent sticking at high temperatures. Use a meat thermometer to verify your burgers have reached safe internal temperatures during cooking. For precise doneness control, an instant-read thermometer like the ThermoWorks Thermapen ONE provides ±0.5°F accuracy with 1-second read times. Pat your burger patties dry with paper towels before applying seasonings to ensure proper crust formation during the searing process. Remember that internal temperature—not just cooking time—is the most reliable indicator for doneness when grilling your burgers.
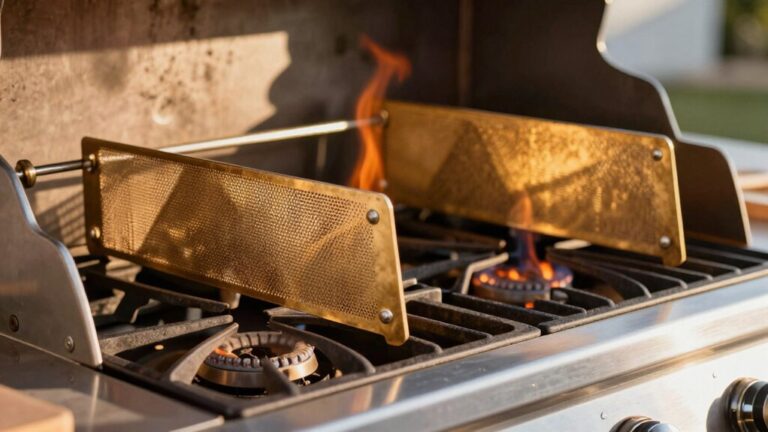
Setting Up Your Gas Grill
Your seasoned patties are ready—now you’ll prepare the grill itself to deliver consistent, high-heat performance. Start by opening the grill lid before lighting to dissipate accumulated gas and prevent dangerous flare-ups. Next, check the propane tank by verifying its secure attachment and ensuring the valve is fully open with the arrow indicator aligned. Use soapy water on all connections to detect leaks immediately. Keep control knobs off during this inspection phase.
Once you’ve confirmed tank security, turn on gas slowly to your intended burners. Press the igniter button before turning knobs to avoid gas accumulation. Set burners to high for preheating. Listen for the clicking sound confirming igniter activation. Allow one minute for gas to travel through the lines before expecting combustion. Before each grilling session, brush the cooking grates thoroughly to remove any debris or residue from previous use. If you notice stubborn buildup, heat the grill and use specialized cleaners to tackle tough grime effectively. Regular maintenance and inspection of your grill’s burners, ignition system, and hoses can prevent unexpected issues during grilling sessions. Clean the drip pans regularly to prevent grease fires and ensure safe grilling conditions. Ensure proper propane hookup and leak testing by routinely checking all connections and valves as part of your pre-grill safety routine. If placing your grill on a raised surface, ensure you use non-combustible materials like cinder blocks that can withstand high heat without warping or catching fire. When removing an empty tank, first turn off the gas supply valve before detaching the coupling between the tank and regulator.

Compatible with all appliances featuring a QCC1 / Type 1 connection, this gauge is suitable for propane tanks ranging from 5 lb to 40 lb. Note: This product is not suitable for propane tanks exceeding 40 lb

INSTANT VISUAL LEAK DETECTION: Stop guessing and start seeing. Our fastest-acting formula creates high-visibility, long-lasting Yellow bubbles at the exact source of the leak. Perfect for identifying micro-leaks in HVAC systems, refrigeration lines, and gas pipes that electronic detectors might miss.

Set of 2. Compatible with all appliances with a QCC1 / type1 connection and up 5 lb to 40 lb propane tanks.
Mastering Heat Zones and Temperature Control
Once you’ve got the grill preheated and running smoothly, you’ll need to master heat zones and temperature control to achieve perfect results consistently. Create a dual-zone setup by lighting one side for direct high-heat searing and leaving the other off for indirect gentle cooking. Place thermometers on grates in each zone to monitor differing temperatures accurately. Adjust burner knobs to fine-tune heat levels, then manage airflow dynamics by strategically positioning your grill lid—close it over the indirect zone to trap heat, open it over direct zones to reduce temperature. Consider adjusting grill grate height to further control heat intensity near your burgers. Direct heat grilling is comparable to stovetop cooking because both methods apply intense, concentrated heat to quickly sear and brown food surfaces. Thorough preheating ensures all cooking zones reach your desired heat before you begin cooking. If flare-ups occur during cooking, move your burgers to the indirect heat zone to prevent charring while flames subside. Avoid pressing down on the patties with your spatula, as this causes juices to escape and can trigger additional flare-ups. For grills with exceptional low-temperature control, like the Weber Spirit E-210, maintaining precise heat zones becomes even more manageable throughout the cooking process. Premium models like the Weber Genesis SX-335s deliver even heat distribution across the entire cooking surface, making it easier to maintain consistent temperature zones. Use a quick-read meat thermometer to check your burgers for the desired internal temperature to ensure they’re cooked to perfection. This methodical approach prevents burning exteriors while ensuring centers cook properly, giving you consistent, restaurant-quality results every time you grill.

BBQ / Grill pit thermometer, safe and environmentally friendly.

High-Heat System: Delivers a total of 49,000 BTU, plus a 12,000 BTU side burner for all outdoor cooking needs. The BroilFire Burner System with Z-Shape Flame Ports reaches 500°F in just 5 minutes. Perfectly locking in juices for a crispy exterior and tender interior.

Powerful Cooking System: Experience intense heat with 3 main burners and a dedicated 12,000 BTU broil zone burner. Perfect for achieving the perfect sear on steaks, lamb chops, and other high-heat foods.
Searing and Cooking Techniques
Now that you’ve dialed in your heat zones, it’s time to lock in the searing and cooking techniques that’ll transform your patties into perfectly crusted burgers. Start with pre-sear temperature checks—confirm your grill hits 600°F before placing patties on hot grates. Brush patties lightly with oil to prevent sticking. Execute patty dimpling techniques by pressing your thumb into each patty’s center, which prevents puffing during high-heat searing. Sear 2-3 minutes per side over direct heat to develop caramelized crust. Flip only once when edges lift cleanly without sticking. Season one side before grilling, the second upon flipping. Avoid using a spatula to smash down on the burgers, as this releases essential juices and reduces flavor. For best results, use Certified Angus ground chuck to ensure optimal flavor and texture throughout the cooking process. For even better flavor depth, consider using fresh-ground beef with a higher fat percentage to keep your patties juicy throughout the cook. After searing, move patties to indirect zones until reaching your target doneness, then rest 3-4 minutes for ideal juice redistribution. This two-zone fire setup mimics the professional technique used for grilling steaks, where high direct heat creates the perfect sear while gentler indirect heat finishes the cooking without drying out the meat. While gas grills offer convenience for burgers, charcoal grills can deliver superior smoky flavor and even heat distribution for searing. Use a meat thermometer to verify your burgers have reached the proper internal temperature for food safety and your preferred level of doneness. If you’re looking to upgrade your gas grill, consider models with 304 stainless steel construction for durability and even heating performance.
Achieving the Perfect Doneness
After you’ve nailed that caramelized crust, monitoring internal temperature becomes your primary tool for hitting the exact doneness level you’re after. Insert a meat thermometer into the burger’s center, avoiding the patty’s edges where readings skew higher.
For rare, pull at 120°F to 125°F. Medium-rare reaches 130°F to 135°F and balances tenderness with safety. Medium sits at 140°F to 145°F—USDA’s recommended ideal spot for most diners. Medium-well requires 150°F to 155°F, while well-done demands 160°F or higher. The USDA recommended minimum internal temperature for food safety is 160°F, which aligns with well-done burgers.
After resting the patty for three to five minutes off-heat, carryover cooking raises the final temperature by five degrees. This resting period allows juices to redistribute, ensuring desirable texture and moisture retention across all doneness levels. Choose a digital meat thermometer for the most accurate and instant temperature readings to ensure burger safety. Insert the thermometer in the thickest part of your burger for the most reliable reading, just as you would with chicken or other meats. For precise one-second readings, consider models like the Thermapen ONE that deliver professional-grade accuracy with backlit displays. If you often grill multiple burgers at once, wireless grill thermometers with multiprobe capability let you monitor several patties simultaneously without leaving your guests. For checking grate hotspots before placing your patties, a laser surface thermometer helps identify the most consistent heat zones on your gas grill. Keep a reliable long lighter nearby to quickly relight your gas grill if the flame goes out mid-session.
Melting Cheese and Toasting Buns
When should you add cheese to your burgers? Add two slices of American cheese one minute before your patties finish cooking at 160°F internal temperature. Close your grill lid immediately to trap heat and facilitate cheese fusion strategies. This timing guarantees complete melting without post-grill cooling issues.
For steam management techniques on a skillet, splash water after placing cheese and cover tightly for 30 seconds, creating even melting. However, this method requires an enclosed flat surface, not open gas grills. You can also mix cheeses, such as American and white cheddar, to enhance both flavor and melting consistency. American cheese’s low melting point makes it an ideal choice for achieving that perfect gooey, stretchy texture on your burgers. For best results, cook over medium-low heat to allow the cheese to melt evenly without burning. While cheese adds protein and calcium to your burger, be mindful that it also contributes saturated fat and sodium to your meal.
Toast your sesame buns simultaneously during the final cheese-melting minute. Place open halves directly on grill grates for one minute per side. For an extra crispy exterior, brush the cut sides with mayonnaise instead of butter before placing them face-down on the grill. This timing prevents overcooking your patties while adding crisp texture that contrasts beautifully with melted cheese. Assemble immediately upon removing from heat. For enhanced flavor, try seasoning the butter with garlic powder before brushing it on your buns. If you’re using a combo gas-charcoal grill, you can toast buns over the charcoal side for an added smoky flavor dimension.

One 24 ct pack of individually wrapped Kraft Singles American Slices

One 16 ct pack of individually wrapped Kraft Singles American Slices

YELLOW AMERICAN DELI CHEESE PRODUCT: Land O Lakes Deli American is the staple for lunchtime sandwiches, gooey grilled cheese and juicy burgers; The ultimate sandwich secret weapon
Food Safety and Troubleshooting Tips
Because proper temperature management directly determines burger safety and doneness, you’ll need a digital tip-sensitive thermometer inserted from the side into the center of each patty. Beef burgers require 160°F (71°C); poultry needs 165°F. Color alone won’t indicate doneness—brown burgers can remain undercooked.
Avoiding cross contamination is equally critical. Use separate clean plates for raw and cooked burgers, sanitizing utensils and tongs after raw meat contact. Wash your hands thoroughly before and after handling raw meat. Pathogens can transfer from raw meat to other foods, making proper sanitation essential for preventing foodborne illness. Remember to scrub your hands for at least 20 seconds with soap and water to ensure effective removal of bacteria.
Monitoring cooking time and temperature prevents foodborne illness. Keep raw meat exposed no longer than two hours (one hour above 90°F). Hold cooked burgers at 140°F until serving. Never partially grill and finish cooking later—this practice risks bacterial survival. If your thermometer reads below safe temperature, continue cooking immediately. Keep a multipurpose dry chemical extinguisher rated for Class B and Class C fires within 30 feet of your grill to handle potential grease flare-ups or propane leaks. Before grilling, inspect your grates and remove any rust buildup by scrubbing with a grill brush or steel wool to prevent metallic off-flavors and maintain food safety. For persistent rust on grill grates, you can soak them overnight in a vinegar and salt mixture to help loosen stubborn deposits before scrubbing. Routine grill maintenance, such as cleaning grease trays, helps prevent flare-ups that can char your burgers and create safety hazards. For thorough cleaning between grilling sessions, consider using a dedicated grill cleaner that can cut through baked-on grease and food residue on cold grates without extensive scrubbing.

Instant Read Food Thermometer | Our instant read thermometer features a temperature probe and advanced, highly accurate technology with 1-2 seconds response time; Instructions, meat temperature chart, comes pre-calibrated for your convenience, and recalibrating feature if needed.

【Ultra-Fast & Precision Accurate】This meat thermometer digital delivers accurate readings within ±1°F/±1°C in just 2–3 seconds, with a wide temperature range of -58°F to 572°F (-50°C to 300°C). No more waiting over the heat - know your food's exact temperature instantly.

2.0 inches large auto-rotating backlit display: Digital food thermometer has a 180° auto-rotating backlit display, making this kitchen thermometer perfect for left-hand users and allows you to use it in low light conditions