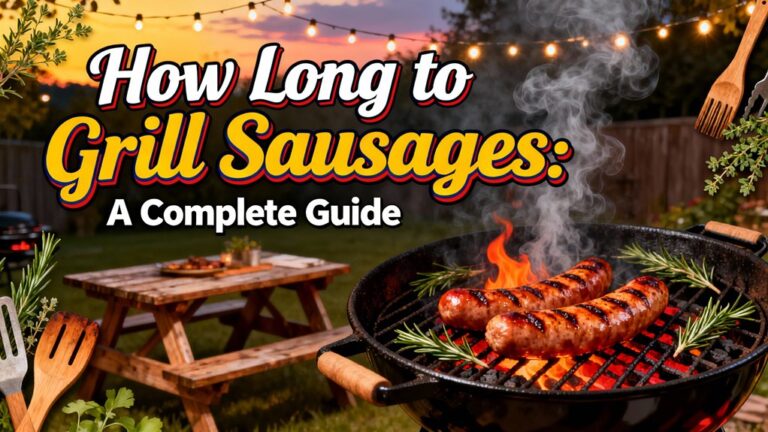
You’ll grill your charcoal burgers for approximately 4-10 minutes total. Start with one minute of direct heat to develop a quality sear, then flip only once and cook 3-5 minutes per side, depending on your desired doneness. Use a meat thermometer for accuracy—160°F for well-done, 145°F for medium. Your exact timing hinges on grill temperature, patty thickness, and whether you’re utilizing a two-zone setup. There’s considerable technique involved in perfecting your method.
Preparing Your Burger Patties
Before you fire up the grill, you’ll need to select the right ground beef and form it into properly shaped patties. Start with 80/20% ground beef for ideal juiciness and flavor. In a large bowl, combine your meat with crushed saltine crackers or Panko breadcrumbs (½ cup per 2 pounds), one egg, 2 tablespoons Worcestershire sauce, 2 tablespoons milk, salt, garlic powder, onion powder, and black pepper. Mix lightly to avoid overmixing, which creates a tough texture.
Shape the mixture into equal-sized balls using a kitchen scale, then gently flatten them. Aim for patty thickness variation: ¾-inch thick edges and ½-inch thick center. Create a thumb indentation in the center to prevent puffing. Dampen your hands with water to make shaping easier and prevent the mixture from sticking to your fingers. These indentations help retain juiciness during the cooking process. For an extra boost of moisture, especially for thicker patties, try placing an ice cube in the center of each raw patty before grilling. For consistently shaped patties, consider using a hamburger press to achieve uniform diameter and thickness across all your burgers. If you prefer the smash burger style with a crispy, caramelized crust, a cast-iron grill press can help you achieve professional results by providing the weight needed to flatten patties directly on the grill grates. Refrigerate your patties to firm them up, then season the surfaces right before grilling for perfect patty flavoring options. Before placing your burgers on the grill, consider using a heavy-duty fire-resistant mat underneath your charcoal grill to protect your deck or patio from grease drips and heat damage.
Setting Up Your Charcoal Grill
To build the foundation for perfectly grilled burgers, you’ll want to start by preparing your charcoal grill properly. Begin by cleaning your grate thoroughly to remove debris and residue from previous grilling sessions. Open all bottom vents, then use a chimney starter filled three-quarters full with charcoal. Light the fire starter underneath and wait 15-20 minutes until coals turn gray with white ash coverage.
Pour the hot coals onto your charcoal grate using gloves, arranging them for direct heat across the bottom or creating a two-zone setup with coals on one side. Replace your cooking grate, close the lid with vents open, and preheat for 5-15 minutes until reaching target temperature. The aroma of burning charcoal will enhance your burgers with signature BBQ character as they cook. Keep both lids closed during cooking to retain heat and maintain consistent grilling temperatures.
For storage, keep unused charcoal in a dry location away from moisture. Position your grill on a flat, non-flammable surface with a water bucket nearby for safety. Whether you choose lump charcoal or briquettes, each option offers distinct advantages for your burger grilling experience. Lump charcoal provides high heat output ideal for searing burger patties, while briquettes deliver consistent medium heat for more controlled cooking. Many Weber kettle-style grills feature reliable airflow controls that make temperature management easier for beginners and experienced grillers alike. Look for models with hinged grates that allow you to add charcoal mid-cook without removing your burgers, a feature available on top-rated options like the Weber Original Kettle Premium. Understanding the heat transfer triad of conduction, convection, and radiation will help you master the cooking process and achieve perfectly grilled burgers every time.

COMPACT SIZE FOR SMALL TO MEDIUM GRILLS: Measures 8.1 x 5.7 x 10 inches and is built for small to medium sized grills, not full-sized ones. Check these dimensions against your grill before ordering. Sits on top of a cold, clean grill.

NO LIGHTER FLUID NEEDED: Briquettes are infused with just the right amount of lighter fluid and feature Sure Fire Grooves, which have more edges for fast lighting
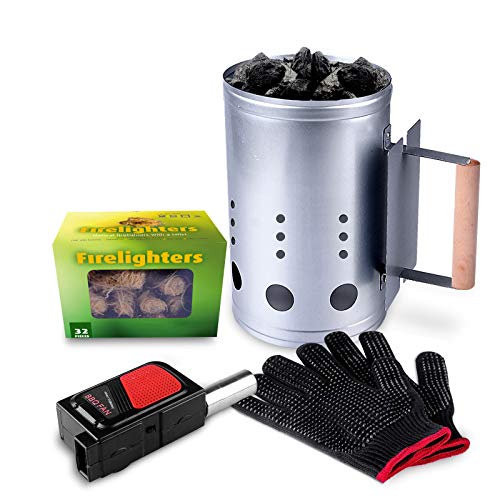
🔥HOMENOTE fireplace accessories include Charcoal Chimney Starter, Lighter Cubes, Portable Air Blower and heat resistant mitts, quickly produce hot coals, make your fireplace, BBQ to quickly produce hot coals for cooking
Achieving the Right Grill Temperature
Getting your charcoal grill to the right temperature is essential for burger success, and you’ll want to aim for medium heat around 375-400°F for consistent, evenly cooked results. Don’t rely solely on checking built-in grill thermometer readings, as they’re notoriously unreliable. Instead, invest in a quality digital thermometer to verify your grill grate temperature precisely. Using a meat thermometer will also allow you to accurately measure the internal temperature of your burgers to ensure they are cooked to the desired level of doneness.
Light your coals in a chimney starter until they’re completely gray with ash, then spread them to one side of your grill. Position your cooking grate in the upper position and preheat for 10 minutes before adding burgers. This preheating ensures effective heat distribution and searing capability. Using the Two-Zone Method for coal arrangement allows you to create both direct and indirect heat zones for optimal burger cooking. Monitor temperature fluctuations throughout cooking, adjusting coal placement as needed to maintain your target range for perfectly cooked burgers. You can also verify your grill temperature using the 2-second hand rule by holding your hand five inches above the grate to gauge heat levels. For serious pitmasters looking for precise temperature monitoring, consider a wireless thermometer with dual-probe capabilities to track both grill temperature and burger doneness simultaneously. For improved accuracy when checking grill grate temperatures, an infrared surface thermometer can help you identify hot zones and ensure even heat distribution across your cooking surface. Keep your bottom vents fully open for good airflow and adjust the top lid damper to fine-tune your heat levels during cooking. Regular grease-trap cleaning and maintenance will help your grill maintain consistent temperatures and prevent dangerous flare-ups during cooking sessions.

Fast & Accurate: Get precise readings in just 1 second with ±0.9°F accuracy. NSF Certified for trusted food safety, this digital food thermometer features a 4.3 inches food-grade stainless steel meat probe, perfect for grilling, frying, baking, making candy and more
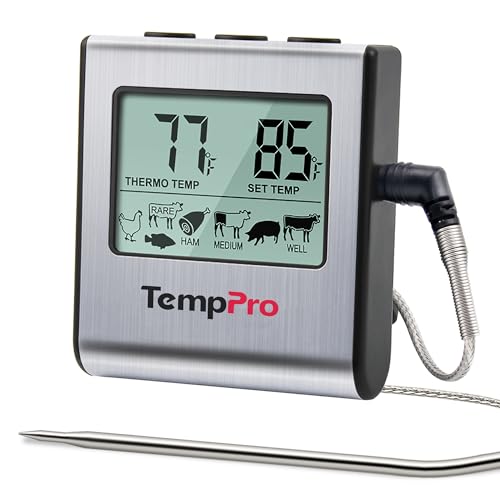
Cook mode with USDA preset temperature settings: TempPro cooking thermometer ideal for meat, oven, smoker or stove top; Programmable alert with preset temperatures for specific foods recommended by USDA; All of the preset temps can be reset to your desired tastes

【Fast & Accurate】Our meat thermometer digital delivers accurate readings within ±1°F in just 1–2 seconds, with a wide temperature range of -58°F to 572°F (-50°C to 300°C). No more waiting over the heat - know your food's exact temperature instantly.
Cooking Times and Techniques
Now that you’ve got your charcoal grill dialed in at the proper temperature, it’s time to master the actual cooking process—and this is where precision matters. Your searing techniques will determine the burger’s crust quality and juice retention. Apply direct heat for 1 minute until you develop that essential brown, crispy bottom.
For your flipping strategy, use the single-flip method: wait until liquid pools on the uncooked surface, then flip once. This minimizes patty damage and preserves interior moisture. After flipping, move burgers to indirect heat for 8 to 13 minutes depending on thickness, keeping the lid closed to maintain ambient temperature and render fat evenly. The rendered fat drips on the hot coals send flavor compounds back up to enhance the meat’s taste profile. Avoid pressing burgers with a spatula when cooking to prevent loss of juices. To prevent sticking during the cook, oil the grill grates or patties before placing them over the heat.
Total cooking time ranges from 10 to 12 minutes. Use a digital meat thermometer to check that your burgers reach the proper internal temperature for your desired doneness—145°F for medium, 155°F for medium-well, or 160°F or more for well-done. Just as with steaks, internal temperature is the most reliable indicator of doneness rather than relying solely on cooking time. Before grilling, apply your seasoning before grilling to ensure consistent, flavorful results throughout the patty. If you’re working with frozen patties, you can skip thawing entirely and place them directly on the grill, though you’ll need to add a few extra minutes to the cooking time. Finish with a 5-minute rest period for carryover cooking and juice redistribution.

Instant Read Meat Thermometer | Our instant read thermometer features a temperature probe and advanced, highly accurate technology with a 1-2 second response time. Our instant read food thermometer comes pre-calibrated with instructions and a meat temperature chart, plus a recalibration feature if needed.

SMART BASE CONTROL: Set temperatures, monitor progress, and receive alerts directly from the base without needing your phone nearby.

PERFECT DONENESS, EVERY TIME: This smart cooking thermometer takes away guesswork with real-time internal temperature updates, flip reminders, rest timers, estimated cooking times, Guided Cooking recipes, and more!
Determining Burger Doneness
How’ll you know when your burger’s reached the perfect doneness? You’ll rely on two critical methods: color characteristics and internal temperature readings.
Use an instant-read thermometer inserted into the thickest part of your patty, avoiding bone or fat. Ground beef requires 160°F minimum for food safety due to bacteria mixing throughout the patty during grinding. Poultry burgers demand 165°F with no exceptions. For optimal results, consider using a leave-in digital probe for thick patties or large batches to ensure consistent temperature monitoring throughout the cooking process. If you’re grinding your own meat at home, you can cook burgers to medium-rare temperatures since the decontamination process removes surface bacteria before grinding.
Account for carryover cooking—temperature rises approximately 5°F during your three-minute rest period. Plan accordingly by removing your burger five degrees below your target temperature. Residual heat continues to cook the meat during the rest period, similar to the way steaks finish cooking after being removed from the grill.
Visual cues matter too. At 160°F, your burger appears fully browned with no pink remaining. Keep in mind that smoked meat can remain slightly pink even when fully cooked, so relying on an instant-read thermometer is essential rather than judging doneness by color alone. Letting burgers rest after cooking enhances juiciness and allows the temperature to stabilize throughout the patty. Inserting your meat thermometer in the thickest part of the meat is crucial to ensure proper doneness without overcooking. Shape your patties to about 3/4-inch thick to promote even cooking and consistent results throughout. Combine thermometer verification with color observation to confirm doneness accurately every time.