
You’ll grill chicken tenders perfectly in 12 to 15 minutes by maintaining a consistent 375-400°F temperature and flipping every 3 to 5 minutes. Pat your tenders dry, coat them lightly with olive oil, and season evenly before grilling. Verify doneness using an instant-read thermometer—aim for 165°F internal temperature in the thickest portion. Allow them to rest for 5 minutes post-grilling. Mastering this timing technique, combined with proper marinade selection and temperature management, transforms your results.
Preparing Your Grill for Success
Before you place your first chicken tender on the grate, you’ll want to confirm your grill’s temperature sits between 375-400°F, which’ll give you consistent, evenly cooked results without charring the exterior. Your ideal preheat duration requires approximately five minutes with the lid closed, eliminating temperature fluctuations that compromise cooking consistency.
During this preheat phase, prepare your grill surface preparation by oiling the grates thoroughly with cooking oil. This prevents sticking and secures proper heat transfer across the cooking surface. Arrange your tenders in a single layer without overlapping, allowing uniform heat exposure. Remove excess marinade before placement to maximize searing potential. For maximum moisture retention, consider brining your chicken in a salt water solution before grilling, as this technique adds flavor and juiciness through osmosis. Season your tenders with salt and pepper during the cooking process to ensure consistent flavoring throughout.
Proper spacing between tenders facilitates heat circulation, preventing steam accumulation that undermines grilling results. Using a meat thermometer inserted in the thickest part of the chicken is crucial to ensure proper doneness without overcooking. Cook the tenders undisturbed on each side to form proper grill marks and develop flavorful browning. Before cooking, use a grill brush to scrub the cooking grates, removing any residue from previous sessions to ensure clean contact with your chicken. Consider bristle-free alternatives like coiled designs for family safety, as they tackle stubborn grime without leaving residues in food. If you’re grilling on a deck, place a grill mat underneath your grill to protect the surface from grease spills and heat damage. These foundational steps establish the conditions necessary for achieving perfectly grilled chicken tenders with perfect moisture retention and exterior browning.

Weber Grill Spray has a non-flammable formula that’s safe to spray directly onto a hot grill or open flame.

For Fat Free Cooking, so there’s more on your plate, and less in your pan
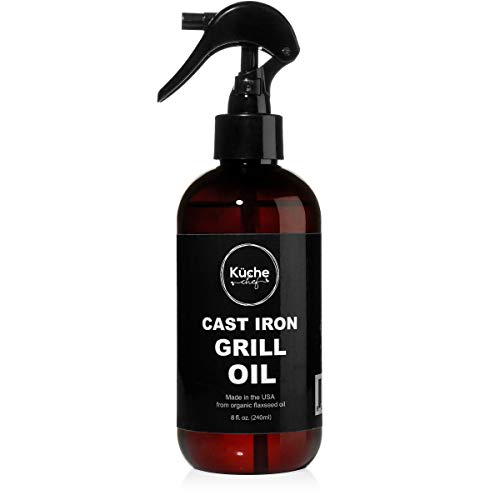
USDA ORGANIC FLAXSEED OIL, GROWN AND PRESSED IN THE USA: The flax is grown and pressed in North Dakota, then bottled for grill care rather than for cooking.
Marinating Your Chicken Tenders
A strategic marinade fundamentally transforms your chicken tenders by enhancing tenderness, juiciness, and flavor while simultaneously improving food safety. You’ll achieve excellent results with marinating duration of 3-6 hours, allowing sodium chloride and polyphosphates to increase water-binding capacity and reduce cooking losses.
Select marinating flavor profiles based on your preferences. Garlic and onion juices (3-6%) deliver superior juiciness and tenderness ratings. Acidic solutions using vinegar or wine effectively tenderize breast meat by lowering pH. Dairy-based marinades like yogurt or buttermilk offer gentler tenderizing effects while adding creaminess to complement acidic elements. For health benefits, green tea marinades reduce PAH levels by 57% during grilling, while lactic acid bases inhibit bacterial growth including Salmonella.
Thyme and citrus combinations maintain sensory quality without lipid oxidation. Garlic provides antioxidant effects, extending shelf life considerably. Chicken is also a lean protein source that supports muscle growth and overall health when properly prepared. Early postmortem injection and tumbling techniques applied during marination can further improve moisture retention in the meat tissue. Monitor your chicken tender sizes for consistent doneness, as uniform thickness ensures even cooking across all pieces. After marinating, pat the chicken dry before placing it on a preheated grill pan to develop attractive grill marks and proper caramelization. Brushing with olive oil or a flavorful oil mixture prevents sticking and adds richness and flavor to the surface. Marinating for at least 30 minutes can enhance both flavor and tenderness even when time is limited. You’ll achieve tender, flavorful, safer chicken tenders through thoughtful marinade selection and adequate marinating duration.

Marinade for chicken and other meats

BRING HOME THE FLAVOR YOU LOVE: Made with Italian herbs, parmesan cheese and garlic, our Parmesan Garlic sauce delivers the familiar, delicious taste you love.

Made with garlic, onion, red bell pepper, chili pepper and cumin
Getting Your Chicken Ready to Cook
Once you’ve removed your chicken from the marinade, you’ll want to prep it properly for ideal grilling results. Start by trimming tendons from the narrow end of each tender using a knife or fork—this eliminates tough sinew and prevents curling during cooking. Pat your tenders dry thoroughly with paper towels to remove excess moisture, which enhances seasoning adherence and promotes superior grill marks.
Next, coat your tenders lightly with olive oil using a bowl toss method. This creates a protective barrier against drying while serving as a flavor carrier. Apply your chosen seasonings evenly across all sides. Kosher salt, black pepper, and optional garlic powder work excellently for basic seasoning. Patting the chicken dry ensures better seasoning adherence and helps create an ideal surface for developing flavor and texture during grilling. For the most reliable results, use an instant-read thermometer to verify your tenders reach the safe internal temperature of 165°F during the cooking process. Just as with bone-in chicken thighs, using a meat thermometer to check doneness is essential for achieving perfectly cooked poultry every time. Before grilling, ensure you preheat the grill to the proper temperature for even cooking and optimal results. Arrange your prepared tenders in a single layer on your preheated grill, spacing them to guarantee even cooking and proper heat distribution. Consider adding seasonings like chili powder, cumin, thyme, or oregano to create distinctive flavor variations that complement your preferred sides. Flipping your tenders every 3 to 5 minutes ensures even cooking and helps achieve beautifully crispy surfaces. Allow your chicken to rest for 5 minutes after removing it from the grill to retain maximum juiciness before serving.

AIR PRESSURE ONLY: Pompeian cooking sprays contain no propellants or additives, providing you the best-tasting, highest-quality oil to help you Eat and Live Well.

Graza Frizzle Oil Spray Made from 100% Olives: A neutral-flavored, high heat cooking oil made from 100% peak harvest olives. With a smoke point of up to 450 degrees, Frizzle is your high-heat kitchen hero. 1 can/5 oz.

From America's #1 Avocado Oil Brand — A oil sprayer for cooking with the same purity standard you already trust, now in a fast, clean, propellant-free cooking spray format. Pair with Chosen Foods Avocado Oil pourable bottles, Avocado Mayo, Salad Dressings, and Dipping Sauces for a complete clean-label kitchen built on real ingredients and real avocados. From a Certified B Corporation on a mission to do good in the world by being good for the world.
Understanding the Perfect Temperature Range
Maintaining the right grill temperature is absolutely critical for achieving juicy, perfectly cooked chicken tenders without drying them out. You’ll want to focus on choosing ideal grill temperature between 375 and 400 degrees F for direct cooking. Preheat your gas or charcoal grill to 425 degrees F, then adjust down to medium-high heat before placing tenders on the grates.
Maintaining consistent heat prevents overcooking and secures even results across all pieces. You should aim for that 375 to 400-degree F sweet spot throughout your entire cooking process. Avoid fluctuating temperatures that’ll compromise moisture retention. Using indirect heat can help prevent flare-ups and ensure more even cooking throughout the grilling process. Closing the lid while grilling helps maintain moisture and develop a rich, smoky color without the need for frequent flipping. Cook your chicken tenders for 2 to 3 minutes per side to achieve the perfect doneness. When the internal temperature reaches 165 degrees Fahrenheit, your tenders are safely cooked through and ready to serve. Use an instant-read thermometer to verify your grill’s actual temperature, not just the dial setting. Just as internal temperature is the most reliable indicator for perfectly grilled steak, monitoring your chicken’s core temperature ensures safe and consistent results. After grilling, let the chicken tenders rest wrapped in foil for about 10 minutes to help retain moisture and keep the meat tender. For reliable temperature performance across your entire cooking surface, consider a quality gas grill with cast-iron grates that deliver consistent heat distribution. This precision approach guarantees professional-quality results every time you grill.

Fast & Accurate: Get precise readings in just 1 second with ±0.9°F accuracy. NSF Certified for trusted food safety, this digital food thermometer features a 4.3 inches food-grade stainless steel meat probe, perfect for grilling, frying, baking, making candy and more

【Fast & Accurate】Our meat thermometer digital delivers accurate readings within ±1°F in just 1–2 seconds, with a wide temperature range of -58°F to 572°F (-50°C to 300°C). No more waiting over the heat - know your food's exact temperature instantly.

【8X Faster + 4X More Precise】: Upgraded with an industrial-leading professional thermocouple sensor, Themomonster meat thermometer digital with NIST certified ±0.5℉ precision provides you the accurate temperature of your food in just 0.5 Seconds.
Timing Your Grilling Process
How long you’ll need to grill chicken tenders depends on balancing direct heat exposure with moisture retention—and getting this timing right’s what separates mediocre results from restaurant-quality tenders. Plan for 6–10 minutes total cooking time over direct heat, adjusting based on tenderness thickness. Gas grills at 425°F require approximately 8 minutes, while charcoal grills need 8–10 minutes. Thinner tenders cook through in 4–6 minutes total.
Flip your tenders once at the midpoint for uniform cooking. Managing temperature fluctuations by controlling grill air flow prevents drying. Keep your lid open during direct cooking to monitor doneness closely. The goal’s achieving clear juices and consistent browning without overcooking the interior. For best results, brush the grill grates with olive oil before cooking to prevent sticking and enhance browning. Use a meat probe to monitor temperature and ensure the chicken reaches 165°F internal temperature for food safety. After grilling, rest your tenders 2–5 minutes before serving. Between cooking sessions, perform routine light cleaning of your grill grates to maintain optimal performance and prevent flavor transfer. When selecting a grill brush for maintenance, opt for bristle-free designs like coil or chainmail options that eliminate the safety risk of stray wire bristles contaminating your food. Brushes with replaceable parts offer long-term value and consistent cleaning performance throughout their lifespan.
Consider using high-smoke-point oils like refined avocado or grapeseed oil for seasoning your grill grates, as these withstand grilling temperatures without burning. Apply oil after each use to protect the grates and build a natural non-stick surface over time.
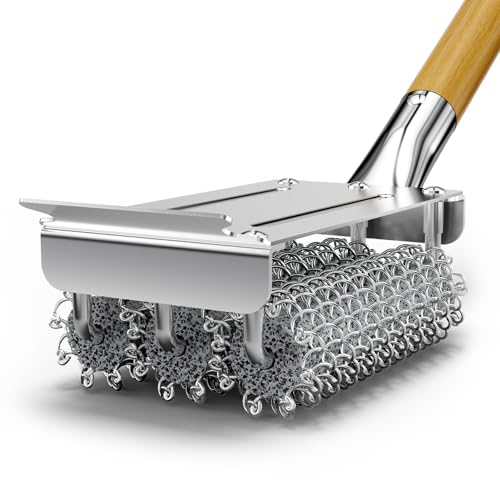
Bristle-free Safety: This grill brush features a patented stainless steel design with no loose wires or sharp edges, helping reduce the risk of broken grill brush bristle ending up in food. Designed with family health in mind, it offers a safer approach to BBQ cleaning.

Award-Winning Design: Named BEST Grill Brush by Bon Appetit (2026) and awarded Gold Medal by renowned BBQ Hall of Famer 'Meathead' Goldwyn (2026) for superior steam-powered cleaning performance and innovative bristle-free technology. Judged BEST Bristle-Free Metal Grill Brush by Food & Wine (2026); also featured in Good Housekeeping (2026).

【The Safest Bristle Free Grill Cleaner】:No wire bristles at all, no melting like nylon grill brushes; With this safe grill brush and scraper, your food will stay 100% Bristle Free. No more worry about swallowing some metal pieces, Let's free to gobble up some favorite barbecue! Save your effort and time, let’s just have fun! (PATENTED design)
Monitoring Doneness Throughout Cooking
Knowing when your chicken tenders‘ve reached the perfect doneness requires you to trust multiple indicators rather than relying on time alone. Combine visual cues with texture indicators to verify completion. Watch for golden-brown exterior coloring and check that the meat displays uniform white throughout when sliced at the thickest section. Press the surface gently—you’ll feel firm resistance with slight bounce-back, confirming ideal structural development. Pierce the thickest point and observe clear juices flowing freely rather than pink. The absence of blood or redness in meat fibers signals safety. Even browning across all exposed surfaces indicates consistent heat exposure. For the most reliable confirmation, use a meat thermometer inserted into the thickest part to verify the internal temperature has reached 165°F (74°C). Digital options like the Thermapen ONE provide one-second readings with precision, while budget-friendly models such as the ThermoPro TP20 offer dual probes for monitoring multiple pieces simultaneously. For wireless monitoring across multiple pieces, consider options like the NutriChef Pwirbbq80 that provide Bluetooth connectivity with multi-probe functionality. For hands-free precision during extended grilling sessions, wireless probes with apps like the Fireboard Pulse or RFX Meat offer superior ambient temperature accuracy and real-world range performance. Premium options featuring USDA temperature presets streamline the monitoring process by automatically alerting you when your chicken reaches safe internal temperatures. Remember that carryover cooking will continue to raise the chicken’s internal temperature after removal from heat, so you may want to pull your tenders slightly before reaching 165°F if you’ve been cooking them in a very hot environment. If grilling from frozen, add approximately 50% more cooking time compared to thawed chicken tenders to ensure safe and thorough cooking. These assessment methods work synergistically, eliminating guesswork and ensuring your chicken tenders meet both safety standards and preferred texture requirements.
Checking Internal Temperature Accurately
An instant-read thermometer is your most reliable tool for confirming that grilled chicken tenders’ve reached the safe internal temperature of 165°F. Insert the probe into the thickest portion of each tender, avoiding bones and fat that’ll skew readings. Position the thermometer perpendicular to the surface, penetrating deeply without piercing through the opposite side.
Temperature variation across your grill necessitates checking multiple tenders. Grill hotspots create uneven cooking, so test several pieces to verify uniform doneness. Check after 3-4 minutes per side, then continue grilling in one-minute increments if needed. Freezer-friendly chicken tenders can be cooked from thawed or partially frozen states, though frozen tenders may require additional cooking time beyond the standard 3-4 minutes per side. For optimal heat retention and faster cooking, consider using a Kamado-style charcoal grill, which can reduce cooking times significantly compared to other grill types.
Clean your thermometer between uses to prevent cross-contamination. For best results, rub grill grates with olive oil before preheating to ensure even heat distribution and accurate temperature readings. Avoid lining your entire grill grate with aluminum foil, as this restricts airflow and heat distribution, leading to uneven cooking and temperature inconsistencies. Regularly cleaning the drip pans prevents grease buildup that can affect heat distribution and create potential fire hazards during cooking. After cooking, maintain your grill by scrubbing with crumpled aluminum foil and baking soda paste to safely remove residue without the risks associated with wire brushes. If outdoor grilling isn’t an option, you can achieve similar results using indoor cooking techniques like broiling, which allows you to cook chicken tenders year-round. This verification method works consistently across all grill temperatures, eliminating guesswork and corroborating food safety while preventing the dryness that overcooking causes.
Resting Your Chicken After Grilling
Once you’ve removed your chicken tenders from the grill, you’ll want to let them rest for 3–6 minutes before serving or cutting. This ideal resting duration allows carryover cooking to continue, bringing your tenders to the safe internal temperature of 165°F while muscle fibers relax for ideal tenderness.
During proper resting technique, tent your tenders loosely with foil to retain heat and maintain juiciness. This method extends temperature retention compared to exposed resting. Avoid cutting immediately after grilling—doing so releases accumulated juices onto your plate rather than allowing them to redistribute throughout the meat. Research shows that tented chicken can retain heat for significantly longer periods than uncovered chicken during resting. The smoke from the fire infuses your chicken with distinctive grilled flavor that makes the extra resting time worthwhile.
After your resting period, check the center temperature around 165°F. The brief pause guarantees your tenders remain succulent and flavorful while meeting food safety standards. While your chicken rests, consider preparing a complementary side dish such as a fresh salad or grilled vegetables to complete your meal. If you have leftover grilled chicken, you can safely freeze it on the day of cooking to maintain quality and extend its shelf life. Before freezing, make sure the chicken has cooled completely to prevent condensation and temperature fluctuations in your freezer. When you’re ready to enjoy your leftovers, reheating until 165°F ensures both food safety and optimal texture. If you’re not planning to freeze your leftovers, refrigerated grilled chicken should be consumed within three to four days when stored at or below 40°F. This simple step greatly improves your final result.
Essential Tips for Perfectly Grilled Tenders
To nail perfectly grilled chicken tenders, you’ll want to dial in your grill temperature between 375–425°F, with medium-high heat delivering the most consistent results. Grill preparation essentials include oiling grates thoroughly to prevent sticking and preheating your gas grill for 10-15 minutes before cooking.
Remove tenders from refrigeration 10-15 minutes prior to grilling for uniform heat distribution. Arrange them in single layers without overlapping. Regarding marinade alternatives, you can enhance flavor through dry rubs, brines, or quick 20-minute marinades—just shake off excess liquid before placing meat on grates. Consider using taco seasoning or Italian seasoning as a simple dry rub option for added flavor.
Flip tenders halfway through their 6-10 minute cook time, cooking 3-4 minutes per side. Verify doneness by inserting an instant-read thermometer into the thickest section, confirming 165°F internal temperature. Using an instant-read thermometer ensures precision and helps prevent overcooking your chicken. This precise technique guarantees perfectly cooked, moist tenders every time. For best results, let rest for 3 minutes after removing the chicken from the grill to retain juices and ensure optimal tenderness. Resting the chicken allows juices to redistribute throughout the meat, resulting in more flavorful and tender results.