You’ll master tender grilled octopus by freezing it overnight to break down proteins, then blanching and ice-shocking three times. Next, marinate with red wine vinegar and olive oil for robust tenderizing. Grill on cast iron with high heat to achieve perfect crust marks. Immediately ice-bath the cooked octopus for 10–15 minutes, then steep for 30–60 minutes to relax collagen fibers. Finish with Greek herb vinaigrette and fresh herbs. The techniques that distinguish restaurant results from amateur attempts require more nuanced timing than you’d initially expect.
Selecting and Sourcing Quality Octopus
When you’re shopping for octopus, you’ll want to examine the flesh first—it should appear white and slightly translucent with an intact skin displaying distinct iridescent patches. The eyes must remain bright and clear, indicating freshness. Press gently to confirm elasticity and firmness; you shouldn’t detect sliminess or grittiness. Any ink present on the skin is a warning sign of poor handling during storage or transport.
Prioritize reputable suppliers like Global Seafoods that demonstrate sustainable sourcing practices. Look for species including red, giant, or Giant Pacific octopus. Check Seafood Watch ratings—select Best Choice/Green or Good Alternative/Yellow designations. Avoid Red/Avoid ratings, which signal overfishing concerns. For optimal results, consider pairing your grilled octopus with kiln-dried, certified wood if you’re using a smoker or wood-fired grill to enhance the natural flavors. Fruitwoods like apple and cherry work particularly well with octopus, imparting mild, sweet notes that complement the delicate seafood. When selecting your smoking wood, ensure it’s properly seasoned to produce thin, blue smoke that won’t overpower the delicate flavors of your octopus.
Consider frozen octopus from reliable sources; freezing preserves premium quality when handled properly. Frozen octopus is often preferred because freezing naturally tenderizes the meat, resulting in a more tender final product. Keep your octopus properly refrigerated and sealed to maintain its quality until you’re ready to grill. Verify sustainability considerations through certifications and sourcing transparency. This diligence guarantees you’re grilling superior octopus while supporting responsible fisheries.

Responsibly Farmed or sustainable wild-caught

Responsibly Farmed or sustainable wild-caught

16” x 16” bag with two 14” long and 1” wide black cotton webbing strap handles.
Freezing and Pre-Cook Tenderizing Methods
Since most commercial octopus arrives pre-frozen, you’ll likely skip additional freezing—but if you’ve sourced fresh octopus, freezing overnight or for several days breaks down proteins and tenderizes the flesh before cooking. After thawing completely, blanch your octopus for two minutes, then shock it in ice water. Repeat this blanch-ice cycle three times total to denature surface proteins rapidly and guarantee tenderness.
For the best results, employ sous vide tenderizing: vacuum-pack your octopus with olive oil, garlic, and pasilla chili, then cook at 85°C for four hours. The post-freeze resting period allows proteins to fully relax. Chill the cooked octopus before grilling. Adding a wine cork to your braising liquid can further enhance the tenderizing process, following traditional Italian cooking methods. The perpendicular arrangement of cephalopod muscles like plywood provides natural flexibility that responds well to both freezing and slow cooking techniques. Just as smoking meats requires monitoring internal temperatures with precision, grilling octopus demands careful attention to doneness to avoid overcooked, rubbery results. Much like matching wood intensity to meat type when smoking, pairing your cooking method to octopus size ensures optimal texture development. Proper heat control and timing are essential to achieving tender, non-spongy results. A cast iron grill pan with tall ridges will create distinctive searing marks and ensure even heat distribution across your octopus for optimal texture, leveraging radiant heat from the charcoal to achieve a perfect crust. These cooking time adjustments and tenderizing methods promise restaurant-quality texture and flavor when you hit the grill.
Mechanical Tenderizing Techniques
Beyond freezing and sous vide methods, you can physically break down octopus muscle fibers through mechanical tenderizing—a category of techniques that ranges from unconventional (washing machine massage) to conventional (pressure cooking and boiling). A washing machine’s one-hour massage cycle mimics restaurant preparation, achieving chicken-like tenderness before finishing on the grill. Pressure cookers offer rapid results; invert the head to prevent muscle tightening during pressurization. Allow the octopus to cool completely in the cooking liquid after pressure release to achieve optimal tenderness. The triple-dunk boiling technique—sequential 2, 3-4, and 6-second dunks in salted water—initiates fiber breakdown before a 30-minute simmer. Combining boiling and freezing provides optimal softness for the most tender results. Just as routine maintenance ensures optimal grill longevity and cooking safety, these mechanical approaches work exceptionally well for alternative protein sources seeking slow cook approaches that develop complex textures. The 100% customizable design of modern outdoor kitchen systems allows you to select the perfect grill configuration for your protein preparation needs. Similar to how indirect heat is used initially when grilling potatoes to ensure even softening before crisping, these tenderizing methods prepare the octopus thoroughly before the final high-heat grilling stage. For maximum tenderness with minimal equipment, consider using a cast iron or hardened grate] that retains heat effectively during the finishing sear. After your octopus is fully tenderized and ready for grilling, remember to close all vents on your charcoal grill after cooking to safely extinguish the coals. Each method delivers fork-tender octopus ready for high-heat finishing.

9 Cooking Functions: Pressure cook, slow cook, sauté, sous vide, steam, sterilize, keep warm, make rice and yogurt—all in one appliance

7 Cooking Functions: Pressure cook, slow cook, sauté, steam, make rice, yogurt, or simply keep your meal warm—all in one appliance

7 Cooking Functions: Pressure cook, slow cook, sauté, steam, make rice, yogurt, or simply keep your meal warm—all in one appliance.
Preparing Marinade and Brining Solutions
After you’ve tenderized your octopus through mechanical methods, a properly formulated marinade will amplify flavor and lock in moisture during grilling.
For acidity regulation, you’ll employ two primary approaches. Red wine vinegar at 14 tablespoons per 1-1.5 kg octopus provides robust tenderizing action, while balsamic vinegar in 1/2 cup quantities delivers milder acidity with color complexity. These vinegar concentrations work synergistically with 1/2 cup extra virgin olive oil to create emulsified protection against moisture loss. Local octopus is typically salty enough on its own, so taste before adding additional salt to your marinade. For enhanced tenderness, consider using half a cup of wine as an alternative tenderizing agent.
Combine your acid base with 2 teaspoons dried oregano, crushed garlic cloves, and 1/4 cup fresh lemon juice for Mediterranean authenticity. After marinating, use a meat thermometer to verify your octopus reaches the proper internal temperature for optimal doneness and juiciness. Cast iron griddles offer superior heat retention and even distribution, making them ideal for achieving consistent results when grilling delicate proteins like octopus. Thicker grill rods and properly selected porcelain-enameled cast iron materials ensure superior heat transfer and bold sear marks that enhance the final presentation. For optimal results, consider grilling your marinated octopus on a Himalayan salt block heated gradually to high temperatures, which will enhance mineral infusion while creating superior char development. Like quality steaks, resting your grilled octopus for several minutes after cooking allows juices to redistribute, ensuring a tender and succulent final dish. Marinate 2 hours minimum or overnight in refrigeration for ideal flavor absorption. This formulation prevents sticking during grilling while enhancing char development and surface browning.

Double Burner Configuration: The Lodge Double Play Reversible Cast Iron Grill/Griddle covers two burners, offering a generous breakfast grill plate for family breakfasts or meal prep with ease
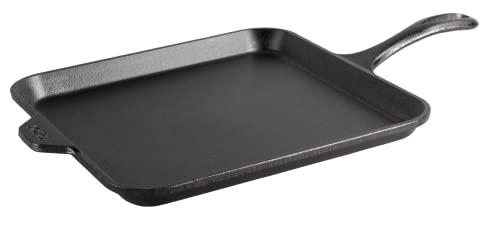
Versatile Square Cast Iron: The Lodge Seasoned Cast Iron Square Griddle Pan is ideal for perfectly cooked pancakes, eggs, and tortillas in any location

【SAFE-TO-USE COOKWARE】Crafted with pure iron and oil, just as traditional seasoned cast iron should be — our cookware is free of harmful PFOA and PTFE. We’re dedicated to creating products that keep you and your loved ones safe: every stage of our manufacturing process prioritizes the well-being of our employees and our customers.
Braising and Poaching for Optimal Tenderness
While marinating enriches flavor, the real tenderization magic happens through moist heat methods that break down the octopus’s dense muscle fibers. You’ll choose cooking method based on your timeline: braising delivers results in one hour at medium-high heat with onions, garlic, bay leaves, and smoked paprika, while poaching requires forty to fifty minutes of gentle simmering post-boil in the octopus’s own released juices.
For braising, you’ll flip the octopus midway through cooking to guarantee even tenderness. When choosing liquid flavor additives, rely on aromatics and seasonings rather than wine or tomatoes—the octopus naturally releases sufficient liquid. Adding sea salt and black pepper will enhance the braising liquid without overpowering the delicate flavor of the cooked octopus. Like smoking meats, allowing adequate resting time after cooking helps retain the juices and achieve optimal texture. The optimal cooking temperature for moist heat methods typically ranges from 225°F to medium-high heat, similar to smoking temperatures used for other proteins. The octopus’s muscle is packed with collagen and connective tissue that requires extended moist heat to break down completely. Careful cooking practices that avoid excessive charring, as with grilled meats, can help minimize the formation of carcinogenic compounds during the finishing stages. After tenderizing through braising or poaching, you can finish the octopus on a high-heat grill to achieve the charred exterior that complements its tender interior, following a similar approach to the two-zone fire method used for steaks. Test doneness by inserting a knife into the tentacle; it should penetrate effortlessly. This prolonged moist heat achieves the tender-yet-firm texture essential for subsequent grilling.
Cooling and Steeping for Enhanced Texture
Once your octopus reaches knife-tender perfection, you’ll immediately transfer it to an ice bath—this critical step halts residual cooking and locks in the tender-yet-firm texture you’ve worked to achieve. Maintain water temperature at 0-4°C for 10-15 minutes, stirring occasionally to guarantee uniform cooling.
Next, transfer your cooled octopus to a steeping liquid—ice water or brine enhanced with vinegar or citrus—for 30-60 minutes. This extended steeping relaxes collagen fibers, reducing chewiness by up to 40% according to sensory evaluations. Use a 1:10 octopus-to-liquid ratio to prevent dilution of your flavor profile. Similar to how an octopus can change texture through muscular contractions in its skin, the steeping process softens the octopus meat by restructuring its protein matrix. Research from molecular neurobiologists studying cephalopods has shown that temperature-dependent RNA editing in octopus tissue contributes to the animal’s natural adaptation mechanisms, which inform our understanding of optimal cooking temperatures. Just as seasoning and cooking techniques impact the final result in holiday meals, your choice of steeping liquid and timing dramatically influences the octopus’s flavor profile and tenderness. Consider pairing your grilled octopus with flavorful side dishes like fresh vegetable-based accompaniments to create a well-rounded meal.
Monitor cooking time adjustments based on tentacle thickness; thicker sections benefit from extended steeping up to two hours. Like smoked salmon, proper internal temperature targets ensure moist, tender results. Pat dry thoroughly before grilling to attain ideal char without rubberness.
Grilling Technique and Temperature Control
Your octopus emerges from its ice bath and steeping liquid primed for the final stage—high-heat searing that’ll develop a caramelized crust while preserving the tender flesh you’ve cultivated. Preheat your grill to 400–500°F for direct-char results, or push toward 500–600°F if you’re targeting maximum char. This temperature range transforms your grate into a non-stick surface. An instant-read meat thermometer ensures you hit your target temperatures with precision throughout the cooking process. For the most reliable results, consider a thermometer with one-second readings to capture accurate grill temperatures before searing. A wireless grill thermometer with dual-frequency design provides superior range stability when monitoring high-heat cooking zones across larger outdoor setups.
For moisture retention strategies, flip minimally—once per side—to prevent excessive evaporation. Sear 1–5 minutes per side on very hot grills; 4–9 minutes on moderately heated ones. Grill temperature adjustment matters: hotter grills demand shorter windows. Watch for uniform spotty browning and caramelized suction-cup edges. Your visual cues trump timing guides. That tender internal texture and crispy exterior signal doneness. The octopus legs should reach a final meat temperature of 175-180°F to ensure optimal texture and food safety. Using a meat thermometer inserted in the thickest part of the octopus is crucial to verify doneness without overcooking. For extended cooking sessions where you’re managing multiple grilling zones simultaneously, wireless probes with apps offer hands-off precision monitoring without requiring constant manual checks. If using pre-cooked octopus tentacles, reduce your grilling time to 3–4 minutes per side since the octopus is already tender and requires only surface charring.

Material:This Grill Temperature Gauge is made of stainless steel to maximum durability and reliability.That is not only safe but also environmentally friendly
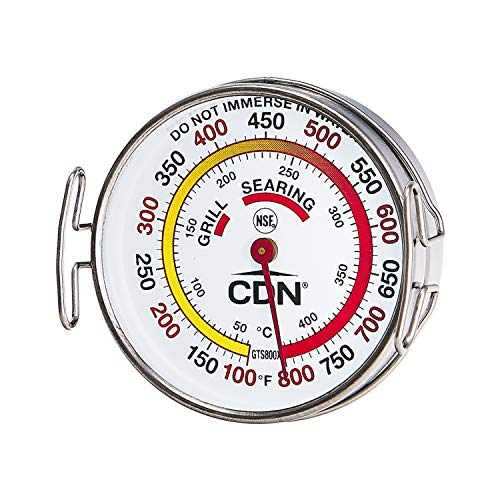
ACCURATE TEMPERATURE ZONES. The CDN GTS800X Grill Surface Thermometer features a color-coded scale that allows precise monitoring of temperature zones, providing optimal control over your grilling experience.

The 2 3/8" large face of the temperature gauge makes it easy to read and classify the temperature of your food. The Stem is 2 7/8"
Seasoning, Finishing Touches, and Plating
The foundation of exceptional grilled octopus lies in Mediterranean seasoning strategies that don’t mask the delicate, briny flavor you’ve worked to safeguard. You’ll apply salt and pepper generously before grilling, then finish with your chosen flavor profiles: either a Greek herb vinaigrette combining olive oil, red wine vinegar, garlic, lemon, oregano, and parsley, or a balsamic-based marinade with capers and thyme.
Drizzle your grilled tentacles immediately post-charring while they’re still warm, allowing the oils to penetrate the exterior. Seasonal variations matter—incorporate za’atar for earthiness or red pepper flakes for heat. For enhanced tenderness, consider adding bay leaf or peppercorns to the boiling water during the initial cooking phase. Just as precise temperature control ensures optimal results in specialized cooking equipment, maintaining consistent heat during grilling guarantees superior texture and flavor development. Like the brief simmering used in other protein preparations, a gentle precooking process allows the octopus to tenderize thoroughly before the final grilling step. Smoking at moderate temperatures like 275°F balances shorter cook times with maintaining the protein’s natural juiciness. While hickory and other hardwoods for smoking can add depth to various proteins, octopus pairs best with subtle wood-free grilling to preserve its delicate character. Cut tentacles into bite-sized pieces and toss gently to coat evenly. Remember that pre-cooked octopus will result in a tender final dish when properly finished with vinaigrette, whereas raw octopus grilled without prior tenderizing would remain tough and chewy.
Plate alongside grilled lemon wedges, serving warm as an appetizer or main course. This technique-focused approach guarantees maximum flavor absorption without overwhelming the octopus’s natural sweetness.
Troubleshooting Common Grilling Problems
Even with meticulous preparation, you’ll encounter predictable pitfalls that derail your grilled octopus—overcooking that toughens the flesh, undercooking that leaves connective tissue intact, temperature miscalibrations that prevent proper searing, and moisture issues that sabotage the Maillard reaction.
Address overcooking by monitoring internal temperature at 150°F-160°F and probing for butter-like tenderness. Combat undercooking through sufficient simmering—two hours minimum—ensuring connective tissue breaks down completely. Preheat your grill to 425-450°F and allow octopus cooling times to reach room temperature before grilling, preventing uneven texture variations from thermal shock. Including bay leaves as a key flavoring enhances the depth of your marinade and complements the charred exterior during the grilling process. Allowing the octopus to rest in its broth after the initial cooking phase further tenderizes the flesh and infuses additional flavor.
Pat your octopus completely dry post-poaching; residual moisture blocks charring. A heat shield or deflector on your grill helps vaporize drippings and prevents flare-ups that can char your octopus unevenly. Using a meat thermometer ensures you remove the octopus at the precise doneness point, similar to how precision temperature monitoring prevents overcooking delicate proteins. Oil your grill rack thoroughly for consistent browning. These interventions systematically eliminate common failure points, yielding restaurant-quality results.

BBQ / Grill pit thermometer, safe and environmentally friendly.

Large Display: Features a 2 3/8 inches large face for clear visibility; Stem length of 2 7/8 inches enhances accessibility; Enables easy classification of food temperatures in various cooking environments

✅[ Easy Temperature Reading ] - 3 3/16'' Large Dial BBQ Grill Smoker Thermometer with enlarged degree scales and numbers , easy to read even from far away. Perfectly fits for most smokers or grills with a 3/8 inch opening or hole