You’ll smoke beef ribs to fall-off-the-bone tenderness in three to six and a half hours, depending on your temperature choice. At 225-250°F, you’re looking at five to six and a half hours for gradual collagen breakdown. If you prefer faster results, bump it to 275-285°F and you’ll finish in roughly three hours while maintaining probe tenderness. Wrapping at 160°F internal temperature and spritzing every thirty to forty-five minutes guarantees consistent moisture. The specific techniques that’ll elevate your results deserve deeper exploration.
Choosing the Right Temperature for Your Smoker
Temperature control is the foundation of smoking beef ribs successfully, and you’ll find three primary ranges that deliver excellent results: low (225-250°F), moderate (250-275°F), and higher (275-285°F).
Your choice depends on available time and desired tenderness. Lower temperatures extend cook times beyond four hours, allowing gradual collagen breakdown. Higher ranges around 275-285°F compress timing to roughly three hours while maintaining probe tenderness. For optimal results, smoking beef ribs at the recommended 250 degrees F for a longer period of time produces fall-off-the-bone tender ribs that showcase the meat and smoke. The connective tissue in beef ribs is of a finer, less dense sort compared to other barbecue cuts, which allows for shorter cook times without sacrificing tenderness. At 250°F, you’ll achieve rendered fat and texture similar to traditional low-and-slow smoking methods while reducing overall cooking duration. Monitoring your beef ribs’ internal temperature with a reliable thermometer ensures you reach the target doneness without overcooking.
Oak wood performs reliably across all temperature ranges. Resting the meat after smoking allows juices to redistribute throughout the cut, enhancing flavor and tenderness. Allow a rest period post-smoking to retain the juices before serving. Regardless of your selection, you’re managing smoke density through adjusting airflow to maintain stability. Set thermometer alerts at 300°F high and 250°F low, using Smoke X2 probes for precise meat and air-temperature monitoring. Indirect heat remains essential at every temperature point for consistent results.

【Easier to Use】Equipped with 2 meat probes, this BBQ thermometer for grill allows you to monitor separate meats or the grill temperature simultaneously, a real comfort in grilling several pork loins for large groups with different tastes

✅[ Easy Temperature Reading ] - 3 3/16'' Large Dial BBQ Grill Smoker Thermometer with enlarged degree scales and numbers , easy to read even from far away. Perfectly fits for most smokers or grills with a 3/8 inch opening or hole

Large Display: Features a 2 3/8 inches large face for clear visibility; Stem length of 2 7/8 inches enhances accessibility; Enables easy classification of food temperatures in various cooking environments
Understanding Cooking Times by Temperature
Once you’ve locked in your smoker’s temperature range, you’ll need to understand how that choice directly affects your cooking timeline. Balancing time and temperature requires recognizing that higher heat accelerates the cooking process. At 225°F, expect 5-6.5 hours depending on rib type. Bumping to 250°F shaves roughly 30 minutes off your cook time, while 275°F cuts it dramatically to around 3 hours. Managing cooking variances means accounting for weather conditions, lid openings, and starting meat temperature—all factors that influence your actual timeline. Your target internal temperature remains consistent: 203-210°F for ideal tenderness. The key is selecting your temperature based on available time, then monitoring progress carefully rather than relying solely on clock time. At 285°F, beef ribs require approximately 8 to 9 hours of smoking to achieve that melted butter tenderness. For those seeking faster results, hot and fast cooking at 300°F significantly reduces cooking time compared to traditional low and slow smoking methods. During the cooking process, you may encounter a temperature stall around 150-160°F where internal temperature plateaus due to moisture evaporation. For optimal results, fill the water pan with water to maintain consistent moisture and temperature stability throughout the smoking process. Precise meat thermometer monitoring ensures you achieve the ideal doneness without overcooking. Resting your ribs for 20-30 minutes after smoking helps retain juiciness and ensures the best final texture before serving.
Monitoring Internal Temperature for Perfect Doneness
While you’re smoking beef ribs, knowing the difference between safe and sublime means understanding two distinct temperature targets. You’ll monitor for 145°F minimum safety, but you’re actually aiming for 203°F for that fall-off-the-bone texture you’re after.
Your probe placement considerations matter greatly. Insert your instant-read thermometer into the thickest meat section between bones, avoiding contact with bone itself. Ensure thermometer accuracy by testing in ice water or boiling water before use. For the fastest and most reliable readings, consider using an instant-read thermometer with one-second read times like those designed for serious pitmasters. For longer cooks, wireless grill thermometers with multiprobe capability allow you to monitor multiple ribs simultaneously without opening the smoker. At the 170°F intermediate checkpoint, you’ll implement foil wrapping techniques to accelerate tenderness development. Like steaks that benefit from resting after cooking, proper resting time allows the residual heat to continue tenderizing the meat. The most accurate wireless models excel in real-world grate temperature tests to ensure your smoker maintains consistent heat throughout the cook.
When you reach 203°F, probe resistance in the meat between bones should feel like melted butter. Use programmable thermometer alerts to catch this exact moment. To achieve optimal results, maintain your smoker temperature between 225-250°F throughout the entire smoking process. Using a meat thermometer to monitor internal temperature ensures the best doneness results. Rest your wrapped ribs for at least 30 minutes—ideally an hour in a cooler—allowing carryover cooking to stabilize that perfect tenderness before slicing.
Preparing Your Beef Ribs Before Smoking
Before your beef ribs hit the smoker, you’ll need to prep them properly—and this groundwork directly determines how well the smoke penetrates and how evenly your rub adheres to every surface.
Start with the uniform trimming process: neaten edges using a sharp filet or boning knife, then remove excess fat from the meaty side to prevent chewiness. Beef ribs do not require removal of the membrane on the back, unlike pork ribs, so focus your trimming efforts on the fat cap and edges. Pull the membrane from the bone side with a paper towel for grip, lifting the edge first with a small knife. Pat everything dry afterward.
For ideal rib presentation, sprinkle kosher salt on both sides before applying your rub liberally—use blends containing paprika, chili powder, brown sugar, cayenne, garlic, and onion powder. Allow seasoning at least 30 minutes to adhere. Position your rack meat-side up, ready for smoking. The dry surface of your prepped ribs will allow the rub to adhere better than moist ribs, while also enabling radiant heat from your smoker to cook the meat more effectively. For best results, soak wood chunks before adding them to your smoker to generate ample smoke for penetration. Once your ribs are seasoned and positioned, ensure your smoker is functioning properly by cutting off oxygen supply to any previous fires before you Preheat the smoker to 250°F to ensure optimal cooking conditions. For even more effective heat management, consider setting up indirect heat zones similar to how you would arrange coals on a charcoal grill to maintain consistent temperature throughout the smoking process.
TRIM BRISKET AND BEEF FAT EFFORTLESSLY AND PRECISELY. STRIP YOUR BONES CLEAN IN MINUTES: Superior sharpness and a curved 6 inch blade make trimming fat from meat easy. Reduce errors by cutting precision and end up with less waste and a better looking result. De-boning is faster and more efficient.

SHARP TRIMMING BLADE: The sharp blade slices through fat easily. Comes with three replacement blades and a blade cover.

Razor-Sharp Precision for Detailed Boning - Expertly crafted from German stainless steel, our 6-inch boning knife features a curved blade specifically designed for meat cutting. With its extremely sharp edge and perfect flexibility, this flexible boning knife effortlessly separates meat from bones and cartilage, making it the ideal curved boning knife for poultry, fish, and delicate butcher work. It’s not just a butcher knife – it’s a precision meat trimming knife designed for perfection.
The Smoking Process: Step-by-Step
Now that your ribs are prepped and seasoned, you’re ready to fire up the smoker and begin the transformation that’ll yield tender, deeply flavored beef ribs. Set your smoker to 250°F to 275°F, positioning ribs bone-side down on the grates. For the first three hours, allow heavy smoke to roll without interruption—this phase establishes your signature smoke ring and deep flavor foundation. After two hours, you can begin spritzing to maintain moisture. Use post oak or mesquite for robust smoking characteristics that complement beef. Around the three-hour mark, consider sauce application to enhance the bark while monitoring internal temperatures every 45 minutes. Wrapping your meat in butcher paper during the second phase helps prevent direct contact with aluminum foil, which can potentially leach into the food. Before you begin smoking, ensure your grates are clean by scrubbing with a stiff brush to remove any debris that could affect flavor, and consider performing periodic deep cleaning to eliminate carbon buildup and grease residue that accumulates over time. Continue cooking until your ribs reach an ideal finished temperature of 205-210°F, checking for tenderness with a probe or toothpick. For extra juiciness during the wrapped phase, consider adding moisture enhancers like butter and brown sugar inside the wrapping to keep your beef ribs tender and succulent. Using a digital or wireless meat thermometer inserted into the thickest part of the meat ensures accurate temperature readings throughout the smoking process. For optimal results, consider using a full charcoal smoker with adjustable grates to maintain consistent heat distribution throughout the lengthy cooking process. Your marinade composition and technique during this critical phase directly impact final tenderness and flavor complexity.

【Ultra-Fast & Precision Accurate】This meat thermometer digital delivers accurate readings within ±1°F/±1°C in just 2–3 seconds, with a wide temperature range of -58°F to 572°F (-50°C to 300°C). No more waiting over the heat - know your food's exact temperature instantly.

【0.3S Instant Read & 10X Faster】Upgraded with industry-leading premium sensor, this Instant Read digital meat thermometer delivers precise temperature readings in only 0.3 seconds—10 times faster than standard models, with accurate precision up to ±0.5℉. No more waiting over the heat - know your food's exact temperature instantly.

Ultra Fast & Accurate Reading - Biison professional digital thermometer with 3s fast response time measure food temperature From -58°F to 572°F (the accuracy of ±2°F),applicable from ice water to oil Temp
Spritzing and Maintaining Moisture Throughout the Cook
As your beef ribs establish their initial bark during those first 90 minutes, you’re building the foundation for what’ll become a perfectly textured crust—but you can’t stop there. Once that bark forms, begin spritzing every 30 to 45 minutes using equal parts apple cider vinegar and water, or apple juice for flavor profile enhancement. Maintain spritz temperature control by keeping your liquid warm, which promotes better absorption and caramelization of your rub’s sugars.
Apply your spritz as a fine mist across all surfaces, ensuring even moisture distribution. This technique rehydrates the meat while preventing the exterior from drying during the extended cook. Spritz thoroughly around edges and trimmings to ensure comprehensive flavor absorption throughout the ribs. Continue spritzing until your ribs reach 203-205°F internally, balancing moisture retention with bark development. The bend test for tenderness is another reliable indicator that your ribs have reached optimal doneness alongside internal temperature measurements. The target internal temperature range of 200-205°F ensures optimal tenderness and juiciness throughout your cook. Like the 3-2-1 method used for pork ribs, consistency in your spritzing schedule ensures you maintain the low and slow cooking approach that renders connective tissues effectively. Most beef rib smoking sessions typically range from 3 to 5 hours depending on your smoker type and desired tenderness level. Proper timing and consistency transform your final results into exceptionally tender, flavorful ribs.

SMOKERS CHOICE is The Original Apple Cider Vinegar Spray, Providing Richer Smoke Flavors While Maintaining Meat Moisture Helping Rubs Absorb Better

What is Spritz King? Our culinary basting sprays make it easier for you to achieve a crunchy, deep, robust dark bark with a moist interior when grilling, smoking, or air frying. Simply apply our innovative BBQ spritz throughout the cooking process to yield tastier, more flavorful meats, veggies, and seafood.

Product Type:Vinegar
Wrapping Techniques for Optimal Results
When should you wrap your beef ribs? Wrap at 160°F internal temperature for guaranteed tenderness. You’ve got two primary foil wrapping techniques: place ribs meat-side down on heavy-duty aluminum foil (dull side against meat), add liquids like apple juice or butter, then fold sides tightly with no air pockets. This traps moisture for accelerated cooking. Make sure to wrap exposed bones with an 8cm strip of foil folded lengthwise to prevent piercing the outer layer. Low temperature smoking allows the ribs to break down connective tissues without overcooking, making the wrapping process even more effective for final tenderness. Maintaining consistent heat through careful vent adjustment ensures even cooking throughout the wrapping phase. Proper vent and damper management helps you sustain the ideal temperature for wrapped ribs during the entire smoking process. Using hardwoods like pecan, oak, or mesquite for smoke flavor enhances the depth of taste in your wrapped ribs.
Alternatively, butcher paper wrapping techniques preserve your bark better. Position ribs meat-side down on pink butcher paper, wrap tightly while allowing slight airflow, then continue cooking until probe-tender at 202°F or higher. Paper yields firmer texture and enhanced smoky flavor compared to foil’s steaming effect. Wrapped ribs are notably more tender with meat fibers that separate easily compared to unwrapped preparations. After wrapping, add wood chunks periodically to maintain the smoke flavor that develops throughout the low and slow cooking process.
Both methods reduce total cook time considerably. Choose foil for competition-style moisture retention or paper for superior smoke penetration and bark development.
Resting Your Beef Ribs for Maximum Tenderness
Once you’ve removed your ribs from the smoker at 203°F, you’ll want to resist the urge to slice into them immediately. Resting is essential for achieving that coveted fall-off-the-bone texture you’re after.
Place your wrapped ribs in an insulated cooler with towels for at least one hour. This excellent cooling method maintains elevated temperatures while allowing collagen to break down further, creating that butter-like consistency. Your ideal serving temperatures should reach around 140°F before slicing. The collagen melting process continues even during the resting phase, further tenderizing the meat. Similar to finishing ribs on the grill, the resting period allows the meat to reach optimal tenderness and juiciness. Just as with brisket smoking, allowing the meat to rest helps retain juices and develop optimal texture through the low-and-slow method. For best results, consider dry brining and seasoning your ribs well before smoking to enhance their flavor profile. Using a meat thermometer to verify internal temperature ensures your ribs have reached the proper doneness before serving. Wrapping the ribs in towels or placing them in a warming drawer during the resting period will help preserve heat and optimize the tenderizing effect. A minimum resting time of 1 to 4 hours allows the connective tissues to break down fully, resulting in maximum tenderness.
Verify tenderness by inserting a probe—it’ll slide through effortlessly when properly rested. An hour-long cooler rest considerably enhances juiciness and texture compared to shorter resting periods. Skip this step, and you’ll sacrifice the quality you’ve worked hard to achieve throughout the smoking process.
Selecting the Best Wood for Smoking Beef Ribs
Why does wood selection matter so much when smoking beef ribs? The wood you choose directly influences flavor intensity, smoke profile, and overall quality of your final product.
Oak delivers robust smokiness without overpowering—ideal for extended smoking sessions. Hickory provides rich, slightly sweet notes that enhance natural rib flavors, though you’ll want to moderate quantities to prevent bitterness. Mesquite offers the most optimal option for heavy smoke lovers, but use sparingly to avoid oversmoking.
For preferred wood combinations, blend pecan with oak or hickory to add nutty sweetness while maintaining smoke depth. Apple wood works best as a secondary component mixed with stronger woods for balanced results. Achieving thin blue smoke rather than thick white smoke ensures clean combustion and prevents harsh, overpowering flavors from compromising your beef ribs. Mesquite has a very strong flavor profile, so reserve it for situations where you want maximum smoke intensity. Using kiln-dried wood chips ensures a cleaner burn and better smoke quality throughout your smoking session. Always avoid softwoods like pine as they create bitter residue that compromises the quality of your smoked beef ribs. When experimenting with your smoking process, consider blending different woods to achieve the balanced flavor profile that best suits your preferences. Select heartwood-only logs that are bark-free to eliminate unwanted chemicals and contaminants from your smoking process.
Consider replicating regional flavors: Texas post oak for authentic brisket-style profiles, or Memphis-style hickory for Southern traditions. Match wood intensity to your rub and cooking duration for superior outcomes. Matching wood choice to protein ensures your beef ribs develop the ideal smoke characteristics for a memorable final result.

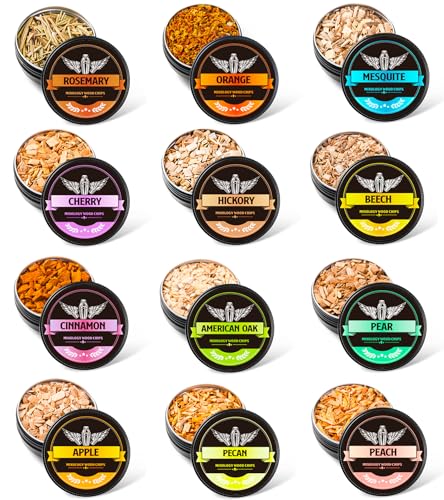
Assorted 12 Premium Smoking Flavors: This set includes 9 smoking wood chips of apple, cherry, oak, mesquite, pecan, pear, peach,hickory, beech wood and 3 herbs and spices including organge, rosemary and cinnamon,each offering its own distinct taste journey. Total 12 assorted of flavors allow you to explore infinite endless smoking possibilities

Value Pack Variety Gift Set of Apple, Mesquite, Hickory, and Oak BBQ Smoker Extra Fine Wood Chips. Ignite quickly and combust completely to create a delicate smokey flavor. The essential fuel for your best BBQ yet - perfect for Memorial Day kick-offs, Father’s Day gifting, 4th of July feasts, and every backyard barbecue all summer long.