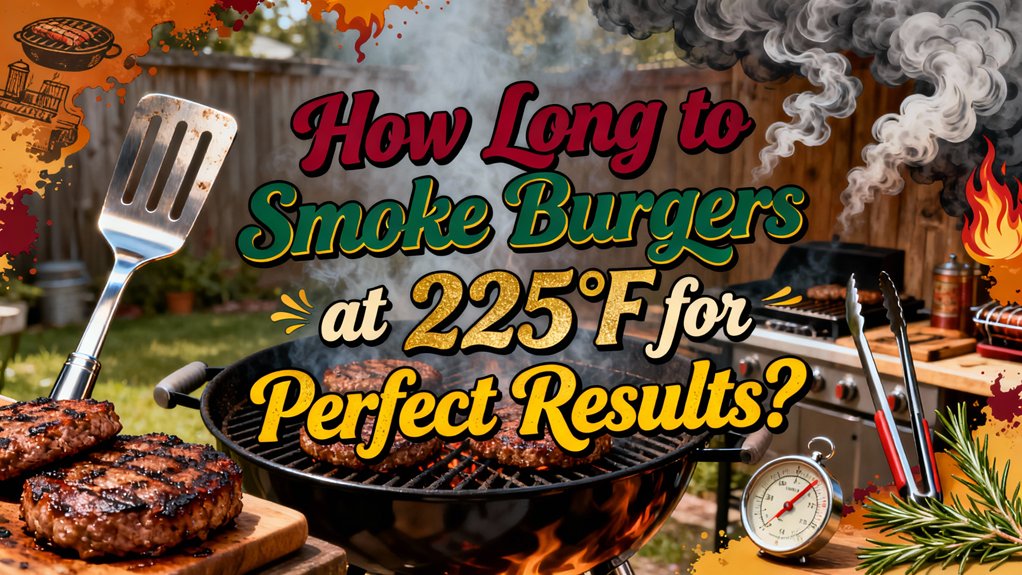
You’ll smoke half-inch burger patties to 160°F in roughly one hour at 225°F, while thicker cuts demand progressively longer cook times—three-quarter-inch patties need 1.5 to 2 hours, one-inch patties require 2 to 2.5 hours, and 1.25-inch burgers extend to 2.5 to 3 hours. Use a meat thermometer to monitor internal temperature consistently for your desired doneness. Temperature control consistency guarantees dependable results and ideal smoke ring development. However, several variables can affect your total smoking duration, and understanding them’ll help you nail the perfect burger every time.
Understanding the 225°F Sweet Spot for Smoking Burgers
Why does 225°F stand out as the ideal temperature for smoking burgers? You’ll find this temperature range delivers optimal flavor development without overwhelming the patty’s natural taste. At this heat level, you’re achieving the perfect balance—the smoky profile complements rather than dominates your burger.
Temperature control consistency matters greatly here. Maintaining steady 225°F produces dependable results across multiple burger batches, eliminating guesswork from your cooking process. You’ll notice that lower temperatures within this range create more pronounced smoke ring appearance, giving your burgers that coveted pink layer beneath the surface that indicates successful smoke penetration. For enhanced crust and texture, consider the smoke-searing technique after reaching your target internal temperature.
The surrounding heat and smoke circulation at 225°F work synergistically, allowing you to skip flipping during the smoking phase entirely. This hands-off approach certifies even cooking while you focus on monitoring your smoker’s consistency. Most burgers will reach the proper internal temperature of 145-160°F within 35 to 45 minutes at this temperature, depending on patty thickness. While smoking at 225°F takes longer than moderate temperature smoking, the extended cooking time enhances flavor penetration and juiciness. Using ground beef with at least 15% fat content helps prevent your burgers from drying out during the smoking process. Grills with adjustable charcoal grates make it easier to maintain this precise temperature by allowing you to raise or lower the heat source as needed. Some pellet grills equipped with strong PID controllers excel at holding this exact temperature throughout your entire cook, ensuring consistent results every time. For optimal smoke flavor on your burgers, experiment with complementary pellet flavors such as oak, hickory, or pecan.
Preparation: Getting Your Patties and Smoker Ready
Before you fire up your smoker, you’ll need to focus on two critical elements: selecting the right ground beef and preparing your equipment for ideal results.
Start with 80/20 ground beef—this fat ratio guarantees juiciness and smoke absorption. For patty formation, divide your meat into equal 5-6 ounce portions using a kitchen scale, then press them into tight patties roughly half an inch larger than your buns to account for shrinkage. Buy your ground beef freshly ground, preferably ground in-house the same day for optimal flavor and texture.
During seasoning application, combine your beef with steak seasoning and Worcestershire sauce, then moderate rub with Holy Cow or basic salt, pepper, and garlic powder. Rub seasonings in thoroughly but avoid overmixing, which creates mushiness. Adding Worcestershire sauce to your patties helps enhance moisture and flavor during the smoking process.
Preheat your smoker to 225°F with a flat coal bed. Select hickory wood for strong flavor or milder options like apple for subtlety. For fuel, consider using lump charcoal if you want high heat capability and clean burning, or briquettes for more consistent, long-lasting heat during your smoking session. Position your grates and insert a meat thermometer probe immediately upon placement. If you prefer using a gas grill instead of a traditional smoker, models like the Weber Genesis SX-335s offer even heat distribution that can work well for smoking applications. Once your patties are ready, insert them into the smoker and begin monitoring with meat thermometer to track internal temperature throughout the cooking process.
Smoking Duration Based on Patty Thickness
Once you’ve placed your patties on the grate, timing becomes your primary control variable. You’ll find that thickness variances dramatically affect your smoking duration at 225°F. Half-inch patties reach 160°F in approximately one hour, while three-quarter-inch patties require 1.5 to 2 hours. Your one-inch thick burgers demand 2 to 2.5 hours, and substantial 1.25-inch patty dimensions extend cooking to 2.5 to 3 hours total.
Cook time scales directly with patty thickness—this relationship isn’t arbitrary but fundamental to achieving even doneness. Monitor your burgers consistently, using a meat thermometer to verify internal temperatures rather than relying solely on elapsed time. Smoker variances and patty size fluctuations necessitate this precision-focused approach for consistently excellent results. Similar to larger cuts of meat, monitoring the internal temperature is critical rather than relying strictly on timing, as outdoor conditions and smoker temperature consistency can influence actual cooking duration. Remember that safe internal temperature for ground beef is 160°F, which ensures harmful bacteria are eliminated while maintaining juiciness in your smoked burgers. Just as with grilling steaks, internal temperature—not just time—is the most reliable indicator for doneness when smoking burgers. To maintain accuracy throughout the smoking process, it’s recommended to start checking the temperature well before your estimated finish time to prevent overcooking. Balancing heat control with consistent monitoring ensures your smoked burgers achieve tender, flavorful results without drying out. After removing burgers from the smoker, resting the meat for a few minutes allows juices to redistribute throughout the patty for maximum flavor and moisture retention.

【Fast & Accurate】Our meat thermometer digital delivers accurate readings within ±1°F in just 1–2 seconds, with a wide temperature range of -58°F to 572°F (-50°C to 300°C). No more waiting over the heat - know your food's exact temperature instantly.

Instant Read Meat Thermometer | Our instant read thermometer features a temperature probe and advanced, highly accurate technology with a 1-2 second response time. Our instant read food thermometer comes pre-calibrated with instructions and a meat temperature chart, plus a recalibration feature if needed.
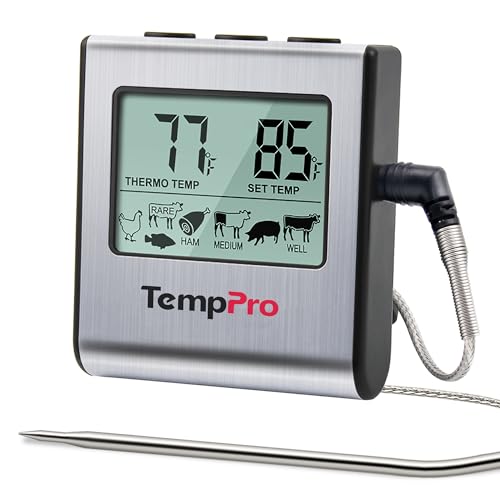
Cook mode with USDA preset temperature settings: TempPro cooking thermometer ideal for meat, oven, smoker or stove top; Programmable alert with preset temperatures for specific foods recommended by USDA; All of the preset temps can be reset to your desired tastes
Internal Temperature Targets for Your Desired Doneness
Achieving your preferred burger doneness hinges entirely on understanding the precise internal temperature thresholds and how carryover cooking affects your final result. You’ll want to pull your burgers at 120-125°F for rare, achieving that cool red center and very soft texture. Medium-rare targets 130-135°F with a warm red appearance and juicy bite. For medium doneness, you’re aiming at 140-145°F, balancing firmness with moisture while reducing safety concerns associated with undercooked beef.
As you approach medium-well at 150-155°F, expect mostly brown coloring with minimal pink and drier texture. Well-done burgers require 160°F minimum for ground beef safety compliance. Using a meat thermometer ensures you achieve accurate internal temperature readings for consistent results every time. An instant-read thermometer provides quick temperature verification in just seconds, making it essential for checking multiple patties efficiently. For the fastest and most precise readings, consider a thermometer with one-second readings like the Thermapen ONE, which delivers accuracy when timing matters most during your cook. For those monitoring multiple burgers simultaneously, wireless options like the ThermoPro TP20 offer dual-probe setups that track two patties at once from up to 300 feet away. The Fireboard Pulse stands out for its exceptional ambient temperature accuracy and extended range capabilities, making it ideal for long smoking sessions where consistent monitoring is critical. If you need extended wireless range throughout your house or yard, consider models using radio frequencies like 433/900 MHz rather than Bluetooth-only designs for more reliable signal penetration.
Remember carryover cooking considerations—your patties continue cooking after removal from heat. Pull them slightly below your target temperature to account for this residual heat, ensuring you hit your desired final doneness without overshooting texture and moisture indicators. Insert your thermometer into the thickest part of the burger to get the most accurate reading and avoid undercooking.

Fast & Accurate: Get precise readings in just 1 second with ±0.9°F accuracy. NSF Certified for trusted food safety, this digital food thermometer features a 4.3 inches food-grade stainless steel meat probe, perfect for grilling, frying, baking, making candy and more

【8X Faster + 4X More Precise】: Upgraded with an industrial-leading professional thermocouple sensor, Themomonster meat thermometer digital with NIST certified ±0.5℉ precision provides you the accurate temperature of your food in just 0.5 Seconds.

Completely Waterproof: IPX6 waterproof rating means you can wash this cooking thermometer under running water without fear. This food thermometer for cooking ensures cleanup is ultra-fast
The Reverse Sear Method for Optimal Results
Why settle for a burger that’s either smoky but pale or seared but bland? The reverse sear technique delivers both by leveraging pull temperature management strategically. You’ll remove your patties from the 225°F smoker when they’re 10-15 degrees below your target doneness—typically 130-140°F for medium-rare. This pull temperature management prevents overcooking during the searing phase. Next, you’ll increase your smoker to 500°F or transfer patties to a preheated cast iron skillet or griddle. Sear each side for 1-4 minutes, developing a caramelized crust while maintaining your desired interior doneness. For best results, season your patties just before placing on smoker so the seasoning adheres well to the cold meat. The reverse sear method works especially well for thick cuts that require even cooking throughout. Monitor your burgers with a reliable meat thermometer to ensure precision throughout the cooking process. After searing, let your burgers rest for a few minutes to allow residual heat to finish the cooking process for a juicier result. The smoking step infuses the burgers with a smoky flavor and tenderizes them slightly, while the high-heat sear creates the perfect exterior. Avoid pressing down on the burgers during the searing phase, as this squeezes out valuable juices and reduces overall flavor. This reverse sear technique guarantees you won’t sacrifice smoke flavor for visual appeal or compromise tenderness for browning.

Dual-Sided Plate: The Lodge Pro-Grid Reversible Grill/Griddle flips between grill and flat surfaces, perfect for pancakes, bacon, eggs, smashburger, and grilled favorites


REVERSIBLE SIDES: The NutriChef Stovetop Grill features convenient reversible sides. The smooth side is great for making grilled cheese sandwich, eggs & pancakes. The ribbed side is perfect for grilling foods such as steak, fish, chicken & hamburger
Monitoring Progress Without Flipping Your Burgers
Now that you’ve mastered the reverse sear method, you’ll need a reliable way to track your burgers’ progress without constantly opening your smoker and disrupting the cooking environment. Temperature monitoring through leave-in thermometers like MEATER® enables remote tracking throughout the smoking process, maintaining smoking consistency without unnecessary interruptions. Digital probes positioned at the grill surface provide real-time internal temperature readings, eliminating guesswork about doneness timing.
You’ll pull your burgers just before reaching your preferred temperature—140-145°F for juicy medium results. This approach removes reliance on misleading visual cues like pink coloration, which persists in fully cooked smoked burgers regardless of doneness. Stable vent control combined with consistent temperature monitoring guarantees predictable cook times based on patty dimensions, allowing you to plan accordingly without frequent thermometer checks. Avoid flipping your burgers too frequently, as constant flipping can cause them to break apart during the smoking process. For optimal results, pull your 6 oz patties at 130°F and let them rest before serving to retain maximum juiciness. After pulling your burgers from the smoker, resting for 5-10 minutes allows the juices to redistribute throughout the patty for maximum tenderness. Some pitmasters recommend placing an ice cube in the center of thicker patties before smoking to help prevent them from drying out during the longer cook time. Using properly seasoned oak wood in your smoker produces the thin, blue smoke ideal for infusing burgers with balanced flavor without overpowering the beef. Budget-friendly options like the Pit Boss 440 SERIES feature digital temperature control that makes maintaining consistent heat easier for beginners smoking burgers. Just as you’d check your grease-trap cleaning routine on your propane grill, regularly inspecting your smoker’s drip pan prevents flare-ups that can ruin burger texture.
Post-Smoke Cooking: From 325°F to the Final Sear
Once you’ve pulled your burgers from the initial 225°F smoke phase, it’s time to ramp up the heat and lock in those flavors you’ve built. Increase your smoker to 325°F and maintain indirect cooking for controlled doneness progression. Insert a leave-in probe thermometer to enable precise temperature control throughout this critical phase.
Pull your burgers 10–15 degrees before reaching your target internal temperature. This accounts for carryover cooking and positions you perfectly for the timed searing technique ahead. When your burgers reach the pull temperature, move them directly over hot coals. Rotate every few seconds and flip every minute, prioritizing temperature over flip count. The pink smoke ring that has developed around the outside of your burgers is a chemical reaction from the smoke exposure and indicates successful flavor development. For fattier meat like an 80/20 lean-to-fat ratio, you can safely pull your burgers at 155°F before the final sear.
This reverse sear approach develops an exceptional crust while preserving the smoky interior you’ve carefully crafted. If you prefer a traditional smash burger technique for your final sear, a cast-iron press delivers the weight needed to create maximum surface contact and a superior crust. Stainless steel presses offer rust resistance and are often dishwasher safe, making cleanup easier after your grilling session. For the ultimate sear, consider using cast iron grates on your grill, which provide excellent heat retention and superior searing ability compared to standard grates.
Wood Selection and Smoke Flavor Infusion
The wood you choose fundamentally shapes your burger’s final flavor profile, and selecting the right variety requires understanding how different hardwoods and fruitwoods interact with beef. Hickory dominates burger smoking with its savory, bacon-like intensity, while oak provides balanced medium smoke without overpowering. Mesquite demands restraint—its earthy potency easily dominates if you’re not careful. Wood blending techniques elevate your results: combine oak with apple or cherry for sophisticated medium smoke, or pair pecan with stronger hardwoods to temper excessive sweetness. Smoke absorption factors depend on burger thickness and cooking duration; thinner patties require lighter woods like cherry, while thicker burgers withstand hickory’s intensity. For electric smokers and quick smoke sessions on charcoal grills, wood chips provide the smallest smoking option with faster flavor infusion. Hardwoods deliver a slow burn that produces superior smoke flavor consistency throughout your cooking process. Premium wood pellets from brands like Lumberjack, Bear Mountain BBQ, and CookinPellets offer 100% natural hardwoods with no fillers or additives for clean-burning performance and bold smoky flavors. Avoid softwoods entirely; they burn inconsistently and impart undesirable residue. Never use pine or cedar, as their resins create acrid smoke and off-flavors that ruin your meat. Maple offers a milder smoke profile that works exceptionally well for chicken and fish, making it a versatile choice when smoking leaner proteins alongside your burgers. For best results with chips, use 1/2 to 1 cup per hour without soaking for shorter grilling sessions. Cherry wood adds a subtle sweet note and attractive color to burgers, making it ideal for lighter smoke applications. Experimentation with these combinations refines your signature burger flavor.

MATERIALS: Made from 100% natural seasoned hardwood with no unwanted byproducts, our wood chips burn cleanly and evenly.


PREMIUM WOOD CHIPS: Made from all-natural wood that burns cleanly and evenly, these wood chips can be used on top of charcoal and in smoker boxes to deliver professional-level, mouth-watering results.
Common Variables That Affect Total Smoking Time
While wood selection establishes your burger’s foundational flavor, you’ll rapidly discover that smoking time itself depends on multiple interconnected variables—some within your control and others dictated by circumstances beyond the smoker.
Patty composition and thickness dramatically shift your timeline. A standard half-inch patty finishes in 45-60 minutes at 225°F, while inch-thick versions demand 90+ minutes. Starting temperature matters equally—room temperature patties reduce duration by 10-15 minutes compared to refrigerated ones. Chilling beef patties on a baking sheet for at least an hour up to overnight ensures consistent smoke ring development throughout the cooking process.
Your desired doneness level directly correlates to time. Medium-rare requires 40-50 minutes; medium-well extends to 60-75 minutes. Ambient conditions prove equally critical. Cold, windy weather prolongs smoking substantially, while ideal 70°F calm conditions optimize efficiency. Maintaining clean ash catchers and adjusting air dampers appropriately ensures consistent airflow and stable temperatures throughout your smoking session. Smoker type influences results too—pellet grills and charcoal setups yield predictable timeframes when properly maintained. Maintaining thin, blue smoke rather than thick white smoke prevents bitter flavors from developing on your burgers. Understanding that smoking relies on convection heat transfer from circulating hot air helps explain why external temperature and wind conditions so dramatically impact cooking duration. Gas grill users can control smoke intensity by adjusting wood chip quantity and employing smoking boxes to extend burn time and deliver consistent flavor. The lower temperatures used in smoking also reduce the formation of harmful compounds compared to high-heat grilling methods.
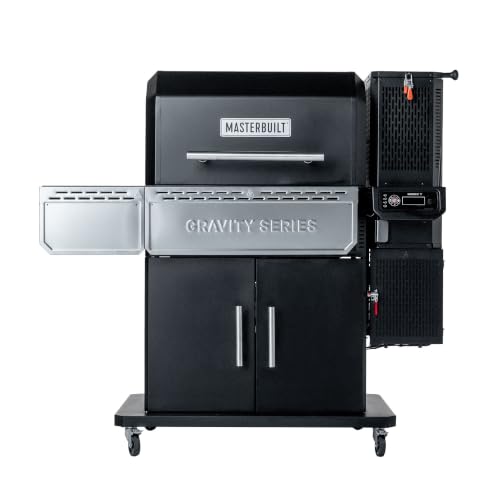
DIGITAL CHARCOAL GRILL & SMOKER: Experience the convenience of automatic temperature control with authentic charcoal flavor for smoking, grilling, searing, roasting, and baking.
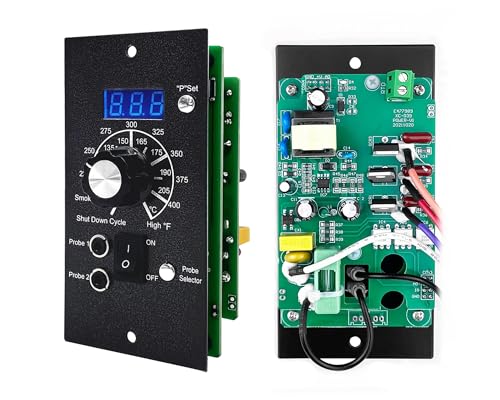
COMPATIBILITY: The grill digital thermostat is replacement for Traeger OEM part BAC365, BAC288, BAC236, fits 20, 22, & 34 Models, including Pro 20/22 34, Texas Elite 34, Lil Tex 22, JUNIOR ELITE 20, Ridgeland, Heartland, Mesa 22, Century 22/34, Silverton (2019), Select Pro, Eastwood 22/24(Not for PTG, Scout, Tailgater, or Bronson)

Compatible with WSM 14"/18"/22" and Bullet Smokers.
Safety Guidelines and USDA Temperature Recommendations
How do you guarantee your smoked burgers are genuinely safe to consume? You’ll need to reach an internal temperature of 160°F (71°C), non-negotiable regardless of smoking method or temperature.
This stringent requirement exists because bacteria distribution in ground beef differs fundamentally from whole cuts. Grinding disperses pathogens throughout the entire patty rather than confining them to the surface, eliminating safety margins. Always clean your meat thermometer with hot soapy water after each use to prevent cross-contamination between raw and cooked foods.
Consider carryover cooking considerations when monitoring doneness. Pull your burgers at 155°F and let them rest 3–5 minutes before serving, allowing residual heat to complete the temperature rise to 160°F. For cast iron or griddle cooking, you should preheat for at least 5 minutes over medium-high heat to ensure even heat distribution across your cooking surface.
Use a meat thermometer to measure the center of each patty. This precision verifies your coldest section meets safety standards before consumption, protecting you and your guests effectively. Keep a multipurpose dry chemical extinguisher rated for Class B and Class C fires within easy reach of your grill to handle grease flare-ups or propane leaks safely. After cooking, maintain your grill grates with a bristle-free grill brush to prevent metal fragments from contaminating future meals while ensuring thorough residue removal. When selecting a grill brush, prioritize coil or chainmail designs that deliver effective cleaning without the safety risks associated with stray wire bristles. Regularly remove and clean drip pans to prevent grease fires and maintain safe grilling conditions throughout the cooking season. For charcoal grills, always close the vents to cut off oxygen supply and safely extinguish the coals after you finish cooking.