You’ll achieve ideal results by matching smoking duration to your cheese type. Hard cheeses like sharp cheddar need 3 to 4 hours for complete flavor development, while soft varieties require just 1 to 2 hours to preserve texture. Shredded cheese demands only 1.5 hours to prevent melting. Temperature control below 70°F remains critical throughout. The specific techniques you’ll employ—from wood selection to resting periods—significantly impact your final product’s quality.
Understanding Optimal Smoking Duration by Cheese Type
You’ll find that cold smoking cheese requires precise timing to achieve ideal flavor absorption without compromising texture. Hard cheeses like sharp cheddar withstand 3 to 4 hours for full flavor development, while shredded varieties need only 1.5 hours to prevent melting. Blocks effectively absorb smoke over 2 to 4 hours with proper penetration.
Soft cheeses demand stricter limits—restrict smoking to 2 hours maximum to preserve texture and prevent excess moisture release. Cream cheese responds well to 1 to 3 hours with light woods, though some prefer the more pronounced smoky flavor achieved at longer durations. Maintaining relative humidity between 60-70% helps prevent your cheese from drying out during the smoking process. Remember that cold smoking temperatures should never exceed 100°F to avoid cooking the cheese.
Achieving ideal smoke density depends on your cheese type and desired intensity. Test flavor at 2 hours, then extend to 4 hours if you want heavier smoke profiles. Smoking times may vary based on the smoke intensity you prefer, similar to how peeled hard-boiled eggs require about 30 minutes at 225°F to infuse adequate smoke flavor. Like salt blocks for grilling, proper surface preparation enhances the smoking process and helps achieve consistent flavor development. As with cold-smoked salmon, resting your cheese after smoking allows flavors to fully develop and stabilize before consumption. While smoking cheese at low temperatures avoids the carcinogen formation associated with high-heat cooking methods, proper temperature control remains essential for food safety and quality. Wood pellet choices such as pecan or apple can influence the flavor profile and overall taste experience. A perfect smoking session balances time with temperature to develop rich flavor while maintaining structural integrity.

10 Flavor Variety Pack for Rich Smoking Aroma – This cocktail smoker wood chips set includes apple, peach, pear, hickory, oak, cherry, mesquite, cypress, alder and beech wood chips, giving you a wide range of natural smoke profiles to enhance whiskey, bourbon and cocktails.

✅ This accessory is designed to WORK IN ANY GRILL (gas, electric or charcoal) and with any smokers. It ADDS GREAT FLAVOR for your meat or fish and exposes them to a tasteful smoke of smoldering wood. Perfect for smoke cheese.

【Package Includes】- It come with 12in&6in pellet smoke tubes, a cleaning brush and 2 S-hook, 12in large capacity can hold enough particles, and can produce a lot of smoke in 5 hours, 6in tube can produce 2.5 hours of smoke, can meet your different needs
Temperature Control: The Foundation of Perfect Cold Smoking
Temperature control separates successful cold smoking from melted disappointment. You’ll maintain your smoker below 70°F, never exceeding 90°F, since cheese begins melting around 100°F. Start by selecting cool mornings or evenings and positioning your smoker in shade to minimize solar heat gain.
You’ll employ multiple cooling strategies: place ice pans above pellets, use frozen jugs to prevent water drips, and fill your water pan with ice. Prefreeze cheese to 35°F before smoking, then arrange it on elevated racks for ideal smoke circulation. The cheese internal temperature should be monitored continuously throughout the smoking process to ensure it doesn’t exceed safe limits. For consistent smoke generation without excessive heat, 12 inch smoking tubes provide reliable performance over your smoking duration. Hexagon-shaped smoke tubes offer non-rolling stability that keeps your tube positioned correctly throughout the entire smoking session.
Ambient humidity control and refrigeration requirements work together—maintain below-60°F ambient temperatures for superior control. Fully open vents initially, then close your lower vent to 1 inch or less and adjust your top vent to 1/4 for tight temperature management. Unlike charcoal grills that rely on radiation heat transfer, cold smoking requires minimal heat generation to preserve cheese texture and quality. Smoker tubes with hexagonal shape designs prevent rolling and maintain optimal positioning for consistent smoke output. A 6 smoker tube of flavor wood pellets provides consistent smoke without excessive heat generation. Different hardwood pellet flavors like hickory and apple can enhance your cheese profile while maintaining low temperatures. This methodical approach guarantees your cheese stays firm and flavorful.
Wood Selection and Smoke Intensity Considerations
Once you’ve mastered temperature control, wood selection becomes your next lever for crafting the ideal cold-smoked cheese. You’ll want to match wood intensity to your cheese’s natural flavor profile. Delicate cheeses benefit from mild applewood or cherry, while robust varieties like cheddar pair well with hickory’s stronger aroma. Maple offers versatility, adding subtle sweetness across different cheese types.
Optimize your smoke generator settings to control smoke density and duration. Monitor wood moisture levels carefully—properly seasoned wood produces cleaner smoke without excessive acidity. You can blend woods strategically; try two-thirds applewood with one-third hickory for balanced complexity. Experiment with lighter woods like pecan alongside heavier options to develop custom smoke profiles tailored to your specific cheese selections. For best results, choose kiln-dried stock with moisture content under 20% to avoid off-flavors in your final product. Avoid soft woods like pine, fir, redwood, spruce, and cedar as these woods can negatively alter cheese flavor. Fruitwood is the best and safest choice for smoking cheese with mild natural flavor, providing a tangy, mild, and sweet flavor that blends well with the cheese. Both red oak and post oak produce thin, blue smoke when properly seasoned, though their stronger profiles work better for meats than delicate cheeses. Each fruit wood variety brings its own character to the final product, allowing you to fine-tune the smoking experience based on your preferences. Cherry and apple woods are particularly prized for cheese smoking due to their light sweetness that complements rather than overpowers delicate dairy flavors. Consider blending woods to balance intensity rather than relying on a single wood variety to achieve more nuanced flavor development.

The information below is per-pack only


【 A UNIVERSE OF FLAVORS & AROMAS 】 From hickory wood chips to mesquite wood chunks, our expansive selection of smoking wood chunks and smoker wood chips turns ordinary drinks and dishes into unforgettable experiences. Craving sweetness? Try cherry, peach, or apple wood chips or chunks. Want something more robust? Go for oak wood chips, walnut wood chips, or bourbon barrel wood chunks.
Preparation Techniques for Maximum Smoke Penetration
How can you maximize smoke penetration into your cheese? You’ll want to remove all wax coating and rinds completely, allowing smoke to reach every surface. Cut your cheese into smaller blocks or chunks rather than large pieces—this dramatically increases the surface area for smoke absorption.
Before smoking, freeze your cheese upright for one hour to dry the outer skin and establish a uniform surface texture. After this pivotal step, pat the surface dry with paper towels. For additional smoke adhesion, brush lightly with maple syrup using a silicone basting brush, which also helps maintain consistent moisture content during the cold smoking process. Maintaining a temperature between 60-90°F ensures the cheese stays firm while allowing smoke to infuse slowly. Choose hard cheeses like cheddar, parmesan, gouda, gruyere, or blue cheese, as these varieties absorb smoke flavor most effectively. For equipment used in smoking, consider using oils with high smoke points to maintain seasonings on your smoker grates, similar to how oiling grill grates preserves their longevity. Using kiln-dried wood chunks rather than chips ensures a longer, more consistent smoke output for proper cheese infusion.
Position your prepared cheese on the top rack, away from direct heat, ensuring ideal smoke exposure without melting. When setting up your smoking station, ensure your grate material and design can withstand prolonged exposure to smoke and moisture without degrading. For cheese smoking, a cordierite stone placed beneath your cheese can help distribute heat evenly and prevent melting while allowing optimal smoke circulation.
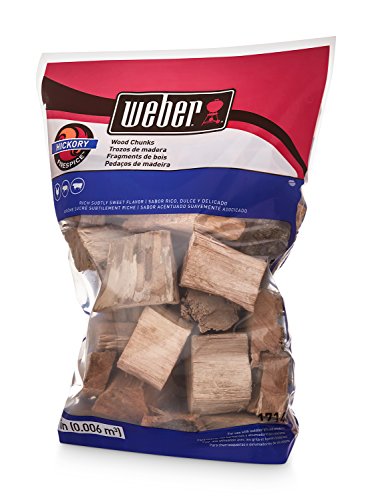

ALL NATURAL HICKORY WOOD CHUNKS: These smoking wood chunks are crafted from 100% hickory hardwood without any harsh chemicals. They naturally enhance chicken, pork, beef, and seafood with a slightly sweet, powerful smoke flavor and a deep color.

Monitoring and Adjusting Your Smoking Process
Vigilant oversight during cold smoking prevents the most common failure: cheese that’s melted or softened before it’s properly smoked. You’ll need accurate temperature monitoring using digital probe thermometers like ChefAlarm for constant surveillance. Check readings every fifteen minutes, removing excess charcoal if temperatures exceed 100°F.
Proper equipment usage involves positioning ice pans above and below your cheese, creating a two-zone cooling setup. Rotate cheese every thirty minutes for even smoke exposure. Use an infrared temperature gun for spot checks on surfaces, and pull your cheese if internal temperature approaches 77°F after 2.5 to 3 hours. Solid milk fat in cheese begins to liquefy at 90°F, which is why maintaining proper cooling is essential throughout the smoking process. Avoid using aluminum foil to line your smoking equipment, as it can restrict airflow and heat distribution, leading to uneven results. Choose a stainless-steel perforated basket to allow optimal smoke circulation and temperature control around your cheese. A waterproof cover stored indoors between sessions will protect your smoker and maintain consistent equipment performance. For best results, vacuum seal and refrigerate your cheese for at least one month after smoking to allow the smoke flavor to mellow and any bitterness to diminish.
When temperature spikes occur, briefly increase ventilation without compromising smoke retention. For stubborn residue or buildup inside your smoker, consider using pumice-based cleaning bricks to maintain optimal equipment performance between smoking sessions. Multi-probe wireless systems allow you to monitor both your cheese temperature and ambient smoker conditions simultaneously throughout the cold smoking process. Extend or shorten smoking duration based on desired flavor intensity. These adjustments guarantee ideal results.
Post-Smoking Cooling and Storage Methods
The critical hours immediately after you’ve removed your cheese from the smoker will determine whether you’ve successfully locked in that smoke flavor or compromised your work. Let your cheese cool on the countertop, then blot excess oil with paper towels. Minimize handling procedures to preserve the smoke patina you’ve developed.
Place your cheese exposed in the refrigerator for 1-2 days on smoking racks. After this initial rest, wipe off accumulated moisture. Wrap individual pieces in uncoated butcher paper, then place them in zip-lock bags.
Vacuum seal each wrapped piece to remove air and lock in flavors. Store your sealed cheese in a refrigeration environment positioned away from the door, maintaining temperatures below 40°F. Proper storage at consistent temperatures is critical for maintaining quality and preventing spoilage. Label packages with your smoking date for tracking purposes. For optimal results, allow cheese to age for up to 2 weeks so the smoke flavors can mellow and penetrate throughout the cheese. Consider extending the aging period to 6-8 weeks for even deeper smoke penetration and a more refined flavor profile.
Aging Your Cheese for Enhanced Flavor Development
Once you’ve properly stored your cold-smoked cheese, you’re ready to begin the aging process—a critical phase where biochemical transformations‘ll deepen and intensify the smoke character you’ve worked to develop.
During aging, microbes convert lactose to lactic acid while enzymes break down proteins and fats into amino acids and crystals. These reactions concentrate smoky flavors progressively over time. Hard cheeses benefit from 2 to 12 months of aging; soft varieties require 2 to 8 weeks. Tyrosine crystals can form on the cheese’s surface, adding distinctive texture and flavor complexity to your aged product. The enzyme breakdown of fats and proteins continues throughout this period, fundamentally transforming the cheese’s final character and aroma.
Maintain temperatures between 50°F and 55°F to facilitate enzyme and microbial activity. Humidity control proves equally essential—aim for environments preventing excessive moisture loss without encouraging unwanted mold growth. Keep your aging space in a well-ventilated outdoor space or properly ventilated indoor area to prevent contamination and ensure optimal conditions. Use enclosed containers with damp cloths if needed to maintain proper moisture balance, similar to how quality rack organization and spacing in smoking chambers affects air circulation and even smoke penetration. Consider using weather-resistant materials like those found in quality storage solutions to protect your aging setup. For additional protection during storage, consider investing in a durable grill cover to shield your aging setup from environmental elements. Fire-resistant mats can also help protect your aging area from accidental heat exposure and maintain consistent environmental conditions.
Monitor your cheese regularly, flipping periodically and wiping surfaces to guarantee consistent ripening and proper rind development.