You’ll smoke your 10-pound brisket for approximately 10-12 hours at 225°F, though thickness matters more than weight. Plan on 90 minutes per pound as your baseline, but you’ll encounter the stall phase around 150–170°F where evaporative cooling slows progress. Wrap in butcher paper around 165–170°F to accelerate cooking. Target an internal temperature of 203°F in the thickest part, then rest for 20-30 minutes minimum. Understanding these phases reveals the nuances that’ll transform your smoking technique.
Setting the Right Smoking Temperature
Since temperature control is fundamental to smoking a brisket successfully, you’ll want to establish your target range before you fire up your smoker. The traditional approach calls for maintaining a hot smoker temperature around 225°F, which delivers suitable tenderness and smoke absorption for your 10-pound brisket. You can also consider 250°F if you’re seeking faster cooking without sacrificing quality. Maintain consistent temperature distribution throughout your smoking chamber by monitoring your grill continuously and refilling pellets as needed. To enhance flavor and achieve authentic results, add smoke with wood chips or chunks replenished throughout the cooking process. Pellet smokers excel at holding precise temperatures, making them ideal for beginners. Start at your chosen temperature and smoke until your brisket’s internal temperature reaches 165°F. This methodical approach guarantees even cooking and professional results. For high-quality, well-marbled briskets, you might prefer 180F for subtle smokiness, though this requires additional cooking time. The collagen breakdown that occurs during the extended low-temperature cooking process is what transforms this tough cut into a tender, flavorful final product. During the cook, you may encounter a stall around 150–160°F, where the internal temperature plateaus due to moisture evaporation. Monitoring your brisket with a meat thermometer helps you navigate this crucial phase before the temperature resumes its climb toward the target finish temperature. Allow your brisket to rest for at least 30 minutes after reaching the target internal temperature to retain the juices and ensure optimal tenderness.

Wide Compatibility: This grill ambient probe works with Traeger Pellet Grills (except PTG) and Z-Grill. Replace old RTD probes seamlessly to maintain grill efficiency.

【Compatiable】: Our Traeger control panel fits most Traeger wood pellet grill models (except PTG), ideal Traeger Pro controller for Traeger parts replacement BAC236.
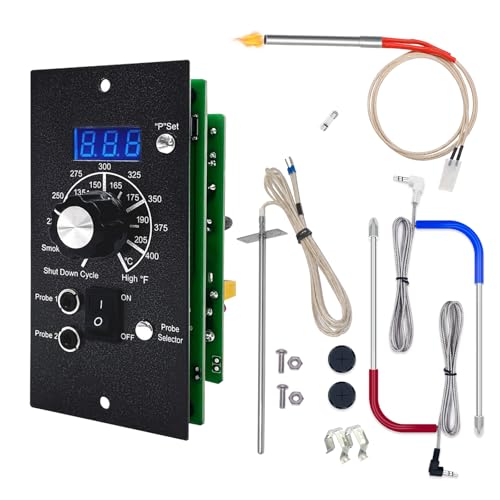
Compatibility: ✔ Direct replacement for Traeger models: Pro 20, 22, & 34, Texas Elite 34, Lil Tex 22, Junior Elite 20, Ridgeland, Heartland, Mesa 22, Century 22/34, Silverton (2019) (Compatible with BAC365/BAC236 systems). ✖ Excludes: Junior, Tailgater, Bronson grills.
Calculating Cooking Time for Your Brisket
How long you’ll need to smoke your 10-pound brisket depends primarily on temperature consistency and the brisket’s individual characteristics. You’ll typically require 10-12 hours at a steady 225°F, though this varies based on thickness, breed, and ambient conditions.
Use the 90-minute-per-pound baseline for trimmed weight as your estimation starting point. Monitor progress through phases: expect 6-7 hours unwrapped to reach 165°F, then 5-8 hours wrapped until you hit 197°F in the thickest part using probe placement in multiple locations. For best results, use hardwood like oak and cherry to ensure optimal smoke flavor and consistent heat throughout the cooking process. Remember that brisket thickness, not just weight, is the primary factor determining your actual cooking time. Spritzing your brisket with apple cider vinegar during the smoking process helps maintain moisture and enhances the overall flavor profile. Testing for tenderness by probe ensures your brisket has reached the ideal texture before removing it from the smoker. Using a water pan during cooking helps keep the meat moist and prevents drying out.
Once you’ve pulled your brisket at the target temperature, allow a resting duration of at least 20-30 minutes. This critical step lets juices redistribute, ensuring ideal tenderness and moisture retention throughout your finished product. Wrapping your brisket in pink butcher paper during the final cooking phase helps retain moisture and accelerate the cooking process while developing a desirable bark. Extended resting periods of 1 to 4 hours allow the connective tissues to break down fully, resulting in superior tenderness and juiciness.
Understanding the Stall Phase
You’ll likely encounter a mysterious temperature plateau somewhere during your smoking journey, typically around the 6-hour mark when your brisket’s internal temperature reaches 150–170°F. This phenomenon, called the stall, occurs when evaporative cooling from your meat’s surface counteracts the smoker’s heat energy.
Understanding this thermodynamic process helps you employ effective evaporative cooling strategies for overcoming temperature plateaus. You can increase your smoker temperature to 250–275°F, providing additional heat energy to push through the stall faster. Alternatively, wrapping your brisket around 165–170°F traps moisture inside while accelerating the cooking process. The Texas Crutch method, whether using foil or butcher paper, is a proven technique that experienced pitmasters regularly employ to reduce stall duration. This moisture retention prevents the slow release of moisture from your meat’s pores and cells, which would otherwise extend the cooling effect. The combination of radiant heat, conduction from the smoker chamber, and convection currents all work together to break down the meat’s collagen during this critical phase. Maintaining a water pan inside your smoker provides consistent moisture that supports the collagen breakdown process essential for achieving that tender, juicy result. Proper airflow management through your smoker’s vents and dampers helps regulate the convection currents that distribute heat evenly around your brisket during the stall phase.
The stall typically lasts 1–5 hours depending on humidity, airflow, and meat size. Once surface evaporation slows and collagen begins breaking down, your internal temperature resumes climbing steadily toward your target doneness level. A dry rub seasoning applied before smoking can enhance the brisket’s flavor development throughout this extended cooking process. Monitoring your brisket’s internal temperature with a reliable thermometer rather than relying solely on time estimates ensures you achieve optimal tenderness and juiciness.
Monitoring Internal Temperature
Temperature serves as your primary guide once you’ve pushed through the stall, though it shouldn’t be your only indicator of doneness. Your target range sits between 200–210°F in the thickest part of the flat, with 203°F offering consistent results across most smoking methods. Using a meat thermometer is essential to ensure you’re accurately measuring the internal temperature throughout the cooking process.
However, measuring probe resistance matters more than hitting an exact temperature. Insert your meat thermometer into multiple spots, verifying even doneness throughout the brisket. The probe should glide through with minimal resistance, feeling like you’re poking softened butter. A properly cooked brisket will hold its moisture because collagen converts to gelatin, which can retain substantial liquid within the meat. Before wrapping your brisket, allow adequate time for bark formation to develop on the exterior, which typically occurs around 160-170°F. For serious pitmasters, investing in high-accuracy instant-read thermometers like the ThermoWorks Thermapen ONE can eliminate guesswork and ensure precise temperature readings across all smoking stages. Skipping the resting period after smoking will result in a dry brisket and missed moisture reabsorption, so plan to rest your brisket in a cooler until the internal temperature drops to around 140°F. Just as with smoked ribeye, proper resting allows juices to redistribute throughout the meat for optimal tenderness and flavor.
Once you’ve reached 195°F, maintain this temperature zone for at least 30 minutes to allow proper connective tissue rendering. Following the general smoking principle of 35 to 40 minutes per pound ensures your brisket reaches optimal tenderness while developing a flavorful exterior. This combination of temperature monitoring and tactile feedback guarantees your 10-pound brisket finishes perfectly cooked.

Fast & Accurate: Get precise readings in just 1 second with ±0.9°F accuracy. NSF Certified for trusted food safety, this digital food thermometer features a 4.3 inches food-grade stainless steel meat probe, perfect for grilling, frying, baking, making candy and more

【Fast & Accurate】Our meat thermometer digital delivers accurate readings within ±1°F in just 1–2 seconds, with a wide temperature range of -58°F to 572°F (-50°C to 300°C). No more waiting over the heat - know your food's exact temperature instantly.

【8X Faster + 4X More Precise】: Upgraded with an industrial-leading professional thermocouple sensor, Themomonster meat thermometer digital with NIST certified ±0.5℉ precision provides you the accurate temperature of your food in just 0.5 Seconds.
Wrapping Techniques to Speed Up Cooking
When your brisket stalls around 165°F, wrapping it strategically becomes your best tool for pushing through that temperature plateau. You’ve got two excellent options: foil or pink butcher paper.
Foil creates a leak-proof seal that traps moisture exceptionally well, reducing cook time by 6-10 hours. Center your brisket on heavy-duty Reynolds Wrap, fold edges together tightly, then return it seam-side down to your smoker. However, foil can result in a less desirable “steamed” texture compared to butcher paper.
Pink butcher paper offers a balanced approach. Spray 36-40 inches of paper with liquid to increase pliability, place your brisket near one end, then roll tightly while tucking ends underneath. This method maintains moisture retention while still allowing bark development on your meat’s exterior. Like the Texas Crutch technique used for ribs, wrapping your brisket with liquid helps accelerate the cooking process significantly. Similar to the pre-cooking phase, wrapping helps render fat and tenderize the meat while developing deeper flavors. Lower temperature smoking, like the 180-degree approach, also requires longer cooking times to properly break down connective tissues and achieve tenderness. For added juiciness, consider wrapping with butter and brown sugar inside the paper, a technique that keeps your meat tender throughout the cooking process. Strategic wrapping maintains juiciness while balancing cooking speed with flavor development, much like moderate temperature smoking methods.
Both techniques accelerate cooking substantially while preserving the juicy results you’re after. The Texas Crutch method also significantly decreases overall cook time by preventing your meat from spending 6 to 10 hours stuck in the stall phase.
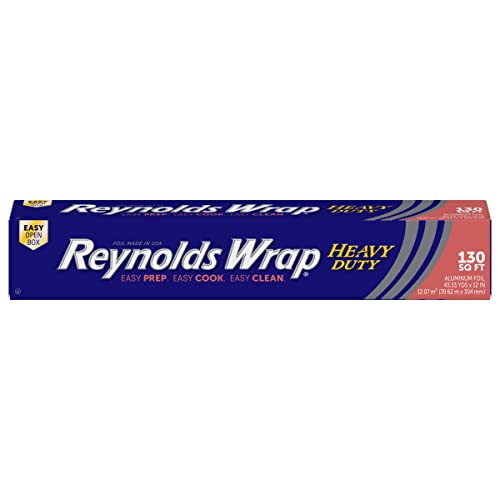
Package Includes-One (1) Reynolds Wrap Heavy Duty Aluminum Foil Roll measuring 130 feet long by 12 inches wide (130 square feet total)

Package Includes: One (1) Reynolds Wrap Heavy Duty Aluminum Foil Roll measuring 50 feet long by 12 inches wide (50 square feet total)

Package Includes: One (1) Reynolds Wrap Pitmaster’s Choice Extra Thick Aluminum Foil Roll measuring 25 feet by 18 inches wide (37.5 square feet total)
Identifying When Your Brisket Is Done
Now that you’ve wrapped your brisket and it’s working through that final phase, knowing when to pull it from the smoker requires more than just watching the clock. You’ll need to verify doneness through three methods: temperature, time in zone, and probe resistance.
First, guarantee your brisket reaches 200-205°F in the thickest section. However, temperature variability between smokers means you shouldn’t rely solely on thermometer readings. After hitting 195°F minimum, leave your brisket in the 195-203°F zone for at least 30 minutes. Using wireless temperature probes allows you to monitor these critical temperature thresholds remotely without constantly opening the smoker and losing heat. This resting period within the ideal temperature range enables collagen breakdown into gelatin, which is essential for achieving that perfect tender and succulent texture. Models with multiprobe capability and strong wireless range give you the flexibility to track both grate temperature and meat doneness simultaneously throughout this critical final stage. For the fastest and most accurate readings during final verification checks, consider keeping an instant-read thermometer on hand as a backup confirmation tool. Maintaining consistent smoker temperature throughout the cooking process ensures even cooking and predictable results. Top-rated options like the Thermapen ONE offer one-second readings that provide quick verification when you need final confirmation. Most experienced pitmasters recommend smoking brisket at 225-250°F to achieve optimal tenderness and smoke penetration.
Next, test probe resistance by sliding a toothpick through the meat. It should glide like butter with minimal resistance, confirming connective tissue breakdown. This tactile confirmation separates perfectly tender brisket from undercooked meat, regardless of temperature alone.
The Importance of Resting Your Meat
All your meticulous work smoking that brisket—monitoring temperatures, managing smoke, wrapping at the right moment—gets undermined the instant you slice into meat that hasn’t rested. Resting allows muscle fibers to relax, redistributing moisture back into the meat. Without rest, juices flood your cutting board, leaving you with dry, tough results despite perfect cooking. Just as maintaining consistent temperature is critical throughout the smoking process, allowing adequate resting time is equally essential to your final product.
Here’s what you need: a proper rest container that maintains your ideal resting temperature while the brisket cools gradually. A minimum two-hour rest enables juice redistribution and allows collagen to continue gelatinizing, thickening the meat’s texture. Extended resting—up to four hours—further enhances tenderness and moisture retention. During this critical resting phase, gelatin thickens as meat cools, which traps more moisture in the meat when you slice it. For resting periods beyond one hour, an insulated cooler prevents the brisket from cooling to unsafe temperatures while maximizing the benefits of carryover cooking. Proper storage practices, including maintaining consistent temperatures after your brisket has rested and cooled, will help preserve your smoked meat for several days if refrigerated. This patience differentiates mediocre brisket from exceptional barbecue.
Slicing and Serving Your Smoked Brisket
How you slice your brisket determines whether all those hours of careful smoking translate into an exceptional eating experience. You’ll start by separating the flat from the point using the fat layer as your guide, then tackle each section with different cutting angles. For the flat, slice against the grain in quarter-inch pieces using long, smooth strokes without pressing down. The point requires rotating each half ninety degrees before slicing to guarantee tenderness.
Your slice presentation matters equally. Arrange uniform slices neatly on a platter, keeping the lean flat separate from the moist point for authentic Texas-style service. Remove flavorful end cuts as chunks before main slicing. Allow the serrated knife to do the work rather than applying excessive pressure during the slicing process. Using quality grill tool sets with proper cutting implements ensures you have the right equipment for achieving clean, professional slices. For optimal results, consider investing in bristle-free hybrid tools that balance durability and performance when handling your finished brisket. A well-maintained stainless steel cutting tool provides the reliability and edge retention necessary for cleanly separating meat fibers without tearing. When selecting your cutting tools, prioritize replaceable-head designs for easier maintenance and long-term cost effectiveness, as these designs offer the same longevity benefits found in quality grill cleaning equipment. Resting the brisket fully before you begin slicing ensures the meat retains its juices and tenderness. This methodical approach ensures consistent portions and maximizes the tender, juicy results your smoking technique deserves.

[Different Thickness] - CUSIMAX 200W electric meat slicer adopted the high quality blade. Precise adjustable thickness from super thin to approximately 15mm thick for slicing various of food. It is great for cutting beef jerky, ham, deli sandwiches, charcuterie boards, cold cuts, hard cheeses, fruit, vegetable and bread, sliced fruits for dehydrating, party platters, appetizers and more
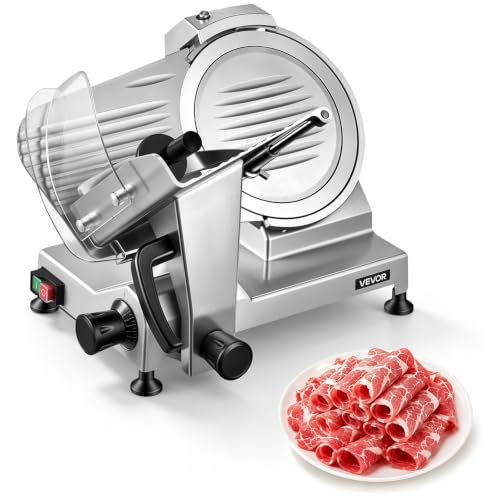
10" Blade: The 10" meat slicer features an upgraded 45# carbon steel blade with a wider cutting surface. The built-in sharpening stone keeps the blade sharp, allowing you to easily handle various ingredients of different textures, including frozen meats, raw meats, cooked meats, and hams.

Powerful 200W DC Motor: The meat slicer is equipped with a 200W DC motor, delivering stable torque and lower noise operation, making slicing more efficient and reducing kitchen noise for a smoother experience