
You’ll smoke chicken legs perfectly in 1.5 to 2 hours total by starting low at 225-275°F for the initial phase, then finishing hot at 300-325°F for crispy skin. Target an internal temperature of 165-170°F minimum, though dark meat benefits from 175-180°F. Pat your legs dry, season them well, and refrigerate for at least two hours before smoking. Flip halfway through for even cooking. The specific techniques that’ll elevate your results beyond basic smoking await below.
Understanding Smoking Temperatures for Chicken Legs
Getting the temperature right is fundamental to smoking chicken legs successfully. You’ll want to start your smoke duration at a low temperature between 225-275°F for approximately 90 minutes to 1.5 hours. This initial phase allows smoke penetration while preventing leathery skin from developing on your chicken legs.
During this stage, you’re targeting an internal temperature of 165-170°F. Apply an apple cider vinegar or butter spritz 2-3 times to sustain moisture throughout the process. If you’ve employed brine techniques beforehand, this low-temperature phase secures proper absorption of smoke flavors without drying out your meat. Maintaining 275°F as your maximum initial temperature safeguards against moisture loss while permitting optimal smoke penetration and flavor development. Using an instant-read thermometer is essential to monitor doneness precisely and ensure your chicken legs reach the proper internal temperature. For best results, consider using fruitwoods like apple or cherry to complement the meat and provide a sweet and smoky flavor to your chicken legs. Drizzle your chicken legs with olive oil before seasoning to ensure the rub adheres properly and prevents the skin from becoming tough and chewy. Some pitmasters recommend finishing at a higher temperature around 300-325°F to achieve crispy skin without burning. After smoking, you can use direct heat or broiling as a finishing step to enhance the crisp texture of the skin. Continuing to cook until the internal temperature reaches 175-180°F allows the connective tissues to break down completely for exceptionally tender meat. After removing the chicken from the smoker, resting for 5-10 minutes helps redistribute the juices for best texture and flavor.
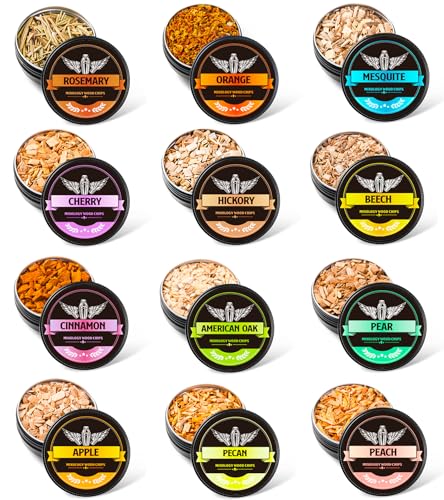
Assorted 12 Premium Smoking Flavors: This set includes 9 smoking wood chips of apple, cherry, oak, mesquite, pecan, pear, peach,hickory, beech wood and 3 herbs and spices including organge, rosemary and cinnamon,each offering its own distinct taste journey. Total 12 assorted of flavors allow you to explore infinite endless smoking possibilities
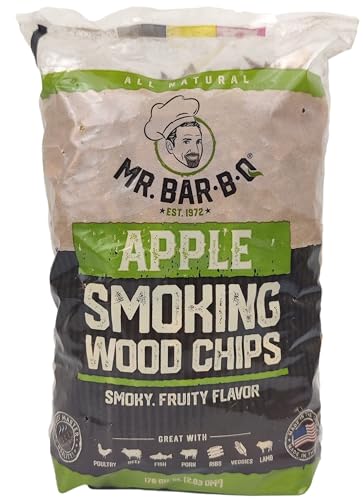
1.8 LB APPLE WOOD CHIPS FOR SWEET & FRUITY SMOKE FLAVOR – Elevate your grilling and smoking with this 1.8-pound bag of premium apple wood chips, ideal for infusing meats, poultry, seafood, and veggies with a mild, sweet, and fruity aroma. Perfect for use in charcoal grills, gas grills, electric grills and smokers, these high-quality smoking chips deliver consistent flavor and slow, even smoldering for delicious results. A must-have for BBQ lovers, pitmasters, and home cooks who want to enhance outdoor cooking and gourmet meals with a signature touch of natural smoke.

Cherry BBQ Smoker Extra Fine Wood Chips. Ignite quickly and combust completely to create a delicate smokey flavor. The essential fuel for your best BBQ yet - perfect for Memorial Day kick-offs, Father’s Day gifting, 4th of July feasts, and every backyard barbecue all summer long.
Preparation Steps for Perfectly Seasoned Legs
Three critical preparation steps separate mediocre smoked chicken legs from exceptional ones: proper drying, strategic seasoning, and thoughtful timing.
Start by patting your chicken legs thoroughly with paper towels. This removes surface moisture that inhibits browning and prevents steam from forming beneath the skin during smoking. Multiple passes guarantee complete drying. For even better results, consider air-drying the chicken uncovered in the fridge overnight to further remove surface moisture and promote crispier skin.
Next, combine your dry ingredients—brown sugar, smoked paprika, garlic powder, onion powder, salt, pepper, and cayenne—in a shallow bowl. Brush your legs with olive oil to facilitate even coating distribution. Dredge each piece until all surfaces, including undersides and thighs, receive complete coverage. Adjust ingredient proportions based on your heat preferences. For optimal flavor development, ensure you store the dry rub in an airtight container if preparing in advance, as this preserves the potency of your spice blend. The combination of flavors creates an exceptional depth that enhances your final smoked result.
For the best results, refrigerate your seasoned legs for at least two hours. This allows spices to penetrate the meat deeply. However, immediate cooking remains viable when time constraints exist. For enhanced crispiness, you can apply kosher salt during the air-drying process before seasoning. Just as light cleaning after each grilling session prevents buildup on grates, maintaining clean grill surfaces ensures your chicken legs cook evenly without sticking. Consider using flavorful woods such as apple, hickory, or mesquite to enhance the smoke profile during cooking. After cooking, let the chicken legs rest before serving to allow juices to redistribute throughout the meat.
Cooking Times at Different Temperature Ranges
Temperature control dramatically influences both your cooking duration and the final texture of your smoked chicken legs. At 225°F, you’ll need 1.5 to 2 hours total, though you’ll risk gummy skin despite deep smokiness. The 250°F range offers preferred smoking times of 1.5 hours, balancing flavor without drying meat. For faster results, 275°F reduces cooking to approximately one hour while maintaining juiciness and superior skin texture.
Multi-stage approaches work exceptionally well. Start low at 225-250°F for 30-45 minutes, then crank to 375-450°F for 20-30 minutes to crisp the exterior. This method maximizes smoke absorption before finishing with preferred resting times of 5-10 minutes, allowing juices to redistribute throughout the meat for ideal tenderness and flavor retention. The low-and-slow method allows fat and connective tissues to break down slowly, keeping the chicken moist and tender throughout the cooking process. Basting during cooking helps lock in moisture and prevents the meat from drying out during the smoking process. Using hickory or mesquite wood chips enhances the overall flavor complexity during the low-temperature smoking phase. For a milder flavor profile, consider apple or cherry wood which provides sweet fruity notes that complement poultry beautifully. A ThermoPro Instant Read Thermometer ensures you accurately monitor the internal temperature progression from 100°F to the final 185°F target. Flipping the chicken legs halfway through smoking promotes even cooking and consistent smoke penetration on all sides of the meat. Testing doneness with a probe or toothpick provides a reliable tactile indicator that the meat has reached optimal tenderness.


Achieving Optimal Internal Temperatures
While your smoker’s temperature settings determine how long chicken legs cook, what truly matters is confirming they’ve reached the right internal temperature. You’ll want to probe the thickest part, avoiding bone contact, using a digital thermometer for accuracy. Food safety guidelines establish 165°F as the USDA minimum, yet dark meat benefits from 175-180°F for ideal, preferred, or supreme tenderness and juiciness. Check multiple legs for consistency before removing them. This higher range prevents the rubbery texture that undercooked dark meat develops. After reaching your target temperature, rest the legs five minutes before serving. Serving size recommendations typically call for two leg quarters per person, so adjust your batch accordingly. For best results, use pure hardwood pellets such as pecan or a hardwood blend to enhance the smoky flavor profile of your chicken legs. Top brands like Lumberjack and Bear Mountain BBQ offer 100% natural hardwoods with no fillers or additives for clean-burning performance. Begin your cook at 225°F for 1 hour to establish a proper smoke ring before increasing heat. To achieve crispy skin, consider raising your smoker temperature to 375-400°F for 10-15 minutes after the initial smoking to dry and brown the exterior. Similar to smoking butterflied chicken, the low-and-slow method typically takes 4-6 hours to fully develop deep smoke penetration and render the fat properly. Maintaining thin, blue smoke throughout the cooking process ensures the best flavor without bitterness. A wireless meat thermometer inserted in the thickest part allows you to monitor temperature without opening the smoker and losing heat. Temperature verification trumps time estimates—your thermometer confirms doneness, not the clock.
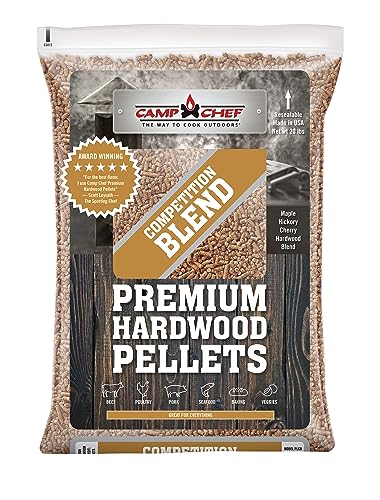
Maple, Hickory, and Cherry Blend: Competition blend is the Jack of All Trades. It's great with poultry, pork, baking, veggies, beef, and seafood. HARDWOODS: Camp Chef Hardwood bbq pellets are not a byproduct. They are 100% pure virgin hardwoods.

Gourmet Blend BBQ Flavor: Take your grilling to another level by using this pack of Gourmet blend wood pellets which provides a sweet tasty finish to any red meats, poultry, or vegetable dishes

Top 4 hardwoods only
Techniques for Crispy, Golden Skin
Achieving crispy, golden skin on smoked chicken legs requires you to master moisture removal and heat management—two interconnected processes that transform flabby skin into a crackling exterior. Start by brining your legs 4-24 hours, then air-dry them on an elevated wire rack for 4 hours. Pat the skin completely dry and apply a salt-heavy dry rub mixed with cornstarch to accelerate moisture extraction.
During smoking, position your legs on upper grates with spacing between pieces to maximize smoke distribution enhancement. Begin at 225°F for 30 minutes to establish smoke flavor, then increase to 275-325°F. Avoid misting or spraying your chicken legs during the cooking process to maintain skin crispness and prevent the exterior from becoming soggy. Near completion, bump temperature to 375-475°F for 2-3 minutes, ensuring skin texture improvement through fat rendering and browning. Remember that high heat should not be skipped, as it is the most critical factor in achieving the ultimate crispy exterior. Use a meat thermometer inserted in the thickest part of the leg to verify doneness and prevent overcooking. Ensure the internal temperature reaches 165°F for food safety and optimal texture. After cooking, rest the chicken for several minutes to allow juices to redistribute throughout the meat. This combined method of lower temperature smoking followed by high-heat finishing delivers results similar to expert grilling techniques. This graduated heat approach delivers ideal results consistently. When sharing leftover smoked chicken with pets, remember that plain cooked poultry is safe while heavily seasoned or smoked meats should be avoided.

THE PERFECT FATHER’S DAY GIFT FOR BBQ LOVERS – Looking for Father’s Day gift ideas for dad, Father’s Day gifts for husband, or BBQ gifts for men? Honey Killer Bee delivers award-winning sweet barbecue flavor that’s perfect for grill masters, pitmasters, and backyard cooks alike.

BOLD, SMOKY TASTE: Cattlemen’s Cowboy Rub delivers a bold flavor profile with a blend of hickory smoke, molasses and coffee, infusing your favorite BBQ dishes with an irresistibly robust taste

Citrus and spice seasoning for chicken dishes
The Two-Phase Smoking Method Explained
The two-phase approach fundamentally transforms how you’ll cook chicken legs by dividing the process into distinct stages that each serve a specific purpose. You’ll start with Phase One at 225°F to 250°F for 1 to 1.5 hours, allowing smoke penetration while your meat reaches 165°F to 175°F internally. During this low-and-slow stage, efficient airflow management and consistent smoker performance guarantee even cooking. You’ll spray apple cider vinegar 2-3 times to maintain moisture. Then you’ll shift to Phase Two, boosting your smoker to 375°F to 400°F for 10-30 minutes. This high-heat finish develops exterior characteristics while pushing internal temperature to 175°F to 185°F. Raising the temperature toward the end helps crisp the skin while maintaining juicy meat underneath. You’ll apply barbecue sauce during the final 5-10 minutes, creating that signature glazed finish. Using a leave-in thermometer throughout both phases ensures you’re monitoring internal temperatures accurately without disrupting the cooking process. Selecting fruity woods like peach, cherry, and apple during Phase One will complement the sweet-smoky flavor profile you’re developing throughout the smoking process. For optimal results, dry brine your chicken drumsticks for approximately 2 hours before smoking to enhance moisture retention and flavor development. After smoking, let the chicken rest for 10 to 15 minutes to allow juices to redistribute for moist, flavorful meat. Consider spraying with apple juice periodically during the smoking process to help maintain surface moisture and enhance flavor development. You can use wood chunks or chips depending on your smoker setup, with chunks providing longer, steadier smoke output ideal for the extended Phase One cooking period.
Monitoring and Resting Your Smoked Chicken
Once you’ve migrated to Phase Two, you’ll need to monitor your chicken legs with precision to avoid overcooking while ensuring food safety. Digital thermometer calibration is essential before smoking begins—verify accuracy in boiling water beforehand. Probe placement importance can’t be overstated; insert your thermometer into the thickest part of the thigh, avoiding bone contact, which skews readings.
Set your high-temp alarm at 180°F for ideal tenderness. Continuously monitor without opening your smoker door, preserving heat stability. For serious pitmasters demanding maximum precision, consider an instant-read thermometer like the ThermoWorks Thermapen ONE with its ±0.5°F accuracy and 1-second read times. Alternatively, multi-probe wireless systems allow for remote monitoring so you can track multiple chicken legs simultaneously without disturbing your cook. If you need to monitor from inside your house, radio‒frequency thermometers provide superior range compared to Bluetooth-only models that may lose signal through walls. Once you’ve pulled your legs at target temperature, rest them covered with foil for 5-10 minutes. This resting period allows juices to redistribute throughout the meat, delivering superior moisture retention and tenderness that rushes from the smoker can’t achieve. When reheating any leftover smoked chicken legs, ensure the internal temperature reaches 165°F to maintain both food safety and quality. Chicken legs should reach 10-15 degrees higher temperatures than breast meat to ensure proper doneness throughout the thigh. For bone-in chicken legs, plan to add a half hour to your total cook time to ensure the meat reaches proper doneness throughout. If you’re seeking crispy skin, consider finishing your chicken legs at 400°F after the low-and-slow smoking phase is complete.
Wood Selection and Flavor Considerations
Your choice of smoking wood fundamentally shapes the final flavor profile of your chicken legs, making it equally important as temperature control and resting technique. You’ll find that applewood and cherry deliver subtle fruity notes complementing chicken’s delicate meat, while pecan introduces mild nutty sweetness with earthy undertones. For bolder preferences, hickory provides robust smoke intensity variation without overwhelming poultry like denser meats. Each wood species has a distinct organic makeup that affects the aroma and flavor during combustion, ensuring nuanced flavor dimensions that truly enhance your final dish.
You should prioritize wood moisture content when selecting your fuel—properly conditioned wood guarantees consistent smoke absorption rather than excessive steaming. Oak offers balanced smoke delivery, allowing chicken flavors to shine through. If you’re smoking legs specifically, apple’s sweet-smoky combination pairs exceptionally well. Cherry wood is particularly forgiving for beginners while imparting a mild, sweet smoke and an attractive mahogany color to the finished chicken. Consider mixing different wood types to add layers of complexity and create unique flavor blends that enhance your chicken legs. Avoid quick-burning mesquite for chicken legs; instead, choose moderate to slow-burning woods enabling extended flavor infusion during your smoking session. Hickory is particularly versatile for chicken, lending a sweet, bacon-like note that enhances the poultry without overpowering its natural flavor. When selecting charcoal as your heat source, opt for natural hardwood lump varieties that burn hotter and cleaner than briquettes, providing better temperature control for your smoking session. Red oak and post oak deliver stronger smoke profiles that work well when you want more pronounced wood flavor on heartier chicken preparations like legs and thighs. Always aim for thin blue smoke during your cook, which indicates clean combustion and prevents harsh, bitter flavors from developing on your chicken legs.


MATERIALS: Made from 100% natural seasoned hardwood with no unwanted byproducts, our wood chunks burn cleanly and evenly.

Apple BBQ Smoking Wood Chunks. Ignites quickly and combusts complete to create a delicate smokey flavor. The essential fuel for your best BBQ yet - perfect for Memorial Day kick-offs, Father’s Day gifting, 4th of July feasts, and every backyard celebration through the height of grilling season.