You’ll achieve perfectly grilled corn without husks by brushing each cob with neutral high-heat oil, seasoning generously with kosher salt and pepper, then grilling at 375-400°F. Rotate every 3-4 minutes for balanced char development across all sides. Cook approximately 10-12 minutes at 450°F or 16 minutes at 400°F, adjusting duration based on your heat level. Monitor closely to prevent charring before kernels cook through. Uncover advanced techniques for flawless results throughout this guide.
Preparing Your Corn for the Grill
Before you grill, you’ll need to shuck your corn completely by grasping the tassel and top leaves, then pulling down firmly to the base of the ear. Peel back the husks without detaching them, then remove all silk by hand using firm, directional pulls. Strip away remaining husks and silks entirely for naked corn. Our corn preparation tips emphasize thorough inspection—rub the cob firmly to ascertain no stray silks remain on the kernels.
Once shucked, apply knife techniques to pat the corn dry if previously soaked. Brush each cob lightly with neutral high-heat oil or avocado oil, coating all sides evenly to prevent sticking and promote char. Season liberally with kosher salt and pepper directly on the oiled surface, guaranteeing consistent coverage before grilling. For added depth of flavor, consider using mild wood chips such as apple or cherry in a smoker box on your grill. Preheat your grill to medium heat (about 350°F to 400°F) before placing the corn on the grates. For optimal results, consider soaking your corn in water for 30 minutes before brushing with oil to ensure even moisture retention throughout the grilling process. Adding cold salted water during the soaking process can further enhance flavor and help achieve better results. Look for thick, plump kernels and avoid ears with missing kernels to start with the highest quality corn. Using fresh corn ensures the best taste and sweetness when grilling without husks. Plan for a grill timing of approximately 7 to 10 minutes on medium-high heat, rotating the corn regularly to achieve even charring and attractive grill marks.

Graza Frizzle Oil Made from 100% Olives: A neutral-flavored, high heat cooking oil made from 100% peak harvest olives. With a smoke point of up to 490 degrees, Frizzle is your high-heat kitchen hero. 1 bottle/750ml.

100% GRAPESEED OIL BULK SIZE: Expertly crafted by The Olive Oil People using wine grape seeds imported from France
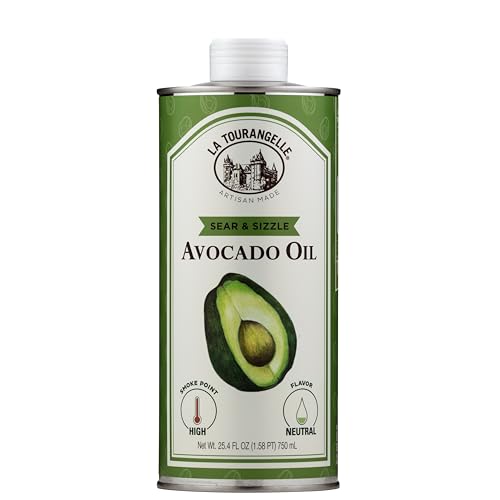
Healthy High Heat Oil: Expeller-pressed from fresh avocados and protected in our iconic light-blocking tin, this smooth, neutral oil preserves freshness and flavor. Fire up the grill, sear the perfect steak, or master a golden, crispy fry — all without losing the natural taste of your ingredients. With a high smoke point and everyday versatility, Sear & Sizzle should be every kitchen’s secret weapon.
Selecting the Right Grill Temperature
Once your corn’s prepped and oiled, getting the grill temperature right’ll make the difference between perfectly charred kernels and burnt exterior with undercooked centers. You’ll want to target medium-high heat, which delivers a consistent grill surface temperature of 375-400°F. This range balances ideal char development with kernel tenderness without excessive burning.
Temperature consistency matters greatly when grilling husked corn. If you exceed 400°F, you’ll risk charring the exterior before kernels cook through. Gas grills stabilize at 375°F medium-high within minutes, while charcoal grills need about five minutes to reach this perfect range. For charcoal grills, using adjustable grates allows you to raise or lower the cooking surface to fine-tune heat intensity and prevent overcooking. Rotating the corn frequently during the 10-15 minute grilling window ensures even heat distribution across all sides. For best results, rotate every 3-5 minutes to achieve uniform charring on all sides.
Preheating for 5-10 minutes confirms your grill surface reaches full temperature capability. This preparation allows direct heat distribution over coals or burners, promoting even cooking throughout your corn. Preheating the grill to the proper temperature range is essential for achieving consistent results with any grilled vegetable. While medium-high heat works best for corn, understanding medium heat ranges between 300-400°F can help you adjust for other vegetables that require gentler cooking. Using direct heat cooking allows you to achieve quick, efficient results compared to the slow-cooking methods used with smokers. If outdoor grilling isn’t an option, you can achieve similar results using aluminum foil wrapping in a preheated oven at 350°F for 30 to 40 minutes.

✔ BLACK BBQ THERMOMETER - Choose from 3" face, 3" stem or 2" Face with 3" Stem; M8 Installation Nut Included

Material:This Grill Temperature Gauge is made of stainless steel to maximum durability and reliability.That is not only safe but also environmentally friendly
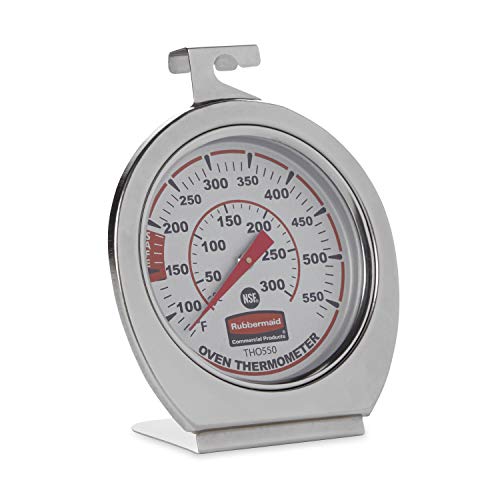
FOOD SAFETY: Thermometer displays true oven temperature instantly to ensure safe food preparation
Cleaning and Oiling Your Grill Grates
Clean grates are essential for preventing rust, ensuring even heat distribution, and keeping your corn from sticking during grilling. Start by heating your grill to high temperature, then use a nylon brush to scrape away stuck food particles while hot. For removing food residue effectively, apply a baking soda paste—equal parts baking soda and water—directly to the grates. Let it sit 15-20 minutes before scrubbing with a stainless steel brush. Rinsing thoroughly with water removes both the paste and loosened debris, which is crucial since heating combined grill residue creates carcinogenic substances that can affect your food’s safety and taste. Consistently cleaning your grates after each use makes deeper cleaning easier and prevents the hardening of food particles.
For maintaining grate condition long-term, consider a vinegar soak using a 50/50 white vinegar and water solution for minimum 8 hours to eliminate rust without metal damage. After cleaning, dry your grates completely with compressed air or a warm oven, then apply a thin oil layer before reuse to prevent oxidation. After applying oil, heat the grill to allow the oil to create a protective non-stick surface that guards against future rust formation. For stubborn baked-on grease and grime, specialized barbecue grill cleaners can cut through buildup in just minutes with minimal scrubbing required on cold grates. When selecting a degreaser, match the cleaner strength to the level of carbonization—mild dish soap works for routine maintenance while heavy deposits may require industrial-strength formulas. After completing your grate maintenance, remember to empty and wipe the drip pan to prevent grease accumulation that can attract pests and create fire hazards. Once all parts are cleaned and dried, reassemble your grill and heat it to burn off residual cleaning solution or moisture.

[Safe Wire Brush & Scraper ] - Grill cleaning brush with sharp stainless steel grill scraper can easily scrub stubborn grease and dirt effortless. Our bbq brush tools reuseable after clean.It's also the perfect Father's Day gifts for dad, family, friends, and barbecue enthusiasts.

The long handle is suitable for cleaning during grilling, while the short handle is suitable for deep cleaning after cooling. This set is a cost-effective choice.

Extra Strong Ergonomic Handle - Still believe that as long as the bristles are stiff enough, the grill cleaning brush can live up to the name - a good barbecue brush? Of course not! A soft and sturdy handle with a stainless steel ring for hanging can make the clean work easier. No possibility such as the handle breaking up or snapped. You can succeed in using this BBQ cleaner for a very long time!
Understanding Optimal Cooking Times
With your grates cleaned and oiled, you’re ready to focus on timing—the factor that’ll make or break your corn’s texture and char. You’ll find that adjusting cooking duration directly correlates with your heat level. At 450°F, you’re looking at 10-12 minutes total. Drop to 400°F, and you’ll need roughly 16 minutes. Managing temperature fluctuations becomes critical here; inconsistent heat prevents uniform char development and kernel tenderness.
Rotate your corn every 3-4 minutes for balanced results across all kernel surfaces. This frequent movement eliminates hot spots and guarantees even charring. Visual cues matter too—when kernels begin blackening with moderate char marks visible, you’re approaching doneness. Remember that fresh sweet corn requires no boiling beforehand, allowing you to grill directly from preparation. Corn wrapped in foil or still in husk requires about 20 minutes to cook, significantly longer than husked corn on the grill. Similar to grilling other vegetables like yellow summer squash, which takes 4-8 minutes, the key is achieving tender results without overcooking to sogginess. When using indirect medium heat around 350°F to 375°F, expect slightly longer cooking times than direct grilling methods. Just as parboiling potatoes reduces overall grilling time by ensuring tenderness before hitting the grates, pre-cooking can streamline timing for various vegetables. For vegetables that require even less time, thick asparagus spears typically need only 6 to 10 minutes when placed perpendicular to the grill grates. A vegetable grilling basket prevents smaller items from falling through grates while ensuring even heat distribution across all surfaces. Monitor closely during final minutes; desired char level determines your exact removal time.
Mastering the Rotation Technique
Rotation is the cornerstone of huskless corn grilling—you’ll need to turn your ears every 2–5 minutes depending on your heat level and desired char intensity. Higher temperatures (450-500°F) demand shorter intervals to prevent burning, while lower settings (350-400°F) allow slightly longer gaps between turns.
Efficient rotation patterns require tongs or silicone pot holders to maintain consistent grill positioning without damaging kernels. Each side needs visible char marks for complete flavor development. Shorter rotation intervals (every 2-3 minutes) produce uniform char across all surfaces, while longer intervals work for medium heat applications. Without the natural protection of husks as a barrier, the kernels are more susceptible to direct heat exposure and require vigilant monitoring. Checking for doneness by inspecting the color and aroma of the corn will help determine when your ears have reached the desired level of charring.
Your total cooking time without husks typically ranges from 10-15 minutes. Monitor darkening color and observable searing patterns—uneven coloring signals insufficient rotation frequency, indicating you’ll need to adjust your technique for better heat exposure and kernel development. For an alternative cooking method, you can also wrap your seasoned corn in heavy-duty foil packets and grill them for similar tender results with easy cleanup. Place a grill mat for your deck beneath your cooking area to catch any drippings and protect your outdoor surface from grease and heat damage. Fire-resistant mats made from recycled tire rubber provide non-absorbent protection against grease while withstanding the high temperatures of gas, charcoal, or pellet grills. Look for mats with a raised lip to catch spills and ensure adequate coverage by choosing one that extends beyond your grill on all sides. Premium grill mats with superior non-stick properties can handle greasy foods and prevent flare-ups while simplifying cleanup after cooking.
Recognizing Signs of Perfect Doneness
Once you’ve mastered consistent rotation, identifying when your corn reaches peak doneness becomes your next pivotal skill. You’ll rely on multiple sensory indicators working together.
Visual cues tell the primary story: look for plump, fully filled kernels with bright yellow coloring and charred spots—but avoid total blackening. The husks should show good char without turning fully black. The kernels should display an intense yellow color indicating proper camelization of the starches.
Aroma signals provide integral confirmation. After 10-12 minutes, you’ll detect a strong cooked corn scent with emerging sweetness. This fragrant indicator, paired with your timer, guides your decision-making. For the most charred and tighter texture without husks, ensure you’re using direct heat zone placement on your grill throughout the cooking process. The entire grilling process typically takes about 10-15 minutes over medium-high heat with regular turning to achieve even charring.
Test texture by pressing kernels with your thumb—they should feel firm with retained crunch, never mushy. Similar to achieving golden grill marks on other vegetables, properly grilled corn shows distinct charred lines without becoming overly burnt. For optimal results, consider using a flat top grill which provides consistent heat distribution across the entire cooking surface. Outdoor flat top griddles excel at maintaining temperature consistency for even cooking, making them versatile alternatives to traditional grills for corn and other vegetables. Models like the Solo Stove Steelfire offer 486 sq in cooking surface that can accommodate multiple ears of corn simultaneously. You’re targeting that perfect moment where sweetness peaks before sugars dominate, creating toughness.
Preventing Burning and Overcooking
Perfect doneness means nothing if your corn chars beyond recognition, so managing heat and monitoring your grill becomes your immediate priority. You’ll prevent burning by maintaining steady medium-high heat between 350–400°F, which prevents rapid charring while ensuring even cooking.
Rotate every 2–3 minutes to distribute heat evenly across all surfaces. This frequent turning prevents any single side from overcooking due to prolonged exposure. Watch for golden-brown spots with grill marks—they signal you’re approaching your limit. Using tongs with rubber grips helps you safely handle the corn and rotate it without risking burns.
Remove corn from the grill at 15–20 minutes total cook time to halt the cooking process. Maintaining proper moisture levels requires avoiding excessive oil, which can cause flare-ups and uneven charring. Monitor internal temperature indirectly by checking kernel tenderness with a fork. Grilling corn with the husk on will result in steaming rather than charring, so proper preparation is essential for achieving the desired char marks. After grilling, clean your grates at the ideal temperature of around 400°F to soften grime for easier removal. Never leave corn unattended, as direct flame exposure demands constant vigilance. A quality bristle-free grill brush helps maintain clean grates without the safety risks associated with traditional wire bristles that can contaminate food. Regular maintenance of your grill ensures optimal functionality and prevents debris from burner ports from affecting heat distribution during your next grilling session. For routine grate maintenance, consider replaceable-head designs that offer both effective cleaning and lower long-term costs. Look for grilling tools with heat-resistant grips that protect your hands and provide better control during extended cooking sessions.
Achieving Even Char on All Sides
Every surface of your husked corn demands equal heat exposure to develop that coveted golden-brown exterior with blackened accents. You’ll achieve this through deliberate rotation and consistent heat distribution across your grill’s surface.
Position shucked corn directly over medium-high heat between 375-450°F, then rotate every few minutes to expose all sides equally. This frequent turning prevents hotspots from creating unevenly charred sections. Roll your cobs like hot dogs over the coals, ensuring each rotation brings fresh kernel contact with direct heat placement. However, be aware that placing shucked ears directly on the grill can burn off the sugars, making the kernels hard and sticky if you’re not careful with your heat management. Before grilling, brush the corn with oil to help retain moisture and enhance the charring process. For high-heat grilling, choose oils with high smoke points such as refined avocado, peanut, or canola oil to prevent burning.
Monitor for blackened spots appearing evenly around the entire cob. You’re targeting bright yellow kernels with golden-brown and black bits distributed uniformly across all surfaces. This typically takes 12-15 minutes total. Similar to grilling vegetables with dark brown grill marks, the char creates a smoky flavor that enhances the natural sweetness of the corn. Just as preheating your grill ensures proper heat control for vegetables, maintaining consistent temperature throughout the cooking process delivers uniformly charred corn. If outdoor grilling isn’t possible, you can achieve similar results using your oven or broiler indoors. Avoid lining your grill grates with aluminum foil, as it restricts airflow and creates uneven cooking with dangerous hotspots. The consistent rotation method guarantees steaming-hot tenderness with balanced smoky flavor throughout.
Serving Your Grilled Corn With Toppings
Your grilled corn’s true potential emerges once you’ve mastered the layering technique that transforms simple kernels into a cohesive dish. Begin with a base layer—mayonnaise, compound butter, or herbed goat cheese—that anchors subsequent toppings. Layer cheese selections strategically: parmesan delivers umami depth, while cotija complements spicy preparations. Add finishing touches through textural contrasts using bacon crumbles, crushed potato chips, or hot pepper flakes. For creative presentations, consider bold flavor profiles like chipotle mayo paired with parmesan or buffalo sauce with blue cheese. Fresh mint provides herbaceous punctuation. Sweet applications—honey-lime butter or maple bourbon butter—suit alternative preferences. Compound butters can also be brushed directly onto the corn for an irresistible honey-lime butter effect that works beautifully across multiple summer dishes. The sweet and spicy sauce enhances the grilled corn by balancing flavors that elevate it beyond simple seasoning. Each layer builds complexity; the interplay between creamy bases, assertive cheeses, and crunchy elements creates dimension that elevates your grilled corn beyond simple seasoning.

Material: the corn cob butter holder is made of durable plastic, cute in look and easy for you to use, it will cater to kids' preferences and also safe for them to use

Reliable material: the butter spreader is made of high quality plastic, which is durable and reusable, the corn cob butter holder are easy to use and clean, keep your hands clean when cooking

Talisman Designs' Butter Girl turns the messy process of buttering corn into clean fun and reduces waste; makes a great hostess or housewarming gift
Flavor Variations and Butter Options
The foundation of exceptional grilled corn rests on mastering compound butters and strategic flavor applications. You’ll build versatile butter flavors by combining room-temperature unsalted butter with fresh minced garlic, chopped herbs like parsley and thyme, and sea salt. For your ideal grilling method, apply half the mixture before cooking and the remaining portion immediately after removal from heat, preventing burning while maximizing flavor penetration.
You can customize further by incorporating spicy elements—chili powder, hot sauce, or smoked paprika—or creating Mexican-inspired profiles with lime zest and cumin. Pre-made seasoning blends streamline preparation. Consider layering umami depth through finely grated Parmesan or experimenting with fresh herb combinations based on seasonal availability. The garlic paste consistency created by pressing fresh garlic cloves ensures even distribution throughout the butter mixture for uniform flavor coverage. Doubling your compound butter recipe provides supply for multiple corn preparations or alternative applications, with leftovers storing well refrigerated for future use. A cast iron grill pan delivers superior heat retention for achieving those authentic char marks when outdoor grilling isn’t an option. The tall ridges of quality grill pans create defined grill marks that enhance both presentation and flavor development. Cast iron’s pre-seasoned surface makes it immediately ready for cooking corn and other vegetables without additional preparation. The induction compatible design of modern cast iron pans ensures versatility across different cooking surfaces and kitchen setups. This technique works seamlessly across gas, charcoal, and pellet grills, allowing you to apply consistent flavor profiles regardless of your preferred grilling equipment.

Steakhouse-style Butter : Blend this garlic herb seasoning with unsalted butter to create compound butter that melts perfectly over ribeye, filet mignon, or sirloin.

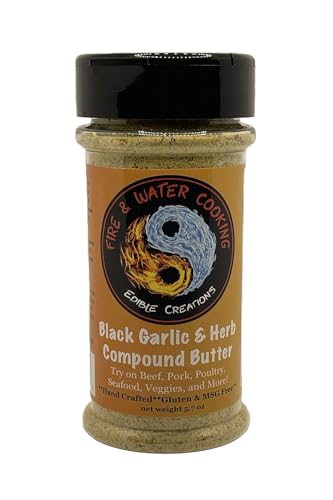
TEXAS-MADE COWBOY BUTTER MIX: Crafted by BBQ expert Jess Pryles, this blend creates a zesty, herb-loaded compound butter with citrus and a touch of heat. Proudly made in Texas with premium ingredients.
🍗 Awesome on poultry!