
You’ll smoke bone-in chicken thighs for approximately 1 to 1.5 hours at 225°F, monitoring smoke density consistently for ideal penetration. Target an internal temperature of 175-185°F in the thickest part of the thigh using an instant-read thermometer. Then raise your smoker to 300-400°F for 10-15 minutes to crisp the skin while maintaining juiciness. Rest the thighs for 5-10 minutes afterward to redistribute juices. The specifics of timing, temperature management, and glazing techniques will greatly enhance your results.
Preparing Your Chicken Thighs for Smoking
You’ll want to start by trimming excess fat and skin from your thighs, which improves smoke penetration and prevents flare-ups. Use a sharp knife to remove fat chunks and thin meat around bone edges, then unroll thighs to access remaining remnants. Pat everything dry with paper towels—this essential step enhances seasoning adhesion and promotes even smoke absorption.
Next, reshape trimmed thighs into tight cylindrical uniform pieces for consistent cooking. Drizzle bone-in skin-on thighs lightly with olive oil, avoiding over-oiling that could cause greasy texture or flare-ups.
For seasoning, combine brown sugar, paprika, smoked paprika, black pepper, kosher salt, garlic powder, onion powder, dry mustard, and cayenne. Apply your rub liberally across all sides, massaging it thoroughly, including under skin on bone-in cuts. Use approximately two tablespoons per two pounds of thighs. For extra crispy skin, consider air-drying your seasoned thighs in the refrigerator for a few hours before smoking. Let the seasoned thighs stand until your smoker reaches the proper temperature, allowing the spice blend to fully adhere to the meat. Consider brining or marinating your chicken thighs beforehand to lock in even more moisture and enhance flavor throughout the smoking process. You can also experiment with different wood choices such as hickory, pecan, maple, or fruitwoods like cherry to enhance the flavor profile of your smoked chicken thighs. Many home cooks find this super easy recipe to be straightforward and produce awesome results when followed carefully. Use an instant-read thermometer to check for doneness, as precise temperature monitoring is essential for perfectly smoked chicken thighs. The low-and-slow method at 225°F allows fat and connective tissues to break down slowly, helping keep your chicken moist throughout the smoking process.
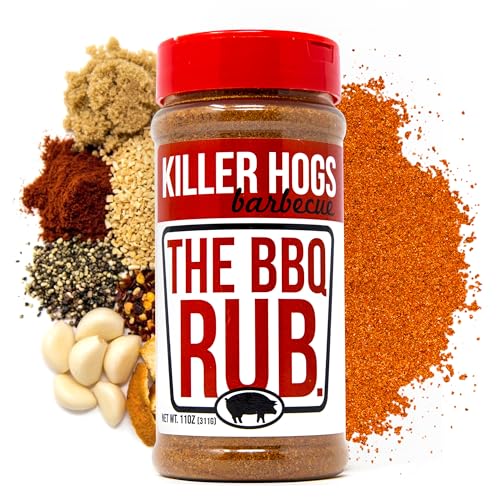
CHAMPIONSHIP PITMASTER FLAVOR: Created by the Killer Hogs Championship BBQ team, this legendary Killer Hogs BBQ Rub delivers a balance of sweetness, spice, and a subtle kick; This BBQ seasoning is ideal for beef, ribs, steak, burgers, pork, and chicken

The Ultimate Chicken Rub: This premium BBQ rub is crafted specifically to complement poultry. Its herbaceous, slightly sweet, and zesty flavor brings out the best in chicken, turkey, and even game birds—without overpowering their natural taste.

You'll be crowing about your latest creation after trying our beer can chicken rub. Comes in a bigger container to bring out flavors that will rule the roost and elevate all your recipes to the top of the pecking order.
Setting Up Your Smoker at 225°F
Once your chicken thighs are prepped and seasoned, getting your smoker to the right temperature is crucial for success. You’ll want to target 225°F measured at grate level—not your dome gauge, which reads 100°F higher. Start your fire using charcoal placement strategies suited to your smoker type: offset models require a small, consistent fire; Weber kettles work well with the snake method.
Let briquettes ash over for 15 minutes before adding them. Balance your bottom and top vents carefully to stabilize temperature. Monitor smoke density adjustments by observing airflow impact on burn rate. Using a digital meat thermometer will help you verify your smoker is maintaining accurate temperature, since built-in thermometers can be off by 20 degrees.
Before placing chicken, let your smoker stabilize for an hour, noting fuel amounts and temperature swings. This baseline data guarantees repeatability and helps you maintain that steady 225°F throughout your cook. For precise monitoring, consider a leave-in probe thermometer with wireless monitoring capabilities that tracks temperature without opening the smoker lid. Maintaining this temperature range stability prevents the meat from drying out or overcooking during the longer cooking time required for chicken thighs. Smoking at the 225-250°F range ensures tender, moist meat with optimal flavor development. Using a reliable meat thermometer is essential rather than relying solely on cooking time to determine when your chicken thighs are properly done. The burning charcoal creates radiant heat that transfers upward to cook the chicken while hot air circulates through convection when the lid is closed. For long smoking sessions, a multi-probe system allows you to monitor both meat and ambient temperatures simultaneously without constant lid lifting.

Smart Display Base with Control: The ThermoMaven G1 wireless meat thermometer features a versatile smart display base that offers real-time temperature readings and allows you to set temperatures directly on the device—no app required. With our user-friendly one-click setup, you can connect the probe, pair it with the base, and start cooking in seconds—no complicated setup needed!
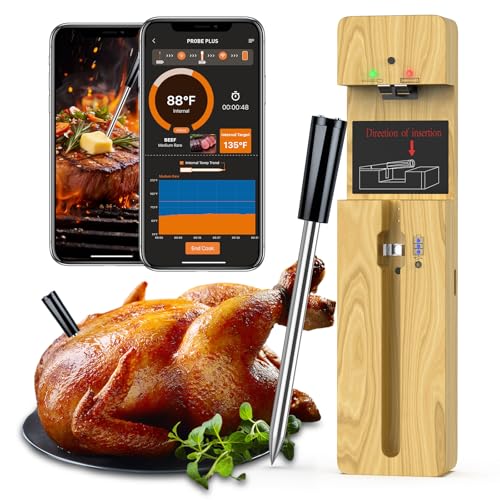
【100% Wireless Ideal for Cooking Enthusiasts】 The Meat Thermometer is completely wireless, giving you complete freedom and flexibility to cook. Plus, you can easily monitor your cooking progress with the free app for smartphones and tablets with iOS and Android.

Ultra-Long Wireless Range:Monitor your food from up to 3000 feet away with Sub-1G wireless technology, which has stronger penetration than bluetooth and delivers signals more stably. Perfect for outdoor BBQs, grilling, or large kitchens, giving you freedom to move without missing a temperature change.
Smoking Timeline and Temperature Progression
With your smoker holding steady at 225°F, the real work of transforming seasoned chicken thighs into smoky, tender perfection begins. You’ll spend approximately 1 to 1.5 hours in this initial phase, calculating total cooking time based on individual thigh thickness and bone-in versus boneless cuts. Monitor smoke density consistently—dense, thin blue smoke penetrates meat best while thick white smoke imparts acrid flavors. Leaving the skin-side up allows the fat to render from the top to the bottom throughout the smoking process.
After reaching 160°F internally near the bone, raise your temperature to 300-400°F for the finishing phase. This 10-15 minute burst at 400°F or hour-long stint at 300°F crisps skin while breaking down connective tissue. Your final target reaches 175-185°F for ideal tenderness. Use an instant-read thermometer rather than relying solely on elapsed time, as smoker consistency varies greatly. Chicken thighs are dark meat that benefits from higher final temperatures to maximize tenderness and juiciness. Smoking at around 225°F imparts smoky flavor and gently cooks the meat for a tender result. Insert your meat thermometer in the thickest part of the thigh to ensure you’ve hit the proper internal temperature without overcooking. Before smoking, patting the chicken dry ensures better seasoning adherence and promotes even cooking. After smoking, resting the chicken for 5 to 10 minutes helps redistribute the juices for best texture and flavor. Choose flavorful woods like apple, hickory, or mesquite to enhance the overall taste profile of your smoked chicken thighs.
Understanding Internal Temperature Targets
Temperature’s the critical variable that separates safely cooked chicken from perfectly smoked chicken thighs. You’ll achieve bacterial destruction at 165°F instantly, but dark meat demands higher temperatures for desired results. Target 175-180°F for bone-in thighs, where tissue breakdown occurs and connective tissues transform into gelatin, yielding succulent tenderness. Boneless thighs benefit from 170-175°F for complete collagen melting. Use a reliable meat thermometer, probing the thickest section while avoiding bone contact. Set your alarm at 175°F on leave-in devices for precise monitoring. Brining your thighs for 2 days before smoking enhances moisture retention and flavor development. Cook to temperature, not time—thigh size variations affect duration considerably. For optimal results, preheat your smoker to 275 degrees F before placing your prepared chicken thighs on the grate. Some pitmasters finish their smoked chicken thighs with a quick sear at higher temperatures around 375-425°F to achieve crispy skin while maintaining juicy meat. Using an instant-read thermometer is key to ensure the chicken reaches the safe and ideal internal temperature without overcooking. Start checking the temperature around the 2.5 to 3-hour mark to prevent overcooking and ensure optimal texture. Allowing the chicken to rest after smoking helps redistribute juices before serving. Monitor the internal temperature with a thermometer rather than relying solely on time for precision. This approach guarantees both food safety and the juicy, tender texture that distinguishes exceptional smoked chicken thighs.
Choosing the Right Wood for Flavor
Wood selection fundamentally shapes your smoked chicken thigh’s final flavor profile, making it as critical as temperature management. Your wood selection techniques should prioritize mild to medium woods that complement rather than overpower delicate poultry. Applewood delivers subtle, fruity aromatics enhancing chicken’s natural qualities, while pecan contributes mild nuttiness without overwhelming. Cherry balances sweetness with moderate smoke intensity, creating sophisticated depth. Oak provides reliable, consistent smoke that’s difficult to overpower. For best results, allow the smoke to burn clean and clear, or “blue smoke,” before adding your chicken thighs to ensure optimal flavor development.
When considering flavor profile considerations, avoid strong woods like mesquite that risk dominating chicken thighs. Combine woods strategically—pair applewood with cherry for complexity or use pecan solo for restraint. Apply lighter wood quantities since chicken absorbs smoke readily. Each wood species has distinct organic makeup that affects the final aroma and flavor outcome. Match your wood choice to your desired intensity level, ensuring your smoking experience delivers perfectly balanced results at 225°F. Additionally, maple wood chips offer another excellent mild option that works particularly well with poultry, providing a subtle sweetness without overpowering the chicken’s natural flavors. Hickory can add a sweet, bacon-like note to chicken when used in moderation, though its stronger profile requires careful application to avoid overwhelming the delicate meat. For longer smoking sessions, consider using wood chunks instead of chips, as they burn slower and maintain consistent smoke throughout the cook. Source your chips from trusted retailers like Best of the West, Bear Mountain BBQ, or Oklahoma Joe’s to ensure you’re getting 100% natural, fresh wood free from mold or pests. Never use softwoods like pine or cedar, as their high resin content produces unpleasant flavors and burns too quickly for controlled smoking.

The information below is per-pack only

Subtle Sweet flavor
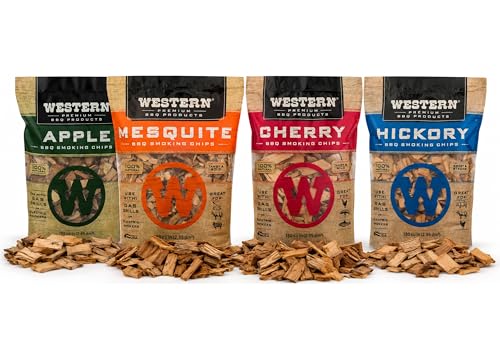
Western BBQ Smoking Wood Chips Variety Pack Bundle (4)- Apple, Mesquite, Hickory, and Cherry Flavors (Original Version)
Monitoring and Maintaining Smoker Conditions
Once you’ve selected your wood and loaded your smoker, controlling the internal environment becomes your primary responsibility for achieving consistent results. You’ll maintain steady temperatures by keeping your lid closed between checks, minimizing the cool air that disrupts chamber conditions. Place your thermometer at grate level for accurate readings—stock gauges often miss hot spots. Start with both intake and outtake vents fully open, then adjust gradually for balance. You’ll control managing temperature fluctuations through adjusting vent mechanisms: open intake vents to raise heat and increase airflow, close them to lower temperatures. Tight seals around the door prevent uncontrolled airflow that can compromise your temperature stability. Monitor for thin blue smoke indicating proper combustion. Consider using a windbreak placement to help stabilize temperatures and protect against external weather conditions affecting your smoker. Just as you’d achieve even cooking by flipping kabobs mid-cooking, rotate your chicken thighs halfway through the smoking process to ensure consistent heat exposure. Keep your smoker at least 10 feet from any combustible structures to maintain a safe cooking environment. After your smoking session, clean the grease collection tray to prevent buildup that can affect performance and create hygiene issues for your next cook. For optimal heat retention and temperature stability, ensure your smoker features thick steel construction that maintains consistent cooking conditions throughout the session. Similar to grilling vegetables where uniform thickness ensures even cooking, maintaining consistent chicken thigh sizes helps achieve predictable smoking times. Practice these damper settings with an empty pit before loading chicken thighs, ensuring you’ve mastered temperature control before your cook begins.
Crisping and Glazing Techniques
Now that you’ve mastered temperature control, you’ll want to transform your smoked chicken thighs from tender to exceptional by developing a crispy, caramelized exterior. Elevate your smoker to 300-400°F during the final cooking phase to activate skin crisping while maintaining internal moisture. Your saucing techniques should involve mixing BBQ sauce with apple cider vinegar for ideal consistency, then applying during this elevated temperature stage. Paint the glaze directly onto chicken thighs, creating a caramelized coating as it tacifies. Alternatively, dunking fully cooked thighs into prepared glaze guarantees complete coverage. You can also finish under your oven’s broiler for accelerated crispness. For even crispier results, consider adding baking powder to the rub before smoking begins. Optional finishing touches like lemon zest or crumbled bacon can be added for extra flavor after smoking. Remember to use a meat thermometer to ensure chicken reaches the proper internal temperature of 170-175°F for food safety and optimal doneness. After cooking, rest the meat before serving to allow juices to redistribute throughout the thighs. Chicken is a lean protein source that supports muscle growth and provides essential vitamins and minerals your body needs. These methods complement proper curing methods established earlier, transforming your smoked thighs into restaurant-quality results with exceptional texture contrast.

PERFECT FOR CHICKEN: Enhance your favorite chicken dishes with this expertly crafted chicken rub. Ideal for grilling, roasting, or baking to deliver bold, savory flavor in every bite.

Features a blend of natural flavors and seasonings, including garlic and rosemary

PERFECT FOR CHICKEN: Enhance your meals with this chicken rub seasoning, ideal for roasting, grilling, or baking. Delivers a savory blend that brings out the best in poultry dishes every time.
Resting Your Smoked Chicken Thighs
The final phase of smoking demands patience—resist the urge to slice immediately after removing your thighs from the heat. You’ll rest your chicken thighs for 10-15 minutes to allow juices to redistribute and connective tissue breakdown to complete, ensuring maximum tenderness. For bone-in chicken thighs, add a half hour to your total resting time to ensure the bone conducts heat evenly throughout the meat.
Follow these resting temperature targets: aim for 175-180°F internal temperature in the thickest part before resting. You can tent loosely with foil during this downtime to retain heat while preserving skin crispiness. Using a meat thermometer throughout the process ensures your chicken reaches safe internal temperatures while maintaining optimal texture. Wrapping the chicken in foil after smoking helps maintain juiciness before serving, similar to techniques used for larger poultry. Serving your smoked chicken thighs alongside corn on the cob, baked potatoes, and an easy chopped salad creates the perfect summer meal the whole family will enjoy.
Your resting duration guidelines should extend to 20-25 minutes when covered with aluminum foil for ideal results. This prevents juice loss upon cutting, maintaining moistness throughout the meat. Allowing the chicken to rest for 5 to 30 minutes helps juices redistribute evenly, a principle that applies to all smoked poultry. The resting process mirrors techniques used when smoking butterflied chicken, where patience after cooking ensures optimal flavor and texture retention. Similar to grilled proteins, letting the meat rest allows the juices to redistribute throughout for better flavor and moisture. Once resting completes, you’ll judge your thighs ready for serving or slicing while still hot.
Troubleshooting Common Smoking Issues
Even with meticulous preparation, you’ll encounter obstacles that compromise your smoked chicken thighs—rubbery skin remains the most persistent culprit, stemming from inadequate fat rendering at temperatures below 275°F. Implement skin texture adjustments by raising your smoker to 300-350°F after an initial low-temperature phase, allowing fat to cook properly into the meat. Prevent skin dryness by mopping thighs every thirty minutes after the first forty-five minutes, maintaining surface moisture without creating steam. Position thighs directly over the firebox for even heat distribution. Avoid water pans, which trap humidity and worsen rubbery textures. Apply baking soda in your rub for enhanced crispiness. For an additional layer of protection against tough outer layers, brush mayonnaise on thighs before seasoning to provide enough fat that prevents the jerky-like texture from forming. Mayo’s higher heat tolerance makes it less prone to burning during the smoking process compared to butter. Ensure you pat the skin dry with paper towels before applying any seasonings to maximize crisping potential. To protect your deck from grease drips and heat damage during the smoking process, place a heavyweight grill mat beneath your smoker that extends beyond its footprint on all sides. Monitor the meat with a thermometer to ensure it reaches an internal temperature of 165°F for safe consumption and optimal juiciness. Consider letting the meat rest for 10 minutes after smoking to allow juices to redistribute throughout the thighs. Installing stainless steel heat tents over your grill burners prevents flare-ups from grease drippings while ensuring consistent heat distribution across the cooking surface. If issues persist, finish on a hot grill to achieve the crispy exterior you’re targeting.

Fireproof and waterproof: Fireproof mat is made of four layered non-itchy silicone coated fiberglass which stands up the temperature up to 2000℉.It has passed the UL94 -V0/5VA flame retardant test.Fire pit mat is not only fireproof but also waterproof, grease does not stick to them and they are easy to clean.The four layers of material make it last longer. It can perfectly protect your deck and lawn, allowing you to easily enjoy barbecue

【Fireproof & Heat Resistant】Our heat resistant mats for countertop is made of fiberglass, heat resistant silicone resin coated on both sides, which can provide heat resistance up to 550℃/1022℉.
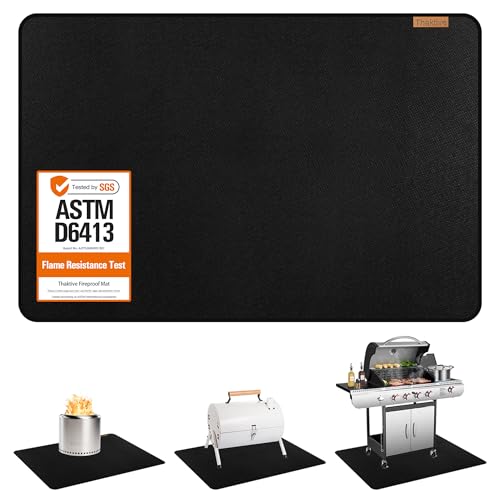
🔥 Heat-Resistant Protection for Deck, Patio, and Grass – Made with premium fire-retardant silicone, this grill floor mat helps protect your deck, patio, grass, or campsite from heat exposure, grease splatter, and stray embers. A practical under grill mat for cleaner and more confident outdoor cooking.