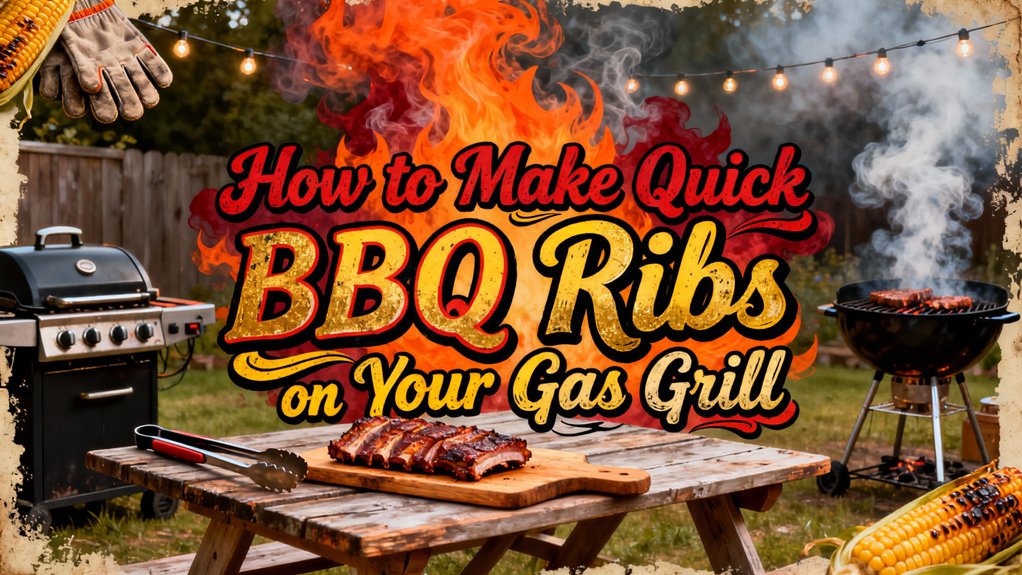
You’ll achieve restaurant-quality BBQ ribs in under three hours using two-zone cooking on your gas grill. Start by removing the silver skin, applying a generously pressed dry rub, and letting it marinate for one hour. Set one burner to medium-high while leaving the opposite side unlit, placing ribs on the cooler side for indirect cooking. After two hours, wrap them in foil with apple juice, cook another 1-2 hours until they reach 195-205°F internally, then glaze with sauce during the final thirty minutes. The complete technique involves several nuanced steps that’ll elevate your grilling results.
Choosing the Right Ribs for Your Grill
When you’re selecting ribs for your gas grill, you’ll want to ponder five primary cuts, each with distinct characteristics that’ll affect your cooking method and final results. Baby back ribs offer lean rib meat quality with faster cooking times, ideal for quick grilling sessions. Spare ribs deliver juicier results through higher fat content but demand extended cooking. St. Louis-style ribs provide uniform cooking and presentation, balancing meatiness with convenience. Country-style ribs, though technically shoulder cuts, offer substantial meat for those prioritizing volume over traditional rib structure. Heritage Duroc pork ribs represent a premium option with superior marbling and natural flavor complexity. Your rib purchasing decisions should align with your available time and desired outcome. For gas grill cooking, baby backs and St. Louis-style ribs prove most practical, delivering quality results within reasonable timeframes. Beef back ribs are another excellent choice since their thinner structure makes them suitable for fast cooking over the high heat that gas grills provide. Like other proteins, ribs benefit from seasoning ahead of time and allowing them to reach room temperature before grilling for more even cooking results. Removing the membrane from ribs before cooking helps seasonings penetrate more effectively and improves the final texture. Different hardwoods and fruitwoods can enhance your ribs with complementary smoke flavors when using a smoker box attachment. Kettle-style charcoal grills excel at heat retention capabilities that help maintain consistent cooking temperatures for longer smoking sessions. To maximize your cooking space and achieve even heat distribution across multiple slabs, consider using vertical rib racks designed specifically for gas grills. Spare ribs are commonly found in grocery stores and remain the most affordable option for budget-conscious grillers.
Preparing Your Ribs for Cooking
Proper preparation separates mediocre ribs from exceptional ones, and you’ll start by removing the silver skin—that thin membrane clinging to the back of each rack. Use paper towels for grip and a butter knife to lift and separate it completely. Next, trim excess fat and cut thinner ends for even cooking. Pat your ribs dry, then apply oil evenly across both sides to help seasonings adhere. Press your dry rub firmly into the meat surface, covering thoroughly. Season your ribs liberally with Kinder’s Hickory Brown Sugar Seasoning to build a flavorful foundation for your cook. Consider applying mustard as a thin base layer beforehand for enhanced flavor development. Refrigerate seasoned ribs for at least one hour, allowing proper marinating time adjustment for absorption. Wrap in foil using storage techniques like aluminum pans with apple juice to maintain moisture before grilling. A leave-in thermometer will help you monitor the internal temperature during cooking to determine the optimal wrapping time. Pre-cooking your ribs in the oven at low temperatures helps render fat and tenderize the meat before the final grilling stage. Protect your deck or patio from grease splatters by setting up a grill mat beneath your grill to catch drippings and maintain a clean cooking space. For organization and easy access to all your prep tools, keep your utensils in a sturdy grill tool set or caddy, which pairs well with quality grill tool sets that can handle years of reliable use. For best results, allow your prepared ribs to rest at room temperature for 15–20 minutes before placing them on the indirect heat side of your grill.
Selecting and Applying Your BBQ Rub
The rub you’ll choose can make or break your ribs, so it’s worth understanding the fundamentals before you commit to a recipe. For pork ribs, select sweet, honey-based formulations featuring paprika and gentle spices. Beef ribs demand bolder pepper and garlic-forward profiles. When balancing rub flavors, combine your SPG base—salt, pepper, garlic—with secondary spices like chili powder, cumin, and mustard powder for complexity without overwhelming your meat. Most successful rib rubs contain just over 9 ingredients, carefully selected to avoid a muddled flavor profile.
Apply your rub generously 1-24 hours before grilling, allowing adequate penetration. Guarantee even coverage across all surfaces using consistent rub application methods. Store mixed rubs airtight to maintain freshness. For enhanced smoky flavor that rivals charcoal cooking, consider complementary smoking techniques like using combo gas-charcoal models that allow you to incorporate charcoal for deeper wood-fired taste. Premium options like the Primo Oval XL feature ceramic construction with versatile heat zones perfect for rub application and slow-cooking. The key to achieving tender, flavorful beef ribs is employing slow-cooking at low temperatures to properly tenderize the meat. For competition-grade results on beef ribs, consider Texas Pepper Jelly Brisket Seasoning which builds exceptional bark without excess sweetness. Unlike charcoal selection where lump charcoal delivers high heat ideal for searing, gas grilling requires a more controlled rub application to prevent burning. This systematic approach develops a flavorful crust during gas grilling while preventing burning, particularly on beef where sugar-heavy compositions should be avoided. When cooking on gas versus kettle and barrel styles, the even heat distribution of your grill makes consistent rub application critical for achieving the smoky flavor profiles typically associated with charcoal grilling.
Setting Up Your Gas Grill for Two-Zone Cooking
Now that you’ve applied your rub and allowed it to penetrate your ribs, you’ll need proper grill setup to execute the cooking method effectively. Start by turning on one side’s burners to medium-high while leaving the opposite burners off. This creates distinct indirect grilling zones essential for rib preparation.
Close your lid and preheat for at least 15 minutes, targeting 450°F-550°F on the lit side and 250°F-350°F on the unlit side. Use oven thermometers in each zone for accurate readings. This two-zone arrangement is similar to cooking on a range with burners and an oven, giving you the flexibility to use different cooking techniques simultaneously. The indirect heat helps manage flare-ups during grilling, which is particularly important when cooking fatty cuts like ribs. Unlike charcoal grills that require lump charcoal vs briquettes decisions, gas grills offer consistent temperature control across both zones.
Position your top vents over the cool side to optimize airflow. Proper preheating ensures even cooking, prevents food from sticking, and helps achieve desired sear marks while also reducing food safety risks. The heat from your burners transfers to food through conduction, convection, and radiation, with the direct side providing intense searing heat and the indirect side enabling gentle, even cooking. For best results, ensure your grill has preheated properly before adding your ribs to the cooking surface. Your temperature control adjustments should maintain the high-heat zone for searing while the indirect zone provides gentle, even cooking. This systematic two-zone configuration prevents flare-ups and enables superior results for thick rib cuts.
Starting the Initial Cooking Phase
Once your two-zone setup‘s stabilized at the target temperatures, you’ll place your seasoned ribs bone-side down directly on the clean grate over the indirect heat zone, positioning them meatier-side up to guarantee even exposure to the gentle radiant heat. Space the racks to facilitate adequate air circulation without crowding. Close the lid immediately after placement to retain heat consistency.
Your initial cooking duration extends for approximately two hours at 250°F. Implement your lid management protocol by minimizing openings—each breach causes temperature fluctuations that extend cook time. Rotate the ribs every 45 minutes for uniform grilling. Work swiftly during necessary adjustments, reclosing the lid promptly. This systematic approach ensures steady, controlled cooking that develops desirable tenderness and smoke penetration throughout the initial phase. You can optionally add smoke using a smoker box or foil pouch with wood chips during the first hour to enhance the authentic BBQ flavor. For best results, consider using cast-iron smoker boxes for intense, long-lasting smoke that pairs well with the low-and-slow ribs cooking method. Many experienced pitmasters recommend maintaining adjustable dampers for temperature control to keep your grill stable throughout the cooking process. For gas grills, hinged lid designs help maintain consistent heat distribution similar to charcoal setups. A wireless meat thermometer allows you to monitor internal temperatures without opening the lid, ensuring your ribs reach optimal doneness while maintaining consistent heat. A sturdy chimney starter can help you preheat additional charcoal if you need to adjust your heat source mid-cook. Once the initial phase concludes, unwrap the ribs and let them rest for 10 minutes before proceeding to the finishing stage.
Monitoring Bark Formation and Spritzing
As your ribs settle into steady cooking, you’ll shift focus toward monitoring bark development—the flavorful, textured crust that forms when your dry rub undergoes dehydration and caramelization on the meat’s surface. After two hours, perform a tactile check: rub your finger across the surface; if the seasoning transfers as paste, continue cooking unwrapped. You’re targeting a reddish bark appearance at the three-hour mark.
Implement proper spritz timing strategically. Before applying your initial rub, lightly mist the meat surface to enhance bark foundation adhesion. Subsequently, employ spritzing sparingly—never excessively—to build seasoning layers without compromising crust integrity. This layering spritz and rub technique creates the contrast between crunch and tender meat you’re pursuing. Use an instant-read thermometer to monitor internal temperatures and ensure the ribs reach 195–205°F for optimal doneness. Maintaining a thin, blue smoke throughout the process ensures the bark develops the authentic smoky flavor that characterized 17th century cooking methods in New France. Metal wire grill brushes can shed bristles that contaminate food, so nylon-bristle grill brushes offer a safer alternative for cleaning your cooking surface. For optimal grill maintenance, consider using a heat-resistant sponge head brush designed to remove baked-on residue without wire bristles that could contaminate your food. For the best results after your ribs finish cooking, clean your grill with a bristle-free grill brush to safely remove residue without contaminating your next meal.
Wrapping Your Ribs for Optimal Tenderness
Why wrap your ribs at all? Wrapping accelerates cooking through steam generation while developing tender, juicy results. After two hours of smoking, you’ll wrap your ribs meat-side down in heavy-duty aluminum foil, creating a double-layer construction that prevents juice leakage.
Before sealing, add moisture-enhancing liquids like apple juice or beer to establish achieving proper moisture balance. Crimp edges tightly, eliminating air pockets that compromise the self-basting environment. For enhanced flavor and tenderness, consider using Heath Riles BBQ Butter Bath & Wrap as your moisture-enhancing liquid. The layered application of your wrapping mixture directly onto the meat before sealing creates a braising environment that infuses complex flavors throughout the ribs. This approach mirrors the foil wrapping technique emphasized in traditional low-and-slow smoking methods.
Avoid common wrapping mistakes by ensuring no gaps exist in your seal. Wrap for approximately one hour and fifteen minutes until your ribs reach an internal temperature of 204°F. The 2-2-1 method provides an effective framework for timing your wrapping stages to optimize tenderness. This methodology traps steam that breaks down connective tissues, transforming tough meat into tender, succulent ribs without direct flame exposure. Common practice in smoking includes wrapping ribs with butter, brown sugar, and honey for additional tenderness and flavor balance. For ribs you plan to store after cooking, proper wrapping in airtight containers will help maintain quality in the refrigerator or freezer.
Unwrapping and Glazing With BBQ Sauce
After your ribs have spent one hour and fifteen minutes wrapped and steaming to an internal temperature of 204°F, you’re ready to unwrap and begin the glazing phase. Carefully remove the foil, then return your ribs to the grill grates at 250-275°F.
Begin glaze application techniques during the final 30-45 minutes of cooking. Mix two parts barbecue sauce with one part honey, creating ideal consistency for even brush application. Apply thin layers across all surfaces, including sides and edges. For best results, you can optionally brush on barbecue sauce during the final stages of grilling to enhance flavor and appearance. The high sugar content in your glaze will help it caramelize and create a shiny, lacquered finish on the ribs. Many pitmasters apply additional sauce layers to achieve visual cues like a mahogany color that indicates perfectly cooked ribs.
Managing glaze temperature requires vigilance. Water-based glazes cause evaporative cooling, temporarily reducing rib temperature. To prevent flare-ups near your grill’s open flame, consider using high heat cooking spray before applying your glaze. Using indirect heat similar to bacon grilling techniques can also help minimize flare-ups and ensure even cooking. Quality non-stick griddles and pans designed for grilling can provide additional cooking surfaces to manage multiple proteins simultaneously. Maintain consistent grill heat to guarantee proper caramelization. Rotate your ribs approximately every minute, reapplying glaze until the coating becomes tacky and develops rich coloring with slight char marks. This systematic approach produces signature glossy-finished ribs. For additional flavor depth, consider finishing your glazed ribs with fresh herbs or complementary seasonings to brighten the overall taste profile.
Achieving the Perfect Finish and Texture
Maintain your grill at 285°F while monitoring temperature fluctuations to prevent thermal inconsistencies. Position your probe thermometer between bones, targeting 202°F for ideal tenderness. You’ll verify doneness when ribs bend slightly and meat pulls cleanly from the bone. Gently tug on the ribs to assess their tenderness and doneness before removing them from heat.
During this final phase, managing smoke infusion becomes critical—keep your middle burner off to sustain indirect heat balance. If you’re applying additional sauce, reapply it sparingly to avoid excessive charring. Hold this temperature for 10-15 minutes, allowing the glaze to set properly. The low and slow cooking method ensures the barbecue sauce caramelizes evenly without burning. Most grilling guides recommend target internal temperatures between 180-200°F for optimal tenderness and flavor development. At higher temperatures like 300°F, you can significantly reduce your total cooking time to between 1.5 and 2.5 hours depending on your rib cut and smoker type. Wrapping your ribs in foil during cooking helps maintain moisture and promotes even tenderness throughout the meat. Similar to smoking brisket, allowing proper resting time after cooking helps retain the juices and enhances the final texture. Testing for tenderness with a probe thermometer, much like you would with brisket at low temperatures, ensures you achieve consistent results across different cuts of meat. You’ll achieve a professional bark-textured exterior with a juicy, tender interior when you execute this systematic finishing approach.
Resting and Serving Your Grilled Ribs
Don’t rush your ribs off the grill—the resting phase is where you’ll lock in the moisture and tenderness you’ve worked to develop. Wrap your ribs in foil and rest them for 5–10 minutes, allowing muscle fibers to reabsorb expelled juices while carryover cooking continues.
For temperature management during rest, monitor internal temps reaching 201–210°F for ideal tenderness. Remove foil once resting concludes, then slice between bones for individual portions with bone-side down presentation. Using indirect heat ensures your ribs maintain consistent temperature throughout the resting period without additional browning. As with chicken preparation, resting allows juices to redistribute throughout the meat for maximum flavor and juiciness.
Your serving techniques and presentation matter equally. Plate ribs promptly while maintaining warmth above cooling thresholds. Apply sauce before service for perfect glaze finish. Account for bone weight when portioning, ensuring clean cuts that showcase your grilling expertise and justify the careful resting protocol you’ve executed. Tenting with foil helps retain heat without steaming the meat during this critical rest period. For optimal grill performance during service, consider regular maintenance to ensure your equipment operates reliably throughout the cooking and resting process, using safe and effective cleaning methods to keep grates in top condition. After service, allow your grill to cool completely by cutting off the oxygen supply to any remaining heat sources before covering and storing your equipment. Wiping down the exterior and protecting your grill from the elements will extend its lifespan and keep it ready for your next grilling session.