
You’ll achieve the best results smoking chicken at 250–275°F, which balances smoke absorption with cooking efficiency. This temperature range guarantees juicy, tender meat while developing excellent flavor without drying out your poultry. Whole chickens typically need 3–4 hours, while individual cuts finish faster depending on thickness and bone content. Using a meat thermometer to monitor internal temperature prevents overcooking. There’s considerably more to master about optimizing your technique for different cuts and achieving that perfect crispy skin.
Understanding Safe Internal Temperatures for Chicken
While the USDA’s 165°F guideline represents the gold standard for chicken safety, you’ll find that temperature and time work together to eliminate harmful bacteria—not temperature alone. This conservative threshold guarantees foolproof safety across diverse cooking methods and skill levels.
However, you can achieve complete food safety at lower temperatures when you maintain proper time-temperature combinations. For instance, chicken breast held at 155°F for one minute destroys all pathogens instantly. Understanding these temperature guidelines and ideal cooking range variations allows you to maximize both safety and quality. Setting a high-temp alarm at 157°F prevents overcooking while maintaining the safety threshold for juicy results.
Different chicken parts require distinct target temperatures. White meat dries easily, demanding careful monitoring around 157°F, while dark meat needs 180–185°F for perfect tenderness. For bone-in pieces like thighs or leg quarters, 170°F to 185°F ensures both tenderness and safety. The low-and-slow method at temperatures around 225°F allows fat and connective tissues to break down gradually, keeping your chicken exceptionally moist. When smoking at this temperature range, bone-in chicken thighs typically require 2 to 3 hours to reach the proper internal temperature for optimal results. Chicken drumsticks smoked at this same temperature generally take 90 minutes to 2.5 hours depending on their size and thickness. A whole chicken weighing around 4 pounds generally takes about 3.5 to 4.5 hours to smoke at 225°F until the breast reaches 160-165°F and thighs reach 170-175°F. By recognizing these nuanced requirements, you’ll consistently produce juicy, safe smoked chicken. Using a meat thermometer to accurately check internal temperature ensures you achieve the optimal balance between safety and moisture retention.
Optimal Smoking Temperatures for Chicken Breasts
Getting chicken breasts right on the smoker hinges on selecting the proper temperature range—and you’ll want to stay between 250°F and 275°F for the best balance of smoke absorption and moisture retention. This temperature sweet spot prevents the rubbery exterior you’d encounter at 250°F while avoiding the diminished smoke infusion that occurs above 275°F.
Your smoker’s thermal mass considerations affect actual cooking time considerably. Experienced pitmasters prefer 275°F because it delivers ideal juiciness without compromising smoke flavor. At these temperatures, you’re looking at 50 to 90 minutes depending on breast thickness. Using dry rub seasoning before smoking will enhance the overall flavor profile of your chicken breasts. A meat thermometer is essential for accurately monitoring the internal temperature throughout the cooking process. Wood choices like oak, pecan, and hickory complement chicken without overpowering its natural flavor.
Pull your breasts at 160°F internal temperature and plan resting duration adjustments of 5-10 minutes with foil tenting. This approach allows carryover cooking to safely reach 165°F while maximizing moisture retention throughout the meat. For enhanced crispiness, you can briefly increase the temperature to 400°F for 10 minutes at the end of the smoking process. Prep techniques like air-drying uncovered in the fridge overnight can improve the final texture and help achieve better smoke adherence to the meat surface. During the cook, spraying with apple cider vinegar can help keep the meat moist and add subtle flavor. Similar techniques apply when smoking other chicken parts, with wings typically requiring 45 minutes to 1.5 hours at lower temperatures before a high-heat finish.
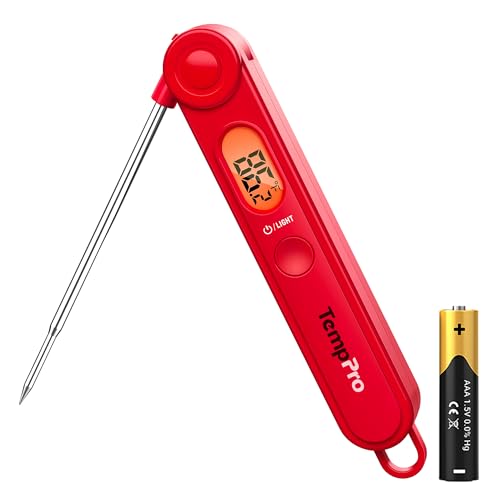
【Easy to Use】Easily release the meat probe at the push of a button, and control the backlight or power with another button. With TempPro, cooking becomes a seamless, stress-free experience

FAST & ACCURATE INSTANT READ: Get temperature readings in just 2-3 seconds with ±1°F accuracy. Whether you're grilling steaks, roasting turkey, smoking brisket, or baking bread, this digital meat thermometer helps you monitor food temperature quickly and confidently

Large Display: Features a 2 3/8 inches large face for clear visibility; Stem length of 2 7/8 inches enhances accessibility; Enables easy classification of food temperatures in various cooking environments
Best Temperature Range for Whole Chickens
Since whole chickens require more cooking time than individual breasts, you’ll want to adjust your smoker temperature downward to maximize smoke penetration while ensuring even cooking throughout the bird. You’ll find that 225°F represents the sweet spot for low-and-slow smoking, requiring 3–5 hours to reach safe internal temperatures. If you’re seeking faster results, the 250–275°F range balances smoke flavor with cooking speed, finishing in 3–4 hours. Monitor ambient smoker humidity and maintain ideal moisture content for preferred bark development. Position your chicken breast-side up on grates, rotating after 1.5 hours for even heat distribution. Whole chickens often on sale at grocery stores make this smoking method an economical choice for feeding a family. For enhanced wood-fired flavor, consider using the Super Smoke setting on your grill during the smoking process. Target 165°F minimum throughout, checking thighs at 170–175°F. For a butterflied chicken, smoking at 225°F typically takes about 30 minutes to an hour for initial smoke flavor, after which you can increase the temperature to finish cooking in 1.5 to 4-6 hours total depending on your method. To achieve crispy skin, raise the smoker temperature to 375-400°F for 10-15 minutes after the initial smoking to dry and brown the skin. Brining or marinating the chicken before smoking helps lock in moisture and enhances the overall flavor profile. A probe thermometer ensures accurate temperature readings and prevents overcooking your bird. Popular wood pellets like apple, cherry, hickory, or mesquite can enhance the smoky flavor profile of your chicken. Rest your bird 15–20 minutes before serving to maximize juiciness.

More Stable Than Bluetooth: Our advanced RF technology ensures a stronger, more reliable connection than Bluetooth. This smoker thermometer provides the freedom to move around without losing connection! Monitor your BBQ from up to 1,000 feet away!
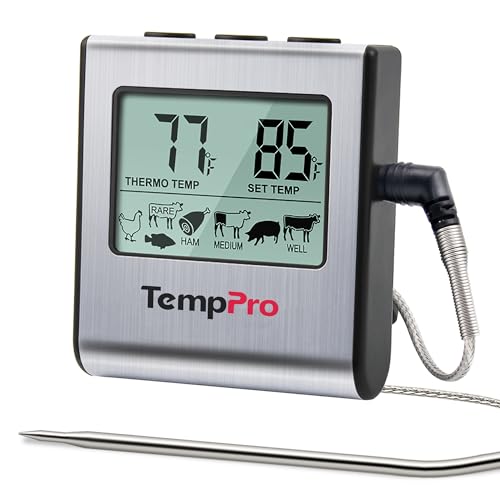
Cook mode with USDA preset temperature settings: TempPro cooking thermometer ideal for meat, oven, smoker or stove top; Programmable alert with preset temperatures for specific foods recommended by USDA; All of the preset temps can be reset to your desired tastes

BBQ HI/LOW temp range alarm: Set your desired food temp and HI/LOW temp range for your grill or smoker to know when to add more fuel smoker thermometer will flash and beep to remind you if the temperature ever goes out your set range; HI/LOW temp range alarm is specifically designed for usage with smokers, grills and BBQs
How Smoking Temperature Affects Texture and Juiciness
Understanding how temperature shapes your final result requires looking beyond simple doneness temperatures—the heat you choose fundamentally alters both the texture and moisture content of your smoked chicken.
Low temperatures preserve juiciness but compromise skin quality. Cooking exclusively below 300°F prevents proper fat rendering, leaving you with tough, rubbery skin that won’t crisp. Your breast meat also dries out when you cook to standard 165°F doneness; instead, pull at 155-157°F for juicier results with carryover cooking ensuring food safety.
The two-stage method solves this conflict. Start at 225-250°F for one hour to absorb smoke flavor, then increase to 350°F or higher. This approach allows fat rendering and skin coloration while preserving the moisture and smoke character you’ve already developed. Dark meat requires finishing at 175-180°F for tenderness without drying white portions. For drumsticks specifically, starting at 225°F until reaching an internal temperature of 100°F before raising heat to 375°F produces optimal tenderness. Flipping frequently every 3 to 5 minutes during the higher-heat finishing phase ensures even cooking and helps achieve that desirable crispy skin. While wood pellet-fired convection ovens like Traeger grills can reach higher temperatures for grilling, the smoke flavor remains most prominent in that lower 180-250°F range during your initial smoking phase. Opening the smoker frequently during the cooking process can cause significant heat and smoke loss, which undermines your temperature control efforts. Air drying the chicken before smoking can also enhance skin crispness by removing surface moisture that otherwise prevents proper browning. Using a reliable meat thermometer ensures you accurately track doneness rather than relying solely on cooking time estimates.
Cooking Times Based on Temperature and Cut
Once you’ve selected your smoking temperature, timing becomes your primary variable—and it shifts dramatically depending on which cut you’re working with. Whole chickens demand 3–4 hours at 250–275°F, while thighs finish in roughly 1.5–2 hours at the same temperature. Quarters split the difference at around 3 hours. Wings move fastest, requiring just 1.25–2 hours. Breasts vary by bone content: boneless takes 45 minutes per pound, bone-in runs 1–1.5 hours per pound at 225°F. For turkey, cooking times extend significantly, with whole birds requiring 6.5 hours and individual parts like legs and wings ranging from 2.5 to 4 hours at 250°F. When smoking at 300°F, you can follow the 15-25 minutes per pound guideline for more efficient cooking while still achieving excellent results. Mastering temperature control and humidity management guarantees consistent results across cuts. Lower temperatures (225°F) extend cooking times but preserve moisture, while higher temps (275–350°F) accelerate the process. Remember that safe temperature does not mean tender, as higher heat breaks down collagen and fat for better texture. If working with frozen chicken, expect total cooking time to increase by approximately 50% compared to thawed poultry, and use indirect heat initially to help thicker pieces thaw evenly. Always verify doneness by reaching 165–175°F internal temperature, depending on your cut. For optimal results, consider removing poultry at 155–160°F to allow for carry-over cooking to the final safe temperature. Allowing the meat to rest 15 to 20 minutes before carving helps retain juices and ensures optimal texture. Using a probe thermometer throughout the cook ensures you track internal temperature accurately without opening the smoker repeatedly.
Techniques for Achieving Crispy Skin
Crispy skin doesn’t happen by accident—you’ll need to dial in moisture removal, temperature sequencing, and strategic seasoning to render fat effectively and develop that coveted golden crust. Start with proper skin surface preparation by patting chicken completely dry with paper towels, then air-dry on an elevated wire rack for at least one hour. Avoid misting or wrapping, which traps moisture.
Next, apply moisture absorption techniques by mixing cornstarch into your dry rub—this pulls residual dampness away while promoting crispiness. You can also use baking soda on the skin before cooking. For best results, salt brine the chicken uncovered in the refrigerator for 4 to 24 hours to further remove surface moisture before seasoning. Finally, execute your temperature sequence: smoke at 275°F–300°F initially, then bump heat to 375°F+ for the final 15–20 minutes with indirect heat. This approach renders fat efficiently while crisping the exterior. Cooking at a minimum of 280°F ensures the chicken reaches the optimal range for achieving golden crispy skin without drying out the meat.

Large Capacity & Durable Design - With 4 layers and a load capacity of 2.2 lbs per layer, this herb drying rack is perfect for drying herbs, flowers, tea, fruits, and vegetables. Made from high-quality polyester with built-in steel wire rings, it provides strong support and resists deformation.

Generous sized mesh surface for fast drying - ideal for sweaters and other delicate items

【Stable & Durable】Dimensions: Each lay flat mesh drying rack measures 28 x 28 x 5.71 inches. Constructed of high-quality plastic pipes to keep flat drying rack more stable and reinforced corner to add the strength of whole structure.
Brining and Resting Methods for Maximum Moisture
While rendering fat creates that prized exterior crunch, you’ll simultaneously need to lock in interior moisture—and that’s where brining becomes your secret weapon.
You’ve got two proven methods. Dry brining uses 1.5% salt by weight (roughly 3/4 teaspoon per pound), applied evenly and refrigerated exposed for 6-8 hours. This draws out juices that reabsorb as a natural brine, tenderizing muscle proteins.
Wet brining requires salt to water ratio considerations: dissolve 5% salt based on water volume (25g salt per 500ml water). Submerge your chicken fully for 4-6 hours, then rinse thoroughly and pat dry. For best results, use large crystal salt like kosher salt rather than regular table salt, as the larger crystals provide better coverage and control over the brining process.
Both methods enhance moisture retention through osmosis and protein solubilization. After brining, rest your chicken revealed in the fridge before smoking. This allows complete reabsorption, drastically reducing moisture loss during cooking. Resting the chicken after brining permits the protein strands to relax and redistribute the juices throughout the meat for optimal texture. Just as with grilled steaks, a proper resting period of 5-10 minutes after cooking allows juices to redistribute, ensuring every bite remains tender and flavorful. Consider periodic basting with melted butter during the smoking process to add extra richness and help develop a beautiful, golden exterior. When you’re ready to smoke, consider using apple wood chunks for poultry, as their mild and fruity profile complements chicken without overpowering the delicate meat. For longer storage of leftover smoked chicken, tightly wrap each portion in plastic wrap followed by aluminum foil to prevent freezer burn and maintain quality for up to three months. This routine maintenance approach to moisture management, much like caring for your equipment, ensures optimal results with every cook.
Wood Selection and Smoke Flavor Intensity
Since wood fundamentally shapes your chicken’s smoke profile, you’ll need to match your wood choice to your desired flavor intensity. You’ll find mild woods like apple and cherry deliver subtle, fruity notes that won’t overpower delicate chicken meat. For controlled smoke intensity with balanced flavor profiles, oak serves as your safest option—strong enough to register without overwhelming the bird.
If you prefer bolder results, hickory and mesquite impart robust, savory characteristics that dominate the palate. You can combine woods to fine-tune your outcome: pairing oak with hickory intensifies smoke presence gradually rather than aggressively. Each wood species carries distinct organic makeup that affects the aroma and flavor during combustion, allowing you to craft increasingly complex taste profiles.
Consider burning speed too. Slow-burning hardwoods like hickory and apple provide extended flavor infusion, while mesquite burns quickly. Your technique and usage method ultimately matter more than specific wood selection for achieving ideal results. To maintain clean smoke throughout your cook, ensure the wood is completely dry when adding it to your smoker, as wet wood produces acrid flavors rather than the desirable blue smoke that enhances chicken. Avoid softwoods like pine, which leave bitter residue that ruins the flavor of your poultry. For longer smoking sessions, wood chunks are preferable to chips since they burn slower and maintain consistent smoke output throughout the entire cook. When using wood chips for shorter grills, add approximately 1/2 to 1 cup per hour to maintain steady smoke production without overwhelming your chicken. Maple also works well for chicken, offering mild, sweet notes that complement poultry without overpowering its natural flavor. Hickory provides a sweet, bacon-like note that pairs especially well with chicken and can enhance the overall flavor profile of your smoked bird.
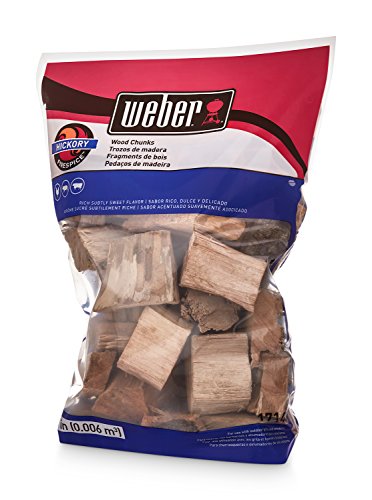

ALL NATURAL HICKORY WOOD CHUNKS: These smoking wood chunks are crafted from 100% hickory hardwood without any harsh chemicals. They naturally enhance chicken, pork, beef, and seafood with a slightly sweet, powerful smoke flavor and a deep color.

MATERIALS: Made from 100% natural seasoned hardwood with no unwanted byproducts, our wood chips burn cleanly and evenly.
Temperature Adjustments for Different Chicken Cuts
Different chicken cuts won’t cook uniformly at the same temperature, so you’ll need to adjust your approach based on what you’re smoking. Maintain 250–275°F for whole chickens and quarters, but thighs benefit from cooking to 175°F for proper texture. Breast meat reaches safe consumption at just 157°F, preventing dryness. Legs require approximately 170°F for correct doneness.
Proper smoking rack placement matters greatly—un-trussed chickens expose legs to more direct heat, accelerating their cooking relative to breasts. You can strategically place an ice bag on breast meat while leaving legs exposed to manage temperature fluctuations across different parts. To prevent bacterial growth, ensure meat does not linger between 40°F and 140°F during the smoking process. A digital thermometer helps monitor the exact internal temperature of each cut to guarantee precision.
Monitor internal temperatures in the thickest sections rather than relying solely on time estimates. Allowing the chicken to rest after smoking helps redistribute juices before carving for maximum tenderness. After smoking, rest loosely covered for 15-20 minutes to allow juices to redistribute throughout the meat. For enhanced flavor, consider using wood pellets during the smoking process to add depth to the chicken’s taste. Just as Taco Bell’s Grilled Cheese Burrito achieves its signature texture through precise heating techniques, smoking chicken requires careful temperature management to develop optimal flavor and texture. Maintaining a steady smoker temperature ensures consistent heat throughout the cooking process for optimal results. This precision guarantees each cut reaches its ideal endpoint temperature while upholding food safety standards.

【Fast & Accurate】Our meat thermometer digital delivers accurate readings within ±1°F in just 1–2 seconds, with a wide temperature range of -58°F to 572°F (-50°C to 300°C). No more waiting over the heat - know your food's exact temperature instantly.

Instant Read Meat Thermometer | Our instant read thermometer features a temperature probe and advanced, highly accurate technology with a 1-2 second response time. Our instant read food thermometer comes pre-calibrated with instructions and a meat temperature chart, plus a recalibration feature if needed.

【Fast & Accurate】Our meat thermometer digital delivers accurate readings within ±1°F in just 1–2 seconds, with a wide temperature range of -58°F to 572°F (-50°C to 300°C). No more waiting over the heat - know your food's exact temperature instantly.