You’ll need 7.5 to 11.5 hours total to smoke your 6-pound brisket. Plan for 3-4.5 hours at 225°F during the initial phase, then account for the stall—where evaporative cooling plateaus your meat’s temperature around 145-155°F. Wrapping in butcher paper around 165-170°F speeds things up while preserving moisture. Don’t rely solely on temperature; use probe tenderness instead. Factor in at least an hour’s rest afterward. The exact duration depends on several variables worth exploring further.
Understanding Smoking Temperature Guidelines
You’ll want to dial in your smoker between 225°F and 250°F for traditional low and slow brisket smoking. This ideal cooking range allows connective tissues to break down gradually while absorbing smoke flavor effectively.
Some pitmasters push toward 250°F for slightly faster cooking without sacrificing tenderness. Competition BBQ often employs 325°F temperatures, though this demands greater experience and skill. For enhanced smoke flavor, consider using a smoke tube or tray filled with wood pellets like hickory, oak, or mesquite during your cook.
Consistency matters most—temperature fluctuations compromise even cooking and smoke penetration throughout your brisket. Your choice depends on several variables: smoker type, brisket size, rub composition, and your desired timeline. Using a Dual Probe Thermometer placed in the thickest part of the flat helps you monitor internal temperature accurately and maintain your target heat throughout the cook.
Maintaining steady heat guarantees uniform results across the entire cut. Oak works exceptionally well as a go-to choice for brisket and red meats, providing strong, versatile flavor throughout long smokes. If you’re using a gas grill, adding a smoker box positioned over a lit burner creates indirect heat zones that mimic traditional smoker performance. After removing your brisket from the smoker, resting for at least 30 minutes helps retain the juices and ensures optimal tenderness. For indoor smoking enthusiasts, ridged grill pans with sloped surfaces provide an alternative method that drains fat while creating attractive sear marks. You can blend woods to balance smoke intensity, combining bold hardwoods like hickory with milder fruitwoods to create a custom flavor profile for your brisket. Select your target temperature and commit to it, monitoring your smoker throughout the cooking process to minimize variations that could negatively impact the final product’s quality.
Approximately 3 hours of smoke time

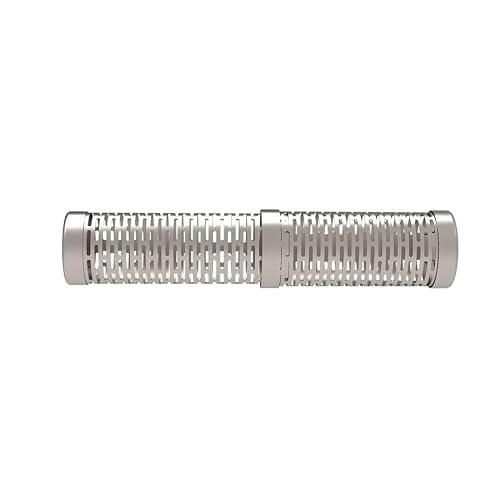
✅ This accessory is designed to WORK IN ANY GRILL (gas, electric or charcoal) and with any smokers. It ADDS GREAT FLAVOR for your meat or fish and exposes them to a tasteful smoke of smoldering wood. Perfect for smoke cheese.
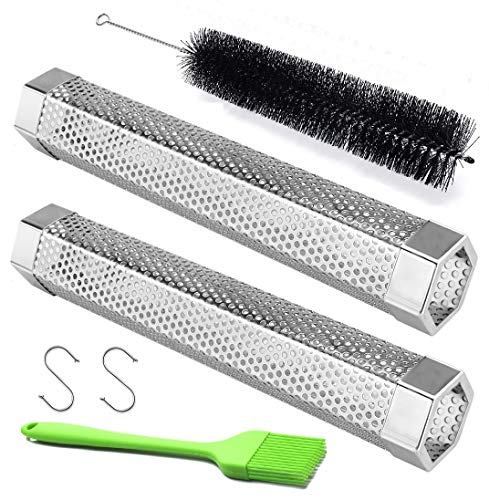
【Works with All Grills and Smokers】- This pellet smoker tube is compatible for electric, gas, charcoal, pellet grills, any type of grills of any size and shape. It can be used with various wood pellets, such as cherry, hickory, mesquite, apple, pecan to add different tastes.
Calculating Cook Time for a 6-Pound Brisket
Once you’ve locked in your smoker temperature, the next variable to nail down is timing—and it’s where most beginners stumble. For a 6-pound brisket at 225°F, you’re looking at an ideal cooking range of 3-4.5 hours for the initial smoke phase. However, smoker performance considerations matter greatly. Your specific equipment, heat consistency, and ambient conditions all influence actual duration. Starting with pure hardwoods like oak or hickory will ensure consistent smoke flavor throughout the cooking process.
The reality is that internal temperature matters more than the clock. Expect your brisket to reach 165°F during the first phase, then continue through wrapping until it hits 200-205°F. Be prepared for the stall phase where evaporative cooling can cause the internal temperature to plateau temporarily. After cooking, resting the brisket for at least an hour is critical for retaining moisture and achieving tender results. Total cook time, including rest, typically spans 7.5-11.5 hours. Build in flexibility. Every brisket cooks differently, so monitor progress consistently rather than relying solely on time estimates. Using a wireless leave-in meat thermometer will ensure you’re accurately tracking doneness throughout the smoking process. Brisket is naturally tough and requires low and slow cooking to break down collagen effectively for maximum tenderness. Place the brisket fat-side up to allow the rendering fat to naturally baste the meat as it cooks. For best results, add hickory wood chips at a rate of 1/2 to 1 cup per hour to maintain that rich, smoky flavor profile throughout the cook.

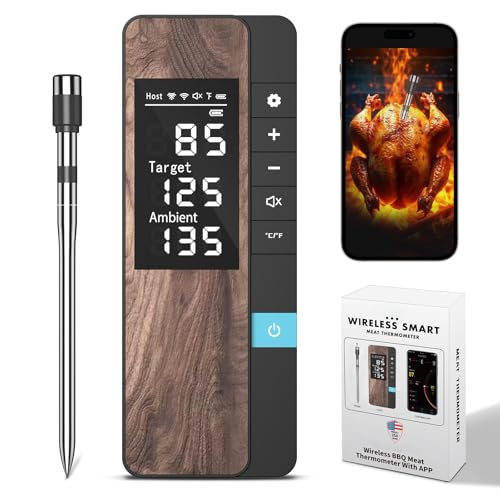
Smart Display Base with Control: The ThermoMaven G1 wireless meat thermometer features a versatile smart display base that offers real-time temperature readings and allows you to set temperatures directly on the device—no app required. With our user-friendly one-click setup, you can connect the probe, pair it with the base, and start cooking in seconds—no complicated setup needed!

SMART BASE CONTROL: Set temperatures, monitor progress, and receive alerts directly from the base without needing your phone nearby.

【Upgraded Higher Durability & 100% Waterproof Probe】1050°F Heat resistant ceramic handles with better sealing design make the meat probe ideal for high-heat cooking like frying, searing and pizza oven, while IPX8-rated waterproof design ensures easy, deep cleaning & long lifespan
The Role of the Stall in Smoking Time
Why does your brisket’s temperature suddenly stop climbing despite your smoker holding steady at 225°F? You’re experiencing the stall—evaporative cooling that plateaus your meat’s internal temperature around 145-155°F. Moisture escaping from your brisket’s surface creates a cooling effect that counteracts your smoker’s heat input.
Managing the stall phase requires understanding that stall duration variability makes predicting cook time challenging. Your 6-pound brisket might stall for two to four hours depending on fat content, collagen levels, and moisture management techniques like spritzing. These variables mean you can’t rely on temperature alone to estimate completion. Wrapping your brisket in pink butcher paper during the stall allows continued smoke influence while retaining moisture to help push through this plateau. Using butcher paper helps maintain moisture while still allowing the development of a good bark on the exterior. The meat’s interior continues to release moisture slowly through its pores, limited by viscous friction that keeps the stall in place until evaporative cooling subsides.
Rather than fighting the stall, accept it as normal. Your brisket will resume climbing past 175°F once evaporative cooling diminishes. Use probe tenderness as your completion indicator—it’s more reliable than temperature milestones. Periodically spritzing with a vinegar-water mix helps maintain surface moisture and can slightly moderate the stall’s intensity. Monitoring with a reliable thermometer throughout the cook ensures you track both the stall phase and final temperature accurately. If you’re working with a water pan in your smoker, it can help stabilize temperature and add moisture to the cooking environment during longer smokes. Adding wood chunks every hour along with fresh coals helps maintain consistent smoke flavor throughout the entire cooking process.
Wrapping Methods and Their Impact on Duration
At what point does wrapping your brisket shift from optional technique to indispensable strategy? When you’re smoking a 6-pound brisket, wrapping becomes vital for managing both time and texture. You’ll want to wrap around 165-170°F internal temperature to push through the stall effectively. Your choice matters tremendously: foil accelerates cooking and maximizes moisture retention but softens bark, while butcher paper balances tenderness with superior bark development. The boat method offers a hybrid approach, keeping your fat cap exposed longer for enhanced bark while controlling moisture loss. Wrapping typically reduces total cook time by 1-1.25 hours per pound at 250°F. For optimal results, use pink butcher paper as recommended by experienced pitmasters for achieving the ideal balance between bark quality and cook time efficiency. After wrapping, plan for the final cook phase to last 1-3 more hours before checking for the floppy texture that indicates doneness. Once your brisket reaches the target internal temperature, resting for an hour or more allows the juices to redistribute throughout the meat before slicing. The wood you choose also influences your final product, with oak and post oak being traditional choices for brisket that complement beef’s rich flavor during the long smoking process. Some pitmasters also recommend spritzing with apple cider vinegar during the unwrapped smoking phase to help maintain surface moisture and develop a better bark. Using a meat thermometer to monitor internal temperature throughout the smoking process ensures you hit your target doneness with precision and consistency. For consistent low-and-slow brisket cooks, modern pellet smokers with PID temperature control can maintain temperatures within 5 degrees, eliminating the guesswork of manual adjustments. Each method trades different qualities—you’re strategically controlling how quickly your brisket reaches probe-tender perfection while preserving the bark characteristics you’re after.

Designed specifically for the culinary enthusiast, our 18 paper roll dispenser is optimally crafted to handle barbecue butcher paper, thereby ensuring the authentic taste of your smoked meats is maintained. This is your ideal bbq wrapping paper for smoking

Unrivaled in durability and strength, our bucher paper offers optimal smoking results with its unmatched ability to trap smoke and release steam

Enhance your smoking meat adventure with our 24-inch wide roll of butcher paper specially crafted to entrap the flavorful smoke, while simultaneously ensuring the release of steam for a superior taste experience
Achieving Optimal Internal Temperature
How you’ll know your 6-pound brisket‘s truly done isn’t just about hitting a number on your thermometer—it’s about combining temperature, time, and feel. You’re aiming for the 195-203°F zone in the thickest part of the flat, where you’ll hold it for at least 30 minutes. Temperature consistency matters here; monitor every hour to catch temperature fluctuations that signal the stall phase between 145-165°F before wrapping.
Start probing for tenderness at 180°F, checking multiple spots every 30 minutes. You’re looking for that soft butter resistance—connective tissue breakdown that temperature alone can’t confirm. Once you hit 202°F and the probe slides through effortlessly, you’ve achieved ideal doneness. An instant-read thermometer with 1-second response time helps you quickly verify doneness across multiple probe points without losing heat from your smoker. Rest wrapped until internal temperature drops to 140°F. Smoking at 225F creates a desired exterior crust while ensuring even cooking throughout your brisket. Because brisket doneness is determined by tenderness rather than temperature alone, verify that the probe meets no resistance when inserted into the thickest sections before considering your brisket ready for the rest period. Using a reliable meat thermometer throughout the cooking process ensures you track these critical temperature milestones accurately and consistently. Wireless models with app connectivity allow you to monitor your brisket remotely without constantly opening the smoker and losing heat. For extended monitoring during long cooks, models with high-heat tolerance up to 1000°F ensure your probe withstands intense smoking conditions without failure. Proper rest times after smoking allow the juices to redistribute throughout the meat, ensuring maximum tenderness and flavor retention.

Fast & Accurate: Get precise readings in just 1 second with ±0.9°F accuracy. NSF Certified for trusted food safety, this digital food thermometer features a 4.3 inches food-grade stainless steel meat probe, perfect for grilling, frying, baking, making candy and more

【Fast & Accurate】Our meat thermometer digital delivers accurate readings within ±1°F in just 1–2 seconds, with a wide temperature range of -58°F to 572°F (-50°C to 300°C). No more waiting over the heat - know your food's exact temperature instantly.

【8X Faster + 4X More Precise】: Upgraded with an industrial-leading professional thermocouple sensor, Themomonster meat thermometer digital with NIST certified ±0.5℉ precision provides you the accurate temperature of your food in just 0.5 Seconds.
Factors That Affect Your Total Smoking Time
Since you’re working with a 6-pound brisket, you’ll find that your total smoking time isn’t fixed—it’s determined by a constellation of variables that interact throughout your cook. Your fuel type drastically impacts temperature stability; charcoal and pellets behave differently under sustained heat demands. External weather conditions prove equally critical—cold temperatures force your smoker to work harder, while wind reduces efficiency and slows heat penetration. Humidity affects moisture retention, potentially extending cooking duration. Your wrapping method matters tremendously; the Texas Crutch technique accelerates the process, while naked smoking demands patience. Maintaining your smoker between 215°F and 250°F ensures the low-and-slow approach gently breaks down connective tissue for optimal tenderness. Smoker type, airflow control, and temperature consistency directly influence collagen breakdown rates. Offset smoker designs like reverse-flow models distribute heat more uniformly than free-flow configurations, reducing hot spots that can lead to uneven cooking. Proper airflow management through your vents and dampers allows you to fine-tune both temperature and smoke intensity throughout the cook. Creating a two-zone fire setup can provide additional control, with one area maintaining higher heat for finishing while the other supports gentler indirect smoking. Adding a water pan helps stabilize temperature fluctuations while introducing moisture that prevents the meat’s surface from drying out prematurely. Selecting a brisket at least 10-12 pounds helps prevent the faster moisture loss that smaller cuts experience during extended cooking. Understanding how your smoker transfers heat through conduction, convection, and radiation enables you to better predict how these forces cook your brisket at different stages. These factors combine to create cooking windows ranging from 6 to 16 hours, making precise timing impossible without understanding your specific conditions.
Preparing and Planning Your Smoking Schedule
You’ll want to build your smoking schedule around realistic time estimates before you even fire up your smoker. Start with a pre-smoking inspection where you’ll trim your brisket—a 20-30 minute task for experienced pitmasters, longer if you’re new to this. After trimming, weigh your meat to calculate accurate cooking duration using the 1.5 hours per pound guideline.
Next, plan for your brisket orientation: position it fat-side-up with the point facing your heat source. Apply your dry rub seasoning and set up your wireless thermometer. To ensure optimal flavor development, slather the brisket with yellow mustard as a binder before applying your salt and pepper blend. Before smoking begins, lightly coat your grill grates with a high-smoke-point oil like canola or vegetable oil to prevent sticking during the long cook. For your offset smoker, select seasoned hardwoods like oak or hickory for a long, steady burn that delivers balanced smoke flavor throughout the cook. If you’re using a pellet grill, consider B&B Post Oak Pellets for their pure wood composition and flavorful smoke that pairs exceptionally well with beef. For charcoal-fueled smokers, choose briquettes over lump charcoal since they provide the consistent medium heat and extended burn time essential for low-and-slow brisket cooking. Premium brands like Lumberjack hickory pellets deliver bold smoky flavor with minimal ash production, making them an excellent choice for extended smoking sessions. Account for the initial 3-hour uninterrupted smoking phase, followed by wrapping and final cooking until you hit that 200-205°F target. This methodical preparation guarantees your total smoking time stays predictable and manageable.

More Stable Than Bluetooth: Our advanced RF technology ensures a stronger, more reliable connection than Bluetooth. This smoker thermometer provides the freedom to move around without losing connection! Monitor your BBQ from up to 1,000 feet away!

Longer Range 650 ft: The built-in best-in-class Bluetooth chip empowers this Bluetooth thermometer a longer range of up to 650 ft, a stronger signal and more stable connection to the smart App; so you'll never lost contact with your food no matter where in your house or yard
Instant Precision, Perfect Results Every Time: High-precision sensors deliver accurate temperature readings (32°F to 212°F) in seconds. Achieve flawless doneness for steaks, poultry, ribs, and more – your reliable partner for home kitchens, travel BBQs, and outdoor adventures.
Resting and Serving Your Finished Brisket
The moment your brisket hits that 200-205°F internal temperature isn’t when you slice into it—it’s when the real work begins. You’ll want to rest your meat for at least two hours in an insulated cooler or warming cabinet set to 140-150°F. This resting period allows juices to redistribute throughout the meat, dramatically improving moisture retention and tenderness. During this rest, collagen continues to gelatinize, further enhancing the texture and quality of your final product.
For proper brisket slicing techniques, let your brisket cool slightly before carving. Use a sharp knife and cut against the grain in thin, even slices. The correct brisket carving methods require patience—rushing this step undermines all your smoking work. Just as low and slow cooking breaks down connective tissues in smoked meats, proper resting ensures your brisket achieves maximum tenderness. Similar to grilled meats, letting your brisket rest for a few minutes before serving helps seal in juices for optimal flavor and moisture. Proper seasoning applied before smoking works with the resting period to deliver a tender, flavorful result. If your bark’s texture needs firming, unwrap it briefly before serving to maintain that desirable crust while the interior stays perfectly moist and tender. Using a meat thermometer rather than relying on time alone ensures you’ve hit the proper doneness before beginning your rest. While your brisket rests, it’s also a good time to check your equipment—if you notice any rust or buildup on your grill grates, soaking in vinegar can help dissolve rust and restore them for your next cook.