You’ll start by preheating your Traeger to 225°F with Super Smoke mode activated for the first 2-3 hours, using premium hardwood pellets like apple or cherry. Position your thawed, dry-rubbed turkey breast-side up with a water pan underneath for humidity and smoke ring development. Maintain consistent temperature while spritzing every 40 minutes, planning for 30-40 minutes per pound. When you hit 160°F in the breast, bump the heat to 300-325°F for final crisping. Rest your bird 15-20 minutes before carving to lock in those juices—and there’s considerably more technique to master.
Getting Your Traeger Grill Ready
You’ll want to start by preheating your Traeger to 225°F with the lid closed for 15 minutes, then activate Super Smoke mode for the first 2–3 hours to maximize smoke penetration into the turkey’s meat. Before firing up, calibrate your temperature probe to guarantee accuracy throughout the cook.
Select premium hardwood pellets—apple, cherry, or a dedicated Turkey Blend—for balanced flavor. Proper pellet storage in a dry location preserves quality and prevents moisture absorption that compromises performance. Mild woods like applewood add a gentle, pleasing flavor that works wonderfully with poultry, while cherrywood imparts a beautiful mahogany color to the turkey skin. Pellet grills offer enhanced smoky flavors from various wood types that elevate your turkey’s taste profile. For best results, choose pellets from reputable brands known for consistent performance and quality construction.
Clean your cooking grates thoroughly and season them by running them over high heat with oil to prevent sticking. Position racks to allow ideal smoke circulation around your bird. Place a water pan directly beneath the grates with 1–2 quarts of warm water to maintain humidity and enhance that coveted smoke ring. For optimal results, maintain a steady smoker temperature around 225°F to 250°F for best flavor and moisture retention. After smoking, allow your turkey to rest for 10 to 30 minutes to let the juices redistribute throughout the meat. Using a reliable meat thermometer ensures you reach the target internal temperature of 165°F in the breast rather than relying on time alone. Resting the turkey for 15-20 minutes after cooking allows the juices to redistribute throughout the meat for optimal tenderness and flavor.
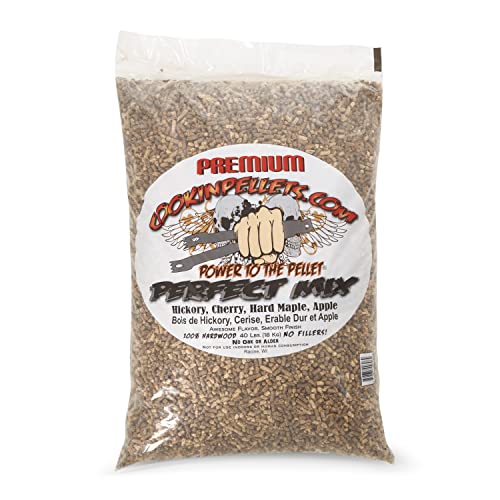
Natural Hardwood Pellets: Premium quality pellets for smoker grill are crafted to infuse your BBQ dishes with an authentic, mouthwatering smokiness that will tantalize your taste buds and leave your guests craving more

Hardwood pellets are best stored in a cool, dry place. Because they can easily absorb moisture, we recommend storing in food-grade, air tight containers.

Festive Holiday Flavor: Holiday Turkey blend with Maple, Hickory & Cherry infuses a sweet, smoky flavor into turkey, lamb, pork, beef, veggies, and even desserts
Preparing Your Turkey for Smoking
Start by selecting a high-quality fresh, all-natural turkey rather than pre-brined or self-basting varieties, which’ll give you complete control over seasoning and salt levels. Guarantee complete defrosting using refrigerator thawing—allow 24 hours per 4-5 pounds for safe handling and even seasoning penetration.
Remove packaging, neck, and giblets from the cavity. Pat your turkey dry inside and out; moisture inhibits proper seasoning adhesion and crispy skin development. Carefully loosen the skin without puncturing, working your fingers underneath to separate it from the breast meat evenly.
Apply your dry rub directly between skin and meat. Use salt, pepper, onion, garlic, and citrus—omit sugar, which burns at smoking temperatures. An instant-read meat thermometer will help you monitor internal temperatures throughout the cooking process. Let your seasoned bird rest 15 minutes before smoking, allowing rub penetration. For best results, brine the turkey for 12-24 hours using a BBQ brine to enhance moisture retention and flavor depth throughout the meat.

Applegate, Natural Oven Roasted Turkey Breast, 7oz
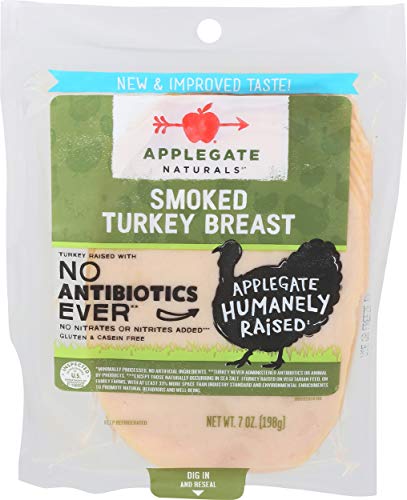
Applegate, Natural Smoked Turkey Breast, 7oz

Includes 1 lb. of Butterball Fresh 93%/7% Lean Ground Turkey
Setting Up for the Initial Smoke
Once your turkey’s seasoned and rested, the smoker’s readiness becomes your next focus. Set your Traeger to 225°F and preheat for 15 minutes with the lid closed. Fill the hopper with hickory or fruitwood pellets, then calibrate your temperature probe before placing the bird.
Position your turkey breast-side up on the grate, tucking wings underneath for even cooking. Place an aluminum water pan beneath the grates and fill it with 1-2 quarts of warm water—this maintains the humidity necessary for smoke ring development and managing cooking time effectively. Since Traeger grills distribute heat evenly via a heating baffle, you can trust consistent temperature throughout the smoking process. For optimal moisture retention, spritz the turkey with a 50:50 mixture of apple cider vinegar and water every 40 minutes throughout the smoking process. Rotating the bird periodically ensures even heat distribution across all surfaces. Brining the turkey beforehand will further help retain moisture and enhance the final product. To ensure proper ignition and prevent error codes, use the prime function to speed pellet delivery to the burn pot before starting your smoke.
Close the lid immediately to stabilize the temperature. Verify thin blue smoke‘s emerging before committing to your smoke. Insert your meat thermometer into the thickest thigh portion without touching bone, aiming for 110-120°F after the initial hours. Using wood chips such as apple wood will enhance the smoke flavor during this critical phase. For a properly smoked turkey, plan on 275°F for approximately 2 hours during this initial smoking phase before raising the temperature for the final stage.
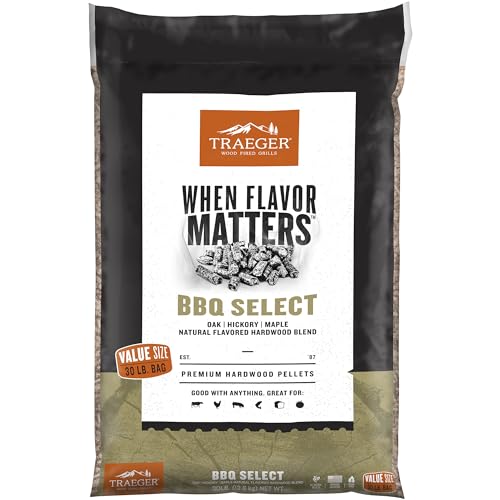
BBQ Select Wood Fired Flavor: Blend of oak, hickory and maple hardwood

SIGNATURE BLEND WOOD FIRED FLAVOR: The flavors of hickory, maple, and cherry hardwoods combine for in our Traeger Signature Blend Hardwood Pellets for flavor that can take on just about anything you cook; From classic BBQ meats, to fish and veggies, this versatile blend gives you full-bodied flavor you'll go back to time and time again

HICKORY WOOD FIRED FLAVOR: Traeger Hickory Hardwood Pellets are great for naturally enhancing beef, chicken, pork, and veggies with full-bodied, bold flavor. So it should come as no surprise that Hickory’s assertive flavor is one of the most popular choices for classic BBQ cooking.
The First Smoking Phase
As your Traeger stabilizes at 225°F with thin blue smoke emerging consistently, the critical first smoking phase begins—a 2-hour window where your turkey absorbs maximum smoke flavor while the breast reaches approximately 110°F. You’ll want to check the temperature at the 90-minute mark, then monitor every 30-45 minutes thereafter using your instant-read thermometer or Traeger probe for accuracy.
Managing smoke intensity during this phase requires selecting ideal pellet flavors like maple, cherry, or turkey blend. If available, Super Smoke mode intensifies flavor development during these initial hours. Keep your pellet hopper full, refilling midway if necessary. Maintain the water pan to enhance humidity and smoke ring development. Brining helps break down muscle proteins to prevent moisture loss during the smoking process, ensuring your turkey stays tender throughout this foundational phase. For optimal results, plan for approximately 30-40 minutes per pound at your target smoking temperature. The internal temperature should reach 165°F in the breast and 175°F in the thigh to ensure food safety and proper doneness. Using a meat thermometer to monitor internal temperature accurately ensures you don’t overcook the meat during this critical phase. When your thigh temperature reaches 160°F, increase the smoker temperature to 350°F to complete the cooking process efficiently. Resting the bird after cooking allows the juices to redistribute throughout the meat, ensuring maximum tenderness and flavor. This foundational phase sets the stage for perfect results.

Keeps Pellets Dry and Fresh for Optimal Performance – The Traeger Stay Dry Pellet Bin is designed to keep your wood pellets dry and fresh for consistent grilling performance.


Transitioning to the Finishing Phase
After your turkey’s breast reaches approximately 110°F and you’ve completed the initial 2-hour smoking phase, you’ll need to increase your Traeger’s temperature to 325°F to accelerate cooking and develop that desirable golden, crispy skin. This grill temperature adjustment is critical for rendering fat and preventing the rubbery texture that results from prolonged low-heat smoking.
During this change, apply moisture retention techniques by brushing your turkey with a honey Dijon maple glaze or light oil coating. These layers lock in juices while facilitating skin crisping. Consider using medium-smoking woods like pecan or hickory to enhance the turkey’s flavor during this finishing phase. Continue monitoring your internal temperature closely as you approach 165°F in the thickest breast portion. Avoid reverting to the Smoke setting, as this compromises your skin quality. For optimal results, use a meat thermometer probe inserted into the thickest part of the breast, avoiding bone and fatty areas to ensure accurate temperature readings. Ensure your turkey is completely thawed before cooking to promote even heat distribution throughout the meat. Allowing the turkey to rest after smoking helps redistribute juices before carving. Your finishing phase typically requires 1-2 additional hours depending on your turkey’s size and your grill’s efficiency.

Brush on meat at the end of cooks to add color and flavor


Monitoring Internal Temperatures
How you’ll know your turkey’s truly done? You’ll rely on an instant-read thermometer and proper meat probe placement at multiple checkpoints. Insert the probe into the thickest part of the breast, guaranteeing you’re reading the innermost temperature without touching bone.
While reaching prime temperatures, you’ll monitor three critical areas: breast, thigh, and wing. Your breast should hit 150-160°F before the finishing heat phase, while thigh meat requires 175-180°F for proper connective tissue breakdown. Don’t pull the probe until you’ve verified all sections. Remember that the food safety standard requires all turkey to reach an internal temperature of 165°F. For the most accurate readings during monitoring, consider using a wireless multi-probe system that allows you to track all three critical areas simultaneously without repeatedly opening your smoker. The ThermoWorks Thermapen ONE offers reliable instant-read accuracy for quick temperature verification between probe checks. When choosing between monitoring options, instant-read versus leave-in styles both provide distinct advantages depending on your smoking workflow and preference for convenience versus continuous observation. Wireless probe systems pair well with propane grills that offer consistent heat distribution for reliable temperature management.
Factor in carryover cooking—you’ll gain approximately 5°F after removal from the smoker. This means pulling your breast at 160°F confirms the 165°F food safety standard. Many modern wireless thermometer apps integrate with your Traeger grill to provide remote temperature monitoring throughout the smoking process. Continuous monitoring prevents overcooking and assures juicy, properly rendered dark meat. For the most accurate readings, allow your instant-read thermometer at least 10 seconds to register the temperature before removing it from the meat.
Achieving the Perfect Skin Texture
While temperature control guarantees your turkey cooks through evenly, skin texture demands a methodical approach starting well before your bird hits the grill. You’ll achieve crispy skin development by air-drying your turkey exposed overnight, then patting it thoroughly dry with paper towels. Loosen the skin over breasts and thighs, creating pockets for herb-butter permeation. Apply a quarter-inch butter-herb mixture under the skin, then dust lightly with baking powder to accelerate browning.
For achieving ideal browning, set your Traeger to 375°F–400°F initially. Spatchcock your turkey to maximize surface area contact with grill grates, leveraging conduction heat transfer from the hot metal to create those desirable sear marks. After thirty minutes, reduce temperature to 300°F, maintaining consistent heat throughout cooking. This two-stage approach certifies edge-to-edge crispness without burning, delivering restaurant-quality results that’ll impress your guests. Remember to remove the backbone and wishbone first to make flattening easier and ensure optimal skin crisping across the entire bird. Once spatchcocked, tuck the wings behind the breast to keep them tight and moist during the smoking process. Properly seasoned grates with a protective non-stick surface will further enhance browning and prevent sticking. Allow your turkey to rest for 20-30 minutes after cooking to permit the juices to redistribute and enhance tenderness. For enhanced flavor and moisture retention, consider wet brining methods to supplement your smoking technique with deeper taste complexity. Using mild fruitwoods for smoke flavor will complement your high-heat searing without overpowering the delicate turkey meat.
Resting Your Smoked Turkey
Resting your smoked turkey isn’t optional—it’s the essential final step that transforms your perfectly smoked bird into a masterpiece of moisture and flavor. After removing your turkey from the Traeger, place it on a wire rack atop a large platter. Your ideal resting temperature targets 160°F in the breast and thigh, which continues rising to safe 165°F through carryover cooking.
Implement effective insulation methods by wrapping your turkey in foil and towels immediately. This setup maintains temperature while allowing juices to redistribute throughout the meat, preventing loss during carving. For standard smoking sessions, rest for 20-30 minutes. Longer rests up to one hour remain safe with proper insulation, though you’ll rarely need extended holds with Traeger’s low-and-slow approach. Tenting with aluminum foil and adding a small amount of broth to the pan can further enhance moisture retention during the resting phase. Once your turkey has finished resting, you can safely store any leftovers by closing all vents to cool the grill completely before covering it for storage. The smoky flavor and moist interior that develop during the slow smoking process are best preserved when you allow adequate resting time. Before carving, verify your turkey has properly preheated and stabilized by allowing the temperature probe calibration to ensure accurate readings throughout the resting phase. Using a meat thermometer to monitor the internal temperature ensures your turkey reaches the safe temperature zone before carving begins. A minimum resting period of at least 20 minutes before carving ensures optimal results. The resting phase allows juices to settle throughout the meat for superior moisture retention. Never skip this indispensable phase—it’s what separates good smoked turkey from exceptional results.
Carving and Serving Your Creation
Now that your turkey’s rested and its juices have redistributed throughout the meat, you’re ready to carve and serve your smoked masterpiece. Proper knife selection is essential—use a sharp carving knife for clean cuts through skin and meat, and a long slicing knife for smooth strokes on breast meat. A carving fork will keep the bird steady while you work, ensuring you don’t lose meat control during the carving process. Start by removing legs and thighs, cutting through the connecting skin and slicing through joints. Next, carve the breast by slitting down the center, following the breastbone closely, then slicing in uniform pieces against the grain. Separate wings at their joints. For plate presentation, arrange white and dark meat separately for visual organization. Position legs, thighs, and wings toward the platter’s front for easy access, with sliced breast meat stacked neatly alongside. Just as sturdy, easy-to-clean items prove more reliable than flimsy alternatives in grill accessories, investing in quality serving equipment will enhance your presentation and make the carving process smoother. Look for serving tools with ergonomic grip design to maintain comfort and control while transferring hot meat to platters. If you’re smoking multiple turkeys or larger portions, multi-tier shelving systems can help you maximize cooking space and manage different cuts during the smoking process. Consider using stackable serving racks to keep carved portions organized and at the ideal serving temperature while you finish plating.